Table of Contents

Related Manuals for CyberHome DVR 1200MU


Summary of Contents for CyberHome DVR 1200MU
- Page 1 DVR 1200 DVR 1200 DVD Recorder & Player Progressive Scan Video Playback VIDEO DVD R W DVR 1200 DVD RECORDER WITH PROGRESSIVE SCAN PLAYBACK Operation Guide Operation Guide PLAY PAUSE RECORD AUDIO STAND BY VIDEO IN 2...
-
Page 2: Table Of Contents
Table of Contents Safety Information..3 Introduction Features ..4 -Recording Features -Playback Features Accessories ..4 -Checking Package Contents Copyrights Notes on Copyrights..4 Discs Disc Compatibility & Care ..5 -Discs Suitable for Playback -Discs Suitable for Recording Caring for Optical Discs ... -
Page 3: Important Safety Instructions
Important Safety Instructions SAVE THESE INSTRUCTIONS Explanation of Warning Symbols The exclamation point within an equilateral triangle is intended to alert the user to the presence of important operating and servicing instructions in the literature accompanying the appliance. The lightning flash with arrowhead symbol, within an equilateral triangle, is intended to alert the user to the presence of not isolated dangerous voltage within the inside of the... -
Page 4: Introduction
Built-In TV Tuner. Front and Rear A/V Inputs. Delete/Rename Titles. Auto-Insert Chapter Markers. Your recordings are playable on most DVD Players. Checking the Package Contents In addition to the DVD Recorder, your package should contain the following accessories. Check the contents of the package carefully, as some items may be located under the packing foam. -
Page 5: Discs
So, any disc space already used by a recording cannot be regained. DVD+R discs are required to be "Finalized" before they will be compatible with standard DVD Players. Once a disc is finalized, no further recordings can be made. DVD+RW: DVD+RW discs can be written to and erased multiple times. -
Page 6: Functions
Remote Control POWER DISPLAY SETUP OPEN/CLOSE MENU GOTO BOOKMARK TITLE ANGLE SUBTITLE AUDIO ZOOM DIGEST PLAY/PAUSE STOP ENTER SLOW MUTE 1/ALL REPEAT RETURN CM SKIP SCHEDULE SOURCE EDIT POWER - Turns the unit on and sends the unit to Standby mode. -
Page 7: Remote Control Preparation & Use
Remote Control Preparation & Use Remote Control Use The battery is already installed into the remote control. Turn over the remote to the back cover. Pull the plastic tab to enable the battery in the remote. Your remote is now ready for use. Remote Control Plastic Tab Replace the battery, check for the correct polarity of... -
Page 8: Front Panel
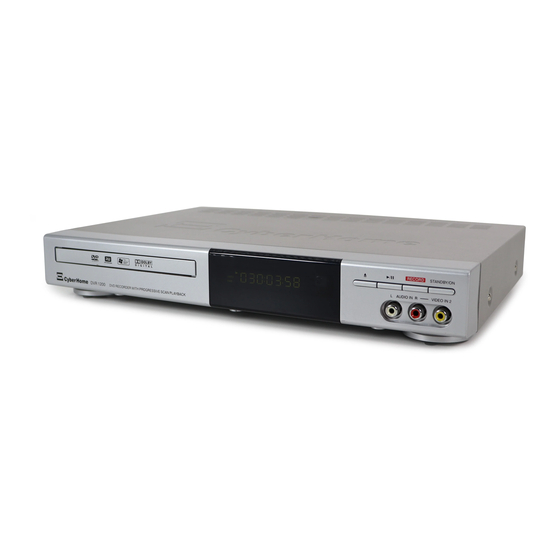
Front Panel DVR 1200 DVD RECORDER WITH PROGRESSIVE SCAN PLAYBACK DISC TRAY - Loads DVD+R/RW, DVD, CD-ROM, VCD/SVCD, MP3, JPG and other optical discs. FRONT DISPLAY - The front Vacuum Flourescent Display shows information about the unit's operation, such as current chapter and elapsed time during playback. -
Page 9: Connections
Typical Connection to TV Your recorder comes with composite video (A/V) cable for connection to TVs with a standard video input as shown below. On most TVs, this connector is colored yellow, and is normally accompanied by stereo audio inputs, colored red and white for stereo channels right and left, respectively. -
Page 10: S-Video & Component Video Connections
S-Video & Component Video Connections S-VIDEO is a higher quality connection than standard composite video, and requires a special S-Video cable (not included). The S-Video connector is distinguishable by its 4 pins, as shown below. If your TV has an S-Video input, it's recommended that you use this type of connection for better picture quality. -
Page 11: Audio Output
Audio Output This unit features a variety of audio line outputs for connection to a receiver or other audio equipment. Use the included A/V cable to connect the stereo audio outputs for connection to a TV or stereo receiver. A COAXIAL digital audio output is able to send an encoded digital bitstream, suitable for receivers with Dolby or DTS decoding capability. -
Page 12: Quick-Start Guide
Powering Up Plugging In and Power On Plug the DVD player's electrical plug into a wall socket or power strip. Press the STANDBY / ON button on the front panel, or the POWER button on the remote control to turn the DVD recorder on. -
Page 13: Playback
Disc Playback Inserting a Disc Press the OPEN/CLOSE button on the remote or front panel to open the disc tray. Insert the disc, being careful not to touch the playing surface. Hold the disc by the sides and with your fore finger through the hold in the middle and insert gently into the tray. -
Page 14: Advanced Playback Functions
Advanced Playback Functions ZOOM Playback Use the ZOOM function to magnify or shrink the image on screen during playback or when paused. Press the ZOOM key repeatedly to choose a magnification level. When the ZOOM function is first activated, directional arrows will appear on screen. During this time, you can use the remote control to move around the image in order to view the area that is currently off screen. -
Page 15: Jumping, Repeat Playback & Bookmark
Jumping, Repeat Playback and Bookmark Jumping to a Time Point The GOTO function provides a convenient way to navigate DVDs or VCDs by allowing you to jump to a time you specify. During playback, press the GOTO key to bring up the GOTO MENU. -
Page 16: On-Screen Player
Viewing JPEG / Play MP3 & WMA This unit can play JPG, WMA & MP3 files on CD-R/RW discs. A handy on-screen player will appear automatically. 0012/0203 DISC DISC - |||||||||||||||||||| + |||||||||||||||||||| / music jam1.mp3 music jam2.mp3 M M P3 music jam3.mp3 M M P3 music jam10.mp3... -
Page 17: Recording Rear Input Connections
Recording Recording to DVD Discs With DVD+R/RW recording, you can create your own DVDs from your home movies, favorite TV shows or from other video sources. DVD+RW Think of DVD+RW (DVD+ReWritable) discs as the digital equivalent of your old VHS tapes. Like video tape, DVD+RW discs can be recorded to, erased and re-used. -
Page 18: Finalizing
Recording- Front Input Connections RECORD RECORD AUDIO AUDIO IN DV IN AUDIO Making a Recording Recording TV programs You can easily record TV programs. Press the POWER key on the remote control to turn on the unit. Insert a recordable DVD disc. Press the SOURCE key on the remote control and select the TUNER input. -
Page 19: Playing & Editing
Edit menu. Select OK, then ENTER to confirm. NOTE: Once you FINALIZE a DVD +R disc, it can be played on other DVD players. However, you may no longer add any content. DVD+RW discs do not need to be finalized. -
Page 20: The Setup Screen
Changing Setup Options The Setup Screen The DVD Recorder's SETUP MENU is where various settings are configured, including setting the, Recording Options, Playback Options, Languages, Parental Control Settings and more. Using the SETUP MENU It's easy to change the recorder's settings with the Setup Menu. -
Page 21: Changing Setup Options
Changing Setup Options Setting Start Time and Recording Length The next field to make an entry in is the START TIME, or when you would like to have the timer recording begin recording. Use the increase/decrease and between fields. By default, the Start times are set to the current time and recording length to one hour. -
Page 22: Parental Control
Changing Setup Options TV Shape (Aspect Ratio) Adjust this setting according to your television’s display capability. By default, this option is set for normal TVs with 4:3 aspect ratio. Unless you're sure you have a WIDESCREEN TV, do not change this setting. The 4:3 Letter Box setting is meant to enable the “Letterbox”... -
Page 23: Parental Control
Changing Setup Options Parental Control Your DVD Player features a Parental Control option. By default, this option is set to the ADULT level, which will allow play of all discs. NOTE : remove any disc in the disc tray to access these setup options. -
Page 24: General
Changing Setup Options General TV Signal Set the signal type you have connected to the recorder. Change this according to your setup. This unit will support Cable TV or an open air Antenna. Default setting : Antenna Add / Delete Channel Here is where you can customize your channel list by SKIPPING or SHOWING any channel you choose. -
Page 25: Clock Setting
Changing Setup Options Select the CLOCK SETTING menu and press ENTER. The CLOCK SETTING screen appears with the following options. Date Settings - Set the date. Use 4-digit year format. Month, day and year fields. Clock Settings - Set the time. This setting will show hour, minutes and seconds. -
Page 26: Common Problems & Solutions
Turn the player on with the Remote Control and then eject the disc. This DVD Recorder is built with Macrovision copy-protection. This will distort the signal when used with VCRs. Connect the player directly to the TV. Some VCR/TV combos may be incompatible with DVD players. Troubleshooting VIDEO menu. Try changing... -
Page 27: Specifications
Specifications are subject to change without notice. While due caution has been exercised in the production of this document, inadvertent technical inaccuracies or typographical errors are possible and unintentional. While all efforts have been made to ensure accuracy, CyberHome Entertainment will not be held liable for any inaccuracies or errors in the information contained herein.
Need help?
Do you have a question about the DVR 1200MU and is the answer not in the manual?
Questions and answers