Table of Contents
Advertisement
Quick Links
Advertisement
Table of Contents

Related Manuals for CyberHome CH-DVD 452


Summary of Contents for CyberHome CH-DVD 452
- Page 1 CH-DVD 452 Operation Guide Bedienungsanleitung www.cyberhome.de...
-
Page 2: Table Of Contents
Handling of discs ...10 Cleaning of discs ...10 Storage of discs ...10 Discs to avoid ...10 Disc accessories ...10 Cleaning of the DVD player ...10 Operation...11 Operation of control panel ...11 Operation of VFD display ...12 Operation of rear panel ...13 Operation of remote control ...14... - Page 3 CONTENTS Playing functions ...30 Selecting a section of the disc to play ...30 1. Selecting a chapter using the DVD menu ...30 2. Playing from a specific time ...30 3. Playing a specific track, picture, title or chapter ...30 4. Playing a specific track, picture, title or chapter using the number buttons ...31 5.
-
Page 4: Safety Instructions
SAFETY INSTRUCTIONS Dear Customer, May we take this opportunity to thank you for purchasing this DVD play- er. We strongly recommend that you carefully study the Operating Instructions before attempting to operate the unit and that you note the listed precautions. Read instructions: All safety/operating instructions should be read before the product is operated. - Page 5 Keep magnetic objects, such as speakers, distant from the DVD player. Condensation: Moisture may form in the device: immediately after a heater has been turned on, in a steamy or very humid room or if the unit is moved from a cold environment to a warm one.
- Page 6 Laser radiation when cover is opened and interlock failed or defeated. Avoid direct exposure to beam. This DVD player is a class 1 laser product. However, this DVD player uses a visible laser beam, which could cause hazardous radiation exposure, if direct- ed.
-
Page 7: Introduction
“ALL” for all regions or with “2” for region 2, for that they can be played in this device. Should another region be printed on the DVD, it cannot be played in this DVD player. The list on the left side shows the various DVD regions of the world. -
Page 8: Compatibility
SUPER VIDEO Recordable ReWritable Compatibility Usable disc types The following discs can be used in your DVD player for playback: DVD-Video (Digital Versatile Disc) DVD+RW (Digital Versatile Disc + rewritable) DVD+R (Digital Versatile Disc + recordable) DVD-R (DVD-Recordable) DVD-RW (DVD-Rewritable) Audio CD (Compact Disc Digital Audio) Video CD (format 1.x/2.0) -
Page 9: Taking Care Of Player And Discs
Do not use any disc accessory to improve the audio quality, disc protective solutions or lens cleaner. These products may cause problems. Cleaning of the DVD player The control panel and the case of the player will only require occasional wiping with a soft cloth. -
Page 10: Operation
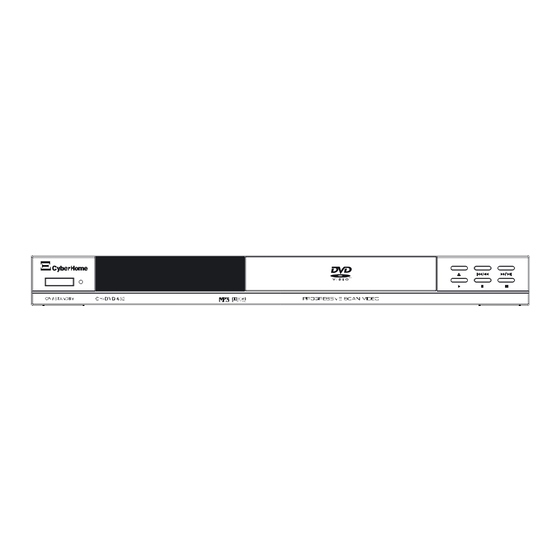
OPERATION Operation of control panel 1. ON / STANDBY: Switches the device on or off. When pressing this button you can only go into Standby mode. 2. VFD DISPLAY: The front Vacuum Fluorescent Display shows informa- tion about the unit’s operational status. 3. -
Page 11: Operation Of Vfd Display
OPERATION Operation of VFD display 1. DISC TYPE INDICATORS: Displays the type of the optical disc inserted - DVD, SVCD, VCD, CD (Audio CD) or MP3. If a DVD+R/RW or DVD-R/RW is inserted, DVD is displayed. 2. PLAYBACK INDICATOR: Indicates that the disc is playing. 3. -
Page 12: Operation Of Rear Panel
OPERATION Operation of rear panel 1. COAXIAL: Digital coaxial audio output for connection to a digital audio device (amplifier/receiver). Please note that the amplifier/receiver has to be compatible to Dolby Digital, MPEG and/or PCM (for more information please refer to the manual of your amplifier/receiver). -
Page 13: Operation Of Remote Control
Operation of remote control Preparing the remote control The DVD player comes with a remote control. Simply pull out the plastic tab in the remote control to activate the battery. The plastic tab - which covers the bat- tery terminals - extends the life of the battery. -
Page 14: Using The Remote Control
OPERATION 30° 30° Using the remote control You can use the enclosed wireless remote control to control this device. When using the remote control, please aim at the device’s remote control sensor, located on the front of the device. A 30 degree angle is recommended for best operation. -
Page 15: Remote Control Buttons
OPERATION POWER DISPLAY DISPLAY SETUP OPEN/CLOSE TITLE MENU GOTO PROGRAM ANGLE SUBTITLE AUDIO MUTE PLAY STOP ENTER PAUSE RETURN BOOKMARK ZOOM SLOW 1/ALL REPEAT VOLUME Remote control buttons POWER Switch on/off To switch the device on or off (only stand- by mode). - Page 16 OPERATION RETURN For returning to the previous menu. BOOKMARK To store specific portions of the disc in memory and play them immediately whenever you want without the need to search. ZOOM For zooming in and out of the picture. SLOW Slow play: Slow forward search while playing (1/2, 1/4, 1/8, 1/16).
-
Page 17: Audio And Video Connections
Television connections In order to use your DVD player, you will need to make a video connection to your TV. The capabilities of your TV and the cables you have on hand will deter- mine the connections you can use. There are four possible connection types: Composite video - The most widely used connection. -
Page 18: Audio/Video Connection To A Tv With Scart Socket
AUDIO AND VIDEO CONNECTIONS 2. If you wish to hear sound through the TV, connect the stereo audio outputs of your DVD player to the matching inputs of your TV using the red and white connectors on the audio/video cable. -
Page 19: Audio/Video Connection To A Tv With S-Video And Stereo Audio Input
2. If you wish to hear sound through the TV, connect the stereo audio outputs of your DVD player to the matching inputs of your TV Using the red and white connectors on the audio/video cable. 3. As this device has a fixed power cord, only plug the other end of the fixed power cord into the wall socket. -
Page 20: Video Connection To A Tv/Beamer With Component Video Inputs (Ycbcr/Ypbpr)
- As this device has a fixed power cord, only plug the other end of the fixed power cord into the wall socket. - Turn on the TV/beamer and the DVD player and select the corresponding video input on your TV/beamer. -
Page 21: Audio Output Connections
WHITE Audio connection to a receiver using the coaxial digital output At the back of the DVD player, there is a digital audio output socket “COAXI- AL” for a coaxial cable. This can be used to connect the following: • an A/V receiver or an A/V amplifier with a digital multi-channel sound decoder (MPEG 2, Dolby Digital) •... - Page 22 AUDIO AND VIDEO CONNECTIONS Have the following cable ready: 1. Coaxial cable (not supplied) COAXIAL DIGITAL INPUT Connect the coaxial digital output with the corresponding input on the AV receiver by means of a coaxial cable (not included in your accessory). The opti- cal digital audio output sends an encoded “RAW”...
-
Page 23: Getting Started
GETTING STARTED POWER DISPLAY SETUP OPEN/CLOSE TITLE MENU GOTO PROGRAM SUBTITLE MUTE ANGLE AUDIO Labeling Side Surface Powering on the unit Only after all connections are complete, connect the power cord and power on the unit. 1. Plug the standard electrical plug into a wall socket or power strip. 2. -
Page 24: Start Playing
GETTING STARTED Start playing 1. Press the Play button “A” to start playing the disc. 2. If the disc inserted is a DVD disc, the title menu can be selected for playing or various special playing functions can be selected depending on the con- tent of the disc. -
Page 25: Playback
• Audio CD • MP3 • Kodak Picture CD • WMA You can operate the DVD player using the remote control or the buttons on the front panel of the DVD player. Problems: ” ” will be displayed on the screen:... -
Page 26: Playing A Dvd+-R/Rw Disc
1. Insert a (Super) Video CD. If playback does not start automatically, press the Play button “ ” on the remote control or on the front of the DVD player. 2. If a menu appears on the screen, use the number buttons “0-9” to select the menu option you want. -
Page 27: Playing An Mp3 Disc
PLAYBACK Kbps 00:00 00:00 001 025 SONGS Another day Peace on earth Mysterious way Happy nation Knocking on my door Playing an MP3 disc MP3 (MPEG1 Audio Layer-3) files are highly compressed music files. Using this technology the data volume can be compressed by a factor of 10, e. g. this means it is possible to record 10 hours music in CD quality on a single CD- ROM. -
Page 28: Playing A Picture Cd
Playing a Picture CD You can also use your DVD player to play Picture CDs, e. g. Kodak Picture CDs or CD-R/RW discs with JPEG files. 1. Insert a Picture CD. If playback does not start automatically, select the requi- red folder using the direction button “... -
Page 29: Playing Functions
PLAYING FUNCTIONS Chapter 01/28 Time *DVD disc display Title 01/04 Chapter - -:- -:- - *DVD disc display Selecting a section of the disc to play If you do not want to play the entire disc, you can select a section to play using one of the following options: 1. -
Page 30: Playing A Specific Track, Picture, Title Or Chapter Using The Number Buttons
PLAYING FUNCTIONS 1/ALL REPEAT VOLUME VOLUME PLAY STOP ENTER PAUSE RETURN RETURN BOOKMARK ZOOM SLOW 3. When entering the wrong number, please press the button “C” on your remote control to delete your input. When you have finished entering the numbers required, the option is closed and the selected track, picture, title or chapter is played. -
Page 31: Using The Repeat Features 1
PLAYING FUNCTIONS 1/ALL REPEAT VOLUME Using the repeat features 1 The repeat feature allows you to repeat a section of a disc, once it has finished playing. According to the disc type, an entire disc, a single track, a single fold- er, a single chapter, a single title or a section of the disc between two selected points can be repeated. -
Page 32: Repeating A Section Of A Disc (A-B)
PLAYING FUNCTIONS 1/ALL REPEAT VOLUME VOLUME PLAY STOP ENTER PAUSE RETURN RETURN BOOKMARK ZOOM SLOW HOLD 3. Repeating a section of a disc (A-B) A section of a disc can be repeated by defining two points (A->B). This feature allows you to select where you want the repeat to start and then the section where you want the repeat to stop. -
Page 33: Slow Play
PLAYING FUNCTIONS PLAY STOP ENTER PAUSE RETURN BOOKMARK ZOOM SLOW PLAY STOP ENTER PAUSE RETURN BOOKMARK ZOOM SLOW PLAY PLAY STOP ENTER PAUSE RETURN BOOKMARK ZOOM SLOW *DVD and Video CD display PLAY STOP ENTER PAUSE RETURN BOOKMARK ZOOM SLOW Slow play When a DVD or Video CD is playing, press the Slow button “IA”... -
Page 34: Using Position Markers (Bookmark)
PLAYING FUNCTIONS Bookmark TT: 01 CH: 04 Time 0 : 25 : 21 Press 'ENTER' key to play Press ‘C’ key to delete Press ‘BOOKMARK’ to exit POWER DISPLAY SETUP OPEN/CLOSE TT 01/04 CH 07/28 TT 01/04 CH 04/28 TT 01/04 CH 04/28 00:26:22 0:18:17 0:18:17... -
Page 35: Adjusting Volumes
PLAYING FUNCTIONS Vol 08 Audio 1/3 : AC3 5.1 ch English SPECIAL PLAYING FUNCTIONS FOR DVD-VIDEO DISCS Adjusting volumes Press the buttons “VOLUME + ” and “VOLUME - ” on the remote control to adjust the playback volumes of the disc. With the button “VOLUME + ” you can increase the volume. -
Page 36: Displaying Subtitles
SPECIAL PLAYING FUNCTIONS FOR DVD-VIDEO DISCS Subtitle 01/03 : English Displaying subtitles Pre-recorded DVD-Video discs often come with subtitles in several languages. You can change the subtitle language of the current disc or switch off subtitles at any time. You can change the subtitle language either using the menu of the inserted disc (“MENU”... -
Page 37: Special Playing Functions For Video Cd's
SPECIAL PLAYING FUNCTIONS FOR VIDEO CD’S SPECIAL PLAYING FUNCTIONS FOR AUDIO CD’S Using playback control (PBC) On Video CDs, the playback control option can be used to enable a menu sim- ilar to the DVD menus. There may be, for example, a list of all chapters on the disc or a list of extra items that have been provided. -
Page 38: Creating A Playlist
CREATING A PLAYLIST PROGRAM: TT (06) / KP (—) Program: TT(06)/KP(—) Exit Next PROGRAM: TT (06) / KP (—) Program: Track (01-07) Exit Next The Playlist facility is available to record a list of tracks, titles and chapters in the order that you want to play them. A playlist can be created by pressing the button “PROGRAM”... -
Page 39: User Preferences
Dutch Set the OSD language Your DVD player features an on-screen setup menu that allows you to adjust settings for your video and audio preferences, and enable features like parental lock. When you change settings in this menu, they are stored even when power is turned off. -
Page 40: Language Codes
USER PREFERENCES Language Video Audio Security General Language setup page OSD language English DVD menu French Audio German Spanish Subtitle Portuguese Italian Swedish Danish Dutch Other Set the DVD menu language Language Video Audio Security General Language setup page OSD language English DVD menu French... -
Page 41: Changing The Video Settings
USER PREFERENCES Language Video Audio Security General Video setup page TV shape Wide TV system Video output S-Vi Video mode Sharpness Brightness Contrast Go to video setup page Language Video Audio Security General Video setup page TV shape Wide Normal/PS 4:3 TV system Normal/LB 4:3 Video output... -
Page 42: Video Output
USER PREFERENCES Language Video Audio Security General Video settings TV shape Wide S-Video TV system Video output S-Vi Video mode Sharpness Brightness Contrast Set the video output Language Video Audio Security General Video setup page TV shape Wide Interlace TV system P-Scan Video output S-Vi... -
Page 43: Changing The Audio Settings
USER PREFERENCES USER PREFERENCES Language Video Audio Security General Video settings Brightness 0 Press ‘ENTER’ to return Language Video Audio Security General Video settings Contrast 0 Press ‘ENTER’ to return Language Video Audio Security General Audio setup page Downmix SPDIF output Dual mono Dynamic Go to audio setup page... -
Page 44: Changing The Security Settings
USER PREFERENCES Language Video Audio Security General Audio setup page Downmix Stereo SPDIF output Mono left Dual mono Mono right Dynamic Mono mixed Dual mono setup Language Video Audio Security General Audio setup page Downmix Full SPDIF output Dual mono Dynamic Dynamic range control Language... -
Page 45: Changing The General Settings
USER PREFERENCES Language Video Audio Security General Security setup page Change PSW Change Parental Change the passwort Language Video Audio Security General Security setup page Change PSW 1.Kid safe Parental 3.PG 4.PG 13 5.PGR 7.NC 17 8.Adults Set Parental Control Language Video Audio... -
Page 46: Angle Mark
USER PREFERENCES Language Video Audio Security General General setup page Angle mark Captions Memory Version Default Set the multi-angle display Language Video Audio Security General General setup page Angle mark Captions Memory Version Default Closed captions Language Video Audio Security General General setup page Angle mark... -
Page 47: Troubleshooting
• The disc may be dirty. Try cleaning the disc. • Make sure the disc is placed with the labeled side facing up. • The region code of the disc may not match that of the DVD player. In this case, the disc cannot be used. - Page 48 TROUBLESHOOTING The setup menu is unavailable. Ejecting a trapped disc. • You must completely stop playback by pressing the Stop key before enter- ing the setup menu (“SETUP” button). • The emergency eject feature allows you to remove a disc from the disc drive in the very rare case that the tray will not open.
-
Page 49: Specifications
SPECIFICATIONS* General specifications Playable disc types: Playable disc formats: TV systems supported: Video out formats: Power supply: Power consumption: Power consumption (standby): Standby LED indicator: Dimensions (W x H x D): Weight without packaging approx.: Operation status: Operation conditions: Laser: Audio/Video connections AV connector SCART: S-Video out:... -
Page 50: Glossary
A component video signal is comprised of the luminance (Y) signal and sep- arate chrominance (PB and PR) signals. The DVD player releases its sound information bit by bit through the digital out- put. The way the sound will stream out of the socket must be adjusted in the OSD menu. - Page 51 DVD recorder. Old recordings can be deleted but can no longer be over- written. Before this disc can be played in a DVD player, it must be finalised in a DVD recorder. Once this process is completed, no further recordings can be added.
- Page 52 S-Video SVCD Widescreen The SCART socket is the simplest connection between your DVD player and your TV. It transports not only the picture signals, but also the sound signals. S-Video offers significantly improved video signal performance through a basic composite video connection. To use this type of connection, your TV must have an S-Video input.
Need help?
Do you have a question about the CH-DVD 452 and is the answer not in the manual?
Questions and answers