Table of Contents
Advertisement
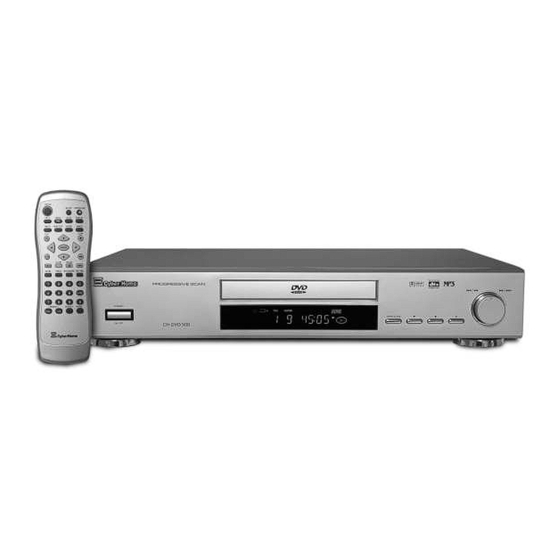
DVD Player
Owner's Manual
Welcome to the Digital Video Revolution!
Your Cyber Home DVD Player is designed to provide a great Home Theater
experience with super-crisp Video and thundering Digital Sound. Please retain
this User Manual for future reference. Remember to read the manual carefully
before connecting and powering on the unit.
www.cyberhome.com
CH-DVD 500
USA Version 1.1
Advertisement
Table of Contents

Related Manuals for CyberHome Cyber Home CH-DVD500


Summary of Contents for CyberHome Cyber Home CH-DVD500
-
Page 1: Dvd Player
Owner’s Manual Welcome to the Digital Video Revolution! Your Cyber Home DVD Player is designed to provide a great Home Theater experience with super-crisp Video and thundering Digital Sound. Please retain this User Manual for future reference. Remember to read the manual carefully before connecting and powering on the unit. -
Page 2: Important Safety Precautions
Refer to the qualified personnel for servicing. Invisible laser radiation when cover is opened and interlock failed or defeated. Avoid direct exposure to beam. When using this DVD player, basic precautions should always be followed, including the following:... -
Page 3: Table Of Contents
Connecting the DVD Player to your TV/Receiver ........ -
Page 4: Dvd Player Features & Supported Discs
Digital Video over conventional formats such as VHS. And your DVD Player also doubles as a superior Music machine, playing CD Audio or “Compact” Discs, as well as discs containing MP3 Music Files and JPG Images. -
Page 5: Caring For Optical Discs
Please thoroughly read the "Instruction Points for Attention" on the discs. Cleaning the DVD Player: The control panel and the case of the player will only require occasional wiping with a soft cloth. Areas with stubborn stains can be cleaned with a soft cloth dipped in a neutral detergent. -
Page 6: Preparing And Using The Remote Control
Installing the Batteries If the remote control only operates when you get closer to the DVD Player, it may mean the batteries are weak. Please replace the two batteries simultaneously with two new batteries (Size AAA, R03, 1.5V) of the same type. -
Page 7: Remote Control Functions
Remote Control Functions (1 of 2) Understanding the Buttons on the Remote The Remote Control provides access to the DVD Player’s advanced functions, such as searching, repeating video segments, accessing the Setup Menu, choosing subtitle mode, muting the volume and pausing the action, just to name a few. -
Page 8: Number Buttons
Remote Control Functions (2 of 2) ZOOM Press to zoom in on picture during playback or on a still frame. PROG Create a custom play list of selected tracks and play sequence. NUMBER BUTTONS Use the number buttons to input numerical values during programing, with GOTO, or to directly select a track to play. -
Page 9: Dvd Front Panel Functions
DVD Front Panel Functions Previous Track/Fast Reverse & Next Track/Fast Forward The front Function Knob allows the control of skip ahead and skip back functions, as well as multi- speed scanning in forward or reverse at 2x, 4x and 8x speeds. To advance to the next track, turn the knob to the right and hold for about one second. -
Page 10: Dvd Display Functions
Number of Current Track Dimming the Front VFD Display Adjusting the Brightness of the Front Display With NO DISC in the unit, the DISPLAY button functions as a 4-phase Dimmer for the DVD Player’s front VFD (Vacuum Flourescent Display). Eject the Current Disc... -
Page 11: Back Panel Connectors
Connections on the Back Panel The back panel is where you’ll find all the physical connections for the DVD Player. You will only use one Video and one Audio connection at any given time. For instance, if you’re using the Composite Video jack to connect to your TV, the S-Video and Component connectors will be unused. -
Page 12: Connecting The Dvd Player To Your Tv/Receiver
Determining the Video & Audio Connections You Will Use The first step to using your new DVD Player is to make the cable connections that will allow you to see the video and hear the audio on your TV and optional Stereo Receiver. Your DVD Player has multiple Video and Audio outputs. -
Page 13: Composite / S-Video & Stereo Audio Connections
You will use these for the Audio Connection. Use the included Video Cable (Yellow) to connect the Video Out of the DVD Player to the Video In of your TV. Connect the Stereo Audio outputs (Red-Red, White-White) of the DVD Player to the matching Inputs of your TV. -
Page 14: Component Video & Progressive Scan Connections
Step 3: Connect the DVD Player using the Component Video Cables At this point, turn off the TV and DVD Player and unhook the Composite or S-Video cable used so far. Connect the separate Component Video Cables to the appropriate jacks. Normally, cables and jacks are color-coded to make connection easier. -
Page 15: Dolby/Dts 5.1 Channel & Digital Audio Connections
You must purchase a separate Coaxial or Optical Digital Audio Cable for these connections, as these cables are not included with the DVD Player. Connect the Optical or Coaxial Digital Audio Out of the DVD Player to the corresponding Input of your Receiver. Adjust your Receiver’s Input Source Setting to the correspond with the Digital Audio In. -
Page 16: Getting Started - Powering On & Playing A Disc
After Video and Audio Cables are Connected and Power is Applied Once the DVD Player is properly connected to your TV and possibly your receiver also, turn on your TV and make sure it’s set to the correct input channel. The video input is usually configured as channel 0 or 1 on most TVs, but may be referred to as “Input 1”... -
Page 17: Stopping And Pausing Play
Stopping and Pausing Play To Stop Disc Play STOP Press the STOP button to stop playback of the disc. With Audio CDs, VCDs and DVDs, after the STOP button is pressed, the message HOLD will be displayed. The stop point is now saved and you can resume playback by pressing PLAY. -
Page 18: Navigating Disc Menus
Navigating Disc Menus Using the MENU and TITLE Buttons to Access Menus on DVD and VCD Discs Most DVDs and some VCD discs feature menus that will allow you to navigate the various Chapters, Special Features and Setup Options available on the disc. Some menus will automatically be displayed when you insert a disc. -
Page 19: Fast Forward/Reverse & Slow Motion Scanning
Finding a Position on the Disc Using the Search Function Your DVD Player features a Search function that will allow you to scan through video at fast or slow speeds to find a specific position. The scan functions available will depend on the type of disc you are using. -
Page 20: Jumping To A Specific Chapter/Track Or Time Position
Jumping to a Specific Chapter/Track or Time Position You may Choose a Specific Track or Time Position to Playback There are many options available to choose the beginning playback point on DVDs, VCDs and Audio CDs. You may use the GOTO button, or enter a Track Number directly using the NUMBER buttons (CD-Audio, VCD). -
Page 21: Previewing Titles, Chapters Or Tracks Before Playback
See a Preview of Chapters on VCD Discs using INTRO Your DVD Player features a great way to introduce yourself to the various content of VCD discs. Using the INTRO button, you can see a preview of all the chapters on a disc. -
Page 22: Repeating A Title, Chapter/Track Or Disc
Repeating a Title, Chapter/Track or Disc Repeat a Single Track on an Audio CD or an Entire DVD Disc Your player has many options for repeating segments of DVDs, VCDs, and Audio CDs. This section covers how to repeat segments already defined on the disc, such as a Chapter or Track. -
Page 23: Playing Tracks In A Particular Order With Program Play
Playing Tracks in a Particular Order with Program Play Create Custom Playback Programs of up to 30 Steps If you would like to program the Chapters or Tracks on your VCD or CD discs to play in an order you specify, create a custom playback program with the PROGRAM button. Select the PROGRAM Button during Playback PROG You will see the Program Menu on the screen. -
Page 24: Playing Mp3 Files With The Mp3 Navigator
Playing MP3 Files with the MP3 Navigator Your DVD Player is also a Feature-Packed MP3 Player! When you insert an MP3 disc, the player will launch the MP3 Navigator, an on-screen program that lets you easily select and play MP3 files stored on CD-R or CD-RW discs. The MP3 Navigator gives you several options for MP3 Playback, including Repeat and Shuffle modes. -
Page 25: Viewing Jpg Files On Your Tv
Viewing JPG Files on Your TV You Can Play Slide-Shows of JPG Images Stored on CD-R and CD-RW Discs When you insert a disc containing only JPG files, the player will automatically launch a Slide-Show of your images. For discs with MP3 and JPG files, the Media Player discussed on page 24 will be launched. JPG Picture files must be saved with the .JPG extension. -
Page 26: Using The Zoom Function
Using the Zoom Function You can Zoom In during Playback or on a Still Frame Want to take a closer look at something you see in a DVD or VCD movie? Use the Zoom function. The Zoom function lets you enlarge the Video Image to twice (2x) the original size, while also viewing a Reference Window showing the full original picture. -
Page 27: More Audio & Video Functions
More Audio & Video Functions Suspending Audio with the MUTE Button MUTE To temporarily cancel the Audio of the disc you’re listening to or watching, simply press the MUTE button. You’ll see an indicator on screen letting you know that the player is in MUTE mode. -
Page 28: Putting It All Together With The Display Button
Putting it All Together with the Display Button Get Quick Access to Playback Information and Important Functions Use DISPLAY to get information about the playback session, as well as direct command of some of the most important functions already discussed, all grouped together in one Menu for Quick and Easy Access. -
Page 29: Using The On-Screen Setup Menu
Using the On-Screen Setup Menu Adjusting Video and Audio Settings in the DVD Player Setup Your DVD Player features an on-screen Setup Menu that allows you to adjust settings for your Video and Audio preferences, and enable player features like Parental Lock. When you change settings in the Setup Menu, they are stored even when power is turned off. -
Page 30: Parental Lock And Other Options
Exploring the CHILD and OTHERS Setup Pages The CHILD and OTHERS Setup Pages contains many important options for your DVD player. The CHILD menu is where you can set a password to control the Parental Lock and Reset functions, which let you limit the play of discs beyond a rating you specify, and reset the settings and password to factory defaults, respectively. -
Page 31: Video Setup Options
ASPECT - 4:3 PS / 4:3 LB / 16:9 WS You can setup your DVD Player to work with normal and wide screen televisions. If you are using a wide screen TV, set this option to 16:9 WS to match the aspect ratio of your TV. When used with a normal TV (4:3 aspect ratio), the 4:3 PS setting results in the typical “Pan &... -
Page 32: Audio Setup Options
Audio Setup Options ANALOG - 5.1CH / 2CH The ANALOG setting controls the DVD Player’s Analog Audio Outputs. These are the Stereo Audio and 5.1 Channel Outputs covered on pages 11, 13 & 15. Select 5.1CH if you are using the 5.1 Channel outputs to connect to a Dolby-Ready Receiver or Speaker System. -
Page 33: Language Options
Language Setup Options Setting Language Options for Setup and DVDs The Language Setup Page allows you to change the language the player will use for the On-Screen Display (OSD), as well as the default language for movies with multiple language tracks. Keep in mind that if the DVD you’re using does not support the language you choose, the default of the disc will be used. -
Page 34: Troubleshooting Common Problems
The movie is paused. There is no sound during Pause or Search modes. Sound From Only Left/Right Front Speakers of 5.1 Channel System If you’re using the 5.1 Channel Analog Outputs, check the ANALOG setting in the DVD Player’s Setup Menu (pg 32). This setting should be set to 5.1CH. -
Page 35: Specifications
Specifications Playable Discs DVD, Audio CD, VCD, CD-R, CD-RW TV Systems Supported NTSC, PAL, P-SCAN Laser Semiconductor Laser, wavelength 650nm Frequency Response (Digital Audio) DVD Linear Sound: 48kHz sampling 4Hz to 22kHz 96kHz sampling 4Hz to 44kHz Audio CD: 4Hz to 20kHz Signal-to-Noise Ratio (Digital Audio) More than 90dB Audio dynamic range (Digital Audio) -
Page 36: Glossary Of Dvd-Related Terms
Recordable Optical Disc formats that can be used as VCD, MP3 or JPG discs with your DVD Player. Coaxial Digital Audio Connector A digital audio connection used to connect a DVD player to a receiver or pre-amplifier. Transfers a “RAW” (encoded) digital audio signal, minimizes signal degradation. -
Page 37: Progressive Scan
DVD movies are produced with region encoding to restrict distribution of titles to certain areas at certain times. To play back a DVD title with a specific region code, you will need a DVD player with the same region code. -
Page 38: Index
Index a-b repeat...22 a-b repeat button...8 angle button ...7 angles (multi-angle playback) ...27 arrow buttons ...7 audio button ...7 audio cd...4 audio outputs ...11 audio settings ...32 back panel ...11 batteries ...6 bookmark button ...8 bookmarks...21 c (clear) button ...8 coaxial output ...11,15 component video output ...11,14 composite video output ...11,13...
Need help?
Do you have a question about the Cyber Home CH-DVD500 and is the answer not in the manual?
Questions and answers