Table of Contents
Advertisement
Advertisement
Table of Contents

Related Manuals for ACME Xperior XP-16R BEAM II


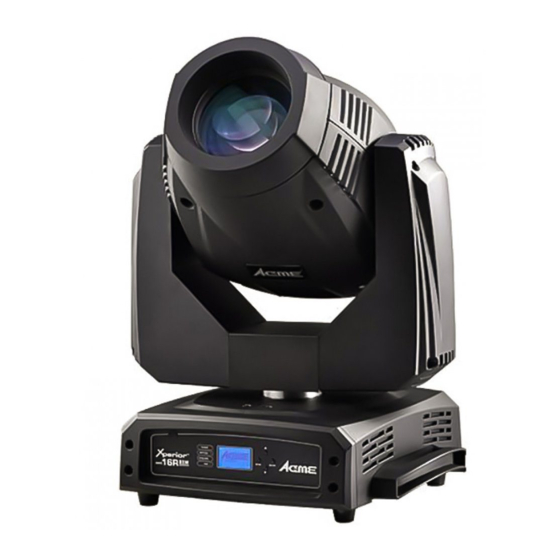
Summary of Contents for ACME Xperior XP-16R BEAM II
- Page 1 XP-16R BEAM II User Manual Please read these instructions carefully before use...
-
Page 2: Table Of Contents
TABLE OF CONTENTS 1. Safety Instruction ....................2 2. Technical Specification ................... 4 3. Description ......................6 3.1 Control Panel ....................6 4. Gobo-wheel and Lamp ................... 7 4.1 Gobo-wheel ....................7 4.2 Lamp ......................7 5. How To Set The Unit ....................8 5.1 Main Function .................... - Page 3 Please keep this User Manual for future consultation. If you sell the unit to another user, be sure that they also receive this instruction manual. Important: Damages caused by the disregard of this user manual are not subject to warranty. The dealer will not accept liability for any resulting defects or problems.
-
Page 4: Technical Specification
12 meters. Disconnect mains power before fuse/lamp replacement or servicing. Replace fuse/lamp only with the same type. In the event of serious operating problem, stop using the unit immediately. Never turn on and off the unit time after time. ... - Page 5 Lamp: - PHILIPS MSD Platinum 16R 330W Optical system: - High efficient Optical system. - Delivering extremely powerful output. - High quality lens. Movement: - Pan: 540° - Tilt: 270° - Pan/Tilt moving speed adjustable. - Automatic Pan/Tilt correction. - Easy calibration and maintenance by magnetic home positioning. - Pan/Tilt position lock for transporting protection.
-
Page 6: Description
Dimension: - 517 × 394 ×392mm 3. Description 3.1 Control Panel Front view Rear view 6 7 8 1. LED: POWER Power On DMX input present 2. Function Display: To show the various menus and the selected function. 3. Button: MENU To enter into, move backward or leave the menu Move up in the menu... -
Page 7: Gobo-Wheel And Lamp
4. Gobo-wheel and Lamp 4.1 Gobo-wheel DANGER! Install/change the gobo-wheel with the device switched off only. 4.2 Lamp PHILIPS MSD Platinum 16R 330W Because of its high internal pressure, there might be a risk that the Discharge lamp would explode during operation. The lamp emits intense UV radiation which is harmful to the eyes and skin. -
Page 8: How To Set The Unit
When lighting up, the lamp operates at high pressure and there is a slight risk of arc tube rupture. The risk increases with age, temperature and improper handling of the lamp. Do not use the lamp longer than its lifespan. Make sure the lamp is located in the center of the reflector for the best projection. - Page 9 Mode1 15 Channel Mode Mode2 17 Blackout DMX State Hold View DMX Value Backlight Intensity Contrast Radio English Language Chinese Exit Lamp Use Hour Reset Time Temperature ﹠ Pan Tilt Effect...
- Page 10 DMX Functions To select DMX Functions, press the ENTER button to confirm, use the UP/DOWN button to select DMX Address, Channel Mode , DMX State or View DMX Value. DMX Address To select DMX Address, press the ENTER button to confirm. Use the UP/DOWN button to adjust the address from 1 to 512, press the ENTER button to store.
- Page 11 Tilt Inverse To select Tilt Inverse, press the ENTER button to confirm. Use the UP/DOWN button to select No (normal) or Yes (tilt inverse), press the ENTER button to store. Press the MENU button back to the last menu or let the unit idle one minute to exit menu mode. P/T Feedback To select P/T Feedback, press the ENTER button to confirm.
- Page 12 Display Inverse To select Display Inverse, press the ENTER button to confirm, present mode will blink on the display, use the UP/DOWN button to select No (normal display) or Yes (inverse display), press the ENTER button to store. Press the MENU button back to the last menu or let the unit idle one minute to exit menu mode.
- Page 13 button to select Auto Test or Manual Test. Auto Test To select Auto Test, press the ENTER button to confirm, the unit will run built-in programs to automatically test pan, tilt, shutter, color, gobo, gobo rotation, prism, prism rotation, focus, dimmer and lamp on/off.
- Page 14 To select Temperature, press the ENTER button to confirm, temperature of the fixture will show on the display, press the MENU button back to exit. Firmware Version To select Firmware Version, press the ENTER button to confirm, firmware version will show on the display, press the MENU button back to exit.
-
Page 15: Home Position Adjustment
Factory Settings To Select Factory Setting, press the ENTER button to confirm, the fixture will reset to factory settings and exit menu mode. 5.2 Home Position Adjustment Press the MENU button into menu mode, then press ENTER button for about 3 seconds into offset mode to adjust the home position. - Page 16 Tilt - Tilt home position adjustment Enter offset mode, select Tilt, press the ENTER button to confirm. Use the UP/DOWN button to offset the value from -128 to 127, press the ENTER button to store. Press the MENU button to exit. Shutter –...
-
Page 17: Error Information
Frost - Frost home position adjustment Enter offset mode, select Frost, press the ENTER button to confirm. Use the UP/DOWN button to offset the value from 0 to 255, press the ENTER button to store. Press the MENU button to exit. Focus - Focus home position adjustment Enter offset mode, select Focus, press the ENTER button to confirm. -
Page 18: Control By Universal Dmx Controller
Reset Fail, Color Reset Fail, , Gobo Reset Fail, Focus Reset fail. They may appear when turning on or resetting the unit, for some parts such as board P.C are damaged. Please contact the qualified maintenance. 6. Control By Universal DMX Controller 6.1 DMX Connections unit 1 unit 2... -
Page 19: Channel Mode Setting
4. Each lighting unit needs to have a DMX address to receive the data by the controller. The address number is between 0-511 (usually 0 & 1 are equal to 1). 5. The end of the DMX 512 system should be terminated to reduce signal errors. 6. - Page 20 CHANNEL VALUE FUNCTION 0-255 0° - 540° TILT 0-255 0° - 270° PAN /TILT SPEED 0-255 Fast Slow COLOR 000-004 Open 005-009 Color 1 010-014 Color 2 015-019 Color 3 020-024 Color 4 025-029 Color 5 030-034 Color 6 035-039 Color 7 040-044...
- Page 21 128-189 Clockwise rotation fast to slow 190-193 Stop 194-255 Clockwise rotation slow to fast R-GOBO 000-127 Index 128-189 clockwise rotation fast to slow 190-193 Stop 194-255 clockwise rotation slow to fast PRISM 000-007 No Effect 008-255 Prism Effect R-PRISM 000-127 Index 127-189 clockwise rotation fast to slow...
- Page 22 FUNCTION 000-069 Null 070-079 Enable blackout while Pan/Tilt moving 080-089 Disable blackout while Pan/Tilt moving 090-099 Enable blackout while color changing 100-109 Disable blackout while color changing 110-119 Enable blackout while gobo changing 120-129 Disable blackout while gobo changing 130-139 Lamp On 140-149 Pan/Tilt reset...
- Page 23 050-054 Color 10 055-059 Color 11 060-064 Color 12 065-127 Index 128-189 Clockwise rotation fast to slow 190-193 Stop 194-255 Clockwise rotation slow to fast GOBO 000-004 Open 005-009 Gobo 1 010-014 Gobo 2 015-019 Gobo 3 020-024 Gobo 4 025-029 Gobo 5 030-034...
- Page 24 R-PRISM 2 000-127 Index 127-189 clockwise rotation fast to slow 190-193 Stop 194-255 clockwise rotation slow to fast FOCUS 0-255 0% 100% FROST 000-007 No effect 008-255 Frost STROBE 000-003 Light On 004-103 Strobe at linearly variable frequency From low to high 104-107 Light On 108-207...
-
Page 25: Troubleshooting
7. Troubleshooting Following are a few common problems that may occur during operation. Here are some suggestions for easy troubleshooting: A. The unit does not work, no light and the fan does not work 1. Check the connect power and main fuse. 2. -
Page 26: Maintenance And Cleaning
axis gear and motor gear. 6. Plug all the connect wires back upon the belt. 7. Tighten all the screws. F. If The tilt belt is broken 1. Turn off the mains power. 2. Loosen all the screws (A) and open the right arm cover (B). 3. - Page 27 A. As the pictures shown above, please replace the cable or cable joints immediately once they’ve turned yellow. B. Do maintain the fixtures every two months and make sure that all the screws and terminals have been locked firmly to make sure the normal performance of the fixtures. Negligence of maintenance would cause malfunction of the fixture.
- Page 28 Declaration of Conformity We declare that our products (lighting equipments) comply with the following specification and bears CE mark in accordance with the provision of the Electromagnetic Compatibility (EMC) Directive 89/336/EEC. EN55103-1: 2009 ; EN55103-2: 2009; EN62471: 2008; EN61000-3-2: 2006 + A1:2009 + A2:2009; EN61000-3-3: 2008. &...
Need help?
Do you have a question about the Xperior XP-16R BEAM II and is the answer not in the manual?
Questions and answers