Advertisement
Advertisement
Table of Contents

Related Manuals for ACME Xperior XP-16R SZ


Summary of Contents for ACME Xperior XP-16R SZ
- Page 1 XP-16R SZ User Manual Innovation, Quality, Performance Please read the instruction carefully before use ...
-
Page 2: Table Of Contents
CONTENTS 1. Safety Instructions .................... 2 2. Technical Specifications ................... 3 3. Description ...................... 6 3.1 Description of the fixture ................. 6 Declaration of Conformity 3.2 Control Panel .................... 6 We declare that our products (lighting equipments) comply with the 4. Gobo and Lamp ....................... 7 following specification and bears CE mark in accordance with the provision of the Electromagnetic Compatibility (EMC) Directive 89/336/EEC. 4.1 Gobos ...................... 7 EN55103‐1: 2009 ; EN55103‐2: 2009; EN62471: 2008; 4.2 Light Source ..................... 8 EN61000‐3‐2: 2006 + A1:2009 + A2:2009; EN61000‐3‐3: 2008. 4.3 Changing the Lamp .................. 8 & 5. How To Set The Unit .................... 10 Harmonized Standard 5.1 Main Function .................... 10 EN 60598‐1:2008 + All:2009; EN 60598‐2‐17:1989 + A2:1991; EN 62471:2008; EN 62493: 2010 5.2 Home Position Adjustment ................ 19 Safety of household and similar electrical appliances Part 1: General requirements 5.3 Error Information ................... 22 6. -
Page 3: Safety Instructions
1. Safety Instructions Please read the instruction carefully which includes important information about the installation, usage and maintenance. WARNING Please keep this User Guide for future consultation. If you sell the unit to another user, be sure that they also receive this instruction manual. Important: Damages caused by the disregard of this user manual are not subject to warranty. The dealer will not accept liability for any resulting defects or problems. Unpack and check carefully that there is no transportation damage before using the unit. The unit is for indoor use only. Use only in a dry location. DO install and operate by qualified operator. DO NOT allow children to operate the fixture. Use safety chain when fixing the unit. Handle the unit by carrying its base instead of head only. The unit must be installed in a location with adequate ventilation, at least 50cm from adjacent surfaces. -
Page 4: Technical Specifications
the mains power immediately. B. Do maintain the fixtures every two months and make sure that all the screws and terminals have DO NOT operate in dirty or dusty environment, do clean fixtures regularly. been locked firmly to make sure the normal performance of the fixtures. Negligence of DO NOT touch any wire during operation as there might be a hazard of electric shock. maintenance would cause malfunction of the fixture. Avoid power wires together twist other cables. The minimum distance between light output and the illuminated surface must be more than 12 Cleaning: meters. The cleaning of internal and external optical lenses and/or mirrors must be carried out periodically Disconnect mains power before fuse/lamp replacement or servicing. to optimize light output. Cleaning frequency depends on the environment in which the fixture ... - Page 5 F. If The tilt belt is broken Light Source 1. Turn off the mains power. ‐ PHILIPS MSD Platinum 16R 330W 2. Loosen all the screws (A) and open the right arm cover (B). Battery backup display 3. Loosen the screws (C) that fix the bridge. ‐ Setting DMX address or other functions without connecting to mains power. 4. Change a new belt (D). Please adjust the tension of the belt properly. Note: do not fix the belt too ‐ Battery for LCD display charges automatically when the fixtures connects to the mains power. tight as it is can easily rupture. ‐ No need to change battery. 5. Reverse the procedures from step 3 to 2. Optical system ‐ High efficiency optical system, delivering extremely powerful output ‐ High quality dichroic lenses Movement ‐ Pan: 540° ‐ Tilt: 270° ‐ Pan/Tilt moving speed adjustable. ‐ Automatic Pan/Tilt correction. ...
- Page 6 Frost damage or interference to DMX interface circuit. ‐ Variable, separate effect. C. One of the channels is not working well Focus 1. The stepper motor might be damaged or the cable connected to the PCB is broken. ‐ Focus effect. 2. The motor’s drive IC on the PCB might be out of condition. Iris ‐ Motorized D. The lamp is cutting out intermittently Zoom 1. The lamp is not working well. Check the mains voltage either too high or too low. - Motorized linear zoom for smooth adjustment of beam size and beam sharpness. 2. Internal temperature may be too high. Check if replacement of fan is needed on the head. Cool ‐ Fan cooled E. If The pan belt is broken Protocols 1. Turn off the mains power. ‐ DMX 512 2. Loosen the screws (A),open the cover (B). ‐ Date input/output: 3/5 Pin XLR socket 3. Loosen the screws (C). Weight 4. Unplug all the connect wires over the belt. ‐ 23Kg 5.
-
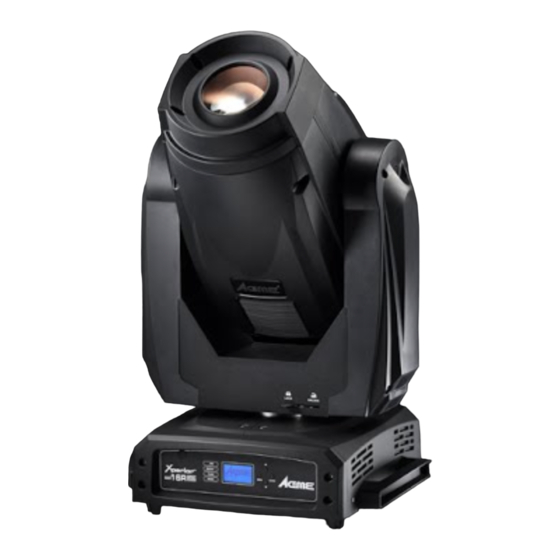
Page 7: Description
3. Description 000‐255 100% 0 FOCUS 3.1 Description of the fixture 19 000‐255 near far FROST 20 000‐255 0% 100% IRIS 21 000‐255 100% 0 1. Front panel SHUTTER 2. Base 000‐007 Shutter Off 008‐015 Open 3. Tilt lock ... -
Page 8: Gobo And Lamp
4. DMX input/output: 190‐193 Stop 194‐255 Counter‐clockwise rotation, slow fast For DMX 512 operation, use 3/5‐pin XLR plug cable to link the units together GOBO WHEEL 2 5. Power Cable: 000‐004 Open To connect to the mains supply 005‐009 Gobo 2‐1 010‐014 Gobo 2‐2 6. Fuse (T 10A): 015‐018 Gobo 2‐3 Protect the unit from damage of over current. 019‐023 Gobo 2‐4 024‐028 Gobo 2‐5 7. Power Switch: Turns On/Off the power 029‐033 Gobo 2‐6 034‐037 Gobo 2‐7 4. Gobo and Lamp 038‐042 Gobo 2‐8 043‐047 ... -
Page 9: Light Source
4.2 Light Source 194‐255 Counter‐Clockwise rotation, slow fast CYAN PHILIPS MSD Platinum 16R 330W 8 000‐255 0 100% Because of its high internal pressure, there might be a risk that the Discharge lamp would MAGENTA 9 000‐255 0 100% explode during operation. The lamp emits intense UV radiation which is harmful to the YELLOW eyes and skin. The high luminance of the arc can cause severe damage to the retina if you 10 000‐255 0 100% take a close look at the lamp. PRESET COLOR 000‐021 Open To protect the lamp, always turn off the lamp first (via control panel or DMX controller) ... - Page 10 23 Channels (Mode 1): CHANNEL VALUE FUNCTION PAN 1 000‐255 0 ° 540° 2 000‐255 PAN FINE TILT 3 000‐255 0 ° 270° 4 000‐255 TILT FINE P/T SPEED 5 000‐255 Fast Slow SPECIAL FUNCTION 000‐069 No function 070‐079 Enable blackout while pan/tilt moving 3. Lift the lamp out of its recess, disconnect the lamp and connect a new lamp that must be the same 080‐089 Disable blackout while pan/tilt moving 090‐099 Enable blackout while color changing type with the old one. And then place the new lamp into the lamp recess. 100‐109 Disable blackout while color changing 110‐119 Enable blackout while gobo changing ...
-
Page 11: How To Set The Unit
the units’ power is disconnected. 5. How To Set The Unit 4. Each lighting unit needs to have a DMX address to receive the data by the controller. The address 5.1 Main Function number is between 0‐511 (usually 0 & 1 are equal to 1). Turn on the unit, press the MENU button into menu mode, and press the UP/DOWN button until the 5. The end of the DMX 512 system should be terminated to reduce signal errors. required function is shown on the monitor. Select the function by the ENTER button. Use the 6. 3 pin XLR connectors are more popular than 5 pins XLR. UP/DOWN button to choose the submenu, press the ENTER button to store and automatically return 3 pin XLR: Pin 1: GND, Pin 2: Negative signal (‐), Pin 3: Positive signal (+) to the last menu. Press the MENU button or let the unit idle one minute to exit menu mode. 5 pin XLR: Pin 1: GND, Pin 2: Negative signal (‐), Pin 3: Positive signal (+), Pin4, Pin5 not used. In the event of disconnecting with mains power, press the UP button for one minute to enter into ... -
Page 12: Control By Universal Dmx Controller
6. Control By Universal DMX Controller 6.1 Connection ATTENTION Termination reduces signal errors and to avoid signal transmission problems and interference. It is always advisable to connect a DMX terminal (Resistance 120 ohm 1/4W between pin2 (DMX‐) and pin3 (DMX+) of the last fixture). 1. At last unit, the DMX cable has to be terminated with a terminator. Solder a 120‐ohm 1/4W resistor between pin 2(DMX‐) and pin 3(DMX+) into a 3‐pin XLR‐plug and plug it in the DMX‐output of the last unit. 2. Connect the unit together in a “daisy chain” by XLR plug cable from the output of the unit to the input of the next unit. The cable cannot be branched or split to a “Y” cable. DMX 512 is a very high‐speed signal. Inadequate or damaged cables, soldered joints or corroded connectors can easily ... - Page 13 Lamp Too Hot Low Power It appears when detected temperature is higher than 105℃. the unit will run on a low power level. Maintenance Fixture It appears when the maintenance remaining time becomes 0S, please enter menu mode and reset the time. Lamp On Over 700 Hour It appears when the lamp always has been on over 700 hours, please turn off the lamp. Memory Initial Fail It appears when the memory IC is damaged. CPU‐B Error, CPU‐C Error, CPU‐D Error They appear when board P.C or some wires are damaged. Pan Reset Error, Pan Encode Error, Tilt Reset Error, Tilt Encode Error, Shutter Reset Fail, Dimmer Reset Fail, Color Reset Fail, Cyan Reset Fail, Magenta Reset Fail, Yellow Reset Fail, Gobo1 Reset Fail, R‐Gobo1 Reset Fail, Gobo2 Reset Fail, Iris Reset Fail, Effect Reset Fail, R‐Effect Reset Fail, Frost Reset DMX Functions Fail, Flat Reset Fail, Focus Reset Fail, Zoom Reset Fail To select DMX Functions, press the ENTER button to confirm, use the UP/DOWN button to select They may appear when turning on or resetting the unit, for some parts such as board P.C are damaged. DMX Address, DMX Channel Mode or View DMX Value. Please contact the qualified maintenance. DMX Address —DMX512 address setting ...
-
Page 14: Home Position Adjustment
the DMX channel value. Press the MENU button back to the last menu or let the unit idle one Prism—Prism home position adjustment minute to exit menu mode. Enter offset mode, Select Prism, press the ENTER button to confirm, the present position will blink on the display, use the UP/DOWN button to offset the value from 0 to 255, press the ENTER button to Fixture Setting store. Press the MENU button to exit. To select Fixture Setting, press the ENTER button to confirm, use the UP/DOWN button to select R‐Prism—Prism rotation home position adjustment Pan Inverse, Tile Inverse, P/T Feedback, BL.O. P/T Moving, BL.O. Color Change or BL.O. Gobo Enter offset mode, Select R‐Prism, press the ENTER button to confirm, the present position will blink ... - Page 15 store. Press the MENU button to exit. No (normal while changing color) or Yes (blackout while change color), press the ENTER button to store. Press the MENU button back to the last menu or let the unit idle one minute to exit menu Cyan—Cyan home position adjustment mode. Enter offset mode, Select Cyan, press the ENTER button to confirm, the present position will blink on the display, use the UP/DOWN button to offset the value from 0 to 255, press the ENTER button to BL.O. Gobo Change — Blackout while change gobo store. Press the MENU button to exit. To select BL.O. Gobo Change, press the ENTER button to confirm. Use the UP/DOWN button to Magenta—Magenta home position adjustment select No (normal while changing gobo) or Yes (blackout while changing gobo), press the ENTER Enter offset mode, Select Magenta, press the ENTER button to confirm, the present position will blink button to store. Press the MENU button back to the last menu or let the unit idle one minute to on the display, use the UP/DOWN button to offset the value from 0 to 255, press the ENTER button to exit menu mode. store. Press the MENU button to exit. Lamp Setting Yellow—Yellow home position adjustment Enter offset mode, Select Yellow, press the ENTER button to confirm, the present position will blink on To select Fixture Setting, press the ENTER button to confirm, use the UP/DOWN button to select the display, use the UP/DOWN button to offset the value from 0 to 255, press the ENTER button to On/Off, State/Power on, Off via DMX, On if DMX on, Off if DMX off, Ignition Delay or Low Power store. Press the MENU button to exit. Delay.. Gobo—Gobo home position adjustment On/Off —Turn on/off the lamp Enter offset mode, Select Gobo, press the ENTER button to confirm, the present position will blink on To select On/Off, press the ENTER button to confirm. Use the UP/DOWN button to select On the display, use the UP/DOWN button to offset the value from ‐128 to 127, press the ENTER button to ...
- Page 16 On if DMX On — Lamp turns on when DMX signal is detected Select On if DMX On, press the ENTER button to confirm, present mode will blink on the display, use the UP/DOWN button to select Yes (Lamp turns on when DMX signal is detected) or No (keep the present state), press the ENTER button to store. Press the MENU button back to the last menu or let the unit idle one minute to exit menu mode.(If the lamp is off via DMX signal, you can reconnect the DMX controller to make the lamp on). Off if DMX Off — Lamp turns off when DMX signal is cut off Select Off if DMX Off, press the ENTER button to confirm, present mode will blink on the display, use the UP/DOWN button to select Yes (Lamp turns off when DMX signal is cut off), press the ENTER ...
- Page 17 will run built‐in program to reset all motors to their home positions) or No, press ENTER button to use the UP/DOWN button to select No (normal display) or Yes (inverse display), press the ENTER store. Press the MENU button to exit. button to store. Press the MENU button back to the last menu or let the unit idle one minute to exit menu mode. Special Functions Backlight Auto Off Enter menu mode, select Special Functions, press the ENTER button to confirm, use the UP/ Select Backlight Auto Off, press the ENTER button to confirm, present mode will blink on the DOWN button to select Fixture Maintenance or Factory Setting. ...
- Page 18 automatically test pan, tilt, shutter, color, CMY, gobo, gobo rotation, prism, prism rotation, iris, Reset Functions frost, zoom, focus, dimmer and lamp on/off. Press the MENU button back to the last menu or exit Enter menu mode, select Reset Function, press the ENTER button to confirm, use the UP/DOWN menu mode after auto test. button to select Pan/Tilt, Shutter, Color/CMY, Gobo/Iris, Focus/ Zoom/Frost / Prism or All. Manual Test Pan/Tilt —Reset Pan/Tilt Select Manual Test, press the ENTER button to confirm, the present channel will show on the Select Pan/Tilt, press the ENTER button to confirm, use the UP/DOWN button to select Yes (the display, use the UP/DOWN button to select channel, press the ENTER button to confirm, then use ...
Need help?
Do you have a question about the Xperior XP-16R SZ and is the answer not in the manual?
Questions and answers