Table of Contents
Advertisement
Quick Links
Advertisement
Table of Contents

Related Manuals for ACME XP-5000 SZ NF


Summary of Contents for ACME XP-5000 SZ NF
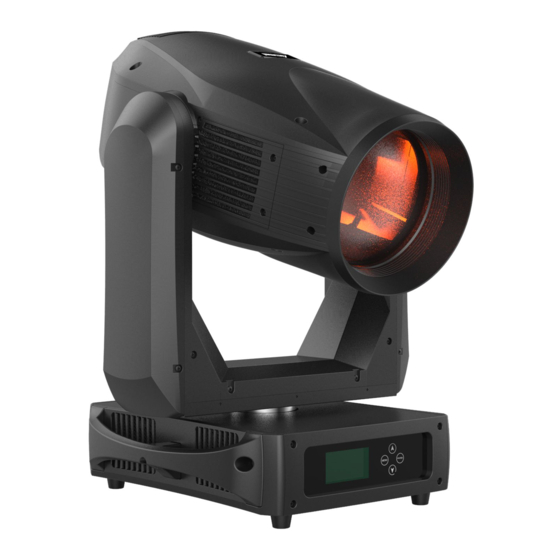
- Page 1 XP-5000 SZ NF User Manual Please read the instruc on carefully before use...
-
Page 2: Table Of Contents
CONTENTS 1. Safety Instruction ....................2 2. Technical Specification ................... 4 3. Control Panel ......................6 4. Gobo Wheel and Lamp ................... 7 4.1 Gobo Wheel ....................7 4.2 Lamp ......................7 4.3 Change The Lamp ................... 8 5. How To Set The Unit ....................9 5.1 Main Function .................... -
Page 3: Safety Instruction
1. Safety Instruction Please read the instruction manual carefully which includes important information about the installation, usage and maintenance. WARNING Please keep this User Manual for future consultation. If you sell the unit to another user, be sure that they also receive this instruction manual. Important: Damages caused by the disregard of this user manual are not subject to warranty. - Page 4 Do not operate in dirty or dusty environment; do clean the fixture regularly. Do not touch any wire during operation as there might be a hazard of electric shock. Avoid power wires twist other cables. The minimum distance between light output and the illuminated surface must be more than 12 ...
-
Page 5: Technical Specification
2. Technical Specification Power supply: AC 230V, 50/60Hz Power Consumption: 1790W Lamp: OSRAM Lok-it 1400/PS Brilliant Optical system: -High efficient Optical system. - Delivering extremely powerful output. - High quality lens. Movement: - Pan: 540° - Tilt: 270°... - Page 6 Animation Wheel: Perfect water wave and flame effects, rotating and index able Framing System: - 4 fast, smooth framing shutters, each shutter blade position and angle can be controlled individually - Completed framing module can be rotated at 90° ...
-
Page 7: Control Panel
3. Control Panel Front View Rear View 1. FUNCTION DISPLAY: Shows the various menus and the selected functions; 2. ETHERNET: Transfers fixture’s information to a main controller; 3. DMX IN: DMX 512 operation, use 5-pin XLR cable to link the unit and DMX controller; 4. -
Page 8: Gobo Wheel And Lamp
6. DMX OUT: DMX 512 operation, use 3-pin XLR cable to link the next units; 7. BATTERY DISPLAY: Shows the battery status; 8. FUSE (AC250V/T 15A): Protect the unit from damage of over voltage or short circuit; 9. POWER: Connect to the mains supply. 10. -
Page 9: Change The Lamp
explode during operation. The lamp emits intense UV radiation which is harmful to the eyes and skin. The high luminance of the arc can cause severe damage to the retina if you take a close look at the lamp. To protect the lamp, always turn off the lamp first (via control panel or DMX controller) and let the unit run at least five minutes to cool down before switching off the mains supply. -
Page 10: How To Set The Unit
Remove the old lamp and turn the lamp left in order to take the lamp out, put a new lamp that must be the same type as the old one. And then place the new lamp into the lamp holder and turn the lamp right in order to fix. - Page 12 DMX Settings To select DMX Settings, press the ENTER button to confirm, use the UP/DOWN button to select DMX Address, Channel Mode or View DMX Value. DMX Address To select DMX Address, press the ENTER button to confirm. Use the UP/DOWN button to adjust the address from 1 to 512, press the ENTER button to store.
- Page 13 No (Pan or tilt’s position will not feedback while out of step) or Yes (Feedback while pan/tilt out of step), press the ENTER button to store. Press the MENU button back to the last menu or let the unit idle one minute to exit menu mode. P/T Speed To select P/T Speed, press the ENTER button to confirm.
- Page 14 Linear: The increase in light intensity appears to be linear as DMX value is increased. S-cure: Light intensity control is finger at low levels and high levels and coarser at medium levels. Lamp Settings To select Lamp Settings, press the ENTER button to confirm, use the UP/DOWN button to select Lamp On/Off or State/Power on.
- Page 15 Temperature Unit To select Temperature Unit, press the ENTER button to confirm. Use the UP/DOWN button to select ℃ or ℉, press the ENTER button to store. Press the MENU button back to the last menu or let the unit idle one minute to exit menu mode. Language To select Language, press the ENTER button to confirm.
- Page 16 Fixture Use Hour Select Fixture Use Hour, press the ENTER button to confirm, fixture use time will show on the display, press the MENU button to exit. Light Use Hour To select Light Use Hour, press the ENTER button to confirm, lamp on time will show on the display, press the ENTER button to confirm, use the UP/DOWN button to select Exit or Reset Time, press the ENTER button to confirm.
-
Page 17: Home Position Adjustment
minute to exit menu mode. Effect To select Effect, press the ENTER button to confirm, use the UP/DOWN button to select Yes (the unit will run built-in program to reset effect to their home positions) or No, and press the ENTER button to store. - Page 18 Encoder Calibrate- Encoder Calibrate home position adjustment Enter offset mode, select Encoder Calibrate, the fixture will calibrate the encoder. Press the MENU button to exit.
- Page 19 Pan - pan home position adjustment Enter offset mode, select Pan, press the ENTER button to confirm. Use the UP/DOWN button to offset the value from -128 to 127, press the ENTER button to store. Press the MENU button to exit. Tilt - Tilt home position adjustment Enter offset mode, select Tilt, press the ENTER button to confirm.
- Page 20 to offset the value from 0 to 255, press the ENTER button to store. Press the MENU button to exit. Blade-LF1 - Blade-DW1 home position adjustment Enter offset mode, select Blade-LF1, press the ENTER button to confirm. Use the UP/DOWN button to offset the value from 0 to 255, press the ENTER button to store.
-
Page 21: Error Information
Enter offset mode, select Zoom press the ENTER button to confirm. Use the UP/DOWN button to offset the value from 0 to 255, press the ENTER button to store. Press the MENU button to exit. Cyan- Cyan home position adjustment Enter offset mode, select Cyan, press the ENTER button to confirm. -
Page 22: Control By Universal Dmx Controller
Maintenance Fixture It appears when the maintenance remaining time becomes 0S, please enter menu mode and reset the time. Lamp On Over 700 Hour It appears when the lamp has been on over 700 hours, please turn off the lamp. Memory Initial Fail It appears when the memory IC is damaged. -
Page 23: Channel Mode Setting
1. At last unit, the DMX cable has to be terminated with a terminator. Solder a 120-ohm 1/4W resistor between pin 2(DMX-) and pin 3(DMX+) into a 3-pin XLR-plug and plug it in the DMX-output of the last unit. 2. Connect the unit together in a “daisy chain” by XLR plug cable from the output of the unit to the input of the next unit. -
Page 24: Dmx Control
confirm, use the UP/DOWN button to select DMX Address, press the ENTER button to confirm, the present address will blink on the display. Use the UP/DOWN button to adjust the address from 1 to 512, press the ENTER button to store. Press the MENU button back to the last menu or let the unit idle one minute to exit menu mode. - Page 25 COLOR WHEEL: Open 001 – 014 Open Color 1 Color 1 016 – 029 Color 1 + Color 2 Color 2 031 – 044 Color 2 + Color 3 Color 3 046 – 059 Color 3 + Color 4 Color 4 061 –...
- Page 26 Iris 000 – 255 0%-100% 000 – 255 Zoom 000 – 255 Focus 000 – 255 000 – 255 Pan Fine 000 – 255 Tilt 000 – 255 Tilt Fine Function: 000 – 009 No function 010 – 014 Reset all 015 –...
- Page 27 0% 100% 000 – 255 DIMMER FINE CYAN: 000 – 255 0% 100% MAGENTA: 000 – 255 0% 100% YELLOW: 000 – 255 0% 100% CTO: 000 – 255 6000K 3200K COLOR WHEEL: Open 001 – 014 Open ...
- Page 28 000 – 255 Blade_Down2 000 – 255 Blade_Left1 000 – 255 Blade_Left2 000 – 255 Blade_Right1 000 – 255 Blade_Right2 Frost 000 – 255 0%-100% Iris 000 – 255 0%-100% 000 – 255 Zoom 000 – 255 Zoom Fine 000 – 255 Focus 000 –...
-
Page 29: Troubleshooting
7. Troubleshooting Following are a few common problems that may occur during operation. Here are some suggestions for easy troubleshooting: A. The unit does not work, no light and the fan does not work 1. Check the connect power and main fuse. 2. -
Page 30: Maintenance And Cleaning
4. Unplug all the connect wires over the belt. 5. Change a new belt (E), put the belt around the axis gear and motor gear. 6. Plug all the connect wires back upon the belt. 7. Tighten all the screws. F. - Page 31 Ballast A. Do check the fixtures every two months and make sure that all the screws and terminals have been locked firmly to make sure the normal performance of the fixtures. Negligence of check would cause malfunction of the fixture. B.
- Page 32 Lens Optical module Zoom focus module BASE Radiator Tilt belt Pan belt Code Replace Clean Lubricate Adjust...
- Page 35 Declaration of Conformity We declare that our products (lighting equipments) comply with the following specification and bears CE mark in accordance with the provision of the Electromagnetic Compatibility (EMC) Directive 89/336/EEC. EN55103-1: 2009 ; EN55103-2: 2009; EN62471: 2008; EN61000-3-2: 2006 + A1:2009 + A2:2009; EN61000-3-3: 2008. &...
- Page 36 Innovation, Quality, Performance...
Need help?
Do you have a question about the XP-5000 SZ NF and is the answer not in the manual?
Questions and answers