Table of Contents
Advertisement
Quick Links
Advertisement
Table of Contents

Related Manuals for promotal iQuest 3050-60


Summary of Contents for promotal iQuest 3050-60
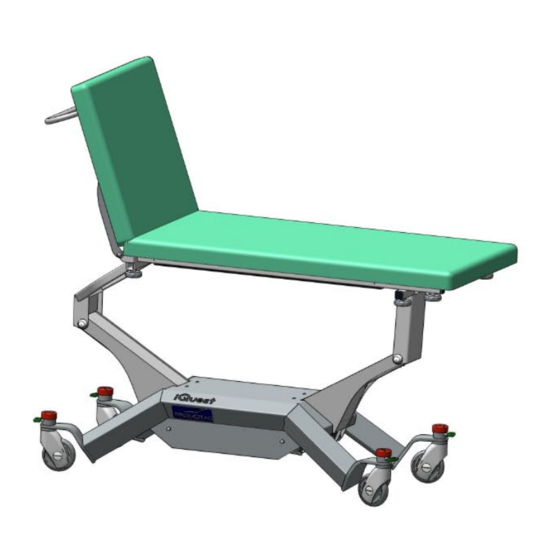
- Page 1 User’s Guide Model Shown : 3050-60 Electric Examination Couch 3050-60...
- Page 2 Operating Manual are deemed correct at the time of 22, rue de Saint-Denis de Gastines printing. B.P. 26 - 53500 ERNÉE Cedex Promotal , however, reserves the right to modify its models FRANCE and its procedures or render them obsolete without notice. Tél. :...
-
Page 3: Table Of Contents
Summary Important information Safety symbols Applied parts Electromagnetic interference Unpacking precautions Medical device delivered on a wooden pallet Storage conditions Conditions of use Unpacking and Installation Step by step Check Remark: Authorised EC Representative Cleaning protocol Warning Cleaning/Disinfecting User manual – iQuest Intended purpose Patient weight capacity Protection against penetration of liquids... - Page 4 Summary Using the brakes Using the steering wheel Accessories Pair of Clamps (reference 166) Arm rest (reference 2536) Pair of stirrups (reference 850) Installing the stirrups Pair of legrests (reference 840) Installing the legrests Pair of covers for legrests 2 hook IV pole (reference 985-01) Installing the IV pole Auto-blocking I.V.
- Page 5 The pair of barriers (reference 85114-01) Installing the pair of barriers Using the pair of barriers Push handles (reference 3095-01) Setting up the handles Foot pedal Presentation Using the pedal control Setting up the control unit Options Accumulator (reference 3092-01) Charging the accumulator Accumulator safety symbols Technical characteristics of the accumulator...
-
Page 6: Important Information
Important information Safety symbols Warning sign Information marked with this symbol must be read and strictly complied with! Remark Draws your attention to a procedure, practice or situation. Maximum number of Correct orientation for Humidity limitation stacked pallets transportation Atmospheric pressure Temperature Fragile limitation... -
Page 7: Applied Parts
Electromagnetic interference This Promotal medical device was designed and built to minimize electromagnetic interference with other equipment. If interference is, however, observed, you must remove the apparatus causing the interference from the room and/or plug it into an isolated circuit. -
Page 8: Unpacking Precautions
Unpacking precautions Medical device delivered on a wooden pallet The medical device positioned on a wooden pallet ensure that the forklift truck is correctly positioned may be easily moved using a forklift truck, as long in relation to the pallet, and that the unit is stable. as this is used correctly. -
Page 9: Check
2) Check the external components for any Remark: Authorised EC Representative Within the European Union, all problems, complaints or questions should be addressed to the Authorised EC Representative of Promotal indicated below: Promotal 22, rue de Saint-Denis de Gastines 53500 Ernée,... -
Page 10: Cleaning Protocol
• The use of abrasive powders or any other abrasive product should be avoided. • High-pressure cleaning is forbidden. Under no circumstances shall Promotal be held liable under warranty for any damage caused by non-compliance with the use instructions for a detergent- disinfectant. -
Page 11: Intended Purpose
User manual – iQuest Intended purpose This medical device is designed for use in professional premises only: • Medical office • Health establishment This medical device must not be installed in domestic premises. This medical device is intended for general or specialist medical examinations and acts. Only health professionals (doctors, caregivers) and/or qualified members of the technical staff can handle or use the device. -
Page 12: Electrical Connection
User manual – iQuest Electrical connection This medical device must be connected to the mains supply. • Connection to the mains supply : 120 V or 230 V (depending on the country) • Frequency : 50/60 Hz • Protection classification : Class 1/ type B device •... -
Page 13: Assembling Instruction
Assembling instruction The table is delivered dismounted. The packaging contains 2 boxes : the upholstery, the paper roll holder. Steel frame with matte white epoxy finish Assembling the upholstery Upholstery Backrest Ensures good clamping with each N°4 Allen key User’s Guide... -
Page 14: Assembling The Support Handle
Assembling instruction Assembling the support handle A2A200-04 Select the corressponding hard control support to the relevant upholstery : A2A200-03 - A2A200-03 / 600150-65, 600151-65 - A2A200-04 / 600150-70, 600150-75, 600151-75 The support handle, located beteween the upholstery and the frame, may be moved or installed on the other side. -
Page 15: Assembling The Side Casings
Assembling the side casings Remove the 2 screws (VXM18512) User’s Guide... -
Page 16: Safety
Safety Caution To avoid malfunctions and for safety reasons, no objects must be left under the chair’s seat or between its moving frames. Caution the supply cable for this medical device may represent an obstacle and cause falls. Do not forget its presence when moving around the device once connected to the mains supply. - Page 17 Safety note Before using the medical device lowering control, ensure that no objects or obstacles are between the moving parts and the ground. Safety note When using the position memory function, movements can be interrupted by pushing on one of the command buttons for the couch or, as a last resort, by disconnecting the power supply cord.
-
Page 18: Using The Individual Control
Using the individual control Manual command Presentation Safety note When using the pre-programmed positions, (welcome, QE1, QE2, chair position, couch position), do not leave the patient on the couch without supervision. (save confirmation) Adjusting the height Adjusting the height (up) (down) Adjusting the height by holding Adjusting the height by holding... -
Page 19: Adjusting The Height
Adjusting the height The position below is obtained by pressing on the manual control. Down Adjusting the trendelenburg position The position below is obtained by pressing on the manual control. Down User’s Guide... -
Page 20: Adjusting The Backrest Tilt
Using the individual control Adjusting the backrest tilt The position below is obtained by pressing on the manual control. Down Position QE1 et QE2 The QE1 and QE2 buttons are factory-set but cannot be modified. To enter a new position for buttons QE1 and QE2, simply adjust the couch to the desired position and then press and hold the QE1 (or QE2) button for 6 seconds. -
Page 21: Welcome Position
Welcome position The position can be recalled by pressing once on the button NB: This position cannot be modified. Welcome position «Emergency» position Warning The return to position is made by 1 sustained press It is strictly forbidden to leave the on the patient alone and unattended in this position. -
Page 22: Using The Couch
Using the Couch Paper roll Installation of the paper roll holder N°4 Allen key Using the paper roll Caution follow the indications provided well obtain a greater Cover the upholstery with paper before use. longevity of the material. User’s Guide... -
Page 23: Mechanical Braking On Individual And Steering Wheels
Mechanical braking on individual and steering wheels Using the brakes Braking position: Press on the three red buttons and the grey button Transport position: Press on the four green buttons Using the steering wheel Steering position: Press on the grey button and on the green buttons on the other three wheels Caution Ensure brakes are fully engaged before installing a patient. -
Page 24: Pair Of Clamps
Accessories Only accessories designed and provided by Promotal for this medical device are authorised for use. Pair of Clamps (reference 166) Installing the Clamps Take the stopper (B) out of the square tube if necessary. Loosen the nuts (V), and put the pair of clamps ref.166 (E) into position in the square tubes. -
Page 25: Pair Of Stirrups
Pair of stirrups (reference 850) Installing the stirrups Ensures good clamping with each Caution Clamps are necessary to install these accessories. (réf. : 166) Pair of legrests (reference 840) Installing the legrests Caution Clamps are necessary to install these accessories. Ensures good clamping with each (réf. -
Page 26: Hook Iv Pole
Accessories Only accessories designed and provided by Promotal for this medical device are authorised for use. 2 hook IV pole Caution (reference 985-01) Clamps are necessary to install these accessories. Installing the IV pole (réf. : 166) Ensures good clamping with each Auto-blocking I.V. -
Page 27: Headrest
Headrest (reference 1102-10) Backrest extension (reference 2055-01) Installating the Backrest extension N°4 Allen key User’s Guide... -
Page 28: Adjustable Paper-Roll Holder
Accessories Only accessories designed and provided by Promotal for this medical device are authorised for use. Adjustable paper-roll holder (reference 2056-02) Installating the paper roll holder 1. Remove the standard paper roll holder. M6x25 (x 2) N°4 Allen key 2. Replace the paper roll holder. -
Page 29: Installation Of The Paper Roll
Installation of the paper roll The paper roll is positioned on a mobile axis with adjustable hooks at each end. 1. Unscrew the screw handle (VS). 2. To remove the paper roll holder 1/2 slightly (PR). 3. Insert the paper roll. Cover the upholstery with paper before use. -
Page 30: Vise
Accessories Only accessories designed and provided by Promotal for this medical device are authorised for use. Vise (reference 878-12) Caution Mounting this accessory requires the use of rails (reference 30878-65 P or T, 30878-75 P or T, 30878-85 P or T) -
Page 31: Crystal Head Section Side Protectors
Crystal head section side protectors (reference 3056-02) Cruciform screw driver Positioning the protector 1. Fixer les boutons pressions à l’emplacement prévu à l’arrière de la têtière. 2. Clipser les boutons pressions. 3. Positionner la protection sur la sellerie au niveau de la tête. -
Page 32: Crystal Foot Section Side Protectors
Accessories Only accessories designed and provided by Promotal for this medical device are authorised for use. Crystal foot section side protectors (reference 600150-65C for flat upholstery 600150-65 reference 600150-75C for flat upholstery 600150-75) Cruciform screw driver Positioning the protector 1. Fix the snap fasteners onto the intended position at the back of the headrest. -
Page 33: The Pair Of Barriers
The pair of barriers (reference 85114-01) Installing the pair of barriers 3. Tighten the screw. 1. Unscrew the screw. 2. Insert the pair of barriers. Approach the barriers to obtain a spacing of 25 mm beteween the barriers and the upholstery. Using the pair of barriers To raise the pair of barriers Take hold of the upper part, and lift it to its... -
Page 34: Push Handles
Accessories Only accessories designed and provided by Promotal for this medical device are authorised for use. Push handles (reference 3095-01) Setting up the handles 1. Unscrew the tightening wheels 2. Put the handles in place 3. Screw in the tightening wheels Ensures good clamping with each User’s Guide... -
Page 35: Foot Pedal
Foot pedal Presentation Safety note When using the pre-programmed positions, (welcome and QE1), do not leave the patient on the couch without supervision. Safety note When using the position memory function, movements can be interrupted by pushing on one of the command buttons for the couch or, as a last resort, by disconnecting the power supply cord. -
Page 36: Setting Up The Control Unit
Accessoires Only accessories designed and provided by Promotal for this medical device are authorised for use. Setting up the control unit User’s Guide... -
Page 37: Accumulator
Options Accumulator (reference 3092-01) (Built in to the device’s power supply system) (Note: the couch can functions the same in «Battery mode» or in «Mains mode». Charging the accumulator Before using the chair for the 1st time, it is recommended to leave it plugged into the mains for 24 hours to enable the accumulator to charge fully. -
Page 38: Circuit Breaker
Options Circuit breaker (reference 3058-01) Using the circuit breaker Withdraw the key to completely immobilise the Re-insert the key to use the couch again. couch. Reel for electric cable (reference 3032-01) Leaving the cable Arranging the cable User’s Guide... -
Page 39: Supplemental Power Socket
Supplemental power socket (reference 30400-01) Available exclusively and standard EU & UK Safety note When a medical device is connected to the supplemental power socket, the system becomes an medical electrical device in accordance with Standard EN 60601-1. It is the responsibility of the user to ensure compliance of the medical electrical system with standard EN 60601-1 (Article 16) Using the supplemental power socket... -
Page 40: Equipotential Terminal
Options Equipotential terminal (reference 2059-01) Ce dispositif médical est de classe électrique 1. Il doit être raccordé uniquement à un réseau d’alimentation équipé d’une terre de protection. Remark the equipotential terminal allows the connection of an equipotential conductor to bring all the different elements of an electro-medical system to the same potential. -
Page 41: Notes (Reference 2059-01)
Notes User’s Guide... - Page 42 Notes User’s Guide...
- Page 43 User’s Guide...
-
Page 44: Lifespan Of The Medical Device
Medical device end of service life Your dealer is responsible for the recovery and end of life treatment of this device. If necessary, do not hesitate to contact Promotal. We can propose solutions to treat this equipment in the best conditions. -
Page 45: Maintenance Notebook
Maintenance notebook User’s Guide... -
Page 46: Warranty Information
No Authorization No person or fi rm is authorized to create for Promotal any other obligation or liability in connection with the products. THIS WARRANTY IS PROMOTAL’S ONLY WARRANTY AND IS IN LIEU OF ALL OTHER WARRANTIES, EXPRESS OR IMPLIED. - Page 47 22, rue de Saint-Denis de Gastines, 53500 Ernée - FRANCE Tél. : +33 (0)2 43 05 17 76, Fax : + 33 (0)2 43 05 72 00, www.promotal.com S.A.S. au capital de 4 290 660 € - R.C.S. LAVAL Siret 421 156 720 00011 - TVA FR 67 421 156 720 - APE 3250A...
- Page 48 PROMOTAL - FRANCE www.promotal.com DIC3050-60_4118EN...
Need help?
Do you have a question about the iQuest 3050-60 and is the answer not in the manual?
Questions and answers