Table of Contents
Advertisement
Quick Links
Advertisement
Table of Contents

Related Manuals for XAG P30 2020


Summary of Contents for XAG P30 2020
- Page 1 P30 2020 Quick Start Guide Version 1.0...
- Page 2 To Users Dear user, thank you for choosing XAG products. For safety purposes and the best experience possible, XAG recommends reading through the User Manual and Disclaimer contained in this document before attempting to use the P30 Agricutural UAS 2020.
-
Page 3: Table Of Contents
Reinstall the Removed Parts Wiring Guidelines For P-series UAV Modules V1.1 Use Instructions Activation Prepare the Remote Controller Download XAG AGRI APP Pair the UAV Preparing the Smart Battery Preparing the Liquid Container Description of Status Indicator/Buzzer Check the UAV Status... -
Page 4: List Of Items
List of Items Please carefully check whether the product contains all the items listed below and contact your dealer if there are any missing items. Airframe No. 4 Arm No. 3 Arm No. 2 Arm No. 1 Arm ×1 Module Module Module Module... -
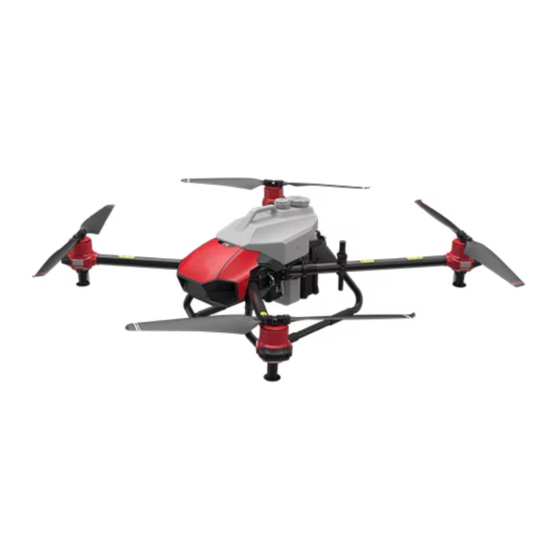
Page 5: About P30 Agricultural Uas 2020
About P30 Agricultural UAS 2020 The main structural components of the P30 Agricultural UAS 2020 are as follows: (Above) Figure 1: Airframe Module Structure 1 (Below) Figure 2: Airframe Module Structure 2 Propeller / Blade Head cover Liquid Container Motor Smart Battery RTK Antenna (one on each side) Landing Gear... - Page 6 Figure 3: Airframe Module & Arm Position Arm Position Number on Airframe Radar (Right) Power Grid Hub Antenna Hub Antenna Frame Central Hub RTK Module Radar (Left) Flight Controller / FC Airframe Nameplate (Serial Number/ QR Code) Radar (Front) Flight Status Indicator Light (Tail Light) HDLS Module Radar (Rear) There are labels on the upper plate of the airframe and the aluminum sleeves of arms.
-
Page 7: Airframe Assembly
Airframe Assembly Pre-Assembly Preparations 1. Disassemble the Head Cover 2. Disassemble the Antenna Frame Lift the head cover up from the front, then Remove the antenna frame fixing screws, and push it backwards. remove the antenna frame from the airframe. 3. -
Page 8: Arms Installation
Arms Installation Slider Buckle 4. Dismantle the Fixed Sliders of No.1 and 2 5. Install No.1 and 2 Arms Arms Insert the No.1 Arm into the designated posi- tion along the airframe plate, then return the Remove the screws on the stopper of No.1 Arm’s top sliders to their original positions. -
Page 9: Pipe & Line Connection
Pipe & Line Connection 8. Correctly Connect the Circuits and Infusion Tubes For instructions, see "Wiring Guidelines for the P-Series UAV Mod- ules" on Page 7 and 8. Before installing the central hatch cover, the Warning feeders and protective sleeves of No.3/4 Arm must be installed in the slots as shown in the figure. -
Page 10: Wiring Guidelines For P-Series Uav Modules V1.1
Wiring Guidelines For P-series UAV Modules V1.1 HDLS Module RTK Module 4G – Left Antenna 4G–Right Antenna 2.4G/5.8G-Left Antenna 2.4/5.8G - Right antenna RTK-Left Antenna RTK–Right Antenna Diagram-Antenna Hub No.1 Motor No.1 Motor Propulsion System Load System Power Supply No.3 Motor No.4 Motor Diagram-Power Grid Load System Power Supply... - Page 11 Wiring Guidelines For P-series UAV Modules V1.1 Smart Battery Uninterruptible Power Supply Load System Backup XCope System Propulsion System Terrain Sensor GNSS RTK Positioning Module PC Upgrade Porta FC Status Indicator High Data Link Module Auxiliary Port1 SBUS Diagram-Flight Control System Liquid Liquid No.1 Nozzle...
-
Page 12: Use Instructions Activation
2. Select “Scan QR”, and add your device by either entering the Serial Number or the Scanning the QR Code of the Aircraft (This information could be found on the Airframe Nameplate). 3. Please Scan the QR Code on the Activation Card provided by Official XAG Partners to activate your device. -
Page 13: Prepare The Remote Controller
Prepare the Remote Controller The XAG P30 Agricultural UAS 2020 needs to be used together with professional remote controllers and APP. The available control mode combinations include: ① ACB1 CommBack (optional) + Smartphone; ② ACS1 ControlStick (optional); ③ ACS2 ControlStick (optional). -
Page 14: Pair The Uav
⑤ Check if the UAS is functioning normally by selecting the UAS and "USE” button. If “IN USE” is then displayed, it means the device is functioning normally. Note: Before pairing, please visit the “XAG Service” WeChat mini-program and click "My Device"-"Scan QR Code to Add Device" to scan the QR code printed on the airframe. -
Page 15: Preparing The Smart Battery
Preparing the Smart Battery The P30 Agricultural UAS 2020 is designed to be powered by B13860S Smart Battery. The Smart Bat- tery contains a power button and six indicator lights. The buttons/indicator lights are as follows: Fixed: Working Slow Flash: Low Temperature Quick Flash: High Temperature... - Page 16 • It is strictly forbidden to use batteries other than those provided by XAG, or to dismantle or replace a battery without authorization. For repairs or replacement, please contact XAG or a designated dealer.The user shall bear the responsibility for battery accidents, flight failures or other accidents...
- Page 17 Charging by Intelligent Super Charger Charging by Auto Super Charge Station The battery must be charged with the charging devices designated by XAG. The user shall bear the re- Warning sponsibility for all the consequences caused by the use of the charging devices not designated by XAG.
- Page 18 • Do not use damaged chargers. For repairs or replacement, please contact XAG’s aftersales or desig- nated dealers. • Do not use the smart batteries or chargers other than the original ones manufactured by XAG. The user shall bear the responsibility for charging accidents, battery failures, flight accidents or other ac- cidents caused by the use of batteries or chargers not provided by XAG.
-
Page 19: Preparing The Liquid Container
Preparing the Liquid Container 1. Place the liquid inlet tube into a barrel containing prepared liquid. 2. Press the ON/OFF button of the refiller to power the machine on. 3. Place the container into the refiller. If the container is positioned properly, a beep will be heard from the buzzer. -
Page 20: Description Of Status Indicator/Buzzer
Description of Status Indicator/Buzzer There are 3 indicator LEDs on the Automatic Liquid Refiller, each indicating a status as follows: Charge LED Display Description Charging RED LIGHT ON Charging completed Charging circuit failure or battery RED LIGHT FLASHES overdischarge Battery Battery Level LED Display GREEN LIGHT ON... -
Page 21: Check Spray Status
Check Spray Status Two Spray Status Indicator Lights (Arm Lights) are located on the side of each motor base, represent- ing the status of corresponding nozzles under each motor. The color of the indicators can be adjusted in the "Plant Protection Operation" APP. Status indicator light definitions are as follows: (using the red light as an example) Spraying Status Indicator Description... -
Page 22: Firmware Upgrade
Firmware Upgrade Users of P30 Agricultural UAS 2020 may update its modules, remote controls and RTK devices via the XAG AGRI APP ① Open Menu on the APP and select “Devices”. ② Select a device (such as the UAS, remote control, RTK device), and click “Update”. -
Page 23: Technical Specifications
(radar function enabled: 0.1m) Hovering Time: 18min 18min (18,000mAh, take-off weight 22kg) Obstacle Avoidance System 10min (18,000mAh, take-off weight 38kg) XCope Battery: XAG- Approved Battery(B12620/B12800/ Model: XCOPE201819 B13860S) Power consumption: 19W Max flight speed: 12m/s Operating frequency: 30Hz Max acceptable wind speed: 10m/s... - Page 24 Communication System Other Features Operating frequency: 2.400~2.4835GHz Operating efficiency: 14ha/h Operating frequency: 5.725~5.850GHz AI intelligent engine 3D operation planning: Supported Transmission power (EIRP): 2.400~2.4835GHz High-precision flow measurement: Supported Transmission power (EIRP): FCC ≤28dBm Hot swap of liquid container/ battery: Supported Transmission power (EIRP): CE ≤20dBm Swarm Operation: Supported...
-
Page 25: Disclaimer
XAG servers during use. In the event that the flight records and data fail to be uploaded and saved and XAG fails to analyze the flight records and data due to any reason of the user, XAG will not assume any responsibility. -
Page 26: Flight Safety Instructions
Flight Safety Instructions • Receive UAV operation training courses and obtain a corresponding UAS operator certificate prior to operation.Unqualified users are not allowed to operate this product without authorization. • Ensure that all flights are carried out in an open and familiar area, avoid obstacles and crowds, and beware of all risks. - Page 27 Refiller, Charger, RTK Rover, RTK Base Station, etc. Users may also check the "User Manuals" of the modules for a bet- ter use experience of the system. Visit our website (www.xa.com/en) for more information XAG AGRI WeChat Public Account of www.xa.com/en...
- Page 28 All information of this User Manual (including but not limited to any text description, illustrations, photos, methods and processes, etc.) belongs to XAG Co., Ltd. and is protected by copyright law. Without written authorization, no individual or institution is allowed to reproduce, extract, translate, distribute, or otherwise reproduce or quote any content here-...
Need help?
Do you have a question about the P30 2020 and is the answer not in the manual?
Questions and answers