Table of Contents
Advertisement
Quick Links
Advertisement
Table of Contents

Subscribe to Our Youtube Channel
Related Manuals for ACME Ozone 3


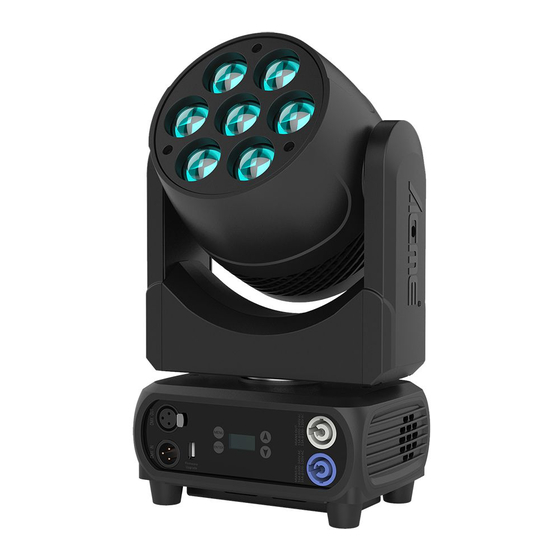
Summary of Contents for ACME Ozone 3
-
Page 2: Table Of Contents
CONTENTS 1. Safety Instructions ..................2 2. Technical Specifications ................. 4 3. How To Set The Unit ..................6 3.1 Control Panel ................... 6 3.2 Main Function ..................6 3.3 Home Position Adjustment ..............13 4. Control By Universal DMX Controller ............18 4.1 DMX512 Connection ................ -
Page 3: Safety Instructions
1. Safety Instructions Please read the instruction carefully which includes important information about the installation, usage and maintenance. WARNING Please keep this User Guide for future consultation. If you sell the unit to another user, be sure that they also receive this instruction manual. Important: Damages caused by the disregard of this user manual are not subject to warranty. - Page 4 off the mains power immediately. DO NOT operate in dirty or dusty environment, do clean fixtures regularly. DO NOT touch any wire during operation as there might be a hazard of electric shock. Avoid power wires together twist other cables. ...
-
Page 5: Technical Specifications
2. Technical Specifications Power Voltage: AC 100~240V, 50/60Hz Power Consumption: 370W Light Source: 7x40W RGBW LED Zoom Range: Beam Angle:6°~40° Field Angle:10°~60° Dimmer/Shutter: Smooth dimming from 0-100%; outstanding strobe effect with variable speed Movement: Pan: 540° Tilt: 250° Pan/Tilt Resolution: 16bit Control: DMX Channel: 17/37 Channels Control Mode: DMX512, RDM... - Page 6 Dimension/Weight: 303x210x457mm, 15.8kgs 11.9"x8.3"x18"in, 34.8lbs Photometric Diagram:...
-
Page 7: How To Set The Unit
3. How To Set The Unit 3.1 Control Panel 1. Display: To show the various menus and the selected function 2. Button: MENU To enter into move backward or leave the menu To go backward to move up in the menu DOWN To go forward to move down in the menu ENTER... - Page 9 DMX Settings To select DMX Settings, press the ENTER button to confirm, use the UP/DOWN button to select DMX Address, DMX Channel Mode, No DMX Status or View DMX Value. DMX Address To select DMX Address, press the ENTER button to confirm. Use the UP/DOWN button to adjust the address from 001 to 496/476, press the ENTER button to store.
- Page 10 Tilt Invert To select Tilt Invert, press the ENTER button to confirm. Use the UP/DOWN button to select No(normal) or Yes(tilt invert), press the ENTER button to store. Press the MENU button back to the last menu or let the unit idle 30 seconds to exit menu mode. P/T Feedback To select P/T Feedback, press the ENTER button to confirm.
- Page 11 White Balance To select White Balance, press the ENTER button to confirm. Use the UP/DOWN button to select Red, Green, Blue, Red1, Green1, Blue1,……Red7, Green7, Blue7, press the ENTER button to store. Use the UP/DOWN button to adjust the value from 125 to 255, press the ENTER button to store. Press the MENU button back to the last menu or let the unit idle 30 seconds to exit menu mode.
- Page 12 Manual Test Select Manual Test, press the ENTER button to confirm. Use the UP/DOWN button to select channel Pan, Pan Fine, Tilt, Tilt Fine, Zoom, Spe Func, Dimmer, Shutter, Red, Green, Blue, White, CTO, Color, Pixel or Pixel Rotating, press the ENTER button to confirm, then use the UP/DOWN button to adjust the value, press the ENTER button to store, the fixture will run as the channel value indicates.
- Page 13 Error Logs To select Error Logs, press the ENTER button to confirm. Use the UP/DOWN button to select Fixture Errors or Reset Error Log, press the ENTER button to store. To select Reset Error Log, press the ENTER button to confirm, use the UP/DOWN button to select No or Yes, press the ENTER button to store.
-
Page 14: Home Position Adjustment
RDM FUNCTIONS Select the MANUFACTURER menu to display the manufacturer of the fixture. Select the SOFTWARE VERSION menu and the program version number of the fixture will be displayed. Select the DMX START ADDRESS menu to change the DMX 512 address (001-512). Select the DEVICE MODEL DESCRIPTION menu to display the model of the fixture. - Page 15 Enter offset mode, Select Pan, press the ENTER button to confirm, the present position will blink on the display, use the UP/DOWN button to offset the value from -128 to 127, press the ENTER button to store. Press the MENU button to exit. Tilt Enter offset mode, Select Tilt, press the ENTER button to confirm, the present position will blink on the display, use the UP/DOWN button to offset the value from -128 to 127, press the ENTER button...
- Page 16 Red1 Enter offset mode, Select Red1, press the ENTER button to confirm, the present position will blink on the display, use the UP/DOWN button to offset the value from 20 to 1000, press the ENTER button to store. Press the MENU button to exit. Red2 Enter offset mode, Select Red2, press the ENTER button to confirm, the present position will blink on the display, use the UP/DOWN button to offset the value from 20 to 1000, press the ENTER...
- Page 17 Green2 Enter offset mode, Select Green2, press the ENTER button to confirm, the present position will blink on the display, use the UP/DOWN button to offset the value from 20 to 1000, press the ENTER button to store. Press the MENU button to exit. Green3 Enter offset mode, Select Green3, press the ENTER button to confirm, the present position will blink on the display, use the UP/DOWN button to offset the value from 20 to 1000, press the ENTER...
- Page 18 Blue3 Enter offset mode, Select Blue3, press the ENTER button to confirm, the present position will blink on the display, use the UP/DOWN button to offset the value from 20 to 1000, press the ENTER button to store. Press the MENU button to exit. Blue4 Enter offset mode, Select Blue4, press the ENTER button to confirm, the present position will blink on the display, use the UP/DOWN button to offset the value from 20 to 1000, press the ENTER...
-
Page 19: Control By Universal Dmx Controller
White4 Enter offset mode, Select White4, press the ENTER button to confirm, the present position will blink on the display, use the UP/DOWN button to offset the value from 20 to 1000, press the ENTER button to store. Press the MENU button to exit. White5 Enter offset mode, Select White5, press the ENTER button to confirm, the present position will blink on the display, use the UP/DOWN button to offset the value from 20 to 1000, press the ENTER... -
Page 20: Address Setting
1. At last unit, the DMX cable has to be terminated with a terminator. Solder a 120-ohm 1/4W resistor between pin 2(DMX-) and pin 3(DMX+) into a 3-pin XLR-plug and plug it in the DMX-output of the last unit. 2. Connect the unit together in a “daisy chain” by XLR plug cable from the output of the unit to the input of the next unit. -
Page 21: Dmx512 Configuration
4.3 DMX512 Configuration Please refer to below configurations to control the fixtures Attentions: 1. The unit will maintain the last condition until reset if you cut-off the DMX signal. 2. For the channel Function, keep the value for about 3 seconds, then the corresponding function will take into effect. - Page 22 Null 001-004 8000K 005-009 7900K 010-013 7800K 014-018 7700K 019-022 7600K 023-027 7500K 028-031 7400K 032-036 7300K 037-040 7200K 041-045 7100K 046-049 7000K 050-054 6900K 055-058 6800K 059-063 6700K 064-067 6600K 068-072 6500K 073-076 6400K 077-081 6300K 082-085 6200K 086-090 6100K 091-094 6000K...
- Page 23 208-211 3400K 212-216 3300K 217-220 3200K 221-225 3100K 226-229 3000K 230-234 2900K 235-238 2800K 239-243 2700K 244-247 2600K 248-255 2500K Color Macro 000-007 NULL 008-011 Color1 012-015 Color2 016-019 Color3 020-023 Color4 024-027 Color5 028-031 Color6 032-035 Color7 036-039 Color8 040-043 Color9 044-047...
- Page 24 206-215 Red->Blue Fast to Slow 216-225 Red->White Fast to Slow 226-235 Green-> Blue Fast to Slow 236-245 Green-> White Fast to Slow 246-255 Blue-> White Fast to Slow Pixel 000-003 Open 004-007 Pattern 1 008-011 Pattern 2 012-015 Pattern 3 016-019 Pattern 4 020-023...
- Page 25 164-167 Pattern 41 168-171 Pattern 42 172-175 Pattern 43 176-179 Pattern 44 180-183 Pattern 45 184-187 Pattern 46 188-191 Pattern 47 192-195 Pattern 48 196-199 Pattern 49 200-203 Pattern 50 204-207 Pattern 51 208-211 Pattern 52 212-215 Pattern 53 216-219 Pattern 54 220-223 Pattern 55...
- Page 26 37 Channels (Mode 2): CHANNEL VALUE FUNCTION 000-255 0°540° PAN FINE 000-255 TILT 000-255 0°250° 000-255 TILT FINE ZOOM 000-255 NarrowWide DIMMER 000-255 0%100% 000-255 DIMMER FINE Shutter 000-007 Close 008-015 Open 016-131 Strobe effect, slow to fast 132-139 Open 140-181 Fast open slow close, slow to fast 182-189...
- Page 27 Green3 000-255 0%100% Blue3 000-255 0%100% White3 000-255 0%100% Red4 000-255 0%100% Green4 000-255 0%100% Blue4 000-255 0%100% White4 000-255 0%100% Red5 000-255 0%100% Green5 000-255 0%100% Blue5 000-255 0%100% White5 000-255 0%100% Red6 000-255 0%100% Green6 000-255 0%100% Blue6 000-255 0%100% White6...
- Page 28 150-159 Zoom Reset 160-199 Null 200-209 Reset All 210-255 Null The display effect of each pattern in 15th channel of channel 17 is as follows:...
-
Page 29: Error Information
5. Error Information 1. Pan Reset Error Check if the position of the pan mounting magnetic steel falls off or is damaged. Check if there are other interference items in the pan operating range. Check if the pan Hall elements is damaged. Check if the pan Hall elements is in poor contact with the lead of the PCB board or disconnected. -
Page 30: Troubleshooting
9. BaseFan/HeadFan speed too slow Check if the basefan/headfan is out of order. 10. ArmFan cannot start Check if armfan is not running 11. ArmFan cannot stop Check if the armfan is still running when the temperature drops to the set value. 12. -
Page 31: Fixture Cleaning
4. Try to use another DMX controller. 5. Check to see if the DMX cables run near or run alongside to high voltage cables that may cause damage or interference to DMX interface circuit. C. One of the channels is not working well 1. - Page 32 Innovation, Quality, Performance...
Need help?
Do you have a question about the Ozone 3 and is the answer not in the manual?
Questions and answers