Table of Contents
Advertisement
Available languages
Available languages
Advertisement
Table of Contents

Related Manuals for Cecilware NHT2-UL-BL-AF


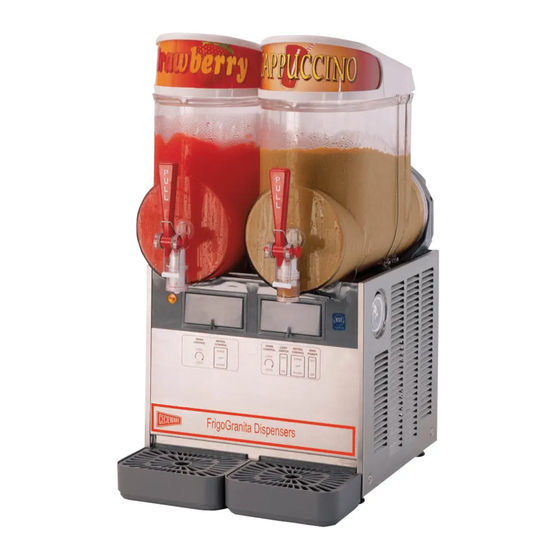
Summary of Contents for Cecilware NHT2-UL-BL-AF
- Page 1 NHT UL AF B L A C K O P E R A T O R ’ S M A N U A L MANUAL DE INSTRUCCIONES...
-
Page 3: Table Of Contents
TECHNICAL CHARACTERISTICS ... 4 INTRODUCTION ... 4 INSTALLATION ... 4 TO OPERATE SAFELY ... 5 OPERATING PROCEDURES ... 5 5. 1 DESCRIPTION OF CONTROLS ... 5 5. 2 OPERATION HELPFUL HINTS ... 6 5. 3 CLEANING AND SANITIZING PROCEDURES ... 7 5. -
Page 4: Technical Characteristics
NHT UL AF BL 1 TECHNICAL CHARACTERISTICS Transparent removable bowls Capacity of each bowl, approx. Dimensions: width depth height Net weight, approx. Gross weight, approx. Adjustable thermostats Hermetic compressor Air-cooled condenser Overload protector Safety pressure switch Noise level lower than 70 dB (A) IMPORTANT Read electrical ratings written on the data plate of the individual units;... -
Page 5: Operating Procedures
5 OPERATING PROCEDURES ATTENTION In case of damages, the power cord must be replaced by qualified personnel only in order to prevent any shock hazard. 1 - Clean and sanitize the unit according to the instructions in t h i s m a n u a l . S e e c h a p t e r 5 . 3 C L E A N I N G A N D SANITIZING PROCEDURES. -
Page 6: Operation Helpful Hints
NHT UL AF BL 5. 2 OPERATION HELPFUL HINTS 1 - Granita viscosity adjustment: proper Granita viscosity is factory preset. To change the viscosity, if needed, use a standard screwdriver to turn the adjustment screw located in the rear wall of each container as follows (see figure 3): - towards right (clockwise) to obtain a thicker product (the indicator F will go down in opening G). -
Page 7: Cleaning And Sanitizing Procedures
5. 3 CLEANING AND SANITIZING PROCEDURES 1 - Cleaning sanitizing recommended to guarantee the conservation of the best product taste and the highest unit efficiency. This section is a procedural guideline only and is subject to the requirements of the local Health Authorities. 2 - Prior to the disassembly and cleaning, the machine must be emptied of product. -
Page 8: Cleaning
NHT UL AF BL 4 - Remove the bowl gasket from its seat (see figure 9). figure 9 5 - Dismantle the faucet assembly (see figure 10). figure 10 6 - Slide the drip tray out and empty it. 5. 3. 2 CLEANING ATTENTION Before any disassembly and/or cleaning procedure make sure that the dispenser is disconnected from its... -
Page 9: In-Place Sanitization
approved lubricant. figure 11 3 - Assemble the faucet by reversing the disassembly steps (see figure 10) 4 - Fit bowl gasket around its seat. Note: the largest brim of gasket must face against the rear wall (see figure 12). figure 12 5 - Insert the auger into the evaporator. -
Page 10: Rear Seal Maintenance
NHT UL AF BL on all surfaces protruding above the solution-level and on the underside of the top cover(s). 4 - Install the top cover(s) and operate the unit. Allow the solution to agitate for about two minutes. Drain the solution out of the bowl(s). - Page 11 defrost periods frozen Granita will melt to thermostat setting temperature and once defrost period has expired, the product automatically freezes down again to Granita setting viscosity. figure 18 To operate the defrost timer proceed as follows (see figure 18). 1 - Set the time of the day by rotating the dial clockwise (arrow A).
- Page 12 NHT UL AF BL 1 INTRODUCTION This operator’s manual is a complement to the standard Granita machine operator’s manual available in the unit package. Carefully read first the standard unit Operator’s Manual and then all the following sections of this one thoroughly to familiarize yourself with all aspects of the system.
-
Page 13: Operational Helpful Hints
located on the rear wall. Its functions are as follows: I position : Autofill Device is turned ON, provided that the power switch of the unit is set to I. 0 position : Autofill Device is turned OFF. II position : Autofill Device may be manually activated (momentary position). -
Page 14: Routine Maintenance
NHT UL AF BL Note: the above Autofill System In Place Sanitization must be followed by unit cleaning and sanitization as described in standard unit Operator’s Manual. 4 ROUTINE MAINTENANCE Daily: inspect the machine for signs of product leaks past seals and gaskets. -
Page 15: Spare Parts List
SPARE PARTS LIST 2442_49 V0.2 05G22 22800-24601 Clip probe 22800-24603 Contact 22800-24612 Flexible contact 22800-17520 Front cover 22800-24602 Contact spacer 22800-24613 Control PWB 22800-17510 Rear cover 22800-24201 Three position switch 22800-24600 Solenoid valve 22800-24609 Spring 10028-03212 Faucet OR 22800-24607 Faucet front part 33800-09100 Faucet gasket 22800-24608 Faucet rear part 10028-01300 Fitting locker... -
Page 16: Caracteristicas Tecnicas
NHT UL AF BL 1 CARACTERISTICAS TECNICAS Contenedores transparentes desmontables Capacidad de cada contenedor, aproximada Dimensiones: ancho largo alto Peso neto, aproximado Peso bruto, aproximado Termostatos regulables Motocompresor hermético Condensador a ventilación forzada Guardamotor Limitador de presión de seguridad Nivel de ruido inferior a 70dB (A) IMPORTANTE Características eléctricas: leer los datos detallados en la placa del distribuidor;... -
Page 17: Instrucciones De Empleo
5 INSTRUCCIONES DE EMPLEO ATENCION Si el cable de alimentación está dañado, debe ser substituito por el fabricante o desde su servicio de asistencia técnica o, en cualquier caso, por una persona cualificada con el fin de evitar cualquier tipo de riesgo. -
Page 18: Sugerencias
NHT UL AF BL 2 - Ajustar los interruptores mezcladores y refrigeración: - en la posición I si se quiere refrigerar el producto sin helarlo - en la posición II si se quiere obtener el granizado. 3 - Poner el interruptor luces en la posición I para encender las luces. -
Page 19: Desmontaje
5. 3. 1 DESMONTAJE ATENCION Antes de proceder con el desmontaje de cualquier componente, desenchufar de la toma de corriente eléctrica el enchufe del aparato o bien apagar el interruptor externo de pared. 1 - Quitar la tapa del contenedor. 2 - Desmontar el contenedor empujando ligeramente la parte inferior (lado grifo) hacia arriba para dejar libres los ganchos inferiores (ver figura 5) y luego quitarlo por... -
Page 20: Lavado
NHT UL AF BL figura 10). figura 10 6 - Desenfilar el cajón recoge-gotas y vaciarlo. 5. 3. 2 LAVADO ATENCION Antes efectuar cualquier desenchufar de la toma de corriente eléctrica el enchufe del aparato o bien apagar el interruptor externo de pared. -
Page 21: Higienizacion Del Distribuidor Montado
enla pared posterior (ver figura 12). figura 12 5 - Enfilar el rascador interior en el evaporador, Poner atenciòn a montar debitamente la junta posterior (ver figura 13). figura 13 6 - Colocar sobre el evaporador el rascador exterior, acoplando su extremidad anterior al árbol del rascador interior y haciendo coincidir los dientes de arrastre (ver figura 14). -
Page 22: Mantenimiento Junta Posterior
NHT UL AF BL 5. 5 MANTENIMIENTO JUNTA POSTERIOR IMPORTANT Lubricar la junta posterior, en la dreas sombreadas, con abundante cantidad de grasa para uso alimenticio. Para prevenir danos a la màquina, sustituir la junta posterior cada 2000 horas. Para remover la junta posterior es necesario apretarla hasta que no pierda l’efecto ventosa (ver figura 16). - Page 23 figura 18 Para utilizar el contador de descongelación seguir los siguientes pasos (ver figura 18): 1 - fijar la hora del día girando el contador en sentido horario. Nunca girar el contador en sentido antihorario ya que el mecanismo interno podria verse dañado. Alinear la hora del día mediante la aguja B situada en la cara del contador.
- Page 24 NHT UL AF BL 1 INTRODUCCION El presente manual tiene como fin completar el “Manual de instrucciones” de la máquina para Granita estándar incluido en cada unidad. Antes de afrontar los argumentos tratados a continuación, les aconsejamos que lean atentamente éste manual con el fin de conocer los principios generales de funcionamiento del aparato.
-
Page 25: Consejos Utiles
causada por un suministro. Una señal visual situada en la tapa posterior (alarma visual), y un avisador automatico colocado en el interior de la tapa posterior (alarma acustica) advirten que el producto se ha acabado. Estos dispositivos funcionan solo si un sensor de fin d e p r o d u c t o h a s i d o i n s t a l a d o y c o n e c t a d o a l a MORSETTIERA (vedere figura 1). - Page 26 NHT UL AF BL g -Poner el interruptor general del distribuidor en posición I . A c t i v ar m a n u a lm en t e e l s is t e m a d e r e c ar g a automatica, teniendo presionado su interruptor (colocado en la tapa posterior de cada contenedor) en posición II;...
-
Page 27: Descripcion Piezas De Repuesto
5 DESCRIPCION PIEZAS DE REPUESTO 2442_49 V0.2 05G22 1 22800-24601 Sensor de nivel 2 22800-24603 Contacto 3 22800-24612 Gommino flexibile 4 22800-17520 Tapa anterior 5 22800-24602 Distancial para contacto 6 22800-24613 Tarjeta electronica con alarma 7 22800-17510 Tapa posterior 8 22800-24201 Interruptor a 3 posiciones 9 22800-24600 Valvula solenoide 10 22800-24609 Muelle 11 10028-03212 OR grifo... - Page 28 SPARE PARTS LIST 2442_49 V 1.2 07C29 NHT UL AF B L A C K...
- Page 29 1 22800-23400 Transparent cover Tapa trasparente 2 22800-17404 Bowl Contenedor 3 22800-14802 Faucet piston Pistón del grifo 4 22800-15100 Faucet piston OR Junta OR del pistón grifo 5 22800-27401 Black faucet handle Palanca grifo nero 6 22800-15002 Faucet handle spring Muelle de la palanca grifo 7 22800-22160 Black faucet handle pin Pivote de la palanca nero...
- Page 30 GEAR MOTOR SPARE PARTS LIST 1 22800-22651 Bracket with bush Soporte con buje 2 22800-22501 Stator Estator 3 10028-03213 Stator protection gasket Junta de la cobertura estador 4 10028-03201 Washer Arandella 5 10028-03200 Rotor spacer Distancial del rotor 6 33800-03802 Gear box with bushing Caja reductor con buje 7 22800-22615 Seal retainer Junta de retencion...
- Page 31 NHT UL AF BL NOTES: Ugolini spa...
- Page 32 CECILWARE CORPORATION 43-05 20th Avenue Long Island City, N.Y. 11105 Tel. (800) 935 2211 Fax (718) 932 7860 Email cecilware@aol.com www.cecilware.com 2442_49 R1.5 07D11...
Need help?
Do you have a question about the NHT2-UL-BL-AF and is the answer not in the manual?
Questions and answers