Table of Contents
Advertisement
Available languages
Available languages
Quick Links
Advertisement
Table of Contents

Related Manuals for Cecilware MT-1-Mini


Summary of Contents for Cecilware MT-1-Mini
- Page 1 MT MINI UL OPERATOR’S MANUAL CARNET D’INSTRUCTIONS MANUAL DE INSTRUCCIONES...
- Page 2 MT MINI UL...
- Page 3 Questo apparecchio è coperto da uno o più dei seguenti brevetti e/o altre domande di brevetto depositate: This dispenser is manufactured under one or more of the following U.S.patents and/or other pending patents: Cet appareil est couvert par un ou plusieurs des brevets suivants et/ou autres demandes de brevet déposées: Dieses Gerät ist durch eines oder mehrere der folgenden Patente und/oder andere eingetragene Patentanmeldungen geschützt: Este aparato está...
-
Page 4: Installation
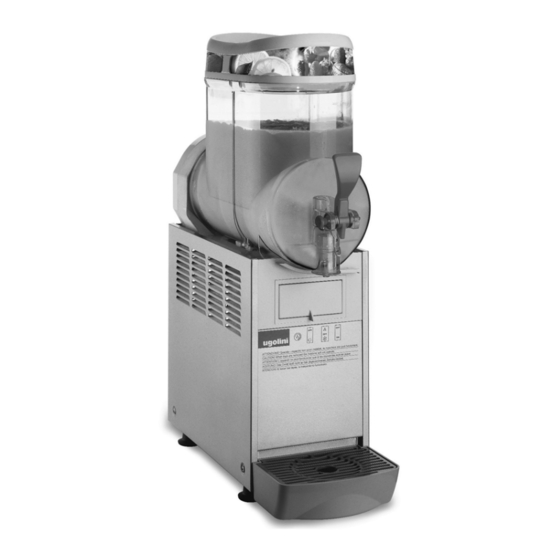
MT MINI UL 1 TECHNICAL CHARACTERISTICS Transparent removable bowls Capacity of each bowl, approx. Dimensions: width depth height Net weight, approx. Gross weight, approx. Adjustable thermostats Hermetic compressor Air-cooled condenser Overload protector Noise level lower than 70 dB (A) IMPORTANT Read electrical ratings written on the data plate of the individual units;... -
Page 5: Operating Procedures
5 OPERATING PROCEDURES ATTENTION In case of damages, the power cord must be replaced by qualified personnel only in order to prevent any shock hazard. 1 Clean and sanitize the unit according to the instructions in this manual. See chapter 5.3 CLEANING AND SANITIZING PROCEDURES. -
Page 6: Cleaning And Sanitizing Procedures
MT MINI UL (the indicator F will go up in opening G). figure 3 2 Beverage temperature adjustment: proper beverage temperature is factory preset. To reset, turn the knob located in each switch box as follows: - towards right (clockwise) to decrease temperature. - towards left (counterclockwise) to increase temperature. - Page 7 figure 6 3 Slide the outer spiral out (see figure 7) and then Outside magnetic rotor assembly (see figure 8). figure 7 figure 8 4 Remove the bowl gasket from its seat (see figure 9). figure 9 5 Dismantle the faucet assembly (see figure 10). figure 10 6 Slide the drip tray out and empty it.
-
Page 8: In-Place Sanitization
MT MINI UL 5. 3. 3 SANITIZING Sanitizing should be performed immediately prior to starting the machine. Do not allow the unit to sit for extended periods of time after sanitization. 1 Wash hands with a suitable antibacterial soap. 2 Prepare at least two gallons of a warm (45-60 °C 120- 140 °F) sanitizing solution (100 PPM available chlorine concentration or 1 spoon of sodium hypoclorite diluted with 2 litres of water) according to your local Health Codes and... -
Page 9: Routine Maintenance
1 Prepare two gallons of a warm (45-60°C, 120-140 °F) sanitizing solution (100 PPM available chlorine concentration or 1 spoon of sodium hypoclorite diluted with 2 liters of water) according to your local Health Codes and manufacturer’s specifications. 2 Pour the solution into the bowl(s). 3 Using a brush suitable for the purpose, wipe the solution on all surfaces protruding above the solution-level and on the underside of the top cover(s). -
Page 10: Caracteristiques Techniques
MT MINI UL 1 CARACTERISTIQUES TECHNIQUES Réservoirs transparents démontables Capacité chaque réservoir, environ Dimensions: largeur profondeur hauteur Poids net, environ Poids brut, environ Thermostats réglables Motocompresseur hermétique Condenseur à ventilation mécanique Protège-moteur Niveau de bruit inférieur à 70 dB (A) IMPORTANT Caractéristiques électriques: lire les données reportées sur la plaque de chacun des distributeurs;... -
Page 11: Description Des Commandes
suivant les instructions fournies dans ce carnet au chapitre 5.3 NETTOYAGE. 2 Remplir les réservoirs avec le produit choisi sans dépasser le niveau maximum indiqué sur les réservoirs. La quantité de produit dans le réservoir (exprimée en litres ou en gallons) est indiquée par les repères se trouvant sur le réservoir. - Page 12 MT MINI UL figure 3 2 Réglage de la température: la température optimale de la boisson (pour le fonctionnement du distributeur comme réfrigérateur de boissons au lieu de distributeur de granita) est réglée en usine. Si l'on désire modifier cette température, il faut t o u r n e r l a p o i g n é...
- Page 13 figure 6 3 Enlever de l'évaporateur la spirale extérieure (voir figure 7) puis Rotor magnétique extérieur complet (voir figure 8). figure 7 figure 8 4 Enlever le joint d'étanchéité du réservoir de son siège (voir figure 9). figure 9 5 Démonter le robinet selon la séquence indiquée (voir figure 10).
-
Page 14: Desinfection Du Distributeur Demonte
MT MINI UL bien. Ne pas utiliser de détergents abrasifs. IMPORTANT Afin d'éviter d'endommager le distributeur utiliser uni- quement un détergent compatible avec les piéces en pla- stique. 2 Utiliser une brosse adéquate et laver soigneusement avec la solution détergente toutes les pièces qui sont en contact avec la boisson. -
Page 15: Entretien (A Effectuer Uniquement Par Le Service D'assistance)
du rotor magnétique extérieur (voir figure 14). figure 14 7 Monter le réservoir et le pousser vers la paroi postérieure, en s'assurant qu'il s'adapte parfaitement au joint et que, en même temps, ses crochets inférieurs soient engagés dans les saillies prévues à cet effet sur le plan égouttoir (voir figure 15). figure 15 8 Rincer avec de l'eau fraîche de manière à... - Page 16 MT MINI UL densité. figure 16 Fonctionnement du timer de dÈgivrage. 1 Règler l’heure du jour en tournant le timer dans le sens des aiguilles d’une montre ( flèche A) Ne jamais tourner le timer dans le sens contraire des aiguilles d’une montre car cela endommagerait le mÈcanisme intÈrieur.
-
Page 17: Instalación
1 CARACTERISTICAS TECNICAS Contenedores transparentes desmontables Capacidad de cada contenedor, aproxi- mada Dimensiones: ancho largo alto Peso neto, aproximado Peso bruto, aproximado Termostatos regulables Motocompresor hermético Condensador a ventilación forzada Guardamotor Nivel de ruido inferior a 70dB (A) IMPORTANTE Características eléctricas: leer los datos detallados en la placa del distribuidor;... -
Page 18: Descripcion De Los Mandos
MT MINI UL La cantidad de producto presente en el contenedor (en litros o en galones) está indicada con señales específicas situadas en el contenedor mismo. 3 Si se quiere distribuir productos concentrados a diluirse con agua, verter en los contenedores el agua agregando a continuación la cantidad necesaria de producto concentrado, según las instrucciones del fabricante. - Page 19 granizado menos denso (el índice F en la ventanilla G se desplazará hacia arriba). figura 3 2 Regulación de la temperatura: la temperatura óptima de las bebidas (para el funcionamiento del distribuidor como refrigerador de bebidas y no como granizador) ha sido regulada en la fábrica.
- Page 20 MT MINI UL figura 5 figura 6 3 Desenfilar del evaporador el rascador exterior (ver figura 7) y después el Rotor magnetico externo completo (ver figura 8). figura 7 figura 8 4 Quitar de su alojamiento la junta del contenedor (ver figura figura 9 5 Desarmar el grifo respetando la secuencia indicada (ver figura 10).
- Page 21 5. 3. 2 LAVADO IMPORTANTE No lavar ningún componente de la maquina en lavavajil- las. ATTENCION Antes de efectuar cualquier tipo de limpieza, desenchu- far de la toma de corriente eléctrica el enchufe del apa- rato o bien apagar el interruptor externo de pared. 1 Poner en una palangana aproximadamente ocho litros de agua caliente (45°-60°C) y detergente respetando con atención las instrucciones del fabricante;...
-
Page 22: Higienizacion Del Distribuidor Montado
MT MINI UL acompañándolo con cuidado (ver figura 13). figura 13 6 Colocar sobre el evaporador el rascador exterior acoplando su extremidad anterior al arbol del rotor magnetico externo (ver figura 14). figura 14 7 Montar el contenedor y empujarlo hacia la pared posterior, controlando que calce completamente en la junta y, al mismo tiempo, que sus ganchos inferiores coincidan con las correspondientes salientes del plano de goteo (ver figura 15). -
Page 23: Contador De Descongelacion
deben ser lubricadas solamente con la grasa suministrada por el fabricante u otra grasa compatible con policarbonato. IMPORTANTE El diagrama eléctrico del distribuidor se ilustra en la parte interior del panel del lado grifo. 7 CONTADOR DE DESCONGELACION El contador de descongelación, que está situado a la derecha del aparato, automaticamente cambia el dispensador de la función del Granizado a la función Bebida y al contrario. - Page 24 MT MINI UL SPARE PARTS LIST LISTE DES PIECES DE RECHANGE DESCRIPCION PIEZAS DE REPUESTO...
- Page 25 00687 Cover fixing plate 00688 Cover 00689 Picture 00690 Complete cover 00691 Bowl 00692 Faucet handle 00447 Faucet handle spring 00420 Faucet piston 00101 Faucet piston OR 00103 Faucet handle pin 00134 Restrictor cap 00109 Thrust washer rubber cap 00537 Thrust washer 00237 Left side panel...
- Page 26 MT MINI UL 00088 Spring 00452 Shaped nut 00087 Density adjustment screw 00573 Rear cover 00569 Rear cover fixing screw 00707 Rear cover picture 00575 Rear cover picture screen Back panel 00157 Timer cover 00526 Right side panel Please order what printed on piece See table MT 1 MINI...
- Page 27 GEAR MOTOR MOTOREDUCTEUR MOTORREDUCTOR 00097 Bracket with bush 00156 Stator 00296 Stator protection gasket 00168 Washer 00253 Rotor spacer 00190 Gear box with bushing 00256 Seal retainer Ball bearing ∅ 28 mm rubber cap 00254 00255 Central shaft OR Ball bearing ∅ 28 mm 00247 00257 1.5 mm spacer...
- Page 28 CECILWARE CORPORATION 43-05 20th Avenue Long Island City, N.Y. 11105 Tel. (800) 935 2211 Fax (718) 932 7860 Email cecilware@aol.com www.cecilware.com 2416_49 R0.1 06N15...
Need help?
Do you have a question about the MT-1-Mini and is the answer not in the manual?
Questions and answers