Table of Contents
Advertisement
Available languages
Available languages
Quick Links
Advertisement
Table of Contents

Related Manuals for Cecilware MT-2-ULAF


Summary of Contents for Cecilware MT-2-ULAF
- Page 1 MT UL AF O P E R A T O R ’ S M A N U A L MANUAL DE INSTRUCCIONES...
-
Page 3: Table Of Contents
TECHNICAL CHARACTERISTICS ... 4 INTRODUCTION ... 4 INSTALLATION ... 4 TO OPERATE SAFELY ... 4 OPERATING PROCEDURES ... 5 5. 1 DESCRIPTION OF CONTROLS ... 5 5. 2 OPERATION HELPFUL HINTS ... 6 5. 3 CLEANING AND SANITIZING PROCEDURES ... 6 5. -
Page 4: Technical Characteristics
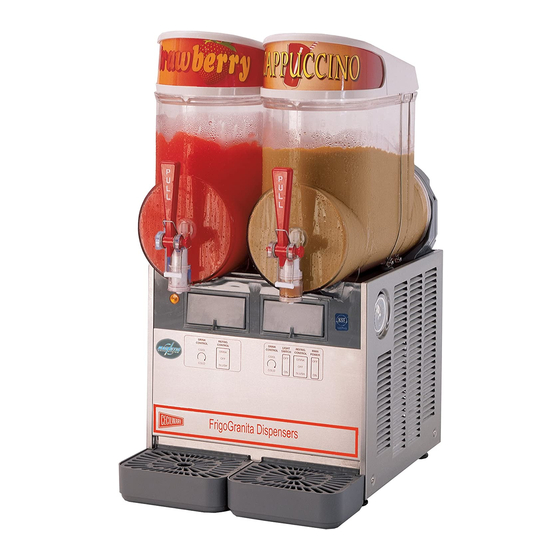
MT UL AF 1 TECHNICAL CHARACTERISTICS Transparent removable bowls Capacity of each bowl, approx. Dimensions: width depth height Net weight, approx. Gross weight, approx. Adjustable thermostats Hermetic compressor Air-cooled condenser Overload protector Safety pressure switch Noise level lower than 70 dB (A) IMPORTANT Read electrical ratings written on the data plate of the individual units;... -
Page 5: Operating Procedures
5 - Do not obstruct air intake and discharge openings: 15 cm (6”) minimum air space all around the dispenser. 6 - Do not put objects or fingers in panels louvers and faucet outlet. 7 - Do not remove bowls, augers and panels for cleaning or routine maintenance unless the dispenser is disconnected from its power source. -
Page 6: Operation Helpful Hints
MT UL AF II position mixer and refrigeration ON. GRANITA mode. Thermostat (D) Turn clockwise : to decrease temperature Turn counterclockwise : to increase temperature To operate the unit: 1 - Set the power switch to I position. 2 - Set the mixer/refrigeration switches as follows: - to the I position to get soft drink. -
Page 7: Disassembly
mode) - place a pail under each faucet and drain all product from bowls - set all control switches to the 0 position. 5. 3. 1 DISASSEMBLY ATTENTION Before any disassembly and/or cleaning procedure make sure that the dispenser is disconnected from its power source. -
Page 8: Cleaning
MT UL AF 5 - Dismantle the faucet assembly (see figure 11). figure 11 6 - Slide the drip tray out and empty it. 5. 3. 2 CLEANING ATTENTION Before any disassembly and/or cleaning procedure make sure that the dispenser is disconnected from its power source. -
Page 9: In-Place Sanitization
wall (see figure 13). figure 13 5 - Insert the auger into the evaporator taking care to accompany it to the end so as to prevent it from hitting against the rear wall (see figure 14). figure 14 6 - Install the outer spiral. Slide it over the evaporator until its front notch engages with the exposed end of the auger Ugolini spa shaft (see figure 15). -
Page 10: Routine Maintenance
MT UL AF 6 ROUTINE MAINTENANCE 1 - Daily: inspect the machine for signs of product leaks past seals and gaskets. If proper assembly does not stop leaks around seals or gaskets, check for improper lubrication, worn or damaged parts. Replace parts as needed. 2 - Monthly on MT 1P, MT 2 and MT 3 models: remove the dust from the condenser filter. -
Page 11: Autofill Device
8 AUTOFILL DEVICE 8. 1 INTRODUCTION This operator’s manual is a complement to the standard Granita machine operator’s manual available in the unit package. Carefully read first the standard unit Operator’s Manual and then all the following sections of this one thoroughly to familiarize yourself with all aspects of the system. -
Page 12: Operating Procedures
MT UL AF 8. 3 OPERATING PROCEDURES Once the remote fill system is set up, follow the procedures described in chapter 3.1 DESCRIPTION OF CONTROLS to activate the Autofill system. IMPORTANT The device is designed so as no refilling occurs in case either the clip probe is not properly installed or the bowl not properly fitted. -
Page 13: Routine Maintenance
Autofill Switch (located on the rear cover of each bowl) in position II, until full strength beverage outflows. Set the unit Power Switch to position 0 and drain all the liquid from the bowl. g -Set the unit Power Switch to position I. Manually energize the Autofill Device, by keeping pushed the Autofill Switch (located on the rear cover of each bowl) in position II, dispense a cup of beverage and check its... -
Page 14: Caracteristicas Tecnicas
MT UL AF 1 CARACTERISTICAS TECNICAS Contenedores transparentes desmontables Capacidad de cada contenedor, aproximada Dimensiones: ancho largo alto Peso neto, aproximado Peso bruto, aproximado Termostatos regulables Motocompresor hermético Condensador a ventilación forzada Guardamotor Limitador de presión de seguridad Nivel de ruido inferior a 70dB (A) IMPORTANTE Características eléctricas: leer los datos detallados en la placa del distribuidor;... -
Page 15: Para Un Funcionamiento Seguro
8 - El distribuidor no sale de fábrica prelavado e higienizado. Antes de utilizarlo debe ser desarmado, lavado e higienizado siguiendo cuanto se ha dicho en las presentes instrucciones del capítulo 5.3 LIMPIEZA. 4 PARA UN FUNCIONAMIENTO SEGURO 1 - No utilizar el distribuidor antes de haber leído el presente manual de instrucciones. -
Page 16: Sugerencias
MT UL AF Posición I : el distribuidor está habilitado para el funcionamiento. Ventilador en función. Interruptor luces (E) Posición 0 : luces tapa apagadas. Posición I : luces tapa encendidas. Interruptor mezcladores y refrigeración (B) Posición I : mezcladores y refrigeración en función. Posición BEBIDA. -
Page 17: Limpieza
grifo, el reductor de flujo provisto (ver figura 5). figura 5 5. 3 LIMPIEZA 1 - La limpieza y el lavado son fundamentales para garantizar la perfecta conservación del gusto de la bebida y la m á x i m a e f i c i e n c i a d e v u e s t r o d i s t r i b u i d o r . L o s procedimientos descritos a continuación deben ser considerados de carácter general y pueden variar por efecto de la reglamentación de higiene vigente. -
Page 18: Lavado
MT UL AF 10). figura 10 5 - Desarmar el grifo respetando la secuencia indicada (ver figura 11). figura 11 6 - Desenfilar el cajón recoge-gotas y vaciarlo. 5. 3. 2 LAVADO ATENCION Antes efectuar cualquier desenchufar de la toma de corriente eléctrica el enchufe del aparato o bien apagar el interruptor externo de pared. -
Page 19: Higienizacion Del Distribuidor Montado
alimenticio. figura 12 3 - Armar de nuevo el grifo sobre el contenedor siguiendo la secuencia inversa a la detallada para el desmontaje (vedere figura 11). 4 - Volver a montar en su alojamiento la junta del contenedor. NOTA: El borde de mayor diámetro debe ser apoyado enla pared posterior (ver figura 13). -
Page 20: Manutencion
MT UL AF 6 - Enjuagar con bebida fresca para eliminar del fondo de los contenedores todo residuo posible de solución para higienizar. Secar la parte interior de los contenedores con una servilleta de papel desechable. 7 - No efectuar más operaciones de enjuague. 6 MANUTENCION 1 - Cada día: controlar el distribuidor y que no se verifiquen pérdidas de producto de las juntas. -
Page 21: Sistema De Recarga Automatica
Note: quando todas las lenguetas no están presionadas la función de descongelación se mantiene apagada (el distribuidor funciona como si no estubiera equipado con el contador de descongelación). 8 SISTEMA DE RECARGA AUTOMATICA 8. 1 INTRODUCCION El presente manual tiene como fin completar el “Manual de instrucciones”... -
Page 22: Procedimiento Para El Funcionamiento
MT UL AF 8. 3 PROCEDIMIENTO PARA EL FUNCIONAMIENTO Una vez que el sistema de alimentación es instalado, para activar el sistema de recarga automatica, seguir el procedimiento descrito en el capitulo 3.1 CONTROLES. IMPORTANTE El dispositivo es proyectado de modo que la recarga no funciona si el nivel de el sensor no ha sido correctamente montado o si el contenedor no se ha fijado en la posición correcta. -
Page 23: Higienizacion
e -Desconectar el depósito para la higienización. Después conectar al sistema de alimentación el contenedor de la bebida. f -Poner el interruptor general del distribuidor en posición I. Activar manualmente el sistema de recarga automatica, teniendo presionado su interruptor (colocado en la tapa posterior de cada contenedor) en posición II, hasta que el líquido entrante non sea esta vez solo bebida. - Page 24 SPARE PARTS LIST / DESCRIPCION PIEZAS DE REPUESTO 2423_49 V 1.5 07D11 MT UL AF...
- Page 25 00263 Transparent cover 00106 Bowl 00161 Faucet piston 00101 Faucet piston OR 00102 Faucet handle 00122 Faucet handle spring 00103 Faucet handle pin 8 22800-23502 Thrust washer rubber cap 00105 Bowl gasket 00126 Rear wall front bushing 00127 Auger bushing 00110 Auger 00111...
- Page 26 GEAR MOTOR / MOTORREDUCTOR 00097 Bracket with bush 00156 Stator 00296 Stator protection gasket 00168 Washer 00253 Rotor spacer 00190 Gear box with bushing 00256 Seal retainer Ball bearing ∅ 28 mm rubber cap 00254 00255 Central shaft OR Ball bearing ∅ 28 mm 00247 00257 1.5 mm spacer...
- Page 27 AUTOFILL DEVICE / SISTEMA DE RECARGA AUTOMATICA 00115 Clip probe 00277 Contact 00278 Flexible contact 00279 Front cover 00280 Contact spacer 00114 Control PWB 00281 Rear cover 00282 Three position switch 00283 Solenoid valve 00284 Spring 00144 Faucet OR 00285 Faucet front part 00286 Faucet gasket...
- Page 28 CECILWARE CORPORATION 43-05 20th Avenue Long Island City, N.Y. 11105 Tel. (800) 935 2211 Fax (718) 932 7860 Email cecilware@aol.com www.cecilware.com 2423_49 R1.7 07D11...
Need help?
Do you have a question about the MT-2-ULAF and is the answer not in the manual?
Questions and answers