Advertisement
Quick Links
12/2011
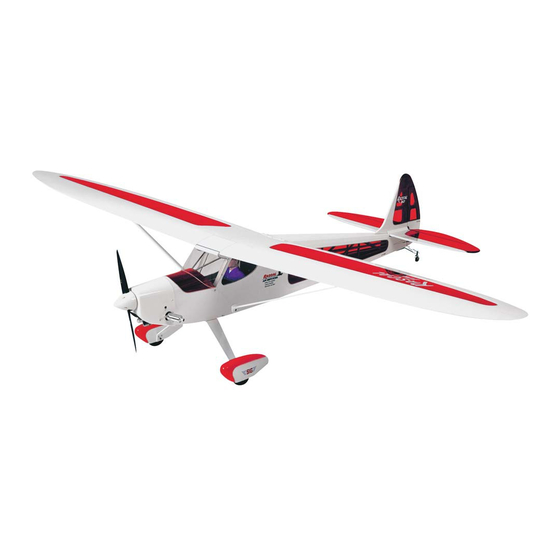
Rascal 110 MANUAL UPDATE
The kit you have is the latest version of the Rascal 110 ARF. It
includes several improvements over the previous release. This
MANUAL UPDATE will guide you through the changes that are not
covered in the ASSEMBLY MANUAL.
ASSEMBLY MANUAL Page 1 - Replace the four paragraphs
under RADIO EQUIPMENT with the following.
RADIO EQUIPMENT:
We highly recommend the use of a modern programmable
computer radio. Such radio systems allow you to easily set and
adjust every channel and additionally program various flight
functions to suit your individual style of flying.
The Rascal 110 ARF requires a 5-channel radio system, with 7
servos, assuming you are going to use the operational Flaps. If
you don't want working Flaps, you can get by with a 4-channel
radio with 5 servos.
SERVO REQUIREMENTS
Ailerons - two (2) heavy-duty servos with at least 70 in/oz of torque
Flaps - two (2) heavy-duty servos with at least 70 in/oz of torque
Elevator - one (1) heavy-duty servo with at least 70 in/oz of torque
Rudder - one (1) heavy-duty servo with at least 70 in/oz of torque
Throttle - one (1) standard servo
SERVO CHORDS NEEDED
Ailerons - two (2) 24" long servo extension.chords
one (1) standard Y-harness chord (plugged into the rx)
Flaps - two (2) 6" long servo extension chords
one (1) reversing Y-harness* chord (plugged into the rx)
Elevator - one (1) 36" long servo extension chord
Rudder & Throttle - no extra chords needed
* We used a Maxx Products
No radio equipment is supplied in this kit. Heavy-duty servos,
extension chords of various lengths, and Y-harness chords are all
available separately from your radio manufacturer. Check their
website, or see your local hobby shop for more information.
RADIO Rx BATTERY PACK
Most radio systems, typically, come with a 500-600 mAh nicad
receiver battery pack, which runs the receiver and the normal 4
servos. Because the Rascal 110 carries as many as seven high-
torque servos, we strongly recommend that you upgrade to a
larger 1100-1500 mAh airborne battery pack in order to be safe.
All radio manufacturers have the larger capacity packs available
for their systems.
ASSEMBLY MANUAL Page 2 - Replace the entire section titled
COVERING MATERIAL with the following.
COVERING MATERIAL:
Your Rascal 110 ARF is covered with Oracover
covering made in Germany, and sold in the U.S. by Hanger-9
Ultracote
®
.
Oracover
®
#10 White (Ultracote
Oracover
®
#29 Transparent Red (Ultracote
Oracover
®
#59 Transparent Blue (Ultracote
R
®
"Miracle-Y" Reversing Y-Harness.
®
, a premium quality
Colors
®
#HANU870) and
®
#HANU950)
or
®
#HANU954)
If sometime in the future you need replacement covering or
matching paint for repairs, they are available from your local hobby
dealer or online from Hanger-9
How To Tighten Loose Covering
After you open your Rascal 110 and take all the covered parts out
of their plastic bags, the covering may begin to wrinkle. This is not
unusual and is no cause for alarm.
Your airplane was built and covered in a part of the world which
has relatively high humidity and therefore, the wood was likely
carrying a fair amount of moisture. When exposed to drier air, the
wood typically loses this moisture, dimensionally "shrinking" in the
process.
In turn, this may cause some wrinkles.
wrinkles are easy to remove by just using a hobby type heat iron.
Caution: Trying to remove the wrinkles by hastily going over them
with a heat gun can lead to more problems. You should take your
time to carefully go over the entire model with a covering iron, as
we will describe.
We suggest using a model airplane covering iron for this process.
Cover the iron's shoe with a thin cotton cloth, such as an old t-shirt,
to prevent scratching the covering as you work.
After covering your iron, the next step is to set the iron to the
correct temperature. This is critical for achieving a good result!
The iron should be set to about 220°F - 250°F (104°C - 121°C) as
measured on the bottom of the iron using a thermometer.
If you do not have a thermometer, you can find the correct
temperature by trial and error. Set your iron to a medium setting.
Glide the iron over some of the covering that is over over solid
wood, such as the sheeted wing center section. Observe the
covering to see if any bubbles appear. If bubbles appear, the
covering is getting too hot! Turn down the temperature of the iron
and repeat the test.
If no bubbles appear, turn up the heat slightly and repeat the test.
Keep adjusting until you "zero in" on the correct temperature. Find
the temperature that will get the covering to stick down without
forming bubbles or causing the seams to pull away.
Once your iron is set to the correct temperature, go over the entire
framework of the airplane, making sure that the covering is
securely bonded to the structure everywhere the covering comes
in contact with the wood underneath. This takes some time, but is
worth the effort.
After you have all the covering secured onto the solid areas, turn
the temperature of the iron up to approximatelly 300°F - 320°F
(149°C - 160°C). This is the correct temperature for shrinking the
covering material.
Use the iron to tighten up any wrinkles in the "open" areas of the
model (no wood underneath the covering). Glide the iron over the
wrinkle for a few seconds, then remove. Repeat until the covering
is tight with no wrinkles.
®
as
If wrinkles keep coming back on the tail surfaces, you may need to
"ventilate" the areas between the ribs. Otherwise, the air that is
sealed in those relatively small areas will expand when the heat is
applied and actually cause the covering to stretch instead of
shrink. Use a pin to poke a tiny hole in the covering between each
rib, on the bottom of the part. That will let the expanding air
escape and the covering to shrink properly.
1
®
.
However,
Advertisement

Related Manuals for SIG Rascal 110


Summary of Contents for SIG Rascal 110
- Page 1 Rascal 110 MANUAL UPDATE dealer or online from Hanger-9 ® The kit you have is the latest version of the Rascal 110 ARF. It How To Tighten Loose Covering includes several improvements over the previous release. This After you open your Rascal 110 and take all the covered parts out MANUAL UPDATE will guide you through the changes that are not of their plastic bags, the covering may begin to wrinkle.
- Page 2 (1) M3 x 18mm Clamp Compression Bolt WINGS: (3) Aluminum Tank Tubes - 40mm, 50mm, 60mm long The Rascal 110 is designed with a permanent 2-piece wing system, where the right and left wing panels will remain separate (1) Metal Clunk Pick-Up Weight for ease of transport and storage.
- Page 3 AILERON AND FLAP RADIO EQUIPMENT (see photo above) locations for two hardwood mounting blocks. Then set the servo aside. AILERONS: Both aileron servos need a 24" extension chord in b. Use epoxy or slow CA glue to mount the 3/8" x 3/4" sq. order to exit at the center of the wing.
- Page 4 Check your radio manual to When the Flap servo plug becomes visible in the oblong hole, figure out the best way to operate the flaps on your Rascal 110. reach in with a narrow needle nose pliers or a hemostat and grasp the plug and pull it to the outside of the wing.
- Page 5 pushrod, clipping the R/C Link in the top or outermost hole in the 13) Make sure your transmitter's flap control (knob or switch) is set horn. (Again, if the clevis pin is hard to snap into the hole, open to the "flap up" position, and then, turn on the radio system. The up the hole with a 1/16"...
- Page 6 ASSEMBLY MANUAL Pages 23-25 The top 2 hinges are already permanently glued into the Fin and Rudder in your Rascal 110. You will glue the bottom hinge in when you mount the Fin onto the Fuselage in Step 2 page 23. Steps 5, 6, and 7 on pages 24-25 can all be done after the Fin is glued onto the Fuselage.
Need help?
Do you have a question about the Rascal 110 and is the answer not in the manual?
Questions and answers