Table of Contents
Advertisement
Quick Links
Advertisement
Table of Contents

Related Manuals for SIG FOUR-STAR 120


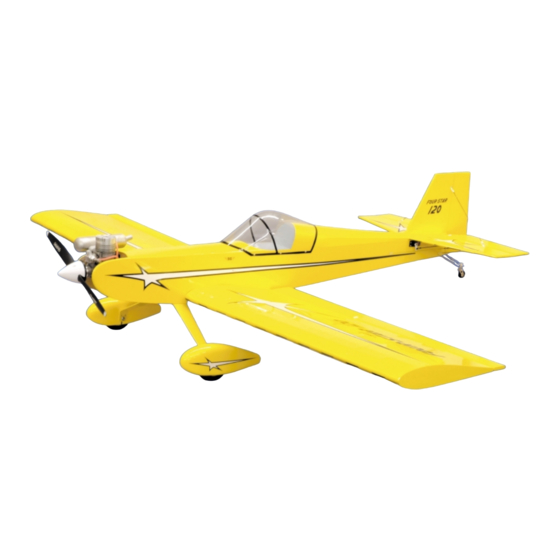
Summary of Contents for SIG FOUR-STAR 120
-
Page 2: Radio Equipment
Four-Star kit series, in an almost installation of a Hitec radio system, using the upgraded servos ready to fly package. The FOUR-STAR 120 ARF is easy to fly mentioned earlier. In addition, you will need two 12" servo lead and makes an ideal choice for your first large low wing airplane. -
Page 3: Covering Material
STAR 120 ARF has a fairly low wing loading and may tend to float • A Selection of Glues - SIG Thin and Medium CA Glue in ground effect during landings. A lower pitch prop has a "braking" SIG Kwik-Set 5-Minute and... - Page 4 BAG #7 Aluminum landing gear wrapped in foam padding - 2 each D2 x 202 mm painted yellow or red drilled for axles and wheel pant (.071 X 7-15/16") rods with bolts - drilled for fuselage mounting bolts. plastic fittings at each end 2 each D2 x 254 mm (.071 x 10") rods with plastic BAG #8 Misc.
-
Page 5: Wing Assembly
1/16" bit to drill pilot holes into the wing panels for the retaining screws. The FOUR-STAR 120 ARF wing has been designed to be a strong, easy to assemble, two-piece unit to ease transport in today's 3) On the top center of both wing panels, just inboard of the smaller vehicles. - Page 6 The aileron place. Any clean-up required for CA glue drops, can be done with should now be in the proper position for permanently hinging it in SIG Debonder and a soft cloth. place. Installing the Aileron Control Horns and Pushrods: For the following steps you will need: •...
-
Page 7: Fuselage Assembly
4) Thread one of the 4-40 hex nuts all the way onto one of the adjust the aileron pushrod R/C links as required to achieve uniform 4-40 x 128 mm threaded aileron pushrods. Thread a 4-40 R/C link contact with the bottom surface of the aileron gage. onto the pushrod, centering its threaded barrel, leaving an equal amount of threads on each side. - Page 8 1) Note that four M4 blind mounting nuts have been factory mount arms and mark the firewall with the appropriate position for installed behind the firewall. The spacing of these nuts, in the throttle pushrod. conjunction with oblong motor mount holes provides crankcase mounting widths from 1-11/16"...
- Page 9 system in this airplane.One fuel line is connected to the fuel 5) To ease pick-up (clunk) line and to the engine's carburetor. This same can removal of the tank at a then be used to fill the tank. The second line is the overflow line, later time, make a pull used when filling the tank.
- Page 10 needle valve holes, etc. These can be easily made using a Dremel ® Tool and sanding bits. Once these openings or clearances have been made, any exposed wood should be fuel-proofed. This can be done using thin CA glue, clear dope, or surfacing resin. Finally, cut and install two lengths of fuel tubing, connecting the fuel tank pick-up line with the carburetor and the tank overflow line with the pressure tap in the engine muffler.
-
Page 11: Tail Surface Installation
followed by the propeller. This assembly is now firmly tightened in place using the engine thrust washer and prop nut. The spinner cone is then placed over the propeller and its rear face fitted into the groove in the backplate. The spinner cone is then secured to the backplate using the two provided PA3 x 12 mm Phillips head sheet metal screws. - Page 12 slips into the rear of the fuselage. Press the fin firmly into place and use a clean paper towel and denatured alcohol to clean up and remove any excess or oozing glue. View the model from the rear, making sure the vertical fin is absolutely 90 upright to the stabilizer.
- Page 13 • 2 each Z-Bend Cable End Fittings mounting screws that came with your radio system. Reinstall the • 2 each Threaded Cable End Fittings servo into the tray and secure it in place with the mounting screws. • 2 each R/C Links - Nylon with Metal Pins •...
-
Page 14: Elevator Servo Installation
3) Thread the two white nylon R/C links onto these fittings until 6) With the fuselage upside down on your bench, choose one about 1/16" of threads protrude through the center of the link. of the rudder cables and slide a copper swage tube onto its end and hold it with your fingers. -
Page 15: Tail Brace Installation
output arm on the servo, making sure it is at or near 90 the servo body, pointing straight down. Reinstall the output arm retaining screw into the servo. 1) First, prepare the elevator servo for mounting by installing its rubber grommets and brass eyelets. Next, plug the 36" servo lead extension into the servo lead. -
Page 16: Installing The Tailwheel
6-25/32" up from the horizontal stabilizer and again 1/4" forward of that the surfaces are all square with each other. If not, adjust the the hinge line. length of the braces to correct. The completed assembly should look like this. 2) At the bottom rear of the fuselage, on each side, one 1/16"... - Page 17 little tension is all that’s needed. this position to the axle. Slide the wheel out to the outside wheel collar, followed by the inside wheel collar. With the setscrew facing straight down, snug the setscrew in the inner wheel collar lightly against the axle, leaving sufficient "play"...
- Page 18 Carefully and completely cut out the decal. Remove the decal itself On/Off Switch: We chose to mount our onboard switch from the sheet using tweezers. Use a product such as SIG Pure assemblies inside the fuselage, directly to the forward end of the Magic Model Airplane Cleaner or Windex ®...
- Page 19 The FOUR-STAR 120 ARF tends to stall very gently, with the nose In the case of a nose-heavy model, the correction to make it dropping straight ahead with little tendency to drop a wing. This is balance level is fairly easy.
-
Page 20: Academy Of Model Aeronautics
SIG MANUFACTURING COMPANY, INC. is committed to your success in both assembling and flying the FOUR-STAR 120 ARF kit. Should you encounter any problem building this kit, or discover any missing or damaged parts, please feel free to contact us by mail or telephone. - Page 21 F O U R - S T A R 1 2 0 L O G B O O K Date of first flight: Comments:...
- Page 22 Having the right fuel for your glow engine is as simple as making So why take chances. Go with the fuel flown by Champions for sure the SIG label is on your bottle. Each gallon of SIG fuel is custom years.
- Page 23 © 2007 SIG Manufacturing Company, Inc.
Need help?
Do you have a question about the FOUR-STAR 120 and is the answer not in the manual?
Questions and answers