Table of Contents
Advertisement
Quick Links
LIL' RASCAL ARF ASSEMBLY MANUAL
INTRODUCTION:
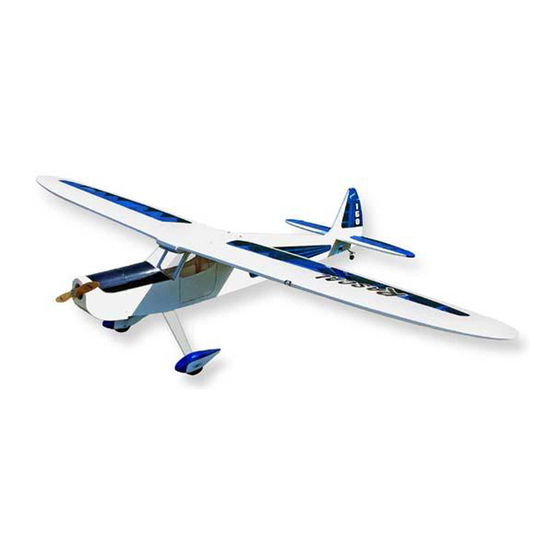
Congratulations on your purchase of the SIG Lil' Rascal ARF kit!
The SIG Rascal series have become popular with modelers
because their classic looks and good flying characteristics. SIG is
pleased to now offer this same fine design in this unique 180 class
size. The Lil' Rascal ARF not only retains the great characteristics
of the original but is also small enough to take almost anywhere,
completely assembled and ready to fly! Unlike most other small
electric powered models, the Lil' Rascal has a really nice power-to-
weight ratio, allowing it to handle much higher wind conditions.
Your Lil' Rascal ARF has been expertly covered with Oracover
This covering material is tough and light weight and is easily
repairable. This kit has been specifically engineered to make
assembly fast and simple when following the detailed instructions
in this manual.
The Lil' Rascal ARF is very light and therefore well matched to the
included electric 180 class motor and geardrive unit. This power
system swings the supplied 6 x 4 prop with amazing power and
efficiency. There are quite a few micro electronic speed controllers
(ESC) that will work well in this model, in the 4-10 Amp range. The
ESC unit shown in this manual is the MAXX Products MX-9104
ESC. This is a very small, light weight 4 Amp unit that handles
5-7 cell battery packs and includes a battery elimination circuit
(BEC), doing away with the need for a separate receiver battery.
This unit is available from MAXX Products, already pre-wired with
the appropriate JST connectors.
To maximize the performance of the motor/geardrive unit used in
this model, we suggest using a 7-cell 300 mAh Ni-MH (2/3 AAA
size) battery pack, in a "folded" configuration. Properly charged,
this pack delivers excellent power and great duration for the Lil'
Rascal model. To derive the maximum capacity and performance
from your battery pack, it is essential to use the correct battery
charger. We use and highly recommend a charger that is designed
for charging NiMH cells, such as the Astro Flight #115D unit. This
charger is an AC/DC type, allowing you to charge packs either at
home or from your car's 12-volt battery at the field. It is also a
"Peak Delta" charger, assuring a maximum battery pack charge
every time. Using this charger, at a 1 Amp charge rate, our packs
take about 15 minutes to fully charge. Having at least two battery
packs will allow you to fly almost continuously.
The assembly and flying of this model will only be successful if you
R
®
.
1
follow these instructions carefully.
instructions has the potential to cause problems later in the
assembly process or during flight. The successful assembly and
flying of this model is your responsibility so take your time and
enjoy your Lil' Rascal.
RADIO EQUIPMENT:
The Lil' Rascal ARF gets its performance from many factors, such
as its light weight and generous wing area. These combine to
produce a very favorable wing loading, allowing the model to take
advantage of the 180 motor/geardrive unit. Since this model is
factory built and covered, you can only realistically control the
finished, ready-to-fly weight by choosing the most appropriate
radio equipment for a model of this size. In short, the performance
of the Lil' Rascal will be reflected in the equipment that you choose.
In flight tests of the Lil' Rascal, we used the Hitec™ #HS-55
servos. However, any brand of servo that is in the same size and
torque range as the HS-55 servo will work just fine. For example,
one of our test models used the MAXX Products MX-50 units and
they performed perfectly. In general, the servo torque properties
for the Lil' Rascal ARF model should be in the 9 – 14 in./oz. area.
Only small or "micro" receivers should be used in this model due to
weight and size constraints. We prefer to use dual conversion
receivers, such as the Hitec™ Electron 6, the FMA M5, etc. Single
conversion receivers can also be used as long as you are aware of
the potential for interference from other transmitters. When we
used the Hitec™ Electron 6 receiver, we carefully removed the
plastic case, thus saving another 7 grams (about 1/4 oz.) in weight.
As mentioned earlier, you will also need a 4-10 Amp electronic
speed controller (ESC) to control the throttle function.
ESC should be pre-wired with JST connectors in order to connect
properly with the motor connector.
In general, choose your airborne radio equipment carefully. As
with any airplane, especially electric powered models, excess
weight is to be avoided. Maximum performance can only be
achieved with light weight components.
COVERING MATERIAL:
Your Lil' Rascal ARF has been covered using Oracover
material is world famous for its ease in application, light weight,
and consistent color. If you live in a dry climate, you may notice
some wrinkles develop in the covering after you remove the
covered parts from their plastic bags. This is perfectly normal in
low humidity. The model was covered in a part of the world where
the relative humidity is high and some of this moisture is retained
in the balsa wood. When the covered parts are exposed to drier
humidity conditions, the retained moisture will evaporate causing
Deviating from these
Your
®
. This
Advertisement
Table of Contents

Related Manuals for SIG LIL’ RASCAL


Summary of Contents for SIG LIL’ RASCAL
- Page 1 In general, the servo torque properties for the Lil’ Rascal ARF model should be in the 9 – 14 in./oz. area. Congratulations on your purchase of the SIG Lil’ Rascal ARF kit! The SIG Rascal series have become popular with modelers Only small or “micro”...
-
Page 2: Required Tools
Transparent Red, or #21-59 Transparent Blue. REQUIRED TOOLS: For proper assembly, we suggest you have the following tools and materials available: • A selection of glues - SIG Thin and Thick CA and SIG Kwik-Set 5-Minute Epoxy • CA applicator tips - fine •... - Page 3 5) The vertical fin - without the rudder hinged in place - is now glued to the top of the stabilizer, again using SIG 5-Minute epoxy. First, trial-fit the fin into the slot in the top of the stabilizer, without...
-
Page 4: Landing Gear
any glue. If needed, trim the bottom fin tab to allow full contact of 2) Look at the landing gear and the wheel pants. Understand the fin base to the top of the stabilizer and the fuselage. Have the that when assembled, the wheel pants face forward while the wing mounted to the fuselage and sitting on a flat surface to allow V-bend shape at the top center of the landing gear wire points to easy viewing from the front. - Page 5 and receiver compartments. Pull the antenna through this hole. The “bobbin” itself is nothing more than a piece of 3/32” x 1/2” x 3/4” balsawood. From the receiver, measure the To hold the antenna in place at the rear of the fuselage, use a pair antenna out to 4-1/2”...
- Page 6 f) Now make sure the motor shaft is moving in the correct elevators with your transmitter. If necessary, use the rudder and direction. When viewing the fuselage from the rear to the front -- elevator trims to adjust the surfaces back to neutral. as if you were sitting in the cockpit -- the motor shaft should turn clockwise when throttle is applied.
-
Page 7: Decal Application
Use a small squeegee to now set the decal FLYING: in place, removing all excess liquid and any air bubbles. The SIG 4” Epoxy Spreader - #SIGSH678 - is perfect for this job. Blot up If you are new to the hobby/sport of flying R/C model airplanes, DO... - Page 8 familiar with the model at slower speeds. Take care of any trim requirements that might be needed and settle back and have fun! Now is the time to find out how the airplane reacts to the control inputs. It does not take much so take it easy on the elevator. Avoid trying to use elevators to “force”...
-
Page 9: Academy Of Model Aeronautics
Telephone: (765) 287-1256 AMA WEB SITE: www.modelaircraft.org CUSTOMER SERVICE SIG MANUFACTURING COMPANY, INC. is totally committed to your success in both assembling and flying the LIL’ RASCAL ARF kit. Should you encounter any problem building this kit or discover any missing or damaged parts, please feel free to contact us by mail or telephone.
Need help?
Do you have a question about the LIL’ RASCAL and is the answer not in the manual?
Questions and answers