
Related Manuals for SICK CLV503


Summary of Contents for SICK CLV503
- Page 1 Q U I C K S TA R T CLV503 / CLV505 Bar Code Scanners Stationäre Barcode-Scanner / Fixed Mount Bar Code Scanners...
- Page 2 Line zur Verfügung. Introduction This Quick Start allows rapid and effortless commis- sioning of the CLV503/CLV505 fixed mount bar code scanners, referred to as “device” in the quick start. Starting from the basic default settings, it is easy to change the most important parameter values to adapt to the application with the help of configuration bar codes.
-
Page 3: Table Of Contents
Inhalt Einstieg ................ 8 Elektrischer Anschluss..........9 Technische Informationen ........13 Konfigurations-Barcodes ..........16 Werkseitige Grundeinstellung ........16 Schnittstellen ............17 Baud-Rate (RS-232) ..........18 Daten, Parität, Stopp-Bits (RS-232) ......19 Handshake (RS-232) ..........20 Keyboard-Sprache .............21 Zu lesende Codearten aktivieren ......23 Datenausgabeformat ..........27 Lesebetriebsarten .............30 Hinweise zur UL-Zertifikation ........34 Technische Daten ............35 202 1- 05 /1AM E S IC K | CLV 50 3/ C LV 505 BAR C ODE S CAN N E RS... - Page 4 Contents Getting started ............8 Electrical connection ..........11 Technical information ..........13 Configuration bar codes ...........17 Default settings ............17 Interfaces ..............17 Baud rate (RS 232) ...........18 Data, parity, stop bits (RS 232) .......19 Handshaking (RS 232) ..........20 Keyboard language ...........21 Enabling code types ..........23 Data output format ...........27 Read mode options ...........31 Hints on UL certification ..........34...
- Page 5 Laserstrahlung Die Geräte arbeiten mit einer Laserdiode (Rotlicht, λ = 650 nm) der Klasse 2 gemäß EN/IEC 60825-1:2014. Die Laserklasse ist identisch zum Normenausgabe- stand EN/IEC 60825-1:2007. 21 CFR 1040.10 wird erfüllt, mit Ausnahme der Abweichungen nach Laser Notice Nr. 50 vom 24. Juni 2007. Das gesamte Lese- fenster ist Austrittsöffnung der Laserstrahlung.
- Page 6 • Gehäuse nicht öffnen. Durch das Öffnen wird die Laserstrahlung nicht ausgeschaltet. Die Gefahr kann sich durch das Öffnen des Gehäuses erhöhen • Gültige nationale Bestimmungen zum Laserschutz beachten. V O R S I C H T Wenn andere als die hier angegebenen Bedienungs- oder Justiereinrichtungen benutzt oder andere Verfah- rensweisen ausgeführt werden, kann dies zu gefährli- cher Strahlungseinwirkung führen.
- Page 7 CAUTION Optical radiation: Laser class 2 The human eye is not at risk when briefly exposed to the radiation for up to 0.25 seconds. Exposure to the laser beam for longer periods of time may cause damage to the retina. The laser radiation is harmless to human skin.
-
Page 8: Einstieg
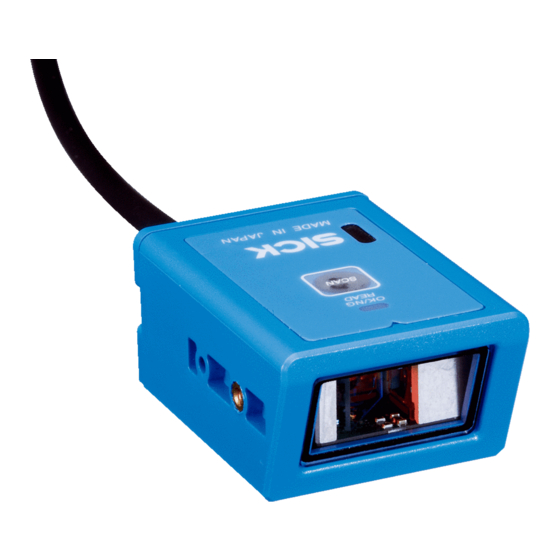
1 = Statusanzeige Leseergebnis (Good Read / No Read) 2 = Taste für Lesetakt (Trigger) Getting started Contents of package • CLV503/CLV505 fixed mount bar code scanner with RS 232 or USB interface, depending on the order • Quick Start Control elements... -
Page 9: Elektrischer Anschluss
Braun Spannungsversorgung Betriebsspannung DC 5 V ± 10 % Leistungsaufnahme, typ. 85 ... 150 mA (CLV503) 205 ... 500 mA (CLV505) Leistungsaufnahme, max. 1.500 mA (CLV503) 2.000 mA (CLV505) 202 1- 05 /1AM E S IC K | CLV 50 3/ C LV 505 BAR C ODE S CAN N E RS... - Page 10 RS-232-Schnittstelle > Gerät an die RS-232-Schnittstelle des Computers gemäß Aderfarbbelegung Seite 9 anschließen. > Um manuell einen Trigger auszulösen: Taste am Gehäuse drücken (siehe Seite 8). > Um das Gerät per Kommando zu triggern: folgende Kommandos über ein Terminalprogramm an das Gerät schicken: „ESC Z CR“...
-
Page 11: Electrical Connection
Brown White Power supply Operating voltage 5 V DC ± 10 % Current consumption, typ. 85 to 150 mA (CLV503) 205 to 500 mA (CLV505) Current consumption, max. 1,500 mA (CLV503) 2,000 mA (CLV505) 202 1- 05 /1AM E S IC K | CLV 50 3/ C LV 505 BAR C ODE S CAN N E RS... - Page 12 RS 232 interface > Connect the device to the RS 232 interface of the computer according to wire colour assignment on page 11. > To manually activate a trigger: press the button on the housing (see page 8). > To trigger the device via a command: send the following commands to the device via a terminal program: “ESC Z CR”...
-
Page 13: Technische Informationen
Prinzipielle Zuordnung der Scanlinie zum Barcode auf dem Objekt und zur Förderrichtung Allocation of the scanning line(s) for the bar code and conveyor system Öffnungswinkel / Aperture angle CLV503 CLV505 Öffnungswinkel / Aperture angle 44° 40° 202 1- 05 /1AM E... - Page 14 Winkelausrichtung des Geräts (Tilt, Pitch, Skew) Angle alignment of the device (Tilt, Pitch, Skew) CLV503 CLV505 α Azimuthwinkel (Tilt) / ± 20° ± 25° α Azimuth angle (Tilt) β Neigungswinkel (Pitch) / ± 35° ± 30° β Inclination angle (Pitch) γ...
- Page 15 Lesefelddiagramme / Reading field diagrams CLV503 Lesefeldhöhe/Reading field height (mm) –100 –200 –300 Leseabstand/Reading distance (mm) Auflösung/Resolution b: 0.25 mm a: 0.15 mm c: 0.50 mm d: 1.00 mm 2021- 05/1 AM E SI C K | C LV5 0 3 /C LV 505 BAR C ODE S CANN ERS...
-
Page 16: Konfigurations-Barcodes
CLV505 Leseabstand/Reading field height (mm) –50 –100 –150 –200 Leseabstand/Reading distance (mm) Auflösung/Resolution b: 0.25 mm a: 0.15 mm c: 0.50 mm d: 1.00 mm Konfigurations-Barcodes Werkseitige Grundeinstellung Die Werte der Grundeinstellung sind im Folgenden fett gedruckt (Seite 18 ff.). Um das Gerät auf die Grundeinstellung zurückzuset- zen, folgendermaßen vorgehen: 1. -
Page 17: Schnittstellen
Configuration bar codes Default settings The values of the basic default settings are printed in bold below (from page 18 on). efaults 1. Defaults Proceed as follows to reset the device with the basic default settings: _ZZ_ _ZZ_ 1. Scan bar code for “SET” 2. -
Page 18: Baud-Rate (Rs-232)
. Baud rate settings 2.1.1. Baud rate settings The baud rate is the rate at which bits are The baud rate is the rate at which bits a transmitted from the reader to the host, and transmitted from the reader to the host, Baud-Rate (RS-232) vice versa. -
Page 19: Daten, Parität, Stopp-Bits (Rs-232)
Daten, Parität, Stopp-Bits (RS-232) Data, parity, stop bits (RS 232) _ZZ_ _ZZ_ _L0_ _L0_ ata bits 7 data bits _L1_ _L1_ ata bits 8 data bits _L2_ _L2_ parity No parity _L3_ _L3_ en parity Even parity _L4_ _L4_ d parity Odd parity _L5_ _L5_... -
Page 20: Handshake (Rs-232)
Handshake (RS-232) Handshaking (RS 232) . Handshaking 2.1.3. Handshaking _ZZ_ _ZZ_ _P0_ _P0_ handshake No handshake _P1_ _P1_ sy/ready Busy/ready _P2_ _P2_ Modem _ZG_ _ZG_ N/XOFF XON/XOFF _P3_ _P3_ K/NAK ACK/NAK K/NAK NO ACK/NAK NO _P4_ _P4_ SPONSE RESPONSE ow Control time out Flow Control time out _I0_ _I0_... -
Page 21: Keyboard-Sprache
e language that has been selected on your same language that has been selected on your anguages supported depend on the The languages supported depend on the Keyboard-Sprache er model and software release. Please reader model and software release. Please ult your sales office for the languages consult your sales office for the languages Keyboard language... - Page 22 Keyboard-Sprache (2) Keyboard language (2) _ZZ_ _ZZ_ _PK_ _PK_ iss ( German ) Swiss ( German ) _PI_ _PI_ Dutch _PJ_ _PJ_ gian Belgian _PD_ _PD_ edish Swedish _PG_ _PG_ nish Finnish _KK_ _KK_ nish Danish _PE_ _PE_ rwegian Norwegian _PM_ _PM_ panese...
-
Page 23: Zu Lesende Codearten Aktivieren
Zu lesende Codearten aktivieren Enabling code types All codes excl. add-on Disable all 2021- 05/1 AM E SI C K | C LV5 0 3 /C LV 505 BAR C ODE S CANN ERS... - Page 24 Zu lesende Codearten aktivieren (2) Enabling code types (2) 3.1.2. Enabling of readable codes 3.1.2. Enabling of readable codes _ZZ_ _ZZ_ _A0_ _A0_ All codes excl. add-on All codes excl. add-on _R1_ _R1_ Enable UPC Enable UPC _R2_ _R2_ Enable UPC + 2 Enable UPC + 2 _R3_ _R3_...
- Page 25 Zu lesende Codearten aktivieren (3) Enabling code types (3) _ZZ_ _ZZ_ _BB_ _BB_ Enable Matrix 2of5 Enable Matrix 2of5 Enable Chinese Post Enable Chinese Post _JS_ _JS_ Matrix 2of5 Matrix 2of5 Enable Korean Postal Enable Korean Postal _WH_ _WH_ Authority code Authority code _B4_ _B4_...
- Page 26 Zu lesende Codearten aktivieren (4) Enabling code types (4) _ZZ_ _ZZ_ able DataMatrix Enable DataMatrix _BG0_ _BG0_ C000 - 140 ECC000 - 140 able DataMatrix Enable DataMatrix _BCC_ _BCC_ C200 ECC200 _BCH_ _BCH_ able Aztec Enable Aztec _BF2_ _BF2_ able Aztec runes Enable Aztec runes _BCD_ _BCD_...
-
Page 27: Datenausgabeformat
Datenausgabeformat Setzen von Prefix und Suffix Dieser Abschnitt zeigt die gebräuchlichsten Beispiele für ein Prefix (Vorspann) und ein Suffix (Nachspann), die jeweils im Leseergebnis aller Codearten entspre- chend gesetzt werden. Data output format Set prefix and suffix Here you will find the most common examples for a prefix and suffix which will be set for all code types. - Page 28 STX DATA ETX DATA CR LF CLV 503/ CLV 5 0 5 BA R C O DE S CA NNERS | SI C K 2021- 05/1AM E...
- Page 29 Löschen aller Prefixe und Suffixe Clear all prefixes and suffixes 2021- 05/1 AM E SI C K | C LV5 0 3 /C LV 505 BAR C ODE S CANN ERS...
- Page 30 Lesebetriebsarten Die folgenden Lesebetriebsarten sind wählbar: Einzellesung (Single read) Wenn das Gerät einen Barcode erfolgreich gelesen hat, schaltet es sich aus. Für eine weitere Lesung ist das Gerät erneut zu triggern. Diese Option und die Betriebsart „Disable trigger“ können nicht gleichzeitig eingestellt werden.
-
Page 31: Read Mode Options
Wartezeit für Codeanhänge (Add-on wait mode) Wird angewendet, wenn die Option UPC/EAN mit An- hang (UPC/EAN with add-on) gewählt ist. Das Gerät sucht innerhalb der gewählten Zeitdauer nach einem gültigen Codeanhang. Findet er einen gültigen Codeanhang, gibt das Gerät sofort die Daten (Code + Codeanhang) aus. - Page 32 Disable trigger This is applicable to devices which have a trigger switch. When this option is selected, the device will stay ON all the time. NOTE: Selecting this option for a device means that the laser diode is ON continuously, which may reduce the lifetime of this component.
-
Page 33: Lesebetriebsarten
Lesebetriebsarten Read mode options Read mode options 5.1. Read mode options _ZZ_ _ZZ_ _S0_ _S0_ gle read Single read _S1_ _S1_ ltiple read Multiple read _S2_ _S2_ ntinuous read Continuous read _S7_ _S7_ able trigger Disable trigger _S8_ _S8_ able trigger Enable trigger d-on wait mode Add-on wait mode... -
Page 34: Hinweise Zur Ul-Zertifikation
Hinweise zur UL-Zertifikation Die Geräte der Serie CLV505 sind nach UL60950-1 zertifiziert, die UL-Datei trägt die Bezeichnung E244281. Die Geräte müssen für den bestimmungs- gemäßen Betrieb durch LPS- oder Class2-Netzgeräte versorgt werden. Die Zertifizierung ist nur gültig bei entsprechender Gerätekennzeichnung auf dem Typen- schild des jeweiligen Geräts. -
Page 35: Technische Daten
Technical Data Technical Data and dimensional drawings of the de- vices see type-dependent Product Data Sheets online at: www.sick.com/CLV50x. N O T E The bar codes being read must conform to at least quality level C in accordance with ISO/IEC 15416. - Page 36 +81 3 5309 2112 Phone +44 (0)17278 31121 Malaysia Phone +603-8080 7425 Phone +1 800.325.7425 Mexico Vietnam Phone +52 (472) 748 9451 Phone +65 6744 3732 Detailed addresses and further locations at www.sick.com SICK AG | Waldkirch | Germany | www.sick.com...
Need help?
Do you have a question about the CLV503 and is the answer not in the manual?
Questions and answers