Table of Contents
Advertisement
User Manual
Version 9.0
This publication contains proprietary information of the Card Scanning Solution Company, provided
for customer use only. No other use is authorized without the express written permission of Card
Scanning Solution.
©
1
IdScan User Manual version 9.0
Card Scanning Solutions, all rights reserved
Advertisement
Table of Contents

Related Manuals for CSSN ScanShell 1000


Summary of Contents for CSSN ScanShell 1000
- Page 1 User Manual Version 9.0 This publication contains proprietary information of the Card Scanning Solution Company, provided for customer use only. No other use is authorized without the express written permission of Card Scanning Solution. © IdScan User Manual version 9.0 Card Scanning Solutions, all rights reserved...
-
Page 2: Disclaimer
Disclaimer DISCLAIMER WARRANTY Card Scanning Solutions provides this publication “as is” without warranty of any kind, either express or implied, including, but not limited to, the implied warranties of merchantability or suitability for any particular purpose. Card Scanning Solutions reserves the right to revise this publication, and to make changes in the content hereof from time to time without notification. -
Page 3: Table Of Contents
Editing and deleting custom fields ... 19 ID data saving...19 ID C VERIFICATION ...19 To verify a card:...19 Understanding the VERIFICATION status light...20 What to do when verification fails? ...20 SCANSHELL 1000 ...21 ...21 VERVIEW ...21 ETTING TARTED Installation ...21... - Page 4 Understanding the VERIFICATION status light...53 What to do when verification fails? ...53 CONFIGURING THE PROGRAM ...55 ...56 UTOMATION TAB Data Source ...56 Scanner button assignment ...57 Saving options...58 Image manual save ...58 Image auto save ...58 File Naming ...59 Driver License images tab ...59 General documents images ...60...
-
Page 5: Table Of Figures
Figure 9: Scanshell 1000 button assignment ...24 Figure 10: Scanshell 1000 button configuration...25 Figure 11: status bar document type indication ...26 Figure 12: ScanShell 1000, ID card placing ...28 Figure 14: Scanned driver license...29 Figure 15: ID Data - basic mode...30 Figure 16: Figure 17: ID Data - Details mode ...31... - Page 6 Table of Content Figure 30: Scanshell 1000 button configuration...57 Figure 31: File naming configuration – Driver license...59 Figure 32: File naming configuration – General documents ...60 Figure 33: Scanner configuration panel - License data processing tab ...61 Figure 34: Scanner configuration panel – OCR TEXT EXPORT tab ...65 Figure 35: Scanner configuration panel –...
-
Page 7: Getting Started
• USB port • 15 MB free storage space CONNECTING THE SCANNER The scanner is connected to the computer via the USB port. To connect the reader, do the following: Place the scanner on a flat, firm, solid surface with easy access. -
Page 8: Installation
The very first time you start the program after installation, you will be prompted to enter your registration key. You'll find your registration key sticker on the box of your ScanShell scanner. On the first time you start the program, you will also be prompted to check for new updates. -
Page 9: Introduction
Barcode Reader Check Reader Signature Reader The modules available to you depend on the package you purchased. The modules configuration usually depends on your type of scanner as follow: Scanner Modules Scanshell idScan for Business Cards, Check Reader, Signature Reader 35... -
Page 10: Scanshell 800
Full automation of the scan process allows chain-feeding of media to the Scanshell 800 scanner while image processing takes place in the background. The ScanShell 800 scanner is capable of scanning any photo media due to its powerful scanning engine – including paper photos, ID cards, and even rigid plastic credit cards. -
Page 11: The Program Interface
Scanshell 800 THE PROGRAM INTERFACE The following figure shows the application main screen: THE MAIN SCREEN CONTROLS • Always on Top: Toggles the application window between normal mode and always-on-top mode. • Help: Displays this document. • Print Preview: Shows the scanned image and the data before printing. •... - Page 12 Image: Click to enlarge the image for better reading. • Scan Otherwise, activates the Note: Opening a file is possible only if a scanner is physically connected to the PC, or if the license key used is a temporary key. • Toggle Image Scanner (ScanShell 800/800N/2000 or ScanShell 1000), Magnetic reader, or an image file on the hard disk.
- Page 13 Scanshell 800The main screen controls • Open Configuration all the application preferences can be set. • Exit / End of Scan: Used to close the application or to save the current image (used in automatic save mode only). • Background save progress background saving progress (used in automatic save mode only).
-
Page 14: Program Operation
Click on this button to for automatic detection of card insertion. If this button is pressed, scanning will start as soon as you insert a card into the scanner. If auto-detect is not turned on, scanning starts when you click the... -
Page 15: Selecting Country And State
9. Start the scan if Auto-detect button. Note: Image file can be selected if a scanner is physically connected to the PC, or if the license key used is a temporary key. Scanner Connection: A green light indicates that the scanner is connected to the PC. -
Page 16: Scanning A New Document
Scanshell 800Scanning a new document SCANNING A NEW DOCUMENT To scan a new document, just feed the document into the scanner. If the scanner is set to automatic scan mode, the scanner will start scanning the card automatically. In manual scan mode, the scanner starts scanning when you click on the Scan button in the main screen. -
Page 17: Id Data
Scanshell 800ID Data ID DATA After scanning and processing the ID card, you can review the acquired text by opening the ID Data window. To open the ID Data window, press the OCR button on the main screen. The ID Data window shows the data retrieved either from the scanned image by OCR (Optical Character Recognition), or from the scanned image Barcode, depending on the option selected. -
Page 18: Custom Fields - User Defined Fields
Scanshell 800ID Data Figure 5: Figure 6: ID Data - Details mode CUSTOM FIELDS - USER DEFINED FIELDS Custom fields can be useful for creating badges and other purposes. • Click on the 'OCR' button at the bottom left of the main screen. •... -
Page 19: Editing And Deleting Custom Fields
Scanshell 800 • Click 'Add' and type in a name for the field. • Repeat the process to create additional fields. • Click OK. You will find new fields in the Custom fields' window. You can now type values or data into the field. Editing and deleting custom fields Repeat the process above. -
Page 20: Understanding The Verification Status Light
9. IdScan will scan the card, and than prompt you to scan the card a second time. Insert the card again in the scanner/reader and repeat the steps above. 10. If the data from the two sources on the card matched, the icon on the verification button will be green. -
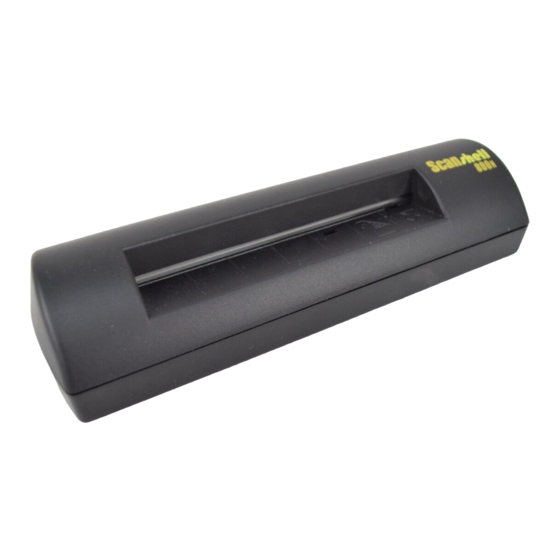
Page 21: Scanshell 1000
The Scanshell 1000 package includes the following modules: idScan for Passports, idScan for Driving Licenses, idScan for business cards, Barcode reader, Check reader , Signature reader Note: A Scanshell 1000 scanner must be connected to the computer in order to use idScan for passports. OVERVIEW... -
Page 22: The Program Interface
Scanshell 1000 THE PROGRAM INTERFACE The following figure shows the application main screen: THE MAIN SCREEN CONTROLS • Always on Top: Toggles the application window between normal mode and always-on-top mode. • Help: Shows this document. • Print Preview: Shows the scanned image and the data before printing. - Page 23 • Scan the image source is set to scanner. Otherwise, activates the Note: Opening an existing file is possible only if a scanner is physically connected to the PC, or if the license key used is a temporary key. •...
-
Page 24: Scanner Button Assignment
FTP Progress Export • when State Auto Detect is selected. SCANNER BUTTON ASSIGNMENT Scanning using Scanshell 1000 can be initiated either by pressing Scan Image button, or pressing the scanner buttons, after they have been configured. To configure the scanner buttons: 1. -
Page 25: Scanning Documents
Click on this button to enable scanning using the scanner buttons. If this button is pressed, scanning will start as soon as you press one of the scanner buttons, according to your buttons configuration. If auto-detect is not turned on, scanning starts when you click the IdScan User Manual version 9.0... -
Page 26: Category
Scanshell 1000 CATEGORY ScanShell 800support all document reading as follows: • Driver Licenses • Passports • Business cards • Barcodes • Checks • Signatures Categories • Combined category: Driver license/ID/Business card: In this mode, ScanShell scans a document assuming that the document is a either a driver license or an ID card. -
Page 27: Selecting Country And State
Auto-detect to your buttons configuration. Note: Image file can be selected only if a scanner is physically connected to the PC, or if the license key used is a temporary key. Scanner Connection: A green light indicates that the scanner is connected to the PC. -
Page 28: Scanning A New Document
Scanshell 1000 SCANNING A NEW DOCUMENT To scan a new document, place the document on the scanner, in the left corner nearest to the scanner buttons. When scanning a passport, the entire glass surface (3" X 5") is being scanned unless the idScan software is configured to scan only the data lines of the passport. -
Page 29: Figure 14: Scanned Driver License
Scanshell 1000 Once the scan is complete, the program will process the image and data. The scanned image and data will be saved according to the settings you specified in the configuration panel, see chapter 7, Configuring the Program, page 55. -
Page 30: Id Data
Scanshell 1000 ID DATA After scanning and processing the ID card, you can review the acquired text by opening the ID Data window. To open the ID Data window, press the OCR button on the main screen. The ID Data window shows the data retrieved either from the scanned image by OCR (Optical Character Recognition), or from the scanned image Barcode, depending on the option selected. -
Page 31: Custom Fields - User Defined Fields
Scanshell 1000 ID Data Figure 16: Figure 17: ID Data - Details mode CUSTOM FIELDS - USER DEFINED FIELDS Custom fields can be useful for creating badges and other purposes. • Click on the 'OCR' button at the bottom left of the main screen. -
Page 32: Editing And Deleting Custom Fields
Scanshell 1000 ID Data • Click 'Add' and type in a name for the field. • Repeat the process to create additional fields. • Click OK. You will find new fields in the Custom fields' window. You can now type values or data into the field. -
Page 33: Idscan User Manual Version 9.0 © Card Scanning Solutions, All Rights Reserved
(This scan will be saved to the database if you will save the record). 10. If you are using the AutoDetect card insertion mode, click on the scanner button. 11. IdScan will scan the card, and than prompt you to scan the card a second time. -
Page 34: Understanding The Verification Status Light
Try authenticating the card again. Passport as well as al other documents should be placed on the glass of the scanner with the side to be scanned facing the glass. When scanning ID and business cards, they should be placed on the top right corner as shown in the figure below. -
Page 35: Scanshell 800 N
When using the automatic page-feed detection, idScan launches the scan job immediately upon the insertion of a document into the ScanShell 800N scanner. The image is scanned and saved to the hard disk in a predefined color scheme, resolution, and scanning area, in a user-defined format (BMP, JPG, PCX, PNG, TIFF, TGA, PSD). -
Page 36: The Program Interface
Scanshell 800 N THE PROGRAM INTERFACE The following figure shows the application main screen: THE MAIN SCREEN CONTROLS • Always on Top: Toggles the application window between normal mode and always-on-top mode. • Help: Displays this document. • Print Preview: Shows the scanned image and the data before printing. •... - Page 37 • Scan the image source is set to scanner. Otherwise, activates the Note: Opening a file’ is possible only if a scanner is physically connected to the PC, or if the license key used is a temporary key. • Toggle Image Scanner (ScanShell 800N or an image file on the hard disk).
- Page 38 Scanshell 800 N • Background Save Progress background saving progress (used in automatic save mode only). • FTP Progress Export • Detected State when State Auto Detect is selected. © IdScan User Manual version 9.0 (Status bar): Shows the (Status bar): Shows the progress of FTP (Status bar): Displays the detected state Card Scanning Solutions, all rights reserved The main screen controls...
-
Page 39: Program Operation
Auto-detect button. Note: Image file can be selected if a scanner is physically connected to the PC, or if the license key used is a temporary key. Scanner Connection: A green light indicates that the scanner is connected to the PC. -
Page 40: Scanning A New Document
Scanning a new document SCANNING A NEW DOCUMENT To scan a new document, just feed the document into the scanner. If the scanner is set to automatic scan mode, the scanner will start scanning the card automatically. In manual scan mode, the scanner starts scanning when you click on the Scan button in the main screen. -
Page 41: Card Data
Scanshell 800 N CARD DATA After scanning and processing the card, you can review the acquired text by clicking button on the main screen. Business card data image by OCR (Optical Character Recognition), or from the scanned image Barcode, depending on the option selected. Irrelevant fields are disabled. The data displayed in Business card data is transferred to a text file (if this option is enabled). -
Page 42: 1D And 2D Modes
Scanshell 800 N As in all other data windows, you can edit data in the fields, and your changes will be saved to the data file. 1D AND 2D MODES idScan is capable of reading both 1D barcodes, which are the traditional barcodes appearing on various products, as well as the new 2D barcode, which is setting new standards for identification. -
Page 43: Data Saving
Scanshell 800 N General Document Mode Figure 23: General Document data window In General Document scanning mode, both sides of a document can be scanned. Use the A/B button at the button of the window to view the two document sides. DATA SAVING Text data saving options are controlled from the configuration panel's Automation tab. -
Page 44: Magshell
License with a magnetic strip. GETTING STARTED Please read chapter 1. Getting Started on page 7 for information concerning the installation of the application and connecting the scanner. IdScan User Manual version 9.0 © Card Scanning Solutions, all rights reserved... -
Page 45: The Program Interface
MagshellThe Program Interface THE PROGRAM INTERFACE The following figure shows the application main screen: THE MAIN SCREEN CONTROLS • Always on Top: Toggles the application window between normal mode and always-on-top mode. • Help: Displays this document. • Print Preview: Shows the scanned image and the data before printing. •... - Page 46 • Scan the image source is set to scanner. Otherwise, activates the Note: ‘Toggle to file’ is possible only if a scanner is physically connected to the PC, or if the license key used is a temporary key. • Toggle Image Scanner (Magshell magnetic reader, ScanShell scanner, or an image file on the hard disk).
- Page 47 MagshellThe main screen controls • Open Configuration which all the application behavior can be set. • Exit / End of Scan: Used to close the application or to save the current image (used in automatic save mode only). • Background Save Progress background saving progress (used in automatic save mode only).
-
Page 48: Swiping Cards
1. Click on the arrow and select the Scanner Connection: A green light indicates that the scanner is connected to the PC. A red light indicates that no scanner was found. If no scanner is detected, input of new data is not possible. -
Page 49: Figure 25: Id Data - Basic Mode
MagshellID Data The ID Data window shows the data retrieved either from the card. Irrelevant fields are disabled (depending on the state). The data displayed in the ID Data window can be reviewed and edited. Once a new ID card is scanned, this data is transferred to a text file (if this option is enabled). -
Page 50: Custom Fields - User Defined Fields
MagshellID Data Figure 26: Figure 27: ID Data - Details mode CUSTOM FIELDS - USER DEFINED FIELDS Custom fields can be useful for creating badges and other purposes. • Click on the 'OCR' button at the bottom left of the main screen. •... -
Page 51: Editing And Deleting Custom Fields
MagshellID Data • Click 'Add' and type in a name for the field. • Repeat the process to create additional fields. • Click OK. You will find new fields in the Custom fields' window. You can now type values or data into the field. Editing and deleting custom fields Repeat the process above. -
Page 52: Id Card Verification
8. If you are using the AutoDetect card insertion mode, just insert the card into the Scanshell 800 scanner, or click the Scanshell 1000 button. 9. If the data from the two sources on the card matched, the icon on the verification button will be green. -
Page 53: Understanding The Verification Status Light
MagshellID Card VERIFICATION UNDERSTANDING THE VERIFICATION STATUS LIGHT The status light provides indications for the verification process, as follows: • Solid black color, the verification function is not activated. • Solid brown color, the verification function is activated and waits for the reference scan or swipe. -
Page 54: Manual Save
MagshellID Card VERIFICATION MagShell 900 Reader Operation When the reader is in standby and ready to be used, it should have a steady green light indicator. The reading of a driver license can be done from right to left or left to right (the reader is bi directional). -
Page 55: Configuring The Program
(see figure 1 page 11). The following configuration panel will be displayed: Figure 29: Scanner configuration panel The configuration panel first tab is the Automation tab. Here you can set various parameters of scanning and saving data and images. The Automation tab consists of three main sections: •... -
Page 56: Automation Tab
2000) to auto-detect document insertion and start the scanning and saving process automatically. When using the ScanShell 1000 scanner, any of the scanner buttons can be pressed to start the scan. In addition, the scanner buttons can be configured, see next section. -
Page 57: Scanner Button Assignment
Configuring the Program SCANNER BUTTON ASSIGNMENT If you use the Scanshell 1000 scanner, clicking the 'Scanner button assignment' will open the following window, allowing you to assign specific document category to each of the scanner buttons. To configure the Scanshell 1000 buttons: Select a document type from the dropdown list of the desired scanner button. -
Page 58: Saving Options
IMAGE AUTO SAVE Image auto save is particularly useful for large batch scanning jobs. This option enables chain-feeding the scanner while image saving is done automatically without user interference. Scan scheme: Select the desired saving scheme (single side, double sided, or two sides on the same image. -
Page 59: Figure 31: File Naming Configuration – Driver License
Configuring the Program FILE NAMING Clicking on the ‘File naming and type’ button will take you to the following configuration screen: Figure 31: File naming configuration – Driver license This dialog sets the naming properties of the automatically saved image files. The file destination folder can be typed into the ‘File Path’, or selected by clicking the File Path button. -
Page 60: Figure 32: File Naming Configuration – General Documents
Configuring the Program • Use file time stamp as file name: The image is named with the current time and date. • Save to a file name using extracted data from ID: The image file name is based on the value of a selected field. Currently, the only option is to use the NAME field from the ID card. -
Page 61: License Text Export Tab
Configuring the Program LICENSE TEXT EXPORT TAB Figure 33: Scanner configuration panel - License data processing tab • Extract full image: extracts the complete ID card image and saves it as a separate file. • Extract face image: Isolates the face image rectangle from the ID card image and saves it as a separate file. -
Page 62: Extract Full Image
Configuring the Program License Text Export tab EXTRACT FULL IMAGE The full card image is extracted from the ID image and saved to a file. The face image is saved under the ID image name (e.g. c:/images/ID-1.bm). To find out more about file naming methods, see the Image manual save and Image auto-save sections on page 58. -
Page 63: Idscan User Manual Version 9.0 © Card Scanning Solutions, All Rights Reserved
Configuring the Program Each ID scan (record) is organized in a single line. Each record has the following organizational order: ID number, License number, Name, Address, City, State, Zip, Issue date, Expiry date, Birth date, Sex, License class, Social security, ID image file name, First name, Middle name, Last name, Name suffix, Scan time, Scan date, Text line1, Text line2, Text line3. -
Page 64: Append Records
Configuring the Program APPEND RECORDS: The records can be written to the text file in two ways: • Appending mode: In this mode, each new record is appended to the end of the text as a new text line. To activate this mode, check the checkbox titled Append Records. -
Page 65: Figure 34: Scanner Configuration Panel – Ocr Text Export Tab
OCR text export tab OCR TEXT EXPORT TAB Figure 34: Scanner configuration panel – OCR TEXT EXPORT tab By checking the checkbox, text extracted from the scanned card will be saved to a text file, which will have the same name as the image file (ending with the .txt extension), and which will be placed in the directory where the image files are saved. -
Page 66: Figure 35: Scanner Configuration Panel – Image Tab
IMAGE TAB The Image tab lets you set various image scanning parameters as follows: Figure 35: Scanner configuration panel – Image tab Document size: The document size determines the size of the scanned area. This area is defined by the width and height values, as shown in Figure 11 below using the... - Page 67 Configuring the Program • Full size (3"x5") Scan the full size of the document • Data section only – Scan only the data section of the document. Driver License size - offers the following options: • ID card (landscape) • ID card (portrait) •...
-
Page 68: Text Stamp
For detailed instructions on how to calibrate the scanner, see Appendix C - Maintaining the scanner, page 79. CLEANING THE SCANNER Cleaning the scanner from time to time to improves the scan quality. For detailed instructions on how to clean the scanner, see Appendix C - Maintaining the scanner, page 79. -
Page 69: Figure 38: Scanner Configuration Panel – Print Tab
The Print tab has the following options: Figure 38: Scanner configuration panel – Print tab Image size as percent of actual size: Reduces / enlarges the image size from 50% to 200% of the actual document size. -
Page 70: Figure 39: Print Custom Fields Dialog
Configuring the Program Printing – Print tab Printing custom fields: Allows you to print custom, user defined fields. This is useful for creating badges and for other purposes. Custom fields can be added in the OCR window, see Custom fields - User defined fields, page 18. This is useful to print badges. -
Page 71: Live Update Tab
Configuring the Program LIVE UPDATE TAB Live Update checks for updates whenever you are connected to the Internet, and updates your program automatically with the most recent version of your program available. Note: If you don’t configure your software for automatic Live Update, you can still update it manually using the Live Update button in the main screen. -
Page 72: Figure 41: Live Update User Details
Configuring the Program Live Update Tab ABC12345 jfk80DD Figure 41: Live Update user details 9. Fill in your details. Note: License, Email and company are obligatory and must be filled in. 10. Click ‘OK’. © IdScan User Manual version 9.0 Card Scanning Solutions, all rights reserved... -
Page 73: Magnetic Reading Tab
Configuring the Program MAGNETIC READING TAB (Only applicable if using a magnetic reader to swipe cards). The Magnetic Reading tab offers options for controlling the way the text file is saved are as follows: MANUAL SAVE In this mode the user saves the text file manually. The data is formatted into a single record and saved either to a text file or to the clipboard. -
Page 74: Save Immediately After Swipe
Configuring the Program Save to a fixed file name: The same file name is used for all the cards. If Append Record is selected, the records are accumulated in the file. If it is not checked, each scan overwrites the previous record. Appending mode: In this mode, each new record is appended to the end of the text as a new text line. -
Page 75: Appendix A - Supported States For Detection
Appendix A – Supported States for Detection APPENDIX A – SUPPORTED STATES FOR DETECTION The following table lists the countries and states supported by idScan. This list will be updated in each new version release of idScan. Region Region Name IdScan User Manual version 9.0 Country Country... - Page 76 Appendix A – Supported States and Countries Region Region Country Name Name Canada Canada America Chile Mexico Brazil Bermuda Bahamas Costa Rica Peru Puerto Rico Nicaragua Guatemala El Salvador Europe France United Kingdom and Ireland Israel Germany Spain Romania Norway Holland Luxemburg Lithuania...
- Page 77 Appendix A – Supported States and Countries Region Region Country Name Name Asia Malaysia New Zealand Singapore General University Documents documents (USA) Employment card © IdScan User Manual version 9.0 Country Document Name Victoria Tasmania Western Australia South Australia Northern Territory Malaysia New Zealand Singapore...
-
Page 78: Idscan User Manual Version 9.0 © Card Scanning Solutions, All Rights Reserved
• ScanShell 900: Driver for the scanner can be found at http://www.id-scan.com/FTP/Scanner_Drivers/MagShell900 • ScanShell 1000: Driver for the scanner can be found at http://www.id-scan.com/FTP/Scanner_Drivers/ScanShell1000 • Scanshell 600, USB 201: Driver for the scanner can be found at http://www.ID-scan.com/FTP/Scanner Drivers/USB 201 IdScan User Manual version 9.0... -
Page 79: 10. Appendix C - Maintaining The Scanner
To calibrate the ScanShell 800scanner, open the configuration panel’s Image tab, insert the calibration paper card that was part of the scanner package into the scanner, and click on the Calibrate button. The ScanShell 1000 does not require a calibration paper, just click on the Calibrate button. -
Page 80: Appendix D - Minimized Interface & Program Line Switches
Appendix D – Minimized Interface & Program Line Switches 11. APPENDIX D - MINIMIZED INTERFACE MODE & COMMAND-LINE SWITCHES The IdScan application behavior can be modified to best suit your needs. This is done by running the program while using command lines switches. IdScan offers the following switches: MI –... -
Page 81: Figure 43: Main Screen In Minimized Mode
Minimized Interface mode. IdScan User Manual version 9.0 Barcode Figure 43: Main screen in minimized mode status: Indicates if the scanner is connected to the PC. © Card Scanning Solutions, all rights reserved Select country & State Scanner connection status... -
Page 82: 12. Appendix E - Full Export Fields List
Appendix F – Supported States for Detection 12. APPENDIX E – FULL EXPORT FIELDS LIST The full list of fields exported from idScan (in this order). Total: 107 fields. 1. ID 2. License 3. Name 4. Address 5. City 6. State 7. - Page 83 Appendix F – Supported States for Detection 33. County 34. Address2 35. Address3 36. Address4 37. Address5 38. Address6 39. Custom0 40. Custom1 41. Custom2 42. Custom3 43. Custom4 44. Custom5 45. Custom6 46. Custom7 47. Custom8 48. Custom9 49. Duplicate 50.
- Page 84 Appendix F – Supported States for Detection 68. Phone1 69. PhoneLabel2 70. Phone2 71. PhoneLabel3 72. Phone3 73. PhoneLabel4 74. Phone4 75. FaxLabel0 76. Fax0 77. FaxLabel1 78. Fax1 79. FaxLabel2 80. Fax2 81. FaxLabel3 82. Fax3 83. EmailLabel0 84. Email0 85.
- Page 85 Appendix F – Supported States for Detection 103. CheckDate 104. CheckIssue 105. CheckIssueBank 106. CheckMicr 107. CheckNum © IdScan User Manual version 9.0 Card Scanning Solutions, all rights reserved...
Need help?
Do you have a question about the ScanShell 1000 and is the answer not in the manual?
Questions and answers