
Subscribe to Our Youtube Channel
Related Manuals for Rangemaster Classic 60 Gas


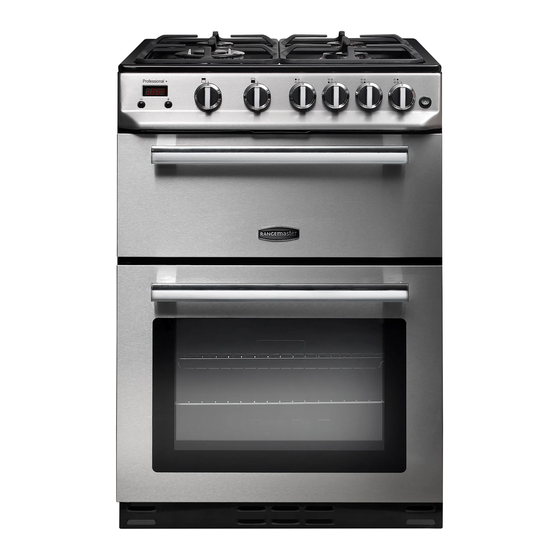
Summary of Contents for Rangemaster Classic 60 Gas
- Page 1 Classic 60 Gas Professional+ 60 Gas User Guide Installation & Service Instructions U111323-02a...
-
Page 3: Table Of Contents
Contents Before You Start... Installation General instructions Dear Installer Installation and Maintenance Safety Requirements and Regulations Peculiar smells Location of Cooker Ventilation Positioning the Cooker Personal Safety General instructions Cooker Care Installation of the Cooker Cleaning Moving the Cooker If a Fault Occurs Electrical Connection Anti-tilting kit Cooker Overview... -
Page 5: Before You Start
Before You Start... Peculiar smells Thank you for buying this cooker. It should give you many years of trouble-free cooking if installed and operated When you first use your cooker it may give off a slight odour. correctly. It is important that you read this section before you This should stop after a little use. -
Page 6: Cooker Care
DO NOT spray aerosols in the vicinity of the cooker Do not attempt to lift or move the appliance by while it is on. pulling the door handles. NEVER allow anyone to climb or stand on the hob. Use dry oven gloves when applicable – using damp gloves might result in steam burns when you touch a hot surface. -
Page 7: Cooker Overview
Cooker Overview TOP OVEN 1 at shelf Fig. 2.1 Shelf Position 4 Shelf Position 3 Shelf Position 2 Shelf Position 1 Shelf Position 5 Shelf Position 4 Shelf Position 3 Shelf Position 2 Shelf Position 1 MAIN OVEN 2 at shelves The 60cm cooker (Fig. - Page 8 Sparks are generated as long as the control knob is held in. Fig. 2.4 If, when you let go of the control knob, the burner goes out, then the FSD has not been bypassed. Turn the control knob to the off (0) position and wait for one minute before you try again, this time making sure to hold in the control knob for slightly longer.
-
Page 9: The Griddle
The Griddle Fig. 2.8 The griddle is intended for use on the right of the hob, sitting on the smaller (1kW) and medium (1.7kW) burners (Fig. 2.8). It is designed for cooking food on directly. DO NOT use pans of any kind on it. The griddle surface is non-stick and metal cooking utensils (e.g. - Page 10 Cooking • Ensure that food is placed centrally on the shelf and that there is sufficient room around the baking tray / dish to allow for maximum circulation. • Stand dishes on a suitably sized baking tray on the shelf to prevent spillage onto the oven base and to help reduce the amount of cleaning required.
-
Page 11: The Ovens
The Ovens Fig. 2.10 Fig. 2.11 Before using the ovens for the first time and to dispel manufacturing odours turn them to the maximum temperature setting and run them empty for 45 minutes. To clear the smell make sure the room is well ventilated to the outside, by opening windows or turning on a cookerhood. -
Page 12: Oven Accessories
Oven Accessories Bottom Oven 2x The Wire Grid (Fig. 2.18) Top Oven Clean the accessories thoroughly with warm water, detergent The Grill Pan and Handle Set (Fig. 2.14) (Fig. 2.15) and a soft clean cloth on first use. Warning: The top oven door must be fully open Shelf supports (Fig. - Page 13 Fig. 2.14 Fig. 2.18 Grill pan handle Grill pan Fig. 2.19 Fig. 2.15 Fig. 2.16 Fig. 2.17...
-
Page 14: Clock
Clock Setting the time The clock must be set to the time of Audible warning time adjustment day before the oven will work The audible warning time can be set to any time between 0:00 and 23:59 hours. Step. 1 The audible warning time is for warning purposes only. -
Page 15: Cooking Tips
Cooking Tips Tips on Cooking Fig. 4.1 If you want to cook more than one dish, choose dishes that require approximately the same cooking time. However, dishes can be ‘slowed down’ slightly by using small containers and covering them with aluminium foil, or ‘speeded up’ slightly by cooking smaller quantities or placing them in larger containers. -
Page 16: Cleaning Your Cooker
Cleaning Your Cooker DocNo.042-0003 - Cleaning - CE 90 - GENERIC Isolate the electricity supply before carrying out any major Fig. 5.1 cleaning. Allow the cooker to cool. NEVER use paint solvents, washing soda, caustic cleaners, biological powders, bleach, chlorine based bleach cleaners, coarse abrasives or salt. -
Page 17: Control Panel And Doors
Control Panel and Doors Fig. 5.2 Avoid using any abrasive cleaners, including cream cleaners. For best results, use a liquid detergent. The same cleaner can also be used on the doors, or alternatively, using a soft cloth wrung out in clean hot soapy water. - Page 18 Manual cleaning of the catalytic liners is not recommended. Fig. 5.7 Damage will occur if a soap-impregnated steel wool pad or any other abrasives are used. In addition, we do not recommend the use of aerosol cleaners on the liners. The walls of a catalytic liner may become ineffective due to excess grease.
- Page 19 Cleaning the Stainless Steel Parts • Clean the stainless steel parts of your appliance on a regular basis. • Wipe the stainless steel parts with a soft cloth soaked in only water. Then, dry them thoroughly with a dry cloth. Do not clean the stainless steel parts while they are still hot from cooking.
-
Page 20: Troubleshooting
Troubleshooting Problem Possible Cause Solution • The oven and/or grill may be in • Check the position of the control Oven and/or grill (if available) do not work. the ´off` position. knob. • Supply gas pressure may not be • Check the gas supply and gas correct. - Page 21 Problem Possible Cause Solution Burner is not igniting or only partially • Burner parts may not be clean or • Ensure that parts of the appliance lighting. dry. are dry and clean. Burner sounds noisy. • - • This is normal. The noise may reduce as they heat up.
-
Page 22: Installation
INSTALLATION Check the appliance is electrically safe and gas sound when you have finished. Installation Dear Installer Instructions for the Installer Ventilation requirements Before you start your installation, please complete the details below, so that, if your customer has a problem relating to For rooms with a volume of less than 5 m3, permanent your installation, they will be able to contact you easily. -
Page 23: Positioning The Cooker
INSTALLATION Check the appliance is electrically safe and gas sound when you have finished. Positioning the Cooker Fig. 7.1 Air inlet section min. 100 cm Fig. 7.2 shows the minimum recommended distance from the cooker to nearby surfaces. The cooker should not be placed near the fridge or on a base. The hotplate surround should be level with, or above, any adjacent work surface. - Page 24 INSTALLATION Check the appliance is electrically safe and gas sound when you have finished. We recommend that two people manoeuvre the cooker. Fig. 7.4 Make sure that the floor covering is firmly fixed, or removed, Gas Pipe to prevent it being disturbed when moving the cooker around.
-
Page 25: Electrical Connection
INSTALLATION Check the appliance is electrically safe and gas sound when you have finished. Points that must be checked during Fig. 7.5 fixed gas connection assembly Gas inlet block The method used to assemble a fixed gas connection (gas connection made by threads, e.g. a nut) varies according to the country you are in. -
Page 26: Anti-Tilting Kit
INSTALLATION Check the appliance is electrically safe and gas sound when you have finished. • The supply cord should be kept away from hot parts Fig. 7.6 of the appliance and must not be bent or compressed. Otherwise the cord may be damaged, causing a short circuit. -
Page 27: Adjusting The Feet
INSTALLATION Check the appliance is electrically safe and gas sound when you have finished. Adjusting the feet Fig. 7.10 Your product stands on four adjustable feet (Fig. 7.10). For safe operation, it is important that your appliance is correctly balanced. Make sure the appliance is level prior to cooking. To increase the height of the appliance, turn the feet anti- clockwise. -
Page 28: Conversion To Lp Gas
WARNING – SERVICING TO BE CARRIED OUT ONLY BY AN AUTHORISED PERSON Disconnect from electricity and gas before servicing. Check appliance is safe when you have finished. Conversion to LP Gas Check the ‘Technical Data’ section at the back of the book Fig. - Page 29 WARNING – SERVICING TO BE CARRIED OUT ONLY BY AN AUTHORISED PERSON Disconnect from electricity and gas before servicing. Check appliance is safe when you have finished. Adjusting the minimum flame position Fig. 8.4 Clip First of all, make sure that the appliance is unplugged from the mains electrical supply and that the gas feed is open.
-
Page 30: Pressure Testing
WARNING – SERVICING TO BE CARRIED OUT ONLY BY AN AUTHORISED PERSON Disconnect from electricity and gas before servicing. Check appliance is safe when you have finished. Pressure Testing Connect the appliance to the gas supply. Check the appliance is gas sound. The gas pressure can be measured at one of the hotplate injectors. -
Page 31: Circuit Diagram
Circuit Diagram DocNo.090-0002 - Circuit diagrams - 90 ceramic GENERIC Thermostat... -
Page 32: 10. Technical Data
10. Technical Data This cooker is designed for use on either: • Natural gas (Cat I 2H ) at 20 mbar or • LP gas (Cat I 3+ ) Butane 29 mbar / Propane 37 mbar INSTALLER: Please leave these instructions with the user. DATA BADGE LOCATION: Cooker back, serial number repeater badge below oven door opening. - Page 33 Trademark Rangemaster CLA60NGFBL/C, CLA60NGFCR/C, Models PROPL60NGFSS/C, PROPL60NGFBL/C Type of Hob Number of Cooking Zones Heating Technology-1 Size-1 Auxiliary Energy Efficiency-1 Heating Technology-2 Size-2 Semi-Rapid Energy Efficiency-2 59 % Heating Technology-3 Size-3 Semi-Rapid Energy Efficiency-3 59 % Heating Technology-4 Size-4 Rapid Burner...
- Page 34 Oven Efficiency Trademark Rangemaster CLA60NGFBL/C CLA60NGFCR/C Models PROPL60NGFSS/C PROPL60NGFBL/C Type of Oven Mass Number of cavities Heat source Volume Litres MJ / cycle 5.11 Energy consumption (gas) - conventional kWh / cycle 1.42 MJ / cycle Energy consumption (gas) - forced air convection...
- Page 35 NOTE...
- Page 36 NOTE...
- Page 37 NOTE...
- Page 40 • DocNo.000-0001 - Back cover Rangemaster Clarence Street, Royal Leamington Spa, Warwickshire, CV31 2AD, England. Tel: +44 (0) 1926 457400 Fax: +44 (0) 1926 450526 E-mail: consumers@rangemaster.co.uk w w w.ran gemaster.co. uk...
Need help?
Do you have a question about the Classic 60 Gas and is the answer not in the manual?
Questions and answers