Table of Contents
Advertisement
Quick Links
INSTALLATION and OPERATION MANUAL
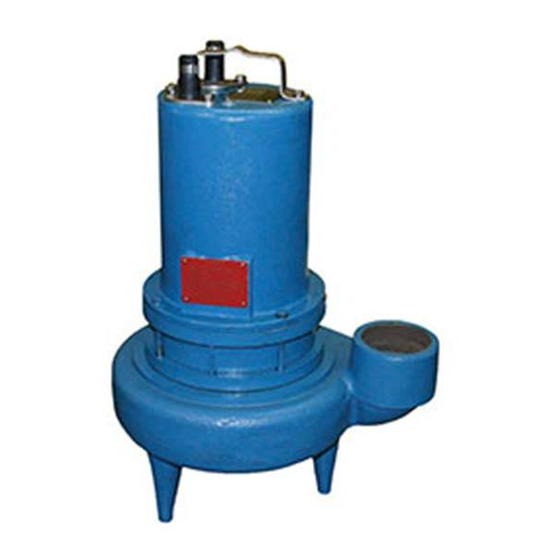
Submersible Sewage Ejector
IMPORTANT:
Read all instructions in this manual before operating pump.
As a result of Crane Pumps & Systems' constant product improvement program, product
changes may occur. As such Crane Pumps & Systems Inc. reserves the right to change product
without prior written notification.
PUMPS & SYSTEMS
420 Third Street/P.O. Box 603
A Crane Co. Company
Piqua, Ohio 45356-0603
Phone: (937) 778-8947
Fax: (937) 773-7157
www.cranepumps.com
Manual Index
BARNES
SERIES: 2SEV & 3SEV, L & DS
1.5 & 2.0 HP, 3450 RPM
Single and Double Seal
83 West Drive, Brampton
Ontario, Canada L6T 2J6
Phone: (905) 457-6223
Fax: (905) 457-2650
®
SUPERSEDED
Some parts may NOT
be available
Form No. 780976-Rev. B
Advertisement
Table of Contents

Related Manuals for Barnes 2SEV


Summary of Contents for Barnes 2SEV
- Page 1 Manual Index ® BARNES INSTALLATION and OPERATION MANUAL Submersible Sewage Ejector SERIES: 2SEV & 3SEV, L & DS 1.5 & 2.0 HP, 3450 RPM Single and Double Seal SUPERSEDED Some parts may NOT be available IMPORTANT: Read all instructions in this manual before operating pump.
-
Page 2: Table Of Contents
SEAL TOOL KIT ( see parts list) PRESSURE GAUGE KIT (see parts list) Other brand and product names are trademarks or registered trademarks of their respective holders. ® Barnes is a registered trademark of Barnes Pumps, Inc. © Barnes Pumps, Inc. 2001, 2002 Alteration Rights Reserved. -
Page 3: Safety First
SAFETY FIRST! Please Read This Before Installing Or Operating Pump. This WARNING ! Do not pump hazardous materials information is provided for SAFETY and to PREVENT EQUIPMENT (flammable, caustic, etc.) unless the pump is PROBLEMS. To help recognize this information, observe the specifically designed and designated to handle them. -
Page 4: Pump Specifications
20 ft. (6M)Cord. Plug on 120 Volt, for DS pumps (Requires Relay in Control Panel). 3" NPT Discharge Custom Molded for Sealing and Adapter. Strain Relief. SPEED: 3450 RPM (Nominal). inches 2SEV-L Series (mm) 12.63 (321) 1.50 6.25 (159) (38) 4.88... - Page 5 2SEV-DS Series (mm) 12.63 (321) 1.50 6.25 (38) (159) 20.78 (528) 4.88 (124) 9.75 (248) 6.66 (169) 3SEV-L Series 13.99 (355) 7.06 2.06 (179) (52) 4.88 19.07 (124) (484) 9.75 (248) 9.03 (229) 3SEV-DS Series 13.99 (355) 7.06 2.06...
-
Page 6: General Information
SECTION B: GENERAL INFORMATION B-4) Service Centers: For the location of the nearest Barnes Pumps Service Center, check your Barnes Engineered catalog, your Barnes Pumps, B-1) To the Purchaser: Congratulations! You are the owner of one of the finest pumps Inc. - Page 7 Stainless Rail Package (Not Shown)- The package system C-4.2) Overload Protection : comes complete and ready to place into the ground as outlined C-4.2-1) Three Phase (Optional) - The normally closed (N/C) in the project specifications. The moveable portion of the Break thermal sensor is embedded in the motor windings and will Away Fitting (BAF), check valve, piping and guide bracket detect excessive heat in the event an overload condition...
-
Page 8: Electrical Data
MODEL VOLT NEMA FULL LOCKED CORD CORD CORD Winding (Nom) START LOAD ROTOR SIZE TYPE Resistance CODE AMPS AMPS Main - Start 2SEV1522L 3450 13.5 31.5 12/3 0.610 2.15 -- 12.49 2SEV1592L 200/240 3450 11.5/10.5 27.0 14/4 0.600 4.22 - 2SEV1542L 3450 13.5... -
Page 9: Start-Up Operation
Return one F-1.1) Checking Oil: copy to Barnes Pumps, Inc. and store the second in the control Motor Housing- To check oil, set unit upright. Remove pipe panel or with the pump manual if no control panel is used. It is plug (39) from motor housing (6). - Page 10 F-1.3) Pressure Test: F-1.4) Replacing Oil: Pumps that have been disassembled, Motor Housing- If the Motor Housing- Set unit upright and refill with new cooling oil pump has been disassembled, the oil should be drained before as per Table 1 (see parts list for amount). Fill to just above motor a pressure test, as described in section F-1.1.
- Page 11 F-3) Shaft Seal Service: Important ! - Handle seal parts with extreme care. DO NOT scratch or mar lapped surfaces. F-3.1) Disassembly and Inspection: Outer Seal (All Units)- To expose shaft seal (28) for examination, disassemble volute and impeller as outlined in paragraph F-2.1.
- Page 12 Inner Seal (DS Units Only)- To expose inner shaft seal (28) Make sure the stationary member is in straight. Slide a bullet for examination, remove outer seal as outlined above. (see parts list - seal tool kit) over motor shaft. Lightly oil (DO Remove socket head cap screws (64).
- Page 13 (50, optional), check for continuity between the black and white wires. If found to be defective, contact a motor service station or Barnes Pumps Service department. Inspect motor winding for shorts and check resistance values. Check rotor for wear. If rotor or the stator windings are defective, the complete motor must be replaced.
- Page 14 Fig. 12 F-4.3) Wiring Connections: Check power cables (16) and control cable (56, if used), for cracks or damage and replace if required (see Figure 12). Make internal wiring connections which are independent of the terminal block as shown, using connectors (48) and wire Fig.
- Page 15 Fig. 13...
-
Page 16: Replacement Parts
SECTION: G REPLACEMENT PARTS G-1 ORDERING REPLACEMENT PARTS: When ordering replacement parts, ALWAYS furnish the following information: 1. Pump serial number and date code. (Paragraph G-4) 2. Pump model number. (Paragraph G-3) 3. Pump part number. (Paragraph G-2) 4. Part description. 5. -
Page 17: Troubleshooting
TROUBLESHOOTING CAUTION ! Always disconnect the pump from the electrical power source before handling. If the system fails to operate properly, carefully read instructions and perform maintenance recommendations. If operating problems persist, the following chart may be of assistance in identifying and correcting them: MATCH "CAUSE"... -
Page 18: Single Seal - Cross-Section (Fig. 15)
2SEV- L & 3SEV- L Series, Single Seal Fig. 15... -
Page 19: Single Seal - Exploded View (Fig. 16)
2SEV- L & 3SEV- L Series, Single Seal Fig. 16... -
Page 20: Double Seal - Cross-Section (Fig. 17)
2SEV- DS & 3SEV-DS Series, Double Seal Fig. 17... -
Page 21: Double Seal - Exploded View (Fig. 18)
2SEV- DS & 3SEV-DS Series, Double Seal Fig. 18... -
Page 22: Parts List
PARTS KITS Seal Repair Kits: Single Seal:..P/N - (†) 2, 12, 26, 28, 36, 39, 40, 43. Double Seal:..P/N - (◊) 2, 12, 26, 27, 28, 32, 36, 39, 40, 43, 44. Seal Tool Kit:....P/N - 107271 Pressure Gauge Kit..P/N - 085343 PARTS LIST ITEM QTY. - Page 23 103587A Seal Housing All double seal 105145 Spacer Ring 2-27008-62 ◊ Retaining Ring All double seal Impeller, Brass 107032TE 4.62 Dia. (STD for a 2.0 HP) 107032TF 4.50 Dia. 107032TG 4.37 Dia. (STD for a 1.5 HP) 107032TH 4.25 Dia. 107032TJ 4.12 Dia.
- Page 24 NOTES...
-
Page 25: Returned Goods Policy
IMPORTANT ! WARRANTY REGISTRATION Your product is covered by the enclosed Warranty. Complete the Warranty Registration Form and returned to Crane Pumps & Systems, Inc. Warranty Service Group IMPORTANT! If you have a claim under the provision of the warranty, contact your local Crane Pumps &... - Page 26 ® BARNES Limited Warranty We warrant to our immediate customer and to the ultimate consumer that products of our manufacture will be free of defects in material and workmanship under normal use and service for the following time periods, when installed and maintained in accordance with our instructions.
-
Page 27: Start-Up Report
START-UP REPORT FOR SUBMERSIBLE PUMPS This report is designed to insure the customer that customer service and a quality product are the number one priority with Crane Pumps & Systems, Inc. (CP&S). Please answer the following questions completely and as accurately as possible. - Page 28 CP&S Control Panel Part No. and Brand Number of pumps operated by control panel NOTE: At no time should holes be made in top of control panel, unless proper sealing devices are utilized. Control Panel Manufactured by Others: Company Name: Model No.
- Page 29 START-UP REPORT FOR SUBMERSIBLE PUMPS This report is designed to insure the customer that customer service and a quality product are the number one priority with Crane Pumps & Systems, Inc. (CP&S). Please answer the following questions completely and as accurately as possible.
- Page 30 CP&S Control Panel Part No. and Brand Number of pumps operated by control panel NOTE: At no time should holes be made in top of control panel, unless proper sealing devices are utilized. Control Panel Manufactured by Others: Company Name: Model No.
-
Page 31: Warranty Registration
IMPORTANT ! WARRANTY REGISTRATION Your product is covered by the enclosed Warranty. Complete the Warranty Registration Form and returned to Crane Pumps & Systems, Inc. Warranty Service Group IMPORTANT! If you have a claim under the provision of the warranty, contact your local Crane Pumps &... - Page 32 FOLD HERE AND TAPE, DO NOT STAPLE PLACE STAMP HERE CRANE PUMPS & SYSTEMS, INC. WARRANTY SERVICE GROUP 420 THIRD STREET P.O. BOX 603 PIQUA, OHIO 45356-0603 - U.S.A.
Need help?
Do you have a question about the 2SEV and is the answer not in the manual?
Questions and answers