Table of Contents
Advertisement
Quick Links
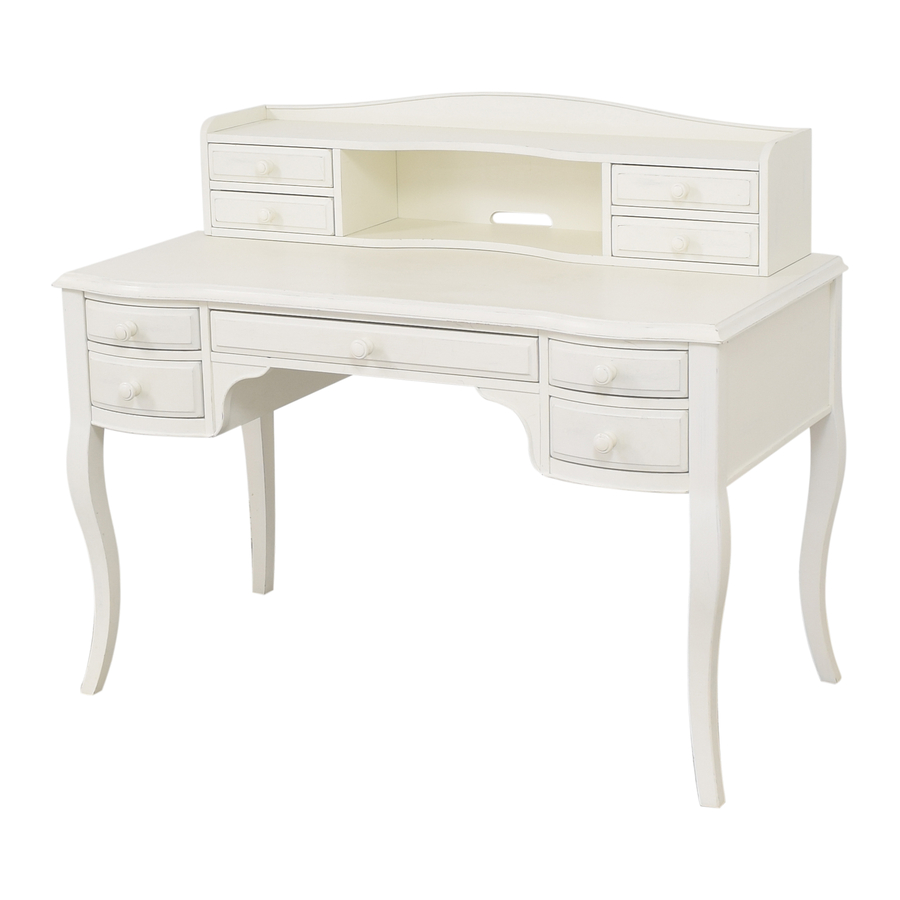
Lilac Desk
•
Please read all instructions before starting to assemble.
•
Remove all parts and hardware from box and lay out on a carpeted or scratch-free work surface. The
shipping box provides and ideal work surface. Do not dispose of any contents until assembly is completed to
avoid accidentally discarding small parts or hardware.
•
Do not use power drill as it may cause cracking.
A – Desk Top – 1pc
C - Wooden Knob – 5pcs
F – Hex Bolts – 12pcs
(M8*57*13mm)
I – Allen Key – 1pc
(M4*74*29mm)
Tools Required (but not included):
Phillips Head Screwdriver
B – Desk Legs – 4pcs
D – Short Wooden Knob Bolt– 4pcs
(22*4mm for Side Drawers)
G - Spring Washers – 12pcs
(M8*13mm)
1/4
www.pbteen.com
E – Long Wooden Knob Bolt – 1pc
(25*4mm, for Center Drawer)
H – Flat Washers – 12pcs
(M8*22*2mm)
Advertisement
Table of Contents

Subscribe to Our Youtube Channel
Related Manuals for PB TEEN Lilac Desk


Summary of Contents for PB TEEN Lilac Desk
- Page 1 Lilac Desk PRE-ASSEMBLY: • Please read all instructions before starting to assemble. • Remove all parts and hardware from box and lay out on a carpeted or scratch-free work surface. The shipping box provides and ideal work surface. Do not dispose of any contents until assembly is completed to avoid accidentally discarding small parts or hardware.
- Page 2 ASSEMBLY: 1. Carefully lay the Desk Top (A) upside down on a carpet or scratch-free surface and remove the drawers as shown. 2. Attach a Leg (B) to the corner brace by placing the Leg (B) into the grooves of the corner brace, making sure the pre-drilled holes of the corner brace and Leg (B) are aligned.
- Page 3 Lilac Vanity Mirror Hutch PRE-ASSEMBLY: • Please read all instructions before beginning assembly. • We recommend assembly by two adults. • Save all packing materials until assembly is complete to avoid accidentally discarding smaller parts or hardware. • An extra wooden knob is included for your convenience. PARTS INCLUDED: A –...
- Page 4 ASSEMBLY INSTRUCTIONS: 1. Place Mirror Arm Base (B) in upright position. As one person holds the Mirror (A) as shown, insert the Connector Knob With Bolt (E) through pre-drilled hole in the Mirror Arm Base (B). When the Connector Knob With Bolt exits the pre-drilled hole, slide a Plastic Washer (F) onto the Connector Knob With Bolt and continue inserting the Connector Knob With Bolt into the pre-drilled hole in the Mirror Frame (A).
Need help?
Do you have a question about the Lilac Desk and is the answer not in the manual?
Questions and answers