Advertisement
Locker Bed – Queen and Full
Pre-Assembly:
Please read all instructions before beginning assembly.
Two-adult assembly is recommended.
Save all packing materials until assembly is complete to avoid accidentally discarding smaller parts or
hardware.
If using power tools to aid in assembly please use with caution. Power tools can damage hardware.
Note: Do not full tighten all bolts until all parts are in place. Failure to follow these instructions may cause the bolts
to misalign during assembly.
Parts and Tools Included:
TOOLS REQUIRED:
Allen Wrench (4mm)
PARTS INCLUDED:
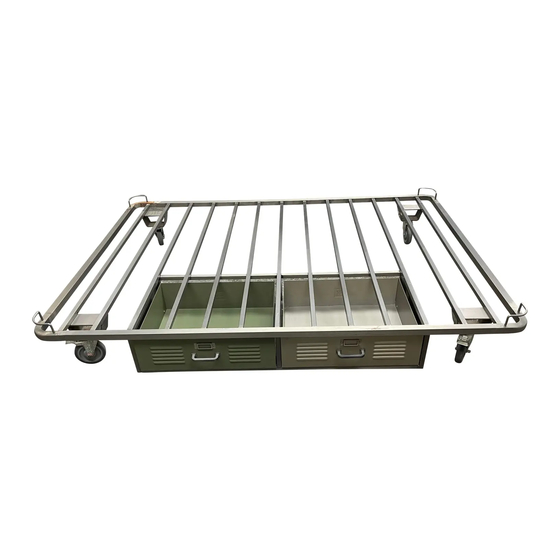
A - Bed - 1pc
HARDWARE LIST:
a –
Small Bolt (Φ 1/4"*1/2"L)
d –
Big Bolt (Φ 5/16"*1"L)
Note: All parts and hardware are delivered in one carton.
Allen Wrench (5mm)
B - Support Leg with Adjustable Leveler – 1pc
– 16pcs
b – Lock Washer et – 16pcs
– 1pc
e – Caster without Brake – 2pcs
www.pbteen.com
- 1 -
c – Flat Washer – 16pcs
f – Caster with Brake – 2pcs
Advertisement
Table of Contents

Related Manuals for PB TEEN Locker Bed Queen and Full


Summary of Contents for PB TEEN Locker Bed Queen and Full
- Page 1 Locker Bed – Queen and Full Pre-Assembly: Please read all instructions before beginning assembly. Two-adult assembly is recommended. Save all packing materials until assembly is complete to avoid accidentally discarding smaller parts or hardware. If using power tools to aid in assembly please use with caution. Power tools can damage hardware. Note: Do not full tighten all bolts until all parts are in place.
- Page 2 Assembly Instructions: 1. Place the bed (A) upside down on a clean, soft surface such as a carpet or rug. 2. Attach the caster (e & f) to the bracket of bed as shown, using flat washer (c), lock washer (b) and big bolt (a) . Securely tighten the bolt with Allen wrench (4mm).
- Page 3 4. Turn the bed to an upright position. If Bed is not level you may slowly unscrew the adjustable leveler to attain a level position. See Figure 3. Figure 3 5. Assembly is now completed. Care Instructions: ● Furniture polishes, abrasive cleaner and household cleaners are not recommended for use. Use a slightly damp cloth to clean.
Need help?
Do you have a question about the Locker Bed Queen and Full and is the answer not in the manual?
Questions and answers