
Related Manuals for PB TEEN HAMPTON CONVERTIBLE LOFT BED


Summary of Contents for PB TEEN HAMPTON CONVERTIBLE LOFT BED
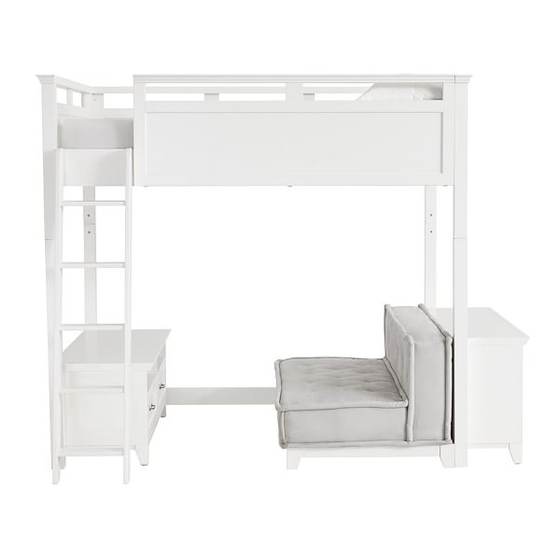
- Page 1 HAMPTON CONVERTIBLE LOFT BED ASSEMBLY INSTRUCTION Date: 2015-June-29 Rev: www.pbteen.com Page 1 of 14...
- Page 2 WARNING: Failure to follow these warnings and assembly instructions could result in serious injury or death. To help prevent serious or fatal injuries from entrapment or fails: ˙Read all instructions before assembling bunk bed. ˙Before each usage or assembly, inspect bunk bed for damaged hardware, loose joints, missing parts or sharp edges.
- Page 3 Important Safety Instructions: Please read all instructions carefully before assembling this bookcase. For your safety, assembly by two or more adults is strongly recommended. Keep these instructions for future use. Use only vendor-supplied hardware to assembly this item. Using unauthorized hardware could jeopardize the structural integrity of the item.
- Page 4 Hardware included: L – Ball Tip Allen M – Allen Bolt N – Spring Washer O – Flat Washer P – Half Moon Washer 5/16 ”x 30 x 5/16”x 63 5/16” x 15 x 4 x 95 x 30(mm) 5/16”x13x1.5(mm)...
- Page 5 Assembly Instruction Steps: 1. Using a Philip Head Screwdriver, remove the Back Panel by detaching the screws – 20x on it. 2. Insert the Dowel (Za) – (8pcs) into the pre-drilled holes of the Left Inner Right Post (G), Right Inner Right Post (H) and Left Right Outer Posts (I) as shown below.
- Page 6 3. Step 3.1 – Adjust the leveler underneath the Left Inner Right Post (G) and Left Right Outer Post (I) to keep the Posts balanced while installing to the TV Media. 4. Step 3.2 – With the help of locating dowel, align the pre-drilled holes of the Left Inner Right Post (G) and Left Right Outer Post (I) to the pre-drilled holes on the outer sides of the TV Media side panels as shown below.
- Page 7 7. Step 5.1 – Adjust the leveler underneath the Right Inner Right Post (H) and Left Right Outer Post (I) to keep the Posts balanced while installing to the Bookcase. 8. Step 5.2 – With the help of locating dowel, align the pre-drilled holes of the Right Inner Right Post (H) and Left Right Outer Post (I) to the pre-drilled holes on the outer sides of the Bookcase side panels as shown below.
- Page 8 13. Secure the Mending Plate (Y) to the Headboard (A) – (2pcs) by inserting Allen Bolt (Z) – (2sets) into the holes of the Mending Plate (Y) through into the pre-drilled holes of the Head Board (A). 14. Using the Ball Tip Allen Key (L), tighten the Allen Bolt (Z) in a clockwise direction as shown below. Do not over-tighten.
- Page 9 18. With the brackets already fixed on the Long Guardrail (E), slot in the Long Guardrail (E) onto the right Side Rail (B) as shown below. 19. Secure the Long Guardrail (E) to the Side Rail (B) by inserting the Phillips Head Screw (V) into the holes of brackets and screw in the Phillips Head Screw into the Side Rail (B) using the Philip Head Screwdriver (not included) in a clockwise direction as shown below.
- Page 10 21. With the brackets already fixed on the Short Guardrail (F), slot in the Short Guardrail (F) onto the Side Rail (B) as shown below. 22. Secure the Short Guardrail (F) to the Side Rail (B) by inserting the Phillips Head Screw (V) into the holes of brackets and screw in the Phillips Head Screw into the Side Rail (B) using the Philip Head Screwdriver (not included) in a clockwise direction as shown below.
- Page 11 24. Place the Center Support Rail (C) onto the Mending Plate (Y) that were installed earlier on the bottom rail of the Head Board (A). Secure by inserting the Allen Bolt (Z) – (2pcs) into the holes underneath the Mending Plate (Y) as shown below. Tighten it with using the Ball Tip Allen Key in an anti-clockwise direction as shown below.
- Page 12 27. Insert the Connector Bolt (R) – (4pcs) into the holes top of the Left Inner Right Post (G), Right Inner Right Post (H) and Left Right Outer Posts (I) with the holes of the Connector Bolt (R) aligning with the Postts as shown below.
- Page 13 31. Turn the bracket out that can be found underneath the Long Guardrail (E) and Short Guardrail (F) to position underneath the Side Rail (B) as shown below. 32. Insert the Philip Head Screw (V) into the holes of the bracket and tighten it with using the Philip Head Screwdriver (not included) as shown below.
- Page 14 35. Place the Cushy Cushion behind the Bookcase as shown below. 36. Assembly is complete. Care Instructions: Dust often using a clean, soft, dry and lint-free cloth. Blot spills immediately and wipe with a clean, damp, cloth. We do not recommend the use of chemical cleansers, abrasives or furniture polish on our lacquered finish.
Need help?
Do you have a question about the HAMPTON CONVERTIBLE LOFT BED and is the answer not in the manual?
Questions and answers