Table of Contents

Related Manuals for Miele PWT 6089 Vario


Summary of Contents for Miele PWT 6089 Vario
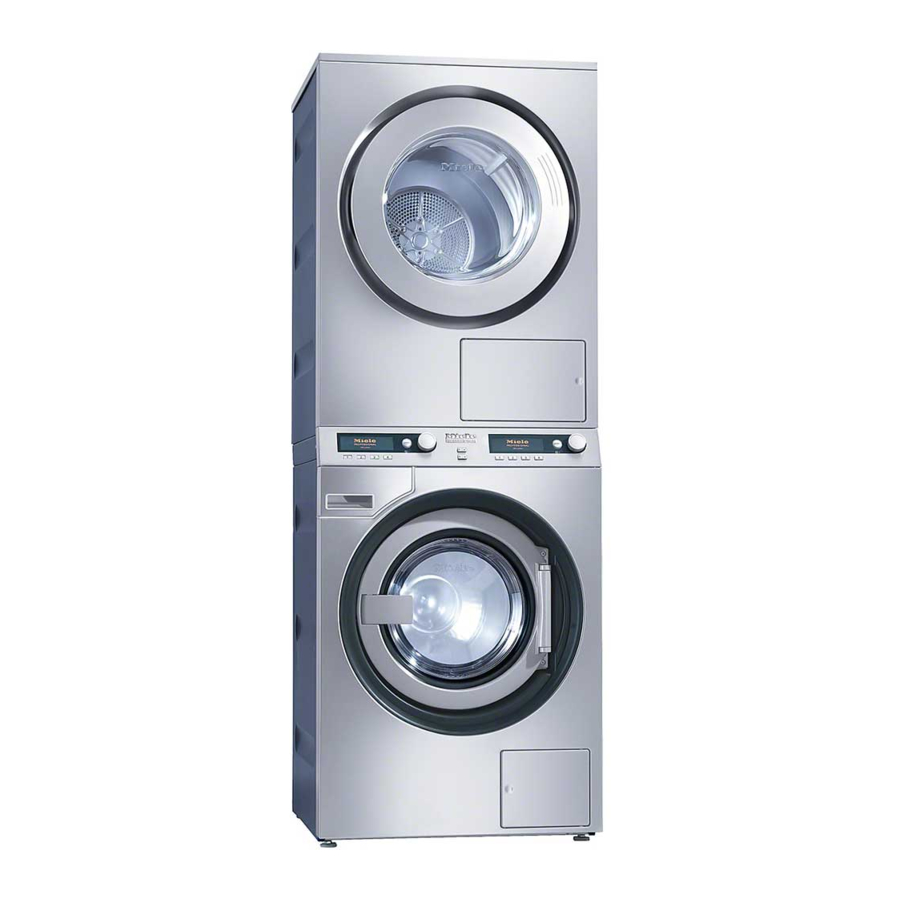
- Page 1 Operating and Installation Instructions for Washer-Extractor and Tumble Dryer Stack PWT 6089 Vario INDUSTRIAL USE ONLY en - US To prevent accidents and machine damage read these instructions before installation or use. M.-Nr. 09 986 690...
-
Page 3: Table Of Contents
Contents IMPORTANT SAFETY INSTRUCTIONS....... . . 5 Caring for the environment ......... 15 Operating the washer-extractor and tumble dryer stack . - Page 4 Contents Cleaning and care ..........53 Cleaning the washer-extractor and tumble dryer stack .
-
Page 5: Important Safety Instructions
IMPORTANT SAFETY INSTRUCTIONS Intended use Only use the washer-extractor to wash items which are specified by the manufacturer to be machine-washable on the wash-care label, and textiles composed of hand-washable wool or It is essential to read these wool blend fabrics as well as satin, instructions. - Page 6 IMPORTANT SAFETY INSTRUCTIONS Keep children away from the appliance stack at all times. It is not a toy! To avoid the risk of injury do not allow children to play on or near it or to play with its controls. Supervise its use by the elderly or infirm, and supervise children while you are using it.
- Page 7 – the connection plugs on the liability. Repairs should only be washer-extractor and on the tumble undertaken by a Miele service dryer have been withdrawn, or technician. If this is not done, any – the on-site fuse has been disabled for...
- Page 8 IMPORTANT SAFETY INSTRUCTIONS This appliance stack is inteded for stationary use only. If this appliance stack is being used in a commercial environment please ensure that all relevant health and safety regulations are obeyed.
- Page 9 "Installation and connection"). special descaling agent is available to During spinning, a transit bar which is still order from Miele. Follow the instructions in place may result in damage to both the for use on the packaging carefully.
- Page 10 IMPORTANT SAFETY INSTRUCTIONS Only use dyes specified by the The ducting must not be connected manufacturer as being suitable for use in a washing machine. Always observe – a chimney or vent flue which is in the manufacturer's instructions use, carefully.
- Page 11 IMPORTANT SAFETY INSTRUCTIONS Adequate ventilation is essential to To prevent the risk of fire, the avoid the danger of asphyxia and following textiles must not be dried in toxic fumes where another appliance this appliance: which also uses the room air (e.g. gas, –...
- Page 12 IMPORTANT SAFETY INSTRUCTIONS To prevent the risk of fire, the following must not be tumble dried: – items which have been cleaned using chemicals (e.g. professional dry-cleaning agents). – fabrics which contain a large proportion of rubber, foam rubber or rubber-like materials.
- Page 13 IMPORTANT SAFETY INSTRUCTIONS Anti-chlorine treatment Chlorine and component damage Anti-chlorine treatment has to be carried out immediately after chlorine Notes on using chlorine bleach and bleach has been used. The use of perchlorethylene hydrogen peroxide or an oxygen based Frequent use of chlorine increases cleaning or bleaching agent is the risk of component damage.
- Page 14 IMPORTANT SAFETY INSTRUCTIONS Accessories Accessory parts may only be fitted when expressly approved by Miele. If other parts are used, guarantee, performance and product liability claims will be invalidated. Disposing of your old appliance Before disposing of an old washer-dryer and tumble dryer stack, disable the washer-extractor door lock.
-
Page 15: Caring For The Environment
Caring for the environment Disposal of the packing Energy saving tips material Energy and water consumption The transport and protective packing – Water consumption and energy has been selected from materials which usage are determined by the size of are environmentally friendly for disposal the load. -
Page 16: Operating The Washer-Extractor And Tumble Dryer Stack
Operating the washer-extractor and tumble dryer stack Control panel Right-hand side for the washer-extractor, left-hand side for the tumble dryer a Display See the following pages for more information. b Short cut buttons For selecting an individual program quickly. These buttons can be programmed to select your own favorite programs. -
Page 17: Display
Operating the washer-extractor and tumble dryer stack Display Entry menu Washer-extractor display: Cottons Uni. 60°C Program selection... Settings F... 2 Minimum iron 40°C 3 Delicates 40°C 4 Woollens H 10:00 30°C Tumble dryer display: Cottons Program selection ... Settings F ... Minimum iron Woollens handcare 10:00... - Page 18 Operating the washer-extractor and tumble dryer stack Program selection There are two ways of selecting a program: – Option 1: Select the Program selection menu in the display and confirm your selection by pressing the jog shuttle. – Option 2: Press shortcut button D, E, F or G. This will automatically take you into the main menu for that program.
- Page 19 Operating the washer-extractor and tumble dryer stack Wash program main menu Cottons Uni. 60°C 1300 rpm Duration: 0:53 h Timer Y Back A Extras Save Turn the jog shuttle to highlight program, temperature or spin speed. Pressing the jog shuttle selects the highlighted option and opens the relevant sub-menu.
- Page 20 Operating the washer-extractor and tumble dryer stack Settings menu J The Settings menu is used to alter the electronics of the washer-extractor and tumble dryer stack to suit different requirements. See the relevant section of the separate washer-extractor or tumble dryer "Commissioning, Program chart and Settings"...
- Page 21 Operating the washer-extractor and tumble dryer stack WS shortcut keys + Logo Washer-extractor display: PROFESSIONAL 30°C 60°C 95°C More 12 programs are available to choose from. To specify which programs are available go to the Settings/supervisor level menu. WS shortcut keys + Logo Tumble dryer display: PROFESSIONAL More...
-
Page 22: Notes And Tips On Laundry Care
Do not wash any items in the instructions. With particularly stubborn washer-extractor which are specified stains ask Miele or your detergent by the manufacturer as not washable manufacturer for advice . on the care label (h symbol). - Page 23 Notes and tips on laundry care 2. Load the washer-extractor 3. Select a program drum ^ Select the most appropriate program for the load being washed. ^ Switch the washer-extractor on with the On/Off button K. See "Program chart" in the separate booklet supplied for details of which ^ To open the drum door pull on the programs are available.
-
Page 24: Wash Care Label Symbols
Wash care label symbols Washing Ironing The number shown in the bucket is The number of dots indicates the the maximum temperature the ironing temperature garment can be washed at. The Hot iron (max sole plate temp. number of bars under the symbol approx. - Page 25 Wash care label symbols 1. Sort the laundry for drying – Stitch in or remove loose underwiring from bras. Before drying – Leave jackets open and undo any – Wash heavily soiled items very long zippers so that textiles dry thoroughly, ensuring that you use evenly.
- Page 26 Wash care label symbols 2. Load the tumble dryer . . . e.g. Machine iron or Hand iron if the laundry needs to be ironed after Using the tumble dryer drying. incorrectly could cause a fire. Read See separate booklet "Commissioning, Program chart and the "IMPORTANT SAFETY Settlings".
-
Page 27: Short Washing Instructions
Short washing instructions It is very important to read the "Notes and tips on laundry care" section before proceeding. A Sort the laundry B Load the washer-extractor drum ^ Switch on the washer-extractor. Make sure that no items are caught between the door and the drum. - Page 28 Short washing instructions C Select a program Payment system Program descriptions If your machine is connected to a payment system, the amount of credit – See separate booklet required will appear in the display. "Commissioning, Program chart and Settings". If a program is cancelled after it has You can select a program either by: started you can lose your credit (depending on how the...
- Page 29 Short washing instructions d Adding detergent Use detergent according to the laundry soiling and water hardness. Too little detergent may cause: – Laundry not getting properly clean, and with time may become grey and hard to the touch. – Greasy particles clinging to laundry. –...
- Page 30 Short washing instructions e Starting a program f At the end of a program "Start" flashes when a program can be "Finish" will appear in the display. started. ^ Open the drum door. ^ Press the "Start" button. ^ Remove the laundry. The "Start"...
-
Page 31: Selecting A Washing Program
Selecting a washing program Selecting/changing a program Entry menu Cottons Uni. 60°C Program selection... Settings F... 2 Minimum iron 40°C 3 Delicates 40°C 4 Woollens H 15:00 30°C ^ Press short cut button D. Main menu Cottons Uni. 60°C 1300 rpm Duration: 0:53 h Timer Y Back A... - Page 32 Selecting a washing program Note: If you do not make a selection in the sub-menu within approx. 15 seconds, the display will revert to the main menu. – Temperature selection Cottons Uni. °C 1300 rpm Temperature from Cold - 60°C ^ Use the jog shuttle to select the temperature you want and confirm your selection.
- Page 33 Selecting a washing program Saving a program as a favorite You can program the short cut buttons to call up the four wash programs you use most frequently. The Save option must be activated via the Settings/Supervisor level menu before the short cut buttons can be programd. Cottons Uni.
-
Page 34: Extras
Extras You can use the Extras option to augment the basic wash programs. To open the Extras sub-menu Cottons Uni. 60°C 1300 rpm Duration: 0:53 h Timer Y Back A Extras ^ Press short cut button D. This opens the Extras sub-menu. -
Page 35: Rinse Hold
Extras Rinse hold The laundry is not spun after the last rinse and remains suspended in the final rinse water. This reduces creasing if the laundry is not going to be removed from the drum imme- diately after the end of the program. Intensive* For heavy soiling or where staining is visible. -
Page 36: Timer
Timer The timer option allows you to select the program end time. The program start can be delayed from 30 minutes to 24 hours. Select the submenu Timer Cottons Uni. 60°C 1300 rpm Duration 0:53 h Timer Y Back A Extras ^ Press the direct select button E. -
Page 37: Spinning
Spinning Maximum final spin speed To omit the final spin (Rinse hold) ^ Select Rinse hold from the Extras The maximum final spin speed will depend on the program chosen. sub-menu. The laundry will not be spun and will remain suspended in You can reduce the final spin speed. -
Page 38: Changing The Program Sequence
Changing the program sequence Payment system Changing a program – After starting a program you can Credit will be lost if the program change the spin speed at any time canceled after it has started. up until the final spin commences and you can select or deselect the Interrupting a program Starch stop and Rinse hold extras. -
Page 39: Detergent
Detergent Water hardness Detergent dispensing Hardness Water Water Water Please follow the detergent level quality hardness hardness manufacturer's instructions. in gpg in mmol/l soft 0 - 7 0 - 1.3 Only use laundry detergent formulated moderate 7 - 14 1.3 - 2.5 for front loading washing machines. -
Page 40: Washing With Several Components
Detergent Washing with several Dye removers / Fabric dyes components Do not use dye removers in this If you wash using several components washer. (e.g. special application detergents), it is recommended to dispense the ^ When dying fabrics in the washer, agents into compartment j in the adhere to the manufacturer’s following order:... -
Page 41: Fabric Softeners, Liquid Starch And Starch Formulations
Detergent Fabric softeners, liquid starch Adding fabric softener or liquid starch separately and starch formulations ^ Add fabric softener or liquid starch to ^ Dispense according to the amount compartment §. specified on the packaging. ^ Select the Separate rinse program. Automatic dispensing of fabric ^ Press the Start button. -
Page 42: External Dispensing System
A conversion kit is required for the washer-extractor to be operated using an external dispensing system. This must be fitted by a Miele service technician. The relay is controlled as described in the separate booklet supplied. The containers must be filled with the correct detergent or disinfectant in the order specified. - Page 43 Detergent If a Disinfection program is running, the following message is displayed: Fault Container empty The program will be cancelled. ^ Press short cut button D to delete the message in the display, and refill the container. ^ Start the program again. If the container is empty for a disinfection program, you have to assume that no disinfection has taken place.
-
Page 44: Short Drying Instructions
Short drying instructions It is very important to read the "Notes and tips on laundry care" section before proceeding. A Sort the laundry B Load the tumble dryer To avoid damaging your laundry, when shutting the door check that no items of laundry have become trapped in the door opening. - Page 45 Short drying instructions C Select a program Payment system ^ Switch the dryer on by pressing the If your machine is connected to a On/Off K button in. payment system, the amount of credit required will appear in the display. Program chart –...
- Page 46 Short drying instructions E Remove the laundry when the Program duration/Estimated time remaining program has finished When a program is selected, the Anti-crease (if selected) and Finish will appear in the display to indicate that estimated duration will appear in the display.
- Page 47 Short drying instructions ^ Remove everything from the drum. Check that all items have been removed from the drum. Anything left in the dryer could be damaged by overdrying when it is next used. The drum lighting will come on when the door is opened.
-
Page 48: Selecting A Drying Program
Selecting a drying program Selecting/changing a program Entry menu Cottons Program selection ... Settings F ... Minimum iron Woollens handcare 10:00 Smoothing ^ Press shortcut button D. Main menu Cottons Normal Duration 1:03 h Timer Y Back A Low temp. Save ^ By turning the jog shuttle you can then highlight the following options in the display: Program (Cottons) or the... - Page 49 Selecting a drying program Note: If you do not make a selection in the sub-menu within approx. 20 seconds, the display will revert to the main menu. – Programs with drying levels (sensor drying) Cottons Normal+ Drying levels from Machine iron - Extra dry ^ Use the jog shuttle to select the drying level you want, and confirm your selection.
- Page 50 Selecting a drying program Low temperature Select Low temperature for all delicate or minimum iron fabrics with the r care label (e.g. acrylic garments). – Delicate fabrics are dried at a lower temperature. – The program duration is longer. ^ Press shortcut button D Low temp. Saving a program as a favorite You can program the short cut buttons to call up the four most frequently used drying programs.
-
Page 51: Timer
Timer Depending on the Delay start setting, you can use the Timer to set the time you wish a program to finish or start at, or you can delay the start of the program. To open the Timer sub-menu Cottons Normal+ Low temp. -
Page 52: Changing The Program Sequence
* Either during the commissioning Danger of burning. process or subsequently, a Miele ser- vice technician can re-set the payment ^ Press shortcut button G Cancel. system so that programming changes On some programs, laundry will be can be made. -
Page 53: Cleaning And Care
Cleaning and care Cleaning the washer-extractor Disconnect both the washer-extractor and the tumble Cleaning the drum, suds container dryer from the electrical supply. and drainage system The drum, suds container and drainage Cleaning the washer-extractor system can be cleaned if necessary. and tumble dryer stack ^ Start the Maintenance program. - Page 54 Cleaning and care ^ Clean the fabric softener channel ^ Pull the detergent drawer out as far it using a brush and warm water. will go. 1. Then press the safety catch down If starching frequently, thoroughly using the lever as illustrated. clean the siphon, the siphon tube and the fabric softener channel 2.
-
Page 55: Cleaning The Inlet Hose Filter
Cleaning and care Cleaning the inlet hose filter Slowly turn on the water supply and The washer has two water inlet filters to check for leaks. If water leaks, protect each inlet valve. Check and tighten the hose connection. clean these filters every 6 months. This may have to be done more frequently To clean the filter in the water inlet with some water supplies. -
Page 56: Cleaning The Lint Filter
Cleaning and care Cleaning the lint filter Do not turn the handle on the lint Lint from items being dried is collected filter, as this will cause the lint filter by a two-part cartridge lint filter in the to come apart (see below). ducting. - Page 57 Cleaning and care Cleaning the filter while dry Replacing the filter The lint filter can be hygienically and If there is a heavy build-up of lint easily cleaned using a vacuum in the ducting, the ducting should cleaner. also be cleaned before the clean filter is replaced.
-
Page 58: Cleaning The Filter Housing
Cleaning and care Cleaning the filter housing Extra cleaning The filter housing should be – Fan checked from time to time, and The fan behind the filter access panel cleaned when there is a build-up of can become clogged with detergent lint there. - Page 59 Cleaning and care – The cover in the door opening Replacing the cover ^ Fit the cover to the left or right hand The cover in the door opening side of the door opening, should only be removed if they ^ then press the cover down until it become severely clogged.
-
Page 60: Problem Solving Guide
Service Department. Repair work to electrical appliances should only be carried out by a Miele Service Technician in strict accordance with current local and national safety regulations. - Page 61 Settings/Supervisor level menu. Technical fault There is a fault. Start the program again. If restart is If the fault message appears unsuccessful, again, contact the Miele Ser- contact Technical vice. Service. Fault During the disinfection The washer-extractor has Disinfection program the water...
- Page 62 Problem solving guide Problem Possible cause Remedy Adjust the load This is not a fault. Use the Hot air program The drum is empty or (timed drying) to dry In some programs, if the the laundry is too dry. individual items. drum has been overloaded or To delete the message:...
- Page 63 Problem solving guide Problem Possible cause Remedy Clean out airways There is a blockage – Clean the lint filter. Clean the lint filters in the ducting system. – Check all possible causes Check ducting given under "The drying appears at the end process goes on too long or of a program.* even switches off."...
- Page 64 Problem solving guide Problem Possible cause Remedy The pump makes This is not a fault. These noises occur at the end of a pump strange noises. sequence as a normal part of the operation. Large amounts of The water pressure –...
- Page 65 Problem solving guide Problem Possible cause Remedy White residues The detergent – Try and brush off the residues which look like contained with a soft brush once the laundry powder detergent compounds (zeolites) is dry. are seen on dark to aid water softening –...
- Page 66 Problem solving guide Problem Possible cause Remedy The laundry is not The load consisted of – Finish drying using the sufficiently dry. different fabrics. Hot air program (timed drying). – Next time, select a more suitable program (see "Program chart" in the separate booklet "Tumble dryer Commissioning,...
- Page 67 Problem solving guide Problem Possible cause Remedy The drying process You might be asked to Please check all possible goes on too long or clean the ducting system causes described below. even switches off. again. The lint filter is blocked. –...
-
Page 68: Opening The Drum Door In The Event Of A Blocked Drain And/Or Power Failure
Problem solving guide Opening the drum door in the Drain the washer-extractor event of a blocked drain and/or If the drain outlet is clogged, a large power failure amount of water will be retained in the washer-extractor (approx. 9 gallons / Disconnect the washer-extractor 35 liters). -
Page 69: Cleaning The Drainage System
Problem solving guide Once the flow of water ceases: Make sure the drain filter is securely tightened. Otherwise there is a risk of water leakage during use. Opening the drum door Always make sure that the drum is stationary before reaching in to remove laundry. -
Page 70: Changing The Lamp
B Remove the screw. C Lower the cover. D Replace the lamp. The temperature resistant lamp should only be ordered from the Miele Spare Parts Department. The lamp specification and maximum wattage is stated on the data plate and on the lamp cover. -
Page 71: Peak Load
After the peak load function is deactivated the program will continue automatically. Display Service If the following message appears in the display after "Poweron", Miele Service needs to perform a routine maintenance. Washer-extractor display; Tumble dryer display: Maintenance 1 Contact Miele Service Press the short cut button D, or wait approx. -
Page 72: After Sales Service
Optical interface PC In the event of any faults which you The indicator or check light marked PC cannot fix yourself contact the Miele on the fascia panel is the interface used Service Department (see back cover for by Miele service technicians during contact details). -
Page 73: Installation And Connection
Installation and connection Front view a Inlet hose (cold water) f Filter access panel b Inlet hose (hot water) g Control panel c Detergent dispenser drawer h Door with handle d Vent ducting i Access panel to lint filter and drain pump e Door j Height adjustable feet... - Page 74 Installation and connection Rear view a Power cord g Drain hose b Slot for communication module h Transit bars (washer-extractor) i Restraining clip for inlet hoses and c Valve for recycled water drain hose d Inlet hose (hot water) j Air inlet vents e Inlet hose (cold water) k Slot for communication module (tumble dryer)
-
Page 75: Installing The Washer-Extractor And Tumble Dryer Stack
Installation and connection Installing the washer-extractor and tumble dryer stack All installation work must be carried out by a suitably qualified technician in strict accordance with local and national safety regulations. It is also possible to transport the stack ^ Transport the washer-extractor and as a complete unit to its installation site. -
Page 76: Payment System
Payment system This appliance stack can be fitted with a payment system.* The payment system can be set up by a Miele service technician when the View from above washer-extractor and tumble dryer are commissioned. Coins / tokens must be removed from the payment system regularly, otherwise it will become blocked. -
Page 77: Removing The Transit Bars
Installation and connection Installation surface Removing the transit bars Do not install the appliance stack near or directly above an open gully or floor drain. Moisture from these can penetrate the stack and damage electrical components. Ensure that the feet of the washer-extractor and the floor are dry to prevent the washer-extractor from slipping during the spin cycle. - Page 78 Installation and connection To avoid the risk of injury the holes for the transit bars must be covered after they have been removed. If they are not covered there is a risk of injury. ^ Release the catch and turn the right hand transit fitting anti-clockwise by 90°.
-
Page 79: Leveling The Washer-Extractor
Installation and connection Leveling the washer-extractor Ensure that the feet of the washer-extractor and the floor are dry to prevent the washer-extractor from slipping during the spin cycle. The appliance stack must stand perfectly level on all four feet to ensure safe and proper operation. -
Page 80: Installing The Tumble Dryer
Installation and connection Installing the tumble dryer ^ Then position the tumble dryer in front of the washer-extractor. ^ Release the cables which protrude from underneath the dryer from the packaging. ^ Lift the dryer from the positions marked in the drawing. When doing so maintain the correct distance from the rear panel. - Page 81 Installation and connection ^ Slide the dryer back along the guides as far as it will go. ^ Fit the rear guides on the base plate of the tumble dryer into the guides on the washer-extractor. Danger of injury! Be careful not to trap your fingers when positioning the tumble dryer.
- Page 82 Installation and connection ^ Secure the dryer through the guides to the washer-extractor dryer using 4 screws and washers (supplied in the accessory pack). Make sure that the connecting ^ Screw the control panel to screws are correctly tensioned washer-extractor using 2 screws. between the washer-extractor and the dryer (45 Nm).
-
Page 83: Plumbing
Maintenance and care and should incorporate a stopcock with a 3/4" thread. The stopcock should be Only use a genuine Miele hose should fitted by a qualified plumber. you ever need a replacement. Miele hoses are tested to withstand pressure The washer-extractor is supplied as of at least 7,000 kPa (1,015 psi). - Page 84 Cold option. stack to a hot water supply, 158°F (70°C) to a maximum of 185°F (85°C). A special inlet hose is required for this option. The machine must also be reprogrammed by a Miele service technician.
-
Page 85: Water Drainage
The necessary parts can purchased from Miele Department. * For a delivery head of more than 3' 3" (1 m) (up to a max. of 5' 3" (1.6 m)) a second duo-drain pump is available with the corresponding kit from Miele. -
Page 86: Electrical Connection
Installation and connection Electrical connection If the appliance stack is hard-wired, provision should be made on-site for The appliance stack is supplied with a all-pole simultaneous disconnection for connection cable and a NEMA L 15-30P both appliances. plug. The disconnection point and the plug and socket connections must be The voltage, rated load and fuse rating are given on the data plate. -
Page 87: Installation - Extraction Ducting
Installation - extraction ducting General Ventilation can be maintained by: – an open window. Before operating the appliance stack, a suitable ducting system – a window contact switch. This prevents the dryer being used must be installed to carry the moist when a window is shut. -
Page 88: To Calculate The Total Duct Length
Installation - extraction ducting To calculate the total duct 4. Refer to Table II for the appropriate duct diameter required. length Friction against the inner walls of the vent ducting will slow down the expelled air as it passes through the Table I ducting. -
Page 89: Dimensions For Exhaust Connection
Installation - extraction ducting Dimensions for exhaust Calculation example connection View from above Rear view of the dryer Wall pipe, with louvred vent = 1 x 12' 6" (3.8 m) = 12' 6" (3.8 m) Additional duct length B/D 2 bends, 90° plastic piping = 2 x 2' 7 1/2"... - Page 90 (* optional accessory) 105 mm = 4 1/8" 1. Wall vent kit (separate fitting instructions are supplied with the Miele wall vent kit) 2. Adpater 3. Plastic piping, diameter DN 100 ^ Fit the connecting piece (1) and pipe...
- Page 91 Installation - extraction ducting Venting system with flexible ducting Flexible ducting can be fitted using an adapter. The following items are required: – an adapter. – flexible ducting hose or Alu-flex ducting* – a wall vent kit* or window vent kit*. * (optional accessory) 1.
- Page 92 Installation - extraction ducting Example: Window vent 1. Window vent kit (fitted in a "plexiglass" pane) (separate fitting instructions are supplied with the Miele window vent kit) 2. Adapter for flexible ducting hose...
- Page 93 Installation - extraction ducting Venting more than one dryer Otherwise condensation could via the same venting system trickle back into the dryers causing damage and endangering their Building regulations approval may electrical safety. be required. Contact your local planning authority for advice. When installing 3 to max.
- Page 94 Installation - extraction ducting 1 Connection to the main venting duct 2 Miele non-return flap* 3 Additional Miele adapter* 4 Miele flexible ducting hose* ^ Push the non-return flap (2) all the way into the adapter (3). (* optional accessory)
-
Page 95: Technical Data
Technical data Height 76" (1930 mm) Width 27 9/16" (700 mm) Depth 29 5/8" (752 mm) Depth with door open 49 1/8" (1248 mm) Weight 461 lbs (209 kg) Max. load bearing in operation 794 lbs (approx. 360 kg) Capacity 20 lbs (8 kg) dry weight each weight of dry laundry Voltage... - Page 96 09 986 690 / / 01 Alteration rights reserved/1021 M.-Nr. M.-Nr. 09 986 690 INFORMATION IS SUBJECT TO CHANGE. PLEASE REFER TO OUR WEBSITE TO OBTAIN THE MOST CURRENT PRODUCT SPECIFICATIONS, TECHNICAL & WARRANTY INFORMATION.
Need help?
Do you have a question about the PWT 6089 Vario and is the answer not in the manual?
Questions and answers