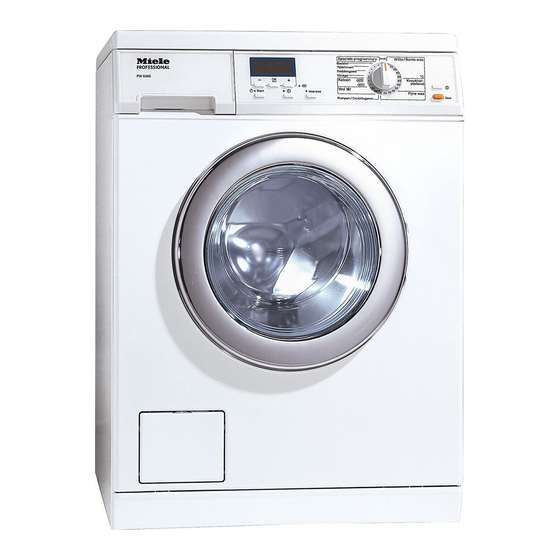
Miele PW 5065 Operating And Installation Instructions
Washer-extractor
Hide thumbs
Also See for PW 5065:
- Operating and installation instructions (68 pages) ,
- Operating manual (64 pages) ,
- Operating manual (64 pages)
Table of Contents

Subscribe to Our Youtube Channel
Related Manuals for Miele PW 5065


Summary of Contents for Miele PW 5065
- Page 1 Operating and installation instructions for washer-extractor PW 5065 en - AU, NZ To avoid the risk of accidents or damage to the appliance, it is essential to read these instructions before it is installed and used for the first time.
-
Page 2: Caring For The Environment
Caring for the environment Disposal of the packing It should be unplugged or disconnected from the mains electricity supply by a material competent person. The transport and protective packing The plug must be rendered useless has been selected from materials which and the cable cut off directly behind the are environmentally friendly for disposal appliance or the machine to prevent... -
Page 3: Table Of Contents
Contents Caring for the environment ......... . 2 Warning and Safety instructions . - Page 4 Contents Colour run and dye removers/dyes ........37 External dispensing system .
- Page 5 Contents Electrical connection ..........63 Single phase AC 230 V - country variant .
-
Page 6: Warning And Safety Instructions
Warning and Safety instructions This machine conforms to current safety requirements. Inappropriate use can, however, lead to personal injury and damage to property. To avoid the risk of accidents and damage to the machine, please read these instructions carefully before using it for the first time. - Page 7 Warning and Safety instructions This machine is not intended for use by persons (including children) with reduced physical, sensory or mental capabilities, or lack of experience or knowledge, unless they have been shown how to use it correctly by a person responsible for their safety. Keep children away from the washing machine at all times.
- Page 8 (e.g. electric shock). Unauthorised repairs could result in unforeseen dangers for the user, for which Miele cannot accept liability. Repairs should only be undertaken by a Miele approved service technician. If this is not done, any resultant damage will not be covered by the warranty.
- Page 9 Change in good time to avoid the risk of leaks and subsequent damage. Faulty components must only be replaced by genuine Miele original spare parts. Only when these parts are fitted can the safety standards of the machine be guaranteed.
- Page 10 Warning and Safety instructions Correct application The maximum load capacity is 6.5 kg (dry laundry). See the "Programme chart" for the specific load capacities of individual programmes. Do not install your machine in rooms where temperatures below freezing may occur. Frozen hoses may burst or split. The reliability of the electronic control unit may be impaired at temperatures below freezing point.
- Page 11 If, however, you do wish to descale the machine, only use proprietary non-corrosive descaling agents and strictly observe the instructions on the packaging. A special descaling agent is available to order from the Miele Professional Service Department. Textiles which have been pre-treated in solvent-based cleaning agents must be thoroughly rinsed in clean water before being washed in the machine.
- Page 12 Miele tumble dryers can be stacked with Miele washing machines. To enable this, a stacking kit can be purchased from Miele as an optional accessory. Please ensure that you order the correct stacking kit to match the washing machine and tumble dryer combination.
-
Page 13: Operating The Washer-Extractor
Operating the washer-extractor Control panel a Start button e Pre-wash button with indicator light Starts the selected programme. f Programme selector b Display with –, OK and + buttons For selecting a programme. The See the following pages for more programme selector can be turned information. -
Page 14: Display
Operating the washer-extractor Display – / + buttons For altering the values highlighted in the display: – decreases the value or moves the highlighting upwards + increases the value or moves the highlighting downwards. OK button For confirming the value selected and choosing the next value. -
Page 15: Before Using For The First Time
Before using for the first time Reminder to remove transport bars Before using the machine for the first time ensure that it is correctly To avoid the risk of damage, the installed and connected. See transport bars must be removed "Installation and connection". -
Page 16: Notes And Tips On Laundry Care
Notes and tips on laundry care 1. Sort the laundry Removing marks ^ Badly soiled areas, stains etc. should be cleaned as soon as possible, preferably whilst still fresh. Spillages should be carefully dabbed off using a soft, colourfast cloth. Do not rub. Badly soiled areas can be pre-treated with liquid detergent, stain removers etc. -
Page 17: Load The Drum
Notes and tips on laundry care General tips The most efficient use of energy and water is achieved when a full load is – Curtains: Remove lead weights first washed. However, do not overload as or place in a laundry bag. this causes creases and reduces –... -
Page 18: Garment Care Label Symbols
Notes and tips on laundry care Garment care label symbols Ironing Washing The number of dots indicates the ironing temperature The figure quoted in the bucket is the approx. 200°C maximum temperature the garment can be washed at. The number of approx. -
Page 19: Short Instructions
Short instructions It is very important to read the Make sure that no items are "Notes and tips on laundry care" caught between the drum door and section before proceeding. seal. A Sort the laundry B Load the drum ^ Switch on the machine. The interior drum lighting will come on. - Page 20 Short instructions C Select a programme When you turn the programme selector to Special programmes, these will appear in the display. Quick wash Shirts Starch ^ Use the – or + button to highlight the programme you wish to select and confirm your selection by pressing the OK button.
- Page 21 Short instructions D Add detergent Take the level of soiling and water hardness into account when determining the amount of detergent to dispense. Too little detergent results in: – Mops etc. and laundry not getting properly clean, and with time maybe becoming grey and hard to the touch.
- Page 22 Short instructions E Start the programme Check that all items have been The Start button will flash as soon as a removed from the drum. Items left in programme can be started. the drum could discolour other items ^ Press the Start button. in the next wash or become discoloured themselves.
-
Page 23: Spinning
Spinning Maximum final spin speed Rinse and interim spin There is a spin after the main wash and Programme between the rinses. A reduction in the Cottons 1400 final spin speed will also reduce the Minimum iron 1200 interim spin speed. Delicates Towelling 1400... -
Page 24: Delay Start
Delay start ^ Confirm the programme end time by You cannot use the delay start pressing the OK button. function if your machine is fitted with a payment system. To begin delay start ^ Press the Start button. With delay start you can choose when you want the programme to end. -
Page 25: Programme Chart
Programme chart Basic programmes Cottons 30°C to 95°C Max. load 6.5 kg Use for Cotton, linen or mixed fibre fabrics. Notes – Only use Cottons 95°C for very heavily soiled laundry. – For dark coloured fabrics use a detergent for coloured fabrics, or liquid detergent. - Page 26 Programme chart Bed linen 40°C to 60°C Max. load 6.5 kg Use for Cotton and mixed fibre bed linen. Note For dark coloured fabrics use a detergent for coloureds. Additional option Pre-wash Detergent Universal detergent or detergent for coloured fabric Curtains Cold to 40°C Max.
-
Page 27: Special Programmes
Programme chart Special programmes The list of special programmes varies depending on the setting (see "Settings menu - List of special programmes"). Quick wash 20°C to 60°C Max. load 3.5 kg Use for Very lightly soiled fabrics which can be washed in a Cottons programme. - Page 28 Programme chart Proofing 30°C to 40°C Max. load 3.0 kg Use for For treating microfibre fabrics, ski wear, fine closeweave cotton garments (poplin) or tablecloths with a water and dirt resistant finish. Notes – The items should be colour sorted and freshly laundered and spun or dried before proofing.
- Page 29 Programme chart Intensive wash* 40°C to 95°C Max. load 6.5 kg Use for Heavily soiled cotton, linen and mixed fibre fabrics. Additional option Pre-wash Detergent Universal detergent or detergent for coloured fabrics Hygiene No laundry Hygiene will appear in the display if the last programme selected used a temperature below 60°C or if the Spin programme is selected.
- Page 30 Programme chart Towels 20°C to 40°C Max. load 5.5 kg Use for Lightly soiled cotton towelling. Note For dark coloured fabrics use a detergent for coloured fabrics. Detergent Universal detergent Towels + 40°C to 60°C Max. load 5.5 kg Use for Heavily soiled cotton towelling.
-
Page 31: Programme Sequence
Programme sequence Main wash Rinses Spinning Water Wash Water Rinses Interim spin Final spin level rhythm level Cottons Minimum iron Delicates – Towelling Table linen Bed linen Curtains – Cottons Eco Woollens Quick wash Shirts – Starch – – – Pillows –... - Page 32 Programme sequence Symbols: Special features in the programme sequences: d = Low water level ( = Medium water level Anti-crease: e = High water level At the end of the programme, the drum continues to turn at intervals for up to = Normal wash rhythm 30 minutes to help prevent creasing.
-
Page 33: Changing The Programme Sequence
Changing the programme sequence To alter a programme If your machine is fitted with a payment system, the programme will To alter a wash programme lock after 3 minutes and it is then no After the start of a programme it is not longer possible to cancel or alter it. -
Page 34: Adding Or Removing Laundry After A Programme Has Started
Changing the programme sequence Adding or removing laundry The door cannot be opened if: after a programme has started – the suds temperature is above 50°C. In some programmes you can add or – the water is above a certain level. remove laundry after the programme –... -
Page 35: Detergent
When using liquid detergent for programmes with a pre-wash you will need to purchase a special container from Miele which sits in the main wash compartment j of the detergent dispenser drawer. Add liquid detergent to this container for the main wash and... -
Page 36: Water Softeners
A water areas. Dispense according to the conversion kit is required which must amount specified on the packaging. be fitted by a Miele approved service First add detergent and then the water technician. softener. Use a quantity of detergent as for soft water. -
Page 37: Fabric Conditioner Or Liquid Starch
Detergent Fabric conditioner or liquid If starching frequently, thoroughly starch clean the dispenser compartment, Fabric conditioners make garments soft especially the siphon tube and fabric to handle and help prevent static cling conditioner channel, regularly. See when tumble drying. "Cleaning the detergent dispenser Starch stiffens and gives body to items drawer". -
Page 38: External Dispensing System
This washer-extractor is suitable for connecting to an external dispensing system. A conversion kit is required for the washer-extractor to be operated using an external dispensing system. This must be fitted by a Miele approved service technician. The external pumps are controlled by relays in the washer-extractor. - Page 39 Detergent Prewash Main wash Fabric Finishing conditioner agent Special programmes Quick wash – – Shirts – – Pillows – – Outerwear – – Proofing – – – Denim – – Dark garments – – Maintenance prog. – – – Intensive wash –...
-
Page 40: Cleaning And Care
Cleaning and care ^ Pull out the detergent dispenser Disconnect the machine from the drawer until a resistance is felt. Press mains electricity supply. down the release catch and at the same time pull the drawer right out of the machine. Cleaning the machine Do not use solvents, abrasive cleaners, glass cleaners or... - Page 41 Cleaning and care Cleaning the detergent dispenser Cleaning the drum, suds container drawer housing and drainage system The drum, suds container and drainage system can be cleaned if necessary. ^ Run a programme of at least 60°C with a small quantity of powder detergent, but without any laundry.
-
Page 42: Cleaning The Water Inlet Filters
Cleaning and care Cleaning the water inlet filters Turn on the tap and check the The machine has two filters to protect connection is watertight. If water the water inlet valve. These filters drips out, tighten the connection. should be checked every six months or so, or more often if there are frequent To clean the filter in the water inlet interruptions to the external water... -
Page 43: Problem Solving Guide
With the help of the following notes, minor faults in the performance of the machine, some of which may result from incorrect operation, can be put right without contacting the Miele Professional Service Department. Please note, however, that a call-out charge will be applied to service visits where the problem could have been rectified as described in these operating instructions. -
Page 44: Fault Messages In The Display
Drainage fault – The water outlet is LP version: Clean the drain blocked or restricted. filter and the drain pump. AV version: Call the Miele Professional Service Department. – The drain hose has The maximum drain height been fixed too high. -
Page 45: General Problems
Problem solving guide General problems Problem Possible cause Remedy The machine feet are Level the machine (see The machine shakes during the spin cycle. not level. "Installation"). The pump makes strange This is not a fault! These noises occur at the end of noises. -
Page 46: An Unsatisfactory Wash Result
Problem solving guide An unsatisfactory wash result Problem Possible cause Remedy Liquid detergents – Use a general purpose detergent Liquid detergent does not give the usually contain no containing a bleaching agent. required result. bleaching agents. – Pour stain removers into compartment j of the dispenser They do not remove fruit, coffee and tea... -
Page 47: The Drum Door Cannot Be Opened By Pressing The Door Button
Problem solving guide The drum door cannot be opened by pressing the Door button Possible cause Remedy There is no power to the Check whether machine. – the machine is switched on. – the electricity supply to the machine is switched –... -
Page 48: Opening The Drum Door In The Event Of A Blocked Drain Outlet And/Or Power Failure
Problem solving guide Opening the drum door in the ... Machines with a drain pump event of a blocked drain outlet If the drain outlet is clogged, a large and/or power failure amount of water will be retained in the machine (up to 30 litres). - Page 49 Problem solving guide Once the flow of water ceases: Make sure the drain filter is securely tightened. Otherwise there is a risk of water leakage during use. To activate the ball valve and prevent a loss of washing detergent, pour approx. 2 litres of water through the detergent dispenser drawer after cleaning the drain filter.
- Page 50 Problem solving guide ... Machines with a drain valve Opening the drum door Always make sure that the drum is stationary before reaching into the machine to remove laundry. Reaching into a moving drum is extremely dangerous. ^ Push the emergency drain lever downwards (see illustration) and hold until no more water runs out.
-
Page 51: After Sales Service
The indicator or check light marked PC contact: on the fascia panel is the interface used – the Miele Professional Service by Miele service technicians during Department servicing work for testing purposes and (see back cover for contact details). -
Page 52: Installation And Connection
Installation and connection Front view a Inlet hose (cold water) g Access to drain filter, drain pump or dump valve and emergency release b Inlet hose (hot water) h Height adjustable feet c Electrical connection i Plinth d Control panel j Fixing bracket (for installing on a e Detergent dispenser drawer concrete plinth) -
Page 53: Rear View
Installation and connection Rear view a Holder for: d Inlet hose (cold water) e Inlet hose (hot water) – Inlet hose f Drain hose for drain pump – Drain hose g Drain pipe (optional accessory) for – Transit bars when removed machines with a dump valve b Mains connection cable h Height adjustable feet... -
Page 54: Installing The Machine
Installation and connection Installing the machine This washer-extractor is not suitable for building under. The machine must be permanently connected to the electricity supply so that the door can be opened. For this reason, it must not be connected to devices such as timers which would switch it off automatically. -
Page 55: Installation Surface
Installation and connection Installation surface Removing the transit bars ^ These must be removed before the Ensure that the machine feet and machine is used for the first time. the floor are dry to prevent the machine from slipping during the spin cycle. - Page 56 Installation and connection ^ withdraw the transit bar. ^ withdraw the transit bar. To avoid the risk of injury, the holes for the transit bars must be covered after they have been removed. ^ Turn the right-hand transit bar 90°, then ^ Fit the covers onto the two holes.
-
Page 57: Re-Fitting The Transit Bars
Installation and connection Levelling the machine The machine must stand perfectly level on all four feet to ensure safe and proper operation. Incorrect installation may increase electricity and water consumption and may cause the machine to move about. Screwing out and adjusting the feet The four adjustable screw feet are used to level the machine. -
Page 58: Securing The Machine To Prevent It Slipping
Installation and connection Securing the machine to prevent it slipping ^ Secure both front feet on the washing ^ Use a spirit level to check the machine using the fixing brackets machine is standing level. supplied. ^ Hold foot 1 securely with a pipe ^ Follow the fitting instructions wrench. -
Page 59: Washer-Dryer Stack
Installation and connection Washer-dryer stack Installation on a raised plinth A Miele tumble dryer can be stacked The washer-extractor can be installed on top of this washer-extractor. A "WTV" on a steel plinth (open or closed, stacking kit (optional accessory) is available as an optional Miele required for this. -
Page 60: Plumbing
10 bar (100 kPa and 1,000 kPa). At Maintenance and care higher water pressures it is essential to Only use a genuine Miele hose should fit a reducer valve. you ever need a replacement. Miele Connection to the water supply should... -
Page 61: Connection To The Hot Water Supply
Installation and connection Connection to the hot water supply If the machine is not connected to a hot water supply, the water settings for the To keep electricity consumption costs main wash, pre-wash and rinses must down this machine can be connected be re-programmed and the hot water to a (ring) piped hot water supply. -
Page 62: Water Drainage
(up to a max. of 1.6 m) a second Dump valve version duo-drain pump is available with the corresponding kit from the Miele A motorised dump valve is used to Professional Service Department. drain the machine. A DN 70 angle... -
Page 63: Electrical Connection
Conversion may only be carried out Connection should be made via a by a Miele authorised service suitable connection socket or isolator technician or Miele technician. which complies with local and national... -
Page 64: Single Phase Ac 230 V - Country Variant
Installation and connection Single phase AC 230 V - country variant This device is intended for connection to a power supply system where the maximum value of external phase neutral loop impedance Z 0.38 Ohms at the point of distributor supply connection is not exceeded. -
Page 65: Technical Data
Technical data Height 850 mm Width 595 mm Depth 725 mm Depth with door open 1,085 mm Weight 109 kg Max. floor load in operation 3000 Newton Capacity 6.5 kg dry laundry Voltage See data plate Connected load See data plate Fuse rating See data plate Emission sound pressure level... -
Page 67: Changing Default Settings
– Some settings are visible and can be changed by all operators via the Settings menu J. – All settings can be locked to prevent unauthorised access. They are then only accessible under Settings/Supervisor level by entering an access code. Please speak to the Miele Professional Service Department for details. -
Page 68: Settings Menu J
Settings menu J Language J To open the Settings menu A Turn the programme selector to The display can be set to appear in Finish. The entry menu will appear. one of several different languages. 15:03 You can select one of the languages displayed via the Languages Select a programme sub-menu. -
Page 69: Settings/Supervisor Level Menu
Settings/Supervisor level menu ^ Repeat the process until all three The Settings menu (with the numbers have been entered. exception of Language J) is locked ^ After the last number has been with a code to prevent it being entered, press the OK button. accessed by unauthorised personnel. -
Page 70: Suds Cooling
Settings/Supervisor level menu Language J Time of day The display can be set to appear in First select either a 24 hour or 12 one of several different languages. hour clock, or not to have a clock displayed at all. Then set the current You can set the language you want as time of day. -
Page 71: Supervisor Level
Settings/Supervisor level menu Supervisor level Standby (Display) You can alter the access code to the To save energy, the display goes out supervisor level. after 10 minutes and the Start button flashes slowly. ^ Enter the old code. Turning the programme selector or ^ Enter a new code. -
Page 72: Memory
Settings/Supervisor level menu Memory Main wash water If an extra option has been selected You can choose for the main wash to for a programme, or the be carried out with either hot or cold recommended temperature or spin water (not available with the Woollens speed has been altered, the machine and Curtains programmes). - Page 73 Settings/Supervisor level menu Low water pressure Temperature pre-wash This setting should be activated to You can choose the temperature you ensure the correct amount of water is want the pre-wash to be carried out taken into the machine in areas at in the Cottons and where the water pressure is Grease and fat + programme.
-
Page 74: Minimum Iron Duration
Settings/Supervisor level menu Minimum iron duration 2. Intensive: The Intensive wash and Hygiene* programmes are available in You can increase the wash duration addition to those listed under option 1. for the main wash in the Minimum * The Hygiene programme only iron programme. -
Page 75: No. Rinses Cottons
Settings/Supervisor level menu No. rinses Cottons Pre-rinse Cottons You can alter the number of rinses A pre-rinse can be carried out in the which are carried out in the Cottons Cottons programme. programme. The machine is delivered with this 2 rinses (factory default setting) option deactivated. - Page 76 Alteration rights reserved/4713 M.-Nr. 09 756 190 / 00...
Need help?
Do you have a question about the PW 5065 and is the answer not in the manual?
Questions and answers