Table of Contents

Related Manuals for Miele PW 6065 Vario


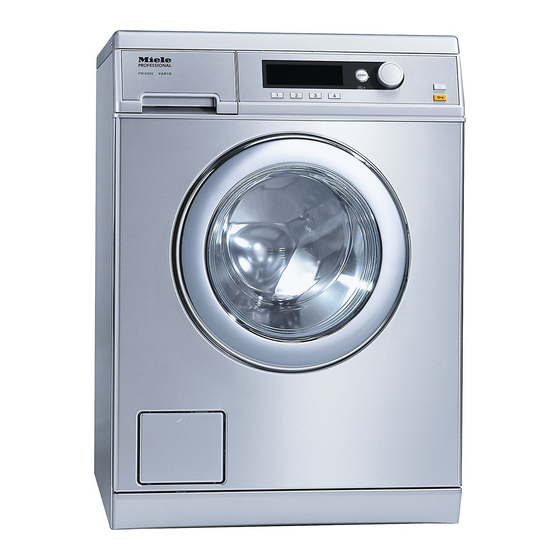
Summary of Contents for Miele PW 6065 Vario
- Page 1 Operating and installation instructions for washer-extractor PW 6065 Vario en - GB To avoid the risk of accidents or damage to the machine it is essential to read these instructions before it is installed and used for the first time.
-
Page 2: Caring For The Environment
Caring for the environment Disposal of the packing Energy saving tips material Energy and water consumption The packaging is designed to protect – Water consumption and energy the machine from damage during usage are determined by the size of transportation. The packaging materials the load. -
Page 3: Table Of Contents
Contents Caring for the environment ......... . 2 Warning and Safety instructions . - Page 4 Contents Changing the programme sequence ....... . . 31 Programme sequence ..........31 Anti-crease .
- Page 5 Contents After sales service ..........48 PC / Optical interface.
-
Page 6: Warning And Safety Instructions
Warning and Safety instructions This machine complies with current safety requirements. Inappropriate use can, however, lead to personal injury and damage to property. To avoid the risk of accidents and damage to the machine, please read these instructions carefully before using it for the first time. - Page 7 Warning and Safety instructions This machine can only be used by people with reduced physical, sensory or mental capabilities, or lack of experience or knowledge, if they are supervised whilst using it or have been shown how to use it in a safe way and recognise and understand the consequences of incorrect operation.
- Page 8 Unauthorised repairs could result in unforeseen dangers for the user, for which Miele cannot accept liability. Repairs should only be undertaken by a Miele authorised service technician. If this is not done, any resultant damage will not be covered by the guarantee.
- Page 9 Change in good time to avoid the risk of leaks and subsequent damage. Faulty components must only be replaced by genuine Miele original spare parts. Only when these parts are fitted can the safety standards of the machine be guaranteed.
- Page 10 Warning and Safety instructions Correct use The maximum load of dry laundry for this machine is 6.5 kg. See the "Programme chart" for the maximum recommended loads in individual programmes. Do not install your machine in rooms where temperatures below freezing may occur.
- Page 11 A special descaling agent is available to order from your Miele Dealer or the Miele Spare Parts Department. Textiles which have been pre-treated in solvent based cleaning agents must be thoroughly rinsed in clean water before being washed in the machine.
- Page 12 Accessory parts may only be fitted when expressly approved by Miele. If other parts are used, guarantee, performance and product liability claims will be invalidated. A Miele tumble dryer can be stacked on top of a Miele washing machine using the appropriate stacking kit (available as an optional accessory).
-
Page 13: Operating The Washer-Extractor
Start button d PC/Optical interface This is used by Miele service technicians during servicing work for testing purposes. e Multi-function selector This is used to select menu options (by turning it) and to confirm your selection (by pressing it). -
Page 14: Display
Operating the washer-extractor Display Entry menu Cottons Uni. 60°C Programme selection... 2 Minimum iron 40°C Settings F... 3 Delicates 40°C 10:00 4 Woollens H 30°C When the machine is switched on, the entry menu (with four favourite programmes listed) appears and Programme selection is highlighted. - Page 15 Operating the washer-extractor Programme selection menu Programme Cottons Hygiene selection Cottons Uni. Minimum iron Delicates You can use the multi-function selector to select any pro- gramme. The highlighting will move up or down depending on the direction the multi-function selector is turned in. The HV arrows on the right of the display, indicate further options.
-
Page 16: Operating A Wash-Salon Machine
Operating the washer-extractor Operating a wash-salon machine The entry menu will vary depending on the Control setting selected. The machine is operated either with the short cut buttons D, E, F, G or the multi-function selector. WS shortcut keys, basic Cottons Uni. -
Page 17: Notes And Tips On Laundry Care
Notes and tips on laundry care 1. Sort the laundry Removing marks ^ Badly soiled areas, stains etc. should be cleaned as soon as possible, preferably whilst still fresh. Spillages should be carefully dabbed off using a soft, colourfast cloth. Do not rub. Badly soiled areas can be pre-treated with liquid detergent, stain removers etc. -
Page 18: Load The Drum
Notes and tips on laundry care 2. Load the drum General tips ^ Switch the machine on with the – Curtains: Remove lead weights first On/Off button K. or place in a laundry bag. – Underwiring and collar stiffeners: The interior drum lighting will come Any loose wiring in bras, shirt collar stiffeners, etc. -
Page 19: Garment Care Label Symbols
Notes and tips on laundry care Garment care label symbols Ironing Washing The number of dots indicates the ironing temperature The figure quoted in the bucket is the approx. 200°C maximum temperature the garment can be washed at. The number of approx. -
Page 20: Short Instructions
Short instructions It is very important to read the "Notes and tips on laundry care" section before proceeding. A Sort the laundry B Load the drum ^ Switch on the machine. The interior drum lighting will come on. Make sure that no items are caught between the door and the drum. - Page 21 Short instructions C Select a programme Payment system Programme descriptions If your machine is connected to a payment system, the amount of credit – See separate booklet required will appear in the display. "Commissioning, Programme chart and Settings". Credit will be lost if, after the pro- You can select a programme either by: gramme has started, the door is opened or the programme cancelled...
- Page 22 Short instructions D Add detergent Take the level of soiling and water hardness into account. Too little detergent results in: – Laundry not getting properly clean, and with time may become grey and hard to the touch. – Greasy particles clinging to laundry. –...
- Page 23 Short instructions E Start the programme The machine will switch off The Start button will flash as soon as a automatically 15 minutes after the programme can be started. end of the anti-crease phase. You will need to press the K button to switch ^ Press the Start button.
-
Page 24: Select A Programme
Select a programme Selecting/changing a programme Entry menu Cottons Uni. 60°C Programme selection... 2 Minimum iron 40°C Settings F... 3 Delicates 40°C 15:00 4 Woollens H 30°C ^ Press short cut button D. Main menu Cottons Uni. 60°C 1400 rpm Duration: 0:47 h Extras Timer Y... - Page 25 Select a programme Note: If you do not make a selection in the sub-menu within approx. 15 seconds, the display will revert to the main menu. – Temperature selection Cottons Uni. °C 1400 rpm Temperature from Cold - 60°C ^ Use the multi-function selector to select the temperature you want and confirm your selection.
-
Page 26: Saving A Favourite Programme
Select a programme Saving a favourite programme You can programme the short cut buttons to call up the four wash programmes you use most frequently. The Save option must be activated via the Settings/Supervisor level menu before the short cut buttons can be programmed. Cottons Uni. -
Page 27: Extras
Extras You can use the Extras option to augment the basic wash programmes. To open the Extras sub-menu Cottons Uni. 60°C 1400 rpm Duration: 0:47 h Extras Timer Y Back A ^ Press short cut button D. This opens the Extras sub-menu. -
Page 28: Rinse Hold
Extras Rinse hold The laundry is not spun after the last rinse and remains suspended in the final rinse water. This reduces creasing if the laundry is not going to be removed from the drum immediately after the end of the programme. Intensive* For heavy soiling or where staining is visible. -
Page 29: Timer
Timer The timer can be used to select the time you want the pro- gramme to finish. The start of a programme can be delayed from 30 minutes up to a maximum of 24 hours, To open the Timer sub-menu Cottons Uni. -
Page 30: Spinning
Spinning Maximum final spin speed To omit the final spin (Rinse hold) ^ Select Rinse hold from the Extras You can reduce the final spin speed. However, you cannot select a final spin sub-menu. The laundry will not be speed higher than that permitted for the spun and will remain suspended in programme selected. -
Page 31: Changing The Programme Sequence
Changing the programme sequence Programme sequence To cancel a programme This machine has fully electronic You can cancel a programme at any controls with automatic load time after it has started: recognition. It takes in the right amount ^ Press short cut button G Cancel. of water required for the programme The suds will be pumped away. -
Page 32: Adding Or Removing Laundry After A Programme Has Started
Changing the programme sequence Adding or removing laundry The door cannot be opened, if: after a programme has started – the suds temperature is above 50°C. In some programmes you can add or – the water is above a certain level. remove laundry after the programme –... -
Page 33: Detergent
Detergent Washing with several Detergent dispensing components Please follow the detergent If you wash using several components manufacturer's instructions. (e.g. special application detergents), we recommend always dispensing the Instructions for use and recommended agents into compartment j in the amounts for a full load are given on the following order: detergent packaging. -
Page 34: Fabric Conditioners, Liquid Starch And Starch Formulations
Detergent Fabric conditioners, liquid Adding fabric conditioner or liquid starch separately starch and starch formulations ^ Add fabric conditioner or liquid ^ Dispense according to the amount starch to compartment §. specified on the packaging. ^ Select the Extra rinse programme. Automatic dispensing of fabric ^ Press the Start button. -
Page 35: External Dispensing System
2 minutes at a time. A separate conversion kit for electrically controlling the dispensing pumps is required, and must be fitted by a Miele approved service technician. The reley is controlled as described in the separate booklet supplied with the machine. The containers must be filled with the correct detergent or disinfectant in the order specified. - Page 36 Detergent If a Disinfection programme is running, the following message is displayed: Fault Container empty The programme will be cancelled. ^ Press short cut button D to delete the message in the display, and refill the container. ^ Start the programme again. If the container is empty for a disinfection programme, you have to assume that no disinfection has taken place.
-
Page 37: Cleaning And Care
Cleaning and care ^ Pull out the detergent dispenser Disconnect the machine from the drawer until a resistance is felt. Press mains electricity supply. down the release catch and at the same time pull the drawer right out of the machine. Cleaning the machine ^ Clean the drawer with warm water. - Page 38 Cleaning and care Cleaning the detergent dispenser Cleaning the drum, suds container drawer housing and drainage system The drum, suds container and drainage system can be cleaned if necessary. ^ Start the Hygiene programme. ^ At the end of the programme check the inner drum and remove any coarse residues.
-
Page 39: Cleaning The Water Inlet Filters
Cleaning and care Cleaning the water inlet filters Turn on the stopcock and check the The machine has two filters to protect connection is watertight. If water the water inlet valve. These filters drips out, tighten the connection. should be checked every six months or so, or more often if there are frequent To clean the filter in the water inlet interruptions to the external water... -
Page 40: Problem Solving Guide
Problem solving guide With the help of the following notes, minor faults in the performance of this machine, some of which may result from incorrect operation, can be put right without contacting the Service Department. Repair work to electrical appliances should only be carried out by a suitably qualified person in strict accordance with current local and national safety regulations. -
Page 41: A Fault Message Appears In The Display
Problem solving guide A fault message appears in the display Remedy A Message in the display Possible cause Water intake fault The water inlet is Check whether Open the stopcock blocked or restricted. – the stopcock is opened enough. check the inlet hose. –... -
Page 42: General Problems
Problem solving guide General problems Problem Possible cause Remedy The machine shakes The machine feet are not Level the machine (see during the spin cycle. level. "Installation and connection"). The pump makes This is not a fault! These noises occur at the end of a strange noises. -
Page 43: An Unsatisfactory Wash Result
Problem solving guide An unsatisfactory wash result Problem Possible cause Remedy Liquid detergents – Use a general purpose detergent Liquid detergent does not give the usually contain no containing a bleaching agent. required result. bleaching agents. – Pour stain removers into compartment j of the They do not remove fruit, coffee and tea... -
Page 44: The Drum Door Cannot Be Opened By Pressing The A Button
Problem solving guide The drum door cannot be opened by pressing the a button Possible cause Remedy There is no power to the Check whether machine. – the machine is switched on. – the electricity supply to the machine is switched –... -
Page 45: Opening The Drum Door In The Event Of A Blocked Drain Outlet And/Or Power Failure
Problem solving guide Opening the drum door in the ... Machines with a drain pump event of a blocked drain outlet If the drain outlet is clogged, a large and/or power failure amount of water will be retained in the machine (up to 30 litres). - Page 46 Problem solving guide Once the flow of water ceases: Make sure the drain filter is securely tightened. Otherwise there is a risk of water leakage during use. To avoid loss of detergent, pour approx. 2 litres of water into the detergent dispenser drawer after cleaning the drain filter.
- Page 47 Problem solving guide ... Machines with a dump valve Opening the drum door Always make sure that the drum is stationary before reaching into the machine to remove laundry. Reaching into a moving drum is extremely dangerous. ^ Push the emergency drain lever downwards (see illustration) and hold until no more water runs out.
-
Page 48: After Sales Service
Optional accessories for this porthole glass when the drum door is washer-extractor are available from open. your Miele Dealer or from the Miele Spare Parts Department. Please note that telephone calls may be monitored and recorded for training purposes. -
Page 49: Installation And Connection
Installation and connection Front view a Inlet hose (cold water) g Access to drain filter, drain pump or dump valve and emergency release b Inlet hose (hot water) h Height adjustable feet c Electrical connection i Plinth d Control panel j Fixing bracket (for installing on a e Detergent dispenser drawer concrete plinth) -
Page 50: Rear View
Installation and connection Rear view a Holder for: d Adapter for external dispensing system – Inlet hose e Inlet hose (cold water) – Drain hose f Inlet hose (hot water) – Transit bars when removed g Drain hose for drain pump b Mains connection cable h Drain pipe (optional accessory) for c Safety cap for transit bars... -
Page 51: Installing The Machine
Installation and connection Installing the machine This washer-extractor is not suitable for building under. The machine must be permanently connected to the electricity supply so that the door can be opened. For this reason, it must not be connected to devices such as timers which would switch it off automatically. -
Page 52: Installation Surface
Installation and connection Installation surface Removing the transit bars ^ These must be removed before the Ensure that the machine feet and machine is used for the first time. the floor are dry to prevent the machine from slipping during the spin cycle. - Page 53 Installation and connection ^ withdraw the transit bar. ^ withdraw the transit bar. To avoid the risk of injury the holes for the transit bars must be covered after they have been removed. ^ Turn the right-hand transit bar 90°, then ^ Fit the covers onto the two holes.
-
Page 54: Re-Fitting The Transit Bars
Installation and connection Levelling the machine The machine must stand perfectly level on all four feet to ensure safe and proper operation. Incorrect installation may increase electricity and water consumption and may cause the machine to move about. Screwing out and adjusting the feet The four adjustable screw feet are used to level the machine. -
Page 55: Securing The Machine To Prevent It Slipping
Installation and connection Securing the machine to prevent it slipping ^ Secure both front feet on the washing ^ Use a spirit level to check the machine using the fixing brackets machine is standing level. supplied. ^ Hold foot 1 securely with a pipe ^ Follow the fitting instructions wrench. -
Page 56: Washer-Dryer Stack
Installation and connection Washer-dryer stack Installation on a raised plinth A Miele tumble dryer can be stacked The washer-extractor can be installed on top of this washer-extractor. A "WTV" on a steel plinth (open or closed, stacking kit (optional accessory) is available as an optional Miele required for this. -
Page 57: Plumbing
Maintenance and care with a flow pressure of between 1 and 10 bar (100 kPa and 1,000 kPa). At Only use a genuine Miele hose should higher water pressures it is essential to you ever need a replacement. Miele fit a reducer valve. -
Page 58: Connection To The Hot Water Supply
85°C. A special inlet hose exceed 70°C. is required. The machine must also be reprogrammed by a Miele service It is not economical to run it from an technician or Miele authorised service individual hot water supply if it is not in dealer. -
Page 59: Water Drainage
(up to a max. of 1.6 m) a second Dump valve version duo-drain pump is available with the corresponding kit from the Miele Spare A motorised dump valve is used to Parts Department or your Miele Dealer. drain the machine. A DN 70 angle... -
Page 60: Electrical Connection
30 mA residual current device (RCD). An electrical safety test must be carried out after installation and after any ser- WARNING vice work. THIS MACHINE MUST BE The mains connection cable may only EARTHED be replaced by an original Miele spare part. -
Page 61: Single Phase Ac 230 V - Country Variant
Installation and connection Single phase AC 230 V - country variant This device is intended for connection to the power supply with Earth Fault Loop impedance Z not exceeding 0.38 Ohms. If in doubt please contact your electricity supplier or a qualified electrician for advice. -
Page 62: Technical Data
Technical data Height 850 mm Width 595 mm Depth 725 mm Depth with door open 1085 mm Weight 109 kg Max. load bearing in operation 3000 Newton Capacity 6.5 kg dry laundry Voltage See data plate Connected load See data plate Fuse rating See data plate Emission sound pressure level... - Page 64 Dubai Tel: (01) 461 07 10, Fax: (01) 461 07 97 Tel: +971-4-341 84 44 E-Mail: info@miele.ie, Internet: www.miele.ie Fax: +971-4-341 88 52 Manufacturer: Miele & Cie. KG E-Mail: info@miele.ae Carl-Miele-Straße 29, 33332 Gütersloh, Germany Internet: www.miele.ae Alteration rights reserved/1015...
Need help?
Do you have a question about the PW 6065 Vario and is the answer not in the manual?
Questions and answers