
Related Manuals for hattrick OLYMPIC


Summary of Contents for hattrick OLYMPIC
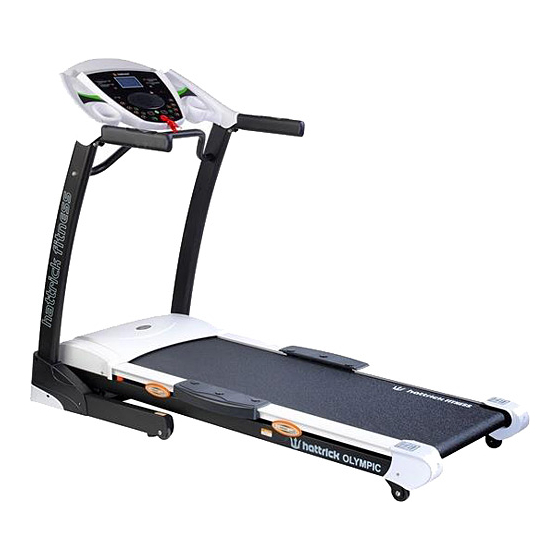
- Page 1 OLYMPIC TREADMILL USER MANUAL PLEASE READ ALL INSTRUCTION IN THE OWNER'S MANUAL CAREFULLY BEFORE ASSEMBLY AND USE THE TREADMILL. AND KEEP IT FOR FUTURE REFERENCE.
-
Page 2: Table Of Contents
CONTENTS C O N T E N T - - - - - - - - - - - - - - - - - - - - - - - - - - - - - - - - - - - - - - - - - - - - - - - - - - - - - - - - - - - - - - - - - - - - - 1 I M P O R T A N T S A F E T Y P R E C A U T I O N S - - - - - - - - - - - - - - - - - - - - - - - - - - - - - - - - - - - - 2 A S S E M B LY I N S T R U C T I O N S - - - - - - - - - - - - - - - - - - - - - - - - - - - - - - - - - - - - - - - - - - - - - - - - 3 - 5 F O L D I N G I N S T R U C T I O N S - - - - - - - - - - - - - - - - - - - - - - - - - - - - - - - - - - - - - - - - - - - - - - - - 6... -
Page 3: Important Safety Precautions
IMPORTANT SAFETY PRECAUTIONS WARNING Before starting any exercise program, consult with your physician or health professional, especially the person who is above 35 years old people or has some health problems before. We take no responsibility for any troubles or hurts due to above reasons. Don't power on until you finish assembly the treadmill and covering the protected top of motor. -
Page 4: Assembly Instructions
ASSEMBLY INSTRUCTIONS WHEN YOU OPEN THE CARTON, YOU WILL FIND THE BELOW SPARE PARTS. SPARE PARTS LIST DES. SPECIFICATION DES. SPECIFICATION MAIN FRAME BOLT M8*15 ∮ 8.4*∮ 14.5*t0.8 ALLEN WRENCH WASHER FOOT PEDAL SCREW DRIVER PLUG FRONT COVER SAFETY KEY FOOT PEDAL BOLT M6*25... - Page 5 STEP 1:Open the box and put the mainframe on the floor; Pull up the COMPUTER (18) and UPRIGHT (4L/R) as arrow direction,until the screw holes are alignment; Lock the UPRIGHT (4L/R) onto the BASE FRAME (2) with M8*15 BOLT (62)、14.5*∮ 8.4*t0.8 WASHER (76); Rotate the COMPUTER (18) as arrow direction,until the screw holes are alignment;...
- Page 6 Step 3:Use M6*25 BOLT (89) to lock FOOT PEDAL (23) onto the RUNNING BOARD (13); then put FOOT PEDAL PLUG (86) onto the FOOT PEDAL (23) to cover the bolts. STEP 4: Put on the SAFEY KEY (87) and MP3 WIRE (92). ATTENTION Must confirm complete assembly as the required above and lock all bolts.
- Page 7 FOLDING INSTRUCTION Lift up the machine and force to pull up until you heard "click" that made by safety casing stuck the pneumatic cylinder. UNFOLDING INSTRUCTION Use foot kick the safety sleeve lightly and pull down the machine at the same time as the arrow direction.
-
Page 8: Incline Instructions
INCLINE INSTRUCTIONS PIC I PIC II INCLINE INSTRUCTIONS 【INCLINE+】 【INCLINE-】and 【+】 【-】on handrail is incline add and subtract button. To adjust incline when treadmill running, the stepping is 1 level / time. Press the button more than 2 seconds, will be up or down automatic. Also have shortcut key 3, 6, 9,12. -
Page 9: Grounding Methods
GROUNDING METHODS This product must be grounded. If it should be malfunction or breakdown, grounding provides a path of least resistance for electric current to reduce the risk of electric shock. This product is equipped with a cord having an equipment-grounding conductor and a grounding plug. The plug must be plugged into an appropriate outlet that is properly installed and grounded in accordance with all local codes and ordinances. -
Page 10: O P E R A T I O N G U I D
OPERATION GUIDE 1. WINDOWS DISPLAY LCD SCREEN:... - Page 11 LCD WINDOW FUNCTION 1. "SPEED" WINDOW: Display the current SPEED, the range is 1.0-20.0 KM/H.When you press START button, it shows 3 secondes count down: 3、2、1. 2. " DIST. / CALO." WINDOW: 2.1 Display running distance. Every 5 seconds, DIST screen will change to CALO. screen. 2.2 Display the calorie value.
- Page 12 To adjust speed when treadmill start, the scope is 0.1 km/hypo in kilometer. To adjust incline when treadmill start, the scope is 1%。 4 / 8 / 12 / 16 adjust the speed when treadmill is running 3 / 6 / 9 / 12 adjust the incline.when treadmill is running.
- Page 13 10 12 ” or rotate the right handrail around to adjust speed . Press “INCLINE (+-)”, “3 6 9 12 ” or rotate the left handrail around to adjust incline. When countdown to 0, the treadmill will stop slowly. Also you could press the "STOP" button or take away the safety lock to stop. 3.BUILD-IN PROGRAM When the treadmill is not running, press program button, the speed window will display “P1-P24”.
- Page 14 MP3 FUNCTION This treadmill can accept various media medium : SD card / USB disk / MP3 wire / headset socket. When you are playing music,please make sure the treadmill is in louder state, not “MUTE” state. A. SD card / USB disk display: Insert the SD card or USB disk with music, the system will play them automatically.
- Page 15 PARAMETERS ARRANGE NOTE 01--02 01= MALE 02= FEMALE 10—99 YEARS HEIGHT 100—200 CM WEIGHT 20—150 KGS RUNNING PARAMETER DISPLAY AND SETTING RANGE Default value Default setting value Setting range Display range TIME(min: s) 30:00 30:00 5:00---99:00 0:00—99:59 SPEED(km/h) -------- -------- -------- 1—20 KMH DISTANCE(km)
-
Page 16: S A F E T Y E X E R C I S
PROGRAM EXERCISE CHAT TIME SETTING TIME / 20 GRADES = EVERY GRADE TIME 10 11 12 13 14 15 16 17 18 19 20 PROG SPEED INCLINE SPEED INCLINE SPEED INCLINE SPEED INCLINE SPEED INCLINE SPEED INCLINE SPEED INCLINE SPEED INCLINE 10 10 10 12 12 8 SPEED... - Page 17 INCLINE SPEED INCLINE SPEED INCLINE SPEED 10 8 INCLINE SPEED 10 6 10 6 INCLINE 10 10 10 12 12 8 SPEED INCLINE SPEED INCLINE SPEED INCLINE SPEED INCLINE SPEED INCLINE 10 9 10 9 SPEED INCLINE 10 8 10 8 SPEED INCLINE...
- Page 18 GETTING STARTED GUIDE PREPARE If you are around 35 years old, or have health problem, even this is your first time to do fitness exercise, please consult doctor or professional before use it. Before do exercise, please stand on the side to learn how to operate, such as start, stop and speed adjustment. After that stand on the plastic deck of the treadmill board, catch hold of the handrail, start by 1.6--3.2 km/h low speed, stand straight, look forward, one foot try to do few times, then stand on the belt to do exercise.
- Page 19 SAFETY EXERCISE Please consult professional staff before do exercise. He can help recommendation exercise rate/intension and time according to your age and health condition. When running, if you feel chest tightness or chest pain, irregular Heartbeats, short of breath, dizziness or other unwell, please stop immediately! And consult professional before you want continually to do exercise.
-
Page 20: W A R M - U P E X E R C I S
WARM-UP EXERCISE It is better to do some warm-up exercise. Warm the muscle easy stretch, so use 5-10 minutes to warm-up. Then stop and according below method to do stretch exercise for five times, and each foot do 10 seconds or more every time. After running, do those stretch exercises one more time. -
Page 21: Maintenance Instruction
MAINTENANCE INSTRUCTION WARNING Please make sure pulled out the treadmill's power plug before cleaning or maintain the product. CLEANING General cleaning or the unit will greatly prolong the treadmill. Keep treadmill clean by dusting regularly. Be sure to clean the exposed part of the deck on either side of the walking belt and also the side rails. -
Page 22: M O T O R B E Lt A D J U S T M E N
MOTOR BELT ADJUSTMENT If you feel the running belt has occasional pause when you are running, the running belt or motor belt is flabby, you need to adjust it. JUDGEMENT METHODS Step 1: Open the motor cover, then let the treadmill work by the slowest speed. Step 2: Stand on the running belt and move together with it, hang on to the handrail foam and try your best to press the running belt with your feet. - Page 23 BELT ADJUSTMENT Place treadmill on a level surface. Make treadmill run at approximately 6-8km/h, observe the running belt deviate condition. If the belt has drifted to the right, unplug the safety lock and power switch, and turn the right adjusting bolt 1/4 turn clockwise, then insert the power switch and safety lock, make the treadmill running, observe the running belt deviate condition.
- Page 24 EXPLODED DRAWING...
- Page 25 PARTS LIST DESCRIPTION REMARK DESCRIPTION REMARK ∮ 9*∮ 62*23.5 MAIN FRAME 25L/R ADJUSTING WHEELS BASE FRAME INNER PIPE 30*60*t1.5 INCLINE BRACKET MOVING WHEELS PIPE 40*80*t1.8 4L/R UPRIGHT EDGING A MOTOR BRACKET EDGING B FRONT ROLLER FLAT CUSHION ∮30*∮6.5*16 REAR ROLLER CUSHION PAD RING PROTECTING COMPUTER BRACKT...
- Page 26 FOOT PEDAL POWER PLUG LITTLE COVER COMPUTER TOP WIRE DESCRIPTION REMARK DESCRIPTION REMARK COMPUTER BOLT M4*15 MIDDLE WIRE ∮8.1*∮12.3* COMPUTER SPRING WASHER BOTTOM WIRE t2.1 ∮8.4*∮14.5* MAGNETIC INNER WASHER SENSOR t0.8 SINGLE WIRE BOLT M5*30 CONTROLLER LOCKING NUT HANDRAIL PIPE LOCKING NUT BOLT M10*45...
-
Page 27: E R R O R C O D E A N D S I G N I F I C A N C
BOLT M4*50 LOUDERSPEAKER BOLT M6*45 BOLT ST4.2*15 BOLT M5*10 ERROR CODE AND SIGNIFICANCE FAULT CODE FAULT DESCRIPTION FAULT PROCESSING Communication The computer shows fault code “E01” abnormal: The control Possible reasons:Communication obstructed between and computer has controller and computer, please check the wire and make sure abnormal communication the wire connect well and the wire without and danger. - Page 28 self-learning again. The machine shows fault code “E06”. Explosion-Proof Possible Reason: Check the motor wire if connect well, and then Protection connect it again. Controller self-checking Change the controller. error EEPROM is broken Change the controller.
Need help?
Do you have a question about the OLYMPIC and is the answer not in the manual?
Questions and answers