Table of Contents
Advertisement
Quick Links
Advertisement
Table of Contents

Related Manuals for hattrick VISION


Summary of Contents for hattrick VISION
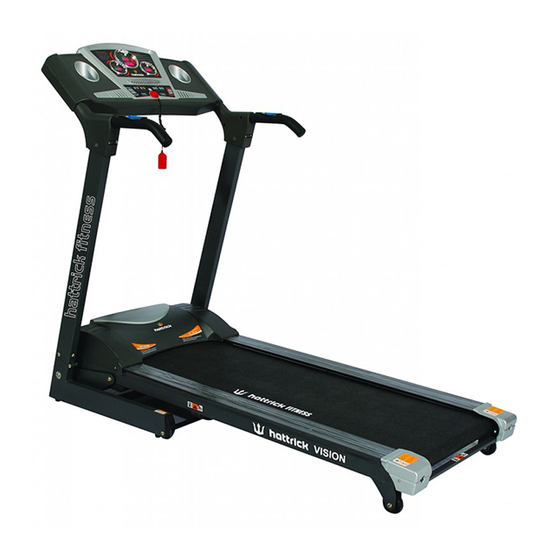
- Page 1 HATTRICK VISION MOTORIZED TREADMILL OPERATING INSTRUCTIONS MANUAL...
-
Page 2: Important Safety Instructions
IMPORTANT SAFETY INSTRUCTIONS WARNING - Read all instructions before using this treadmill. It is important your treadmill receives regular maintenance to prolong its useful life. Failing to regularly maintain your treadmill may void your warranty. Danger – To reduce the risk of electric shock disconnect your treadmill from the electrical outlet prior to cleaning and/or service work. -
Page 3: Important Electrical Information
IMPORTANT ELECTRICAL INFORMATION WARNING! 1) NEVER use a ground fault circuit interrupt (GFCI) wall outlet with this treadmill. Route the power cord away from any moving part of the treadmill including the elevation mechanism and transport wheels. 2) NEVER operate treadmill on Generator or UPS power supply. 3) NEVER remove any cover without first disconnecting AC power. -
Page 4: Fixing Tools
Warning: Now here we suggest that you should consult with your physician or health professional before starting your workout, especially for the age up to 35 old or once-health problem people. We take no responsible for any troubles or hurts if you don’t following our specification. Treadmill will be carefully assembled and covered the motor shield, then connect to the power. - Page 5 WRENCH W/SCREW DRIVER S=13、14、15 1pcs Notice: Do not connect to power source before assembly is completed ASSEMBLY STEP ONE: Open the carton, take out the above spare parts, put the MAIN FRAME on the ground. ASSEMBLY STEP TWO: Pull up the display and upright as arrow direction.
- Page 6 ASSEMBLY STEP FOUR: Use the 5# allen wrench, drill through the bolt (46) to lock washer(66), then lock the Right upright (4) onto MAIN FRAME (1) ASSEMBLY STEP FIVE: Use the 5# allen wrench, drill through the bolt (46) to lock washer(66), then lock the COMPUTER (64) onto R&L upright (3,4).
-
Page 7: Folding Instruction
FOLDING INSTRUCTION Pulling up: Support place A with hand, then pull up following the arrow direction, till hearing the sound that the cylinder (B) is locked into the round tube Pulling down: Support place A with hand , depress the place B of air pressure control bar, then the base frame will fall down automaticlly... -
Page 8: Technical Parameter
TECHNICAL PARAMETER 1585*715*1315 POWER AS ORDER REQUIRE BUILT UP SIZE(mm) MAX OUTPUT 910*715*1470 AS ORDER REQUIRE FOLDABLE IZE(mm) POWER RUNNING SURFACE 1250*450 INPUT CURRENT AS ORDER REQUIRE SIZE(mm) INCLINE 0-20 130KG SPEED RANGE 1.0-18KM/h MAX WEIGHT SPEED TIME DISTANCE CALORIES PULSE DISPLAY GROUNDING METHODS This product must be grounded. -
Page 9: Window Display
OPERATION GUIDE WINDOW DISPLAY: 1.“SPEED” window:Display speed, show range: 1.0-18KM/h. 2.“INCL” window:Show the incline, the incline range is 0-20 level; 3、“TIME” window:Show the running time, count from 0:00 to 99:59. When up to 99:59, the machine will stop smoothly and show ‘END’ in the computer; When you set the time count down, it will count down from the setting data to 0, when down to 0:00, the machine will stop smoothly and show ‘END’... -
Page 10: Button Function
reference, can not be as medicinal data. BUTTON FUNCTION: 1. “PROGRAM” Button:When the treadmill is not running, press the button can circle choose and set up the exercise time and program from “0:00” “ P1-------P5--------P10-------P15-------P24FAT”. Manual mode is the default program, the default speed in kilometer is 1KM/H. (0:00 is manual mode,pre-set program :P1-P25) 2. -
Page 11: Manual Mode
MANUAL MODE: 1. If you do not make any setting and press START button directly, the treadmill will start to run from the speed 1.0km/h, incline 0. The other windows will start to count from positive direction from windows default, press “SPEED+”, “SPEED-” change the speed, press “INCLINE+”、“INCLINE -”to change the incline;... - Page 12 TIME INTERVAL Time Mode SPEED INCLINE SPEED INCLINE SPEED INCLINE SPEED INCLINE SPEED INCLINE SPEED INCLINE SPEED INCLINE SPEED INCLINE SPEED INCLINE SPEED INCLINE SPEED INCLINE SPEED INCLINE SPEED INCLINE SPEED...
-
Page 13: Range Of Program
INCLINE SPEED INCLINE SPEED INCLINE SPEED INCLINE SPEED INCLINE SPEED INCLINE SPEED INCLINE SPEED INCLINE SPEED INCLINE SPEED INCLINE SPEED INCLINE RANGE OF PROGRAM PROGRAM BEGIN SET UP RANGE DISPLAY RANGE TIME(MIN:SECOND) 0:00 15:00 5:00-99:00 0:00-99:59 INCLINE(LEVEL) 0-20 0-20 SPEED(K/h) 1.0-18 1.0-18 DISTANCE(K) -
Page 14: Body Tester
CALORIE(THERM) 10-999 0-999 BODY TESTER: At the beginning state, press “ PROGRAM” continuely entering FAT body fat tester, press “ MODE “ enter F-1、F-2、F-3、F-4、F-5 ( F-1 SEX, F-2 AGE, F-3 HEIGHT, F-4 WEIGHT, F-5 FAT TESTER ), Press “SPEED+”、“SPEED -” to set F-1 – F4 ( refer to the following chart), after that, press “ MODE” to set F-5, grasp the hand pulse, the window will display your body quality index after 3 seconds. -
Page 15: Exercise Instructions
safety pulling rope to your clothing. 3. To end your workout safely, press the STOP button or pull out the safety pulling rope, then the treadmill will stop immediately. EXERCISE INSTRUCTIONS 1. The Warm Up Phase This stage helps get the blood flowing around the body and the muscles working properly. It will also reduce the risk of cramp and muscle injury. -
Page 16: Maintenance
week, and if possible space your workouts evenly throughout the week To tone muscle while on your treadmill you will need to have the resistance set quite high. This will put more strain on our leg muscles and may mean you cannot train for as long as you would like. If you are also trying to improve your fitness you need to alter your training program. -
Page 17: Every Week
3) Inspect the power cord. 4) Make sure the power cord is not underneath the treadmill or in any other area where it can become pinched or cut. Check the tension and alignment of the running belt. Make sure that the treadmill belt will not damage any other components on the treadmill by being misaligned. - Page 18 to the treadmill, voiding any warranty. SERVICING: IF YOU FAIL TO COMPLY WITH MAINTENANCE AND SERVICING STEPS ABOVE, YOU MAY VOID YOUR WARRANTY. IF YOU REQUIRE A SKILLED FITNESS REPRESENTATIVE TO UNDERTAKE ONE OF THE STEPS ABOVE, PLEASE CALL OR EMAIL US. General Cleaning 1) Use a soft, damp cloth to wipe the edge of the belt and the area between the belt edge and frame.
- Page 19 Feel the back surface of the running mat. If the surface is slick when touched, then no further lubrication is needed. If the surface is dry to the touch, apply a suitable silicone lubricant. We recommend you use a silicone based spray to lubricate your Treadmill. This can be purchased from your local sports Retailer or a local hardware store.
- Page 20 Center the running belt: This may cause reduced motor performance and excessive DO NOT OVERTIGHTEN the walking belt. roller wear. TO CENTER WALKING BELT: ● Place treadmill on a level surface ● Run treadmill at approximately 3.5 mph ● If the belt has drifted to the right, turn the right adjusting bolt 1/2 turn clockwise and the left adjusting bolt 1/2 turn counterclockwise ●...
- Page 21 EXPLODED DRAWING...
-
Page 22: Parts List
PARTS LIST DESCRIPTION DESCRIPTION REMARK REMARK MAIN FRAME LEFT BOTTLE BRACKET BASE FRAME RIGHT BOTTLE BRACKET LEFT HANDLEBAR LEFT UPRIGHT COVER L LEFT HANDLEBAR RIGHT UPRIGHT COVER R COMPUTER BRACKET LOCK NUT M8*30 MOTOR BRACKET BOLT INCLINE MOTOR BRACKET LOCK NUT TURNING BUSHING LOCK NUT FRONT ROLLER... - Page 23 SIDE RAIL SCREW ST4.2*12 BOTTOM COVER BOARD SCREW ST4.0*25 RUNNING BELT SCREW ST2.9*8 RIGHT HANDLEBAR COVER BOLT M8*30 WHEEL COVER SCREW ST4.2*12 MOTOR BELT TRANSFORMER BLUE CUSHION PAD LOCK WASHER BLACK CUSHION PAD LOCK WASHER TRANSPORT WHEEL LOCK WASHER FOOT PAD SPRING WASHER ADJUSTABLE WHEEL FLAT WASHER...
-
Page 24: Troubleshooting Guide
BOLT M10*30 L15 BOLT M10*50 L15 SPEAKER PLASTIC BOARD SPEAKER AMPLIFIER BOARD SCREW ST4.2*12 SCREW ST2.9*6.5 MP3 CONNECT WIRE SCREW ST3.5*40 SCREW ST4.2*12 FILTER BOLT M4*8 BIG RING TROUBLESHOOTING GUIDE 1、Probable reason for computer not workable after power start: The wire from computer to bottom control board didn’t connected well or the transformer was burnt out. - Page 25 6、E05: Current overload protecting. Over rated loaded or the motor is stuck, cause excessive current, machine will start self-protecting system. Adjust the machine and restart; Check if the motor has noise from motor or if the motor / bottom control board were burnt out, if burnt out, change good motor and bottom control;...
Need help?
Do you have a question about the VISION and is the answer not in the manual?
Questions and answers