
Related Manuals for hattrick Energy


Summary of Contents for hattrick Energy
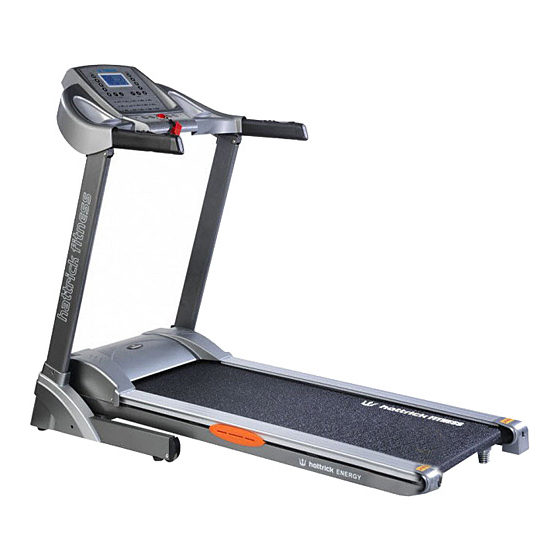
- Page 1 ENERGY USER MANUAL Read all instruction carefully before use this product. Retain this owner’s manual for the future’s reference...
-
Page 2: Safety Instructions
SAFETY INSTRUCTIONS Warning: Now here we suggest that you should consult with your physician or health professional before starting your workout, especially for the age up to 35 old or once-health problem people. We take no responsible for any troubles or hurts if you don’t following our specification. Treadmill will be carefully assembled and covered the motor shield, then connect to the power. -
Page 3: Fixing Tools
15. This Treadmill only for home-using. ●The owner’s manual is only for customers’ reference. ●The supplier can not guarantee for mistakes occurring due to translation or change in technical specification of the product. ●All data displayed are approximate guidance and cannot be used in any medical application ASSEMBLY INSTRUCTIONS When you open the carton, and you will find the below parts in the carton. - Page 4 STEP 1: 1.Open the carton, get out the above spare parts, and put the Main Frame onto the level ground. STEP 2: 1.Put the computer as below illustration, Use the 5# Allen wrench,lock the Computer frame to Left Upright and Right Upright tight by Bolt M8*16(74) and Lock washer(86).
- Page 5 Use the 5# Allen wrench (13),lock STEP 4: the Bolt M8*45 (69) and Lock washer(86),lock the Right Upright Tube (4)to the Main Frame; Use the 5# Allen wrench (13), lock Bolt M8*16 (74) and Lock washer(86) to the base frame through base and right upright tube.
- Page 6 STEP 6: Insert the spring (11) onto the Foot Pad (34),hand up the main frame, spin the foot pad with spring into the main frame. STEP 7: Put the safety key (49) on the computer. ATTENTION:Please confirm complete assembly as the require above and lock all the bolt. Do the following operation after checking everything is OK.
-
Page 7: Folding Instruction
FOLDING INSTRUCTION Pulling up: Pull up the base frame at position A, till hearing the sound that the air pressure bar B is locked into the round tube Pulling down Support place A with hand , kick the place of air pressure bar, then the base frame will fall down automatically ( Please keep anybody and any pet away the machine when falling down) -
Page 8: Grounding Method
TECHNICAL PARAMETER BUILT UP SIZE(mm) 1685*720*1350mm POWER As the rating label showing MAXIMUM FOLDED SIZE(mm) 910*720*1535mm As the rating label showing OUTPUT POWER RUNNING 480*1300mm SPEED RANGE 1-18KM/H AREA(mm) NET WEIGHT 63.8 KG 1 LCD WINDOW SPEED, TIME, DISTANCE, PULSE, CALORIES DISPLAY GROUNDING METHOD This product must be grounded. - Page 9 OPERATION GUIDE 1.LCD WINDOW DISPLAY: SPEED: Show speed When running, the speed show 1.0-18.0KM/h. When starting,The window will count down:3,2,1. TIME: Show running time; DIST.: Show distance; CAL.: Show calories; PUL.: Show heart beat data; INCL.: Show the incline data...
- Page 10 2.BUTTON FUNCTION: “PROG” button: Press this button to choose program P1-P2---P15—U01—U02—U03-----FAT; “MODE” button: When machine in standby state, press this button to choose the mode: mode-time count down, mode-distance count down, mode-calories count down; “START” button: Press this button to start the machine, the machine will run at the lowest speed or at the speed of default program after 3 seconds time count down;...
-
Page 11: Inner Install Program
Press “MODE” to get into the calories count down mode, press the button “SPEED+”、“SPEED-”、 “INCLINE+”、“INCLINE-”,could set calories,setting arrange:10.0—999.0. 4.INNER INSTALL PROGRAM: Press ‘PROG’ button to choose the inner install program from P1----P15. When set the program, the time window will show default data and glitter, press SPEED or INCLINE button to set the running time. Each program has been divided into 20 section, Each exercise time=the setting time/20. - Page 12 5.BODY FAT TEST Press ‘ PROGRAM’ button under ready condition, till ‘ FAT’ show in the window. ‘FAT’ is body fat test mode. Press ‘ MODE’ to choose parameter ‘ SEX / AGE / HEIGHT / WEIGHT’, and the window will show “-1-”, “-2-”、 “-3-”“-4-".
-
Page 13: Exercise Instructions
EXERCISE INSTRUCTIONS WARM UP STAGE If you are over 35 years old, or not very healthy, also it’s your first time exercise, please consult with your doctor or professional person. Before you use the motorized treadmill, please learn how to control the machine, know well how to start, stop, adjust the speed and so on, don’t stand on the machine at this time. - Page 14 people can help you make up the suitable exercise time-chart according to your age and health condition, determine the velocity of movement, the intensity of exercise. Please stop at once, If you feel chest tightness, chest pain, irregular heart beat, breath difficulty, dizziness or other discomfort during exercise. You should consult with your physician or health professional as keep going.
- Page 15 WARM-UP INSTRUCTION Before exercise, it is better to do stretching exercises . Warm muscles stretch more easily, so the first of 5 ~ 10 minutes to warm up. Then in accordance with the following methods to stop and do stretching exercises - do five times, each leg every time 10 seconds or more time to do it again after the end of the exercise.
-
Page 16: Servicing The Unit
RUNNING BELT ADJUSTMENT Warning: ALWAYS UNPLUG THE TREADMILL FROM THE ELECTRICAL OUTLET BEFORE CLEANING OR SERVICING THE UNIT. Clean: General cleaning or the unit will greatly prolong the treadmill. Keep treadmill clean by dusting regularly. Be sure to clean the exposed part of the deck on either side of the walking belt and also the side rails. - Page 17 CENTER THE RUNNING BELT Place treadmill on a level surface. Run Treadmill approximately 6-8KM/H, checking the running condition. If the belt has drifted to the right, pull out of the save clock and switch, turn the right adjusting bolt 1/4 turn clockwise, then start running until centering the belt.
- Page 18 EXPLODED DRAWING...
-
Page 19: Parts List
PARTS LIST DESCRIPTION SPEC. QTY NO. DESCRIPTION SPEC. Main frame Safety key Base frame Light sensor Left upright Magnet Ring Right upright Power Switch Computer Bracket Power Line 54 Overload protection Incline Bracket Motor Bracket AC Single Wire Running board Strengthen Tube Blue Single Wire Rotate Tube... - Page 20 DESCRIPTION SPEC. QTY NO. DESCRIPTION SPEC. Lock Washer Console panel Computer top cover Flat Washer Computer bottom cover Bolt ST4.2*55 Hand Pulse with Speed+/- button Bolt ST4.2*20 Hand pulse with incline +/- button Bolt ST4.2*19 Incline Motor Bolt ST4.2*19 DC Motor Bolt ST2.9*6.5 Control Board...
-
Page 21: Troubleshooting
TROUBLE SHOOTING CODE REASON SOLUTION Message failure between computer 1. Check the computer and bottom control board wire and bottom control board connect well; 2. Check if IC on bottom control board is loosen, reset the IC 3. Power on bottom control board has some problem, change the bottom control board Burst clash 1.... - Page 22 THANK YOU FOR PREFERRING OUR PRODUCT This product you have already purchased in under the guarantee of the SPOR DÜNYASI. In case you have any problems with regard to installation or service, please do not hesitate to contact our technical service department by calling 0850 495 52 12. After calling our technical service line and leaving your record the closest service unit be forwarded to you.
Need help?
Do you have a question about the Energy and is the answer not in the manual?
Questions and answers