Ingenico iWL250 User Manual
Autolink point-of-sale (pos) device supplied and supported by standard bank
Hide thumbs
Also See for iWL250:
- User manual (44 pages) ,
- Quick manual (10 pages) ,
- Short instruction manual (4 pages)
Table of Contents
Advertisement
Advertisement
Table of Contents

Subscribe to Our Youtube Channel
Related Manuals for Ingenico iWL250


Summary of Contents for Ingenico iWL250
- Page 1 Merchant Solutions AutoLink User Manual...
- Page 2 AutoLink User Manual iWL250 Point-of-sale (POS) device supplied and supported by Standard Bank...
-
Page 3: Table Of Contents
Contents iWL250 Package Contents POS Device Functions Card Information Overview Retail Transactions Operator Functions Restaurant Transactions Operator Functions 4.3. Forecourt Transactions Operator Functions Workshop Transactions Operator Functions Usage and Maintenance of the POS Device Refund Transactions Accepting Chip and PIN Cards... -
Page 4: Iwl250 Package Contents
Package Contents • iWL250 portable POS device • Power supply unit • Application user and manager manual • Thermal paper roll X2 • Imprinter booklet iWL250... -
Page 5: Pos Device Functions
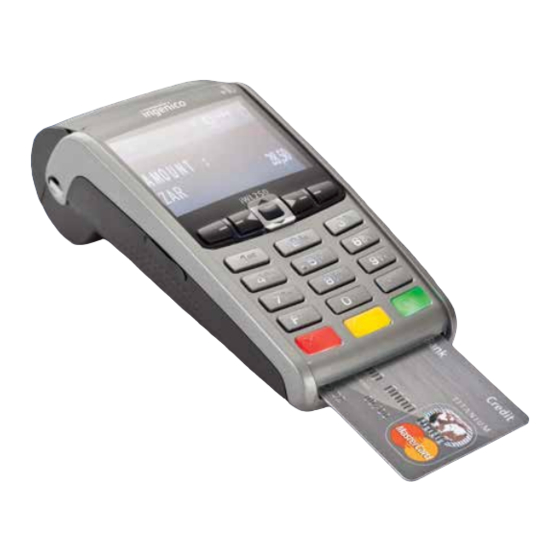
POS Device Functions iWL250 Magnetic Strip Paper Clip Pull paper clip up and forward to open the paper housing Scroll up and down Scroll up and down a Menu menu list Enter a function menu list Enter Press enter to confirm messages... -
Page 6: Card Information Overview
Card Information Overview Issuing bank The responsible bank who issued the card to the member. Tap to Pay Tap to Pay™ functionality available. Card association logos All POS devices accept VISA, MasterCard® and Union Pay International. American Express, Diners Club, RCS, Fleet and other card types can only be accepted if the merchant has signed a separate merchant agreement with these issuers. -
Page 8: Transactions
Transactions The POS device main screen will give you the option to press ‘F’ for menu or the green button to pay. If you press the green button, the following transactions (if enabled) will appear: TRANSACTION SELECTION 1. Sale 2. Refund 3. - Page 9 1. Sale STEP 1 Press the green button and select ‘sale’ STEP 2 Enter the sale amount and press enter Pass the POS device to the customer who can STEP 3 either Tap to Pay™, insert or swipe his or her card If prompted, the customer must enter his or her STEP 4 PIN followed by enter...
- Page 10 2. Refund STEP 1 Press the green button and select ‘refund’ STEP 2 Enter the refund amount and press enter STEP 3 Enter refund PIN Pass the POS device to the customer who can STEP 4 either Tap to Pay™, insert or swipe his or her card If prompted, the customer must enter his or her PIN STEP 5 followed by enter...
- Page 11 3. Correction STEP 1 Press the green button and select ‘correction’ STEP 2 Enter the amount and press enter STEP 3 Enter supervisor PIN Pass the POS device to the customer who can either insert or swipe his STEP 4 or her card (the card must be the same card as the original transaction) STEP 5 If prompted, the customer must enter his or her PIN followed by enter...
- Page 12 4. Balance Enquiry STEP 1 Press the green button and select ‘balance enquiry’ Pass the POS device to the customer who can either insert STEP 2 or swipe his or her card STEP 3 Select ‘cheque’ or ‘savings’ If prompted, the customer must enter his or her STEP 4 PIN followed by enter STEP 5...
- Page 13 5. Cash Withdrawal STEP 1 Press the green button and select ‘cash withdrawal’ STEP 2 Enter the cash amount and press enter STEP 3 Enter supervisor PIN Pass the POS device to the customer who can either insert or swipe his STEP 4 or her card If prompted, the customer must enter his or her PIN...
- Page 14 6. Sale & Cash STEP 1 Press the green button and select ‘sale & cash’ STEP 2 Enter the sale amount and press enter STEP 3 Enter the cash amount and press enter STEP 4 Enter supervisor PIN Pass the POS device to the customer who can either insert STEP 5 or swipe his or her card STEP 6...
- Page 15 7. Voice Override STEP 1 Press the green button and select ‘voice override’ STEP 2 Enter the sale amount and press enter Enter supervisor PIN STEP 3 Enter the authorisation code obtained from Standard Bank telephonically; STEP 4 this code cannot contain any special characters (,.+#*) or blanks Pass the POS device to the customer who can either STEP 5 insert or swipe his or her card...
-
Page 16: Operator Functions
Operator Functions The POS device main screen will give you the option to press ‘F’ for menu or the green button to pay. If you press ‘F’ and select ‘SBSA’ , the following will appear: 1. Operator Options 2. Reports 3. - Page 17 1. Manual Card Entry (if enabled) STEP 1 Select ‘operator options’ and then ‘manual card entry sale’ STEP 2 Enter supervisor PIN Select 1 for ‘sale’ STEP 3 STEP 4 Enter the amount and press enter Enter the card’s card number, expiry date (MM/YY) STEP 5 and CVC/CVV number STEP 6...
- Page 18 2. Reprint Receipt STEP 1 Select ‘operator options’ and then ‘reprint receipt’ STEP 2 Enter supervisor PIN STEP 3 Select 1 for ‘last transaction’ or 2 for ‘specific receipt’ If 1, the last successful transaction will print (both a merchant and STEP 4 customer copy);...
-
Page 20: Transactions
Transactions The POS device main screen will give you the option to press ‘F’ for menu or the green button to pay. If you press the green button, the following transactions (if enabled) will appear: TRANSACTION SELECTION 1. Sale 2. Refund 3. - Page 21 1. Sale STEP 1 Press the green button and select ‘sale’ STEP 2 Enter the purchase amount and press enter Enter the tip amount and press enter STEP 3 Pass the POS device to the customer who can either Tap to Pay™, STEP 4 insert or swipe his or her card STEP 5...
- Page 22 2. Refund STEP 1 Press the green button and select ‘refund’ Enter the refund amount and press enter STEP 2 STEP 3 Enter the tip amount and press enter STEP 4 Enter refund PIN Pass the POS device to the customer who can either STEP 5 Tap to Pay™, insert or swipe his or her card If prompted, the customer must enter his or her PIN...
- Page 23 3. Correction STEP 1 Press the green button and select ‘correction’ STEP 2 Enter the amount and press enter STEP 3 Enter the tip amount and press enter STEP 4 Enter supervisor PIN Pass the POS device to the customer who can either insert or swipe his or her STEP 5 card (the card must be the same card as the original transaction) STEP 6...
- Page 24 4. Balance Enquiry STEP 1 STEP 1 Press the green button and select ‘balance enquiry’ Pass the POS device to the customer who can either insert STEP 2 or swipe his or her card STEP 3 Select ‘cheque’ or ‘savings’ If prompted, the customer must enter his or her STEP 4 PIN followed by enter...
- Page 25 5. Cash Withdrawal STEP 1 Press the green button and select ‘cash withdrawal’ STEP 2 Enter the cash amount and press enter STEP 3 Enter supervisor PIN Pass the POS device to the customer who can either insert or swipe his STEP 4 or her card If prompted, the customer must enter his or her PIN...
- Page 26 6. Sale & Cash STEP 1 STEP 1 Press the green button and select ‘sale & cash’ STEP 2 Enter the sale amount and press enter STEP 3 Enter the tip amount and press enter STEP 4 Enter the cash amount and press enter STEP 5 Enter supervisor PIN Pass the POS device to the customer who can either insert or swipe...
- Page 27 7. Voice Override STEP 1 STEP 1 Press the green button and select ‘voice override’ STEP 2 Enter the sale amount and press enter STEP 3 Enter the tip amount and press enter STEP 4 Enter supervisor PIN Enter the authorisation code obtained from Standard Bank telephonically; STEP 5 this code cannot contain any special characters (,.+#*) or blanks Pass the POS device to the customer who can either...
-
Page 28: Operator Functions
Operator Functions The POS device main screen will give you the option to press ‘F’ for menu or the green button to pay. If you press ‘F’ and select ‘SBSA’ , the following will appear: 1. Operator Options 2. Reports 3. - Page 29 1. Manual Card Entry (if enabled) STEP 1 Select ‘operator options’ and then ‘manual card entry sale’ STEP 2 Enter supervisor PIN STEP 3 Select 1 for ‘sale’ STEP 4 Enter the amount and press enter STEP 5 Enter the tip amount and press enter Enter the card’s card number, expiry date (MM/YY) STEP 6 and CVC/CVV number...
- Page 30 2. Reprint Receipt STEP 1 Select ‘operator options’ and then ‘reprint receipt’ STEP 2 Enter supervisor PIN STEP 3 Select 1 for ‘last transaction’ or 2 for ‘specific receipt’ If 1, the last successful transaction will print (both a merchant and STEP 4 customer copy);...
-
Page 32: Transactions
Transactions The POS device main screen will give you the option to press ‘F’ for menu or the green button to pay. If you press the green button, the following transactions (if enabled) will appear: TRANSACTION SELECTION 1. Sale 2. Refund 3. - Page 33 1. Sale STEP 1 Press the green button and select ‘sale’ STEP 2 Enter the purchase amount and press enter STEP 3 Select 1 for ‘petrol’ , 2 for ‘diesel’ or 3 for ‘oil’ STEP 4 Select the product type (i.e. LRP93, LRP95, Diesel 50ppm etc.) STEP 5 Confirm the amount and litres STEP 6...
- Page 34 2. Refund STEP 1 Press the green button and select ‘refund’ STEP 2 Enter the purchase amount and press enter STEP 3 Enter refund PIN STEP 4 Select 1 for ‘petrol’ , 2 for ‘diesel’ or 3 for ‘oil’ STEP 5 Select the product type (i.e.
- Page 35 STEP 14 The POS device will print a merchant copy of the receipt STEP 15 The POS device will return to the main screen 3. Correction STEP 1 Press the green button and select ‘correction’ Enter the amount and press enter (this amount needs to correspond to STEP 2 the original sale amount in the batch) STEP 3...
-
Page 36: Operator Functions
Operator Functions The POS device main screen will give you the option to press ‘F’ for menu or the green button to pay. If you press ‘F’ and select ‘SBSA’ , the following will appear: TRANSACTION SELECTION 1. Operator Options 2. - Page 37 1. Manual Card Entry (if enabled) STEP 1 Select ‘operator options’ and then ‘manual card entry sale’ STEP 2 Enter supervisor PIN STEP 3 Select 1 for ‘sale’ and enter the amount followed by enter STEP 4 Enter the card’s card number, expiry date (MM/YY) and CVC/CVV number STEP 5 Once the transaction is approved, press the green button for a receipt STEP 6...
- Page 38 2. Reprint Receipt STEP 1 Select ‘operator options’ and then ‘reprint receipt’ STEP 2 Enter supervisor PIN STEP 3 Select 1 for ‘last transaction’ or 2 for ‘specific receipt’ If 1, the last successful transaction will print (both a merchant and STEP 4 customer copy);...
- Page 39 3. Cash Up STEP 1 Select ‘reports’ and then ‘perform cash up’ STEP 2 Press enter to confirm cash up STEP 3 Enter supervisor PIN STEP 4 The cash-up will print STEP 5 The POS device will return to the main screen...
- Page 40 Adjust Fleet Card STEP 1 STEP 1 From the main screen, press ‘F’ and then ‘SBSA’ STEP 2 Press 2 for ‘forecourt’ STEP 3 Enter supervisor PIN STEP 4 Enter the receipt number STEP 5 Select either ‘set odometer reading’ or ‘set usage code’ STEP 6 Update values and select done STEP 7...
-
Page 42: Transactions
Transactions The POS device main screen will give you the option to press ‘F’ for menu or the green button to pay. If you press the green button, the following transactions (if enabled) will appear: TRANSACTION SELECTION 1. Sale 2. Refund 3. - Page 43 1. Sale STEP 1 Press the green button and select ‘sale’ STEP 2 Enter the purchase amount and press enter Pass the POS device to the customer who can either Tap to Pay™, STEP 3 insert or swipe his or her card STEP 4 Enter the odometer reading and press enter* STEP 5...
- Page 44 2. Refund STEP 1 STEP 1 Press the green button and select ‘refund’ STEP 2 Enter the refund amount and press enter STEP 3 Enter refund PIN Pass the POS device to the customer who can either Tap to Pay™, STEP 4 insert or swipe his or her card If prompted, the customer must enter his or her PIN...
- Page 45 Correction STEP 1 STEP 1 Press the green button and select ‘correction’ Enter the amount and press enter (this amount needs to correspond to the STEP 2 original sale amount in the batch) STEP 3 Enter supervisor PIN Pass the POS device to the customer who can either insert or swipe his or STEP 4 her card (the card must be the same card as the original transaction) STEP 5...
-
Page 46: Operator Functions
Operator Functions The POS device main screen will give you the option to press ‘F’ for menu or the green button to pay. If you press ‘F’ and select ‘SBSA’ , the following will appear: TRANSACTION SELECTION 1. Operator Options 2. - Page 47 1. Manual Card Entry (if enabled) STEP 1 Select ‘operator options’ and then ‘manual card entry sale’ STEP 2 Enter supervisor PIN STEP 3 Select 1 for ‘sale’ STEP 4 Enter the amount and press enter STEP 5 Enter the card’s card number, expiry date (MM/YY) and CVC/CVV number STEP 6 Once the transaction is approved, press the green button for a receipt STEP 7...
- Page 48 2. Reprint Receipt STEP 1 STEP 1 Select ‘operator options’ and then ‘reprint receipt’ STEP 2 Enter supervisor PIN STEP 3 Select 1 for ‘last transaction’ or 2 for ‘specific receipt’ If 1, the last successful transaction will print (both a merchant and STEP 4 customer copy);...
- Page 49 3. Cash Up STEP 1 STEP 1 Select ‘reports’ and then ‘perform cash up’ STEP 2 Press enter to confirm cash up STEP 3 Enter supervisor PIN STEP 4 The cash-up will print STEP 5 The POS device will return to the main screen...
-
Page 50: Usage And Maintenance Of The Pos Device
Usage and Maintenance of the POS Device The POS device is a sensitive electronic device, similar to a cellular phone. Any physical operational abuse or dropping of the POS device can damage the device, resulting in unpredictable operational behaviour. The POS device must be kept clean and free of any dust, dirt or grime that can penetrate and damage the keyboard, thermal print head, chip reader and magnetic strip reader. -
Page 51: Accepting Chip And Pin Cards
Accepting Chip and PIN Cards FOLLOW THESE FOUR STEPS TO PROCESS A CHIP TRANSACTION: 1. CHECK Identify whether the card has a chip. It looks like this: CHIP CARD 2. INSERT Insert the chip card into the POS device and follow the prompts. The POS device will tell you how to complete the transaction and whether the customer needs to enter his or her PIN or sign the receipt. -
Page 52: General Information
General Information DATA SECURITY Cardholder privacy Only the cardholder should enter his or her PIN (the cashier may not ask the cardholder for his or her PIN). When performing a PIN authorised transaction, ensure the cardholder’s privacy: Staff members should look away when a customer is entering his or her PIN Other customers in the queue should leave enough room to allow for sufficient privacy Ideally, PIN pads should have a privacy shield Security cameras should not point at the PIN pad... - Page 53 Ensure that you raise any reliability issues with Standard Bank. When performing a magnetic strip card transaction, ensure that the customer signs the merchant receipt copy. This receipt must be kept as proof of purchase to refute any chargebacks from the cardholder. All merchants must retain receipts for at least six months in the event of chargebacks.
-
Page 54: Avoiding Fraud
CHARGEBACKS TO MERCHANT ACCOUNTS WILL OCCUR UNDER THE FOLLOWING CIRCUMSTANCES: The card account number submitted is invalid Authorisation was not obtained for manual transactions or transactions above the floor limit The authorisation was denied The authorisation code provided by you is invalid The card account number or the amount of the sale is missing or illegible on the imprint voucher The transaction amount is duplicated... - Page 55 If the card is swiped through the POS device and the POS device prompts that the card must be inserted into the chip reader, do so immediately. If the POS device prompts you to insert the card into the chip reader but there is no chip on the card, do not proceed with the transaction.
-
Page 56: Card Security Features
Card Security Features 0000 0000 0000 0000 Credit card security features The embossed account number must be clear and uniform in size and spacing 2. A four-digit number will always be pre-printed on the card; it must match the first four digits of the embossed account number The valid date lists the last date on which the card is valid;... - Page 57 IMPORTANT THINGS TO REMEMBER WHEN ACCEPTING A CREDIT CARD A credit card is never transferable, and only the person whose name is embossed on the front of the credit card is authorised by the said bank to use the credit card No other person can be authorised to use the credit card on his or her behalf or sign any sales voucher Always check that the credit card has not expired and that the card is signed;...
- Page 58 If you’re not sure what the signature panel should look like, call your bank if you’re suspicious of the presenter or the credit card being presented (you’ll receive a R500 reward for any stolen credit card you recover and a further R500 reward for the presenter of such a stolen or counterfeit credit card or any positive information that leads to the arrest and conviction of the said presenter, but remember: your safety is our main concern, so always follow our instructions when phoning the bank for a...
-
Page 59: Sim Card Usage And Replacement
SIM Card Usage and Replacement SIM CARD INFORMATION The POS device makes use of a data-only SIM card, provided either by MTN or Vodacom. This SIM card is provisioned for banking data transactions only and cannot be used in a standard cellular phone. Should the SIM card be removed from the POS device and placed in another device, the SIM card will automatically be blocked by the network operator. -
Page 60: Frequently Asked Questions
Frequently Asked Questions 1. WHAT DO I DO WHEN I HAVE TO REPLACE A FAULTY POS DEVICE? If a POS device stops working, call the Call Centre to have it swapped out. A replacement POS device will be delivered to your store, and the faulty POS device will be collected. Ensure that you batch the faulty POS device before handing it over to the collection personnel. - Page 61 You’ll know that a transaction has gone through successfully if the POS device prints You’ll know that a transaction has gone through successfully if the POS device prints out a merchant copy. The transaction will reflect in the current batch. If a customer has a double debit on his or her account but only a single transaction shows in your batch or in your account, the cardholder has to dispute the transaction with his or her bank.
- Page 62 7. IMPRINTER BOOKLET The imprinter booklet is used when conducting manual transactions. You need to ensure that you populate all the details correctly on the slip. The imprint voucher is your proof that the card was present during the transaction. To obtain additional manual imprinter booklets, please call the Standard Bank Merchant Solutions helpdesk on 086 100 1200.
- Page 63 Hold the POS device in your one hand. Use two fingers from your other hand to lift the printer cover release (as shown above) Unstick the end of the new roll. Carefully place the paper roll into the printer compartment Holding the free end of the paper and your POS device, close the printer cover carefully and push it down firmly until it locks While your POS device is displaying the idle screen, press and hold the yellow...
-
Page 64: Contact Details, Hours Of Operation And Support
11. WHAT IS A FALLBACK TRANSACTION? A fallback transaction is processing of a POS device transaction by magnetic strip technology where chip technology is not available or working. Unless this functionality has been enabled on your POS device, avoid processing fallback transactions. If you do, you accept the increased risk that such POS transactions can be charged back to you and that you shall be fully liable for such chargeback transactions.
Need help?
Do you have a question about the iWL250 and is the answer not in the manual?
Questions and answers