
Subscribe to Our Youtube Channel
Related Manuals for ESDEC CLICKFIT BASIC


Summary of Contents for ESDEC CLICKFIT BASIC
- Page 1 MANUAL MOUNTING SYSTEM FOR BITUMEN / EPDM mounting system for uninsulated pitched roof Bitumen / EPDM for solar panels portrait / landscape setup Rev. 10.06.15 © ESDEC BV 2015...
-
Page 2: Table Of Contents
TABLE OF CONTENT 1. Introduction 2. General installation conditions 3. Product description 4. Parts overview 4.1 Exploded-view 4.2 Bill of materials 5. Mounting preparation 5.1 Monitoring tools and accessories 5.2 Determining position of solar panels and measuring 5.3 Cleaning roof 6. -
Page 3: Introduction
Non-compliance with the requirements mentioned in this document may result in invalidation of all warranty and product liability claims. The data, comments and opinions in this document are binding and must be checked for completeness and timeliness. Esdec BV reserves the right to modify this document without notice. - Page 4 Remove the product according to local laws and regulations. At the end of the life span all materials are recyclable. Warranty Warranty according to warranty conditions and terms of Esdec BV. These can be found on the website www.esdec.nl Liability...
-
Page 5: Product Description
3. Product Description The ClickFit mounting system consists of mounting brackets, mounting rails and the necessary installation materials to mount the solar panels in portrait or landscape setup on the roof. The ClickFit mounting system for bitumen / EPDM can be used for all types of bitumen / EPDM. -
Page 6: Bill Of Materials
4.2 Bill of materials 11. End clamp End clamp CFA Article nr: 100-3003 End clamp CFB Article nr: 100-3004 For type see annex ch. 7 1. Solar panel 11A. End clamp Black (optional) 2. RVS Hex bolt M6 x 20 End clamp CFA Black Article nr: 100-0620 Article nr: 100-3950... -
Page 7: Mounting Preparation
5. Mounting preparation 5.1 Monitoring tools and accessories Here is a list of necessary tools / utilities: Measuring tape Brush Ratchet with hex cap Cordless Screwdriver and/ S10 / S13 S8 PZ2 Marker / chalk Kit gun Knife Scaffold or stable safe ladder Rev. -
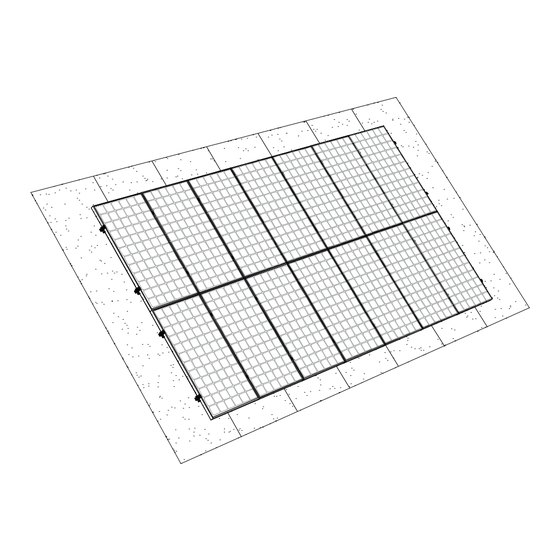
Page 8: Determining Position Of Solar Panels And Measuring
5.2 Determining position of solar panels and measuring In the determination of the position of the solar panels on the bitumen roof, it is very important to pay attention to the sunlight coming in throughout the day and throughout the year. Place the panels on a roof surface which has no shadow. Shadow of a chimney, dormer, trees and nearby buildings have an adverse effect on the amount of energy generated by the solar panels. -
Page 9: Installation
6. Installation 6.1 Preinstall suspension on solar panels (only with portrait) Install per solar panel 2 suspension sockets at the rear of the solar panel (= same side as the connection box). First insert the RVS hex bolts M6x20 in the available holes in the frame and affix thereon the suspension sockets. Then install the M6 nuts. -
Page 10: Attaching Mounting Brackets
6.3 Attaching mounting brackets On the basis of the position of the solar panels on the roof, you determine the position of the mounting brackets. With solar panels in portrait setup the mounting brackets are fixed on 1/4 H of the top panel and panel-bottom edge, at a mutual distance 2/4 H. -
Page 11: Attaching Mounting Rail
6.4 Attaching mounting rail 1. Position the mounting rail on the mounting brackets. Make sure the mounting bracket are completely perpendicular to the mounting rail. It is still possible to turn the mounting bracket something because it is only screwed with the top screw. 2. -
Page 12: Hanging Solar Panels To Mounting Rail (Only With Portrait)
6.5 Hanging solar panels to mounting rail (only with portrait) Temporarily hang the first solar panel using the preinstalled suspension sockets to the upper mounting rail. This will keep your hands free for the rest of the installation. Rev. 10.06.15 MANUAL MOUNTING SYSTEM FOR PITCHED ROOF WITH BITUMEN... -
Page 13: Mounting 1St Solar Panel On The Rail
6.6 Mounting 1st solar panel on mounting rail Slide the first solar panel to the side of the mounting rail. Then slide the end clamp onto the mounting rail. Choose the correct recess so that the end clamp connects to the solar panel. -
Page 14: Mounting Other Solar Panels On The Rail
6.7 Mounting other solar panels on the rail Hang the second solar panel on the rail and slide it towards the first, until a gap remains of about 7mm. Then screw the mounting screw with a module clamping plate module into the mounting rail. The tightening torque of the screw connections is 4,5Nm. -
Page 15: Final Assembly / Multiple Rows Under Each Other
6.8 Final assembly / multiple rows under each other 1. Slide the end clamp onto the mounting rail. Choose the correct recess so that the end clamp connects to the solar panel. 2. Then tighten the end clamp using the mounting screw. (tightening torque 4,5Nm) 3. -
Page 16: Annex
7. ANNEX Frame height End clamp Screw length 29mm 55 mm 30mm 55 mm 31mm 55 mm 32 mm 55 mm 33 mm 60 mm 34 mm 60 mm 35 mm 60 mm 36 mm 63 mm 37 mm 63 mm 38 mm 63 mm 39 mm...
Need help?
Do you have a question about the CLICKFIT BASIC and is the answer not in the manual?
Questions and answers