Table of Contents
Advertisement
Available languages
Available languages
Quick Links
Advertisement
Table of Contents

Related Manuals for BURNHARD FRED JR. DELUXE


Summary of Contents for BURNHARD FRED JR. DELUXE
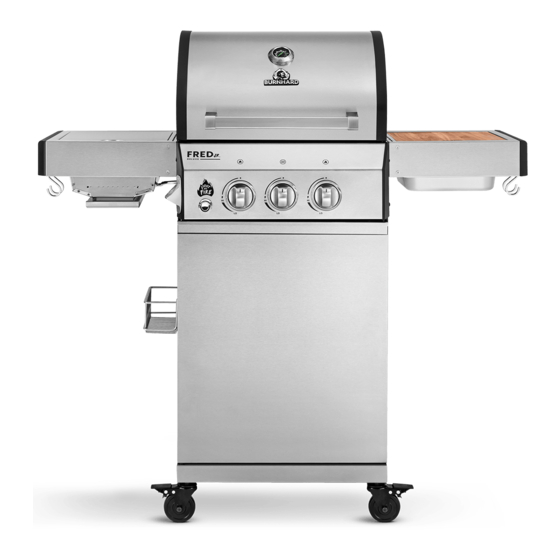
- Page 1 2-BRENNER GASGRILL FRED JR. deluxe 2-BURNER GAS GRILL FRED JR. DELUXE...
-
Page 2: Table Of Contents
INHALT 2-BRENNER GASGRILL FRED JR. DELUXE BLACK SERIES Technische Daten Sicherheitshinweise Lieferumfang/Teilebeschreibung Gasgrill aufbauen Gasflasche anschließen Gasgrill betreiben Gasgrill reinigen Regelmäßige Wartung Fehlerbehebung Gasgrill aufbewahren Kundenservice Entsorgung/Umweltschutz Konformitätserklärung... - Page 3 CONTENT 2-BURNER GAS GRILL FRED JR. DELUXE BLACK SERIES Technical specifications Safety instructions Parts included/Description of components Assembling the gas grill Connecting the gas cylinder Operating the gas grill Cleaning the gas grill Regular maintenance Troubleshooting Storing the gas grill...
-
Page 4: Technische Daten
TECHNISCHE DATEN Leistung: Insgesamt 10,5 kW – 2 Hauptbrenner mit 3,5 kW, 1 Infrarot-Keramikbrenner mit 3,5 kW (im Seitentisch) Maße (B/H/T): 116 x 118 x 55 cm Gewicht: ca. 38 kg Nennwärmebelastung (Hs) Brenner: 10,5 kW Anschlusswert Brenner: 764 g/h Ausgangsdruck: 50 mbar Gasart:... - Page 5 GASANLAGE ANSCHLIESSEN Brand- und Explosionsgefahr • Dieser Gasgrill darf nur mit einem Druckminderer betrieben werden. Der beiliegende Druckminderer ist für den Betrieb mit Flüssiggas werkseitig korrekt eingestellt. • Der Gasschlauch muss ggf. ausgetauscht werden, wenn entsprechende nationale Anforderungen be- stehen. •...
- Page 6 • Lass den Gasgrill während des Betriebes nie rers und der Schlauchleitung vom Gasschlauch unbeaufsichtigt. abgeschraubt werden. • Drehe bei einer Störung oder bei Gasaustritt • Nach Gebrauch die Gaszufuhr an der Gasflasche sofort das Ventil der Gasflasche zu. schließen. •...
- Page 7 Maßnahmen nach schweren Verbrennungen oder Verbrühungen • Es besteht akute Gefahr einer Unterkühlung und eines Schocks. Rufe sofort den Rettungsdienst! • Brennende Kleider sofort mit Wasser löschen oder die Flammen mit einer dicken Decke ersticken. • Bei Verbrennungen: Kleidung am Körper lassen. •...
-
Page 8: Lieferumfang/Teilebeschreibung
LIEFERUMFANG/TEILEBESCHREIBUNG... - Page 9 Ref. Beschreibung Menge Deckel Deckelthermometer Deckelgriff Flammenverteiler Grillrost Holzschneidebrett Brennkammer Food Container Seitentisch (rechts) Zubehörhaken Strebe Unterschrank Seitenwand Unterschrank (rechts) Rückwand Unterschrank Halterung Gasflasche Aufhängung Gasflasche Boden Unterschrank Schwenkrolle Warmhalterost Strebe Abdeckung Infrarot-Keramikbrenner Abdeckung Infrarot-Keramikbrenner Rost Infrarot-Keramikbrenner Seitentisch (links) Flaschenöffner Infrarot-Keramikbrenner inkl.
- Page 10 BEFESTIGUNGEN x 18 5/32-32 1/4-20...
-
Page 11: Gasgrill Aufbauen
GASGRILL AUFBAUEN Verletzungsgefahr ACHTUNG: Achte darauf, deinen Grill entsprechend der folgenden Anleitung richtig zusammenzubauen. Die Nichtbeachtung dieser Anweisungen kann zu schweren Körperverletzungen und/oder Sachschäden führen. Wenn du Fragen zur Montage oder zum Betrieb hast, wende dich an unseren Kundenservice. Der Gasgrill kann teilweise scharfe Kanten aufweisen. Trage während der Montage Sicherheitshandschuhe, um Schnittverletzungen vorzubeugen. - Page 12 6 x B 2 x A...
- Page 13 4 x A...
- Page 14 4 x B...
- Page 15 8 x B 4 x D 2 x E...
- Page 16 2 x A...
- Page 17 1 x A Der Gasanschluss ist für den Transport mit ei- nem Kabel binder unter der Konsole befestigt. Löse den Kabelbinder und schraube den Gas- anschluss an die Seiten- wand des Grills. 1 x C...
- Page 20 ACHTUNG: Der Grill strahlt Hitze ab. Stelle den Grill nie direkt an Glasfronten, Wände, Pflanzen etc. Der minimale Abstand zu Objekten jeder Art beträgt: Nach hinten: 60 cm Zur Seite: 50 cm Nach oben: 100 cm...
-
Page 21: Gasflasche Anschließen
GASFLASCHE ANSCHLIESSEN Brand- und Explosionsgefahr ACHTUNG: Schließe neue oder nicht vollständig entleerte Gasflaschen niemals an, wenn sich Zündquellen in unmittelbarer Umgebung befinden. Nicht rauchen. Die folgenden Teile sind im Lieferumfang enthalten. Sie entsprechen der Norm, die für das jeweilige Land gilt, in das der Grill geliefert wird: •... - Page 22 LECKTEST • Sprühe alle Dichtstellen mit handelsüblichem Lecksuchspray ein oder pinsele sie mit Seifenwasser (Verhältnis: 1 Teil Seife auf 3 Teile Wasser) ein. • Drehe das Ventil der Gasflasche auf. An undichten Stellen zeigen sich kleine Bläschen. • Drehe das Ventil der Gasflasche wieder zu. •...
-
Page 23: Gasgrill Betreiben
GASGRILL BETREIBEN ACHTUNG: Schalte den Grill niemals mit geschlossenem Deckel ein. Bevor du auf dem Gasgrill das erste Mal grillst, solltest du unbedingt vorab mit einem feuchten Tuch über die Oberfläche des Deckels sowie die äußeren Teile der Brennkammer wischen. So verhinderst du, dass etwaige Rückstände aus der Produktion einbrennen können. - Page 24 VERWENDUNG DES INFRAROT-KERAMIKBRENNERS ACHTUNG: Der Deckel des im Seitentisch verbauten Infrarot-Keramikbrenners muss vor dem Zünden bzw. im Betrieb immer geöffnet sein. Solltest du den Grill für längere Zeit nicht benutzen, entnimm die Batterie. Diese kann auslaufen und die Zündung unwiederbringlich beschädigen. ACHTUNG: Klappe den Seitentisch niemals ab, während der Infrarot-Keramikbrenner in Betrieb ist.
-
Page 25: Gasgrill Reinigen
GASGRILL REINIGEN Brand- und Explosionsgefahr • Verwende keine brennbaren Reinigungsmittel. Spüle mit Wasser nach und lass den Gasgrill vor • Entferne vor der Reinigung des Gasgrills die dem nächsten Gebrauch vollständig trocknen. Gasflasche. Alternativ kannst du die nassen Stellen auch mit •... - Page 26 2. Löse die Sicherungsklammern (durch Reindrücken) an den Brennerköpfen und nimm die Edelstahlbrenner aus dem Grill. 3. Setze das Fettablaufblech (ohne die Auffangschale) wieder ein und stelle einen leeren Eimer unter die Öffnung. 4. Spüle den Innenraum deines Grills mit Wasser aus (z.B. mit einer Gießkanne). ACHTUNG: Stelle sicher, dass kein Wasser in die Gasdüsen gelangt.
- Page 27 PFLEGE VON EDELSTAHLROSTEN Grillroste aus Edelstahl müssen nicht eingebrannt werden. Du kannst die rostfreien und strapazier fähigen Roste mit warmem Wasser, mildem Reinigungsmitteln und Schwamm per Hand oder in der Spül maschine säubern. Edelstahl kann sich bei starker Hitze leicht verfärben. Das ist ein natürlicher Vorgang und hat keinen Einfluss auf die Qualität oder dein Grillergebnis.
-
Page 28: Regelmäßige Wartung
REGELMÄSSIGE WARTUNG Nach dem Grillen solltest du den Grill direkt für das nächste Grillen vorbereiten. Lasse den Grill auf voller Hitze mit geschlossenem Deckel ausbrennen (ohne jegliches Grillgut), um Rückstände von Grillgut und Fett auf den Rosten zu verbrennen und anschließend durch Abbürsten zu beseitigen. Gehe dazu folgendermaßen vor: 1. -
Page 29: Fehlerbehebung
FEHLERBEHEBUNG Problem Mögliche Ursache Lösung Gasflasche ist leer Neue Gasflasche anschließen Druckminderer Defekter Druckminderer im Fachhandel überprüfen lassen Fremdkörper im Brenner Brenner säubern Brenner zünden nicht Fremdkörper im Zündsystem oder Zündung und Schlauch säubern Schlauch Kein Zündfunke Piezozündung austauschen lassen Düse defekt (falls die Brenner trotz Beim Kundenservice nach Ersatz vorheriger Maßnahmen nicht zünden... -
Page 30: Gasgrill Aufbewahren
Produkt und Verpackung müssen entsprechend den örtlichen Bestimmungen entsorgt werden. Informiere dich gegebenenfalls bei deinem örtlichen Entsorgungsunternehmen. KONFORMITÄTSERKLÄRUNG Hiermit erklärt die Springlane GmbH, dass sich das Produkt in Übereinstimmung mit den grundlegenden CE Anforderungen zum Tag der Ausstellung befindet. Die vollständige Konformitätserklärung kann unter www.burnhard.de eingesehen werden. -
Page 32: Technical Specifications
TECHNICAL SPECIFICATIONS Power: Total 10,5 kW – 2 main burners with 3.5 kW, 1 infrared ceramic burner with 3.5 kW (in the side table) Dimensions (W/H/D): 116 x 118 x 55 cm Weight: ca. 38 kg Nominal heat load (Hs) Burner: 10,5 kW Connected load Burner:... - Page 33 CONNECTING THE GAS SYSTEM Fire and explosion hazard • This gas grill may only be operated with a suitable pressure regulator. The enclosed pressure regulator is set correctly at the factory for liquid gas operation. • The gas hose may need to be replaced if corresponding national requirements require it. •...
- Page 34 MAINTAINING THE GAS GRILL Fire and explosion hazard • Repairs and maintenance on the gas unit may only be carried out by authorised specialist personnel. Do not make changes to the gas grill or the pressure regulator. • Replace the pressure regulator and the hose after 10 years at the latest, even if there is no visible exter- nal damage.
- Page 35 Measures for minor burns or scalding • Burns: remove clothing only if it does not stick to the body. • In case of scalding: remove clothing immediately. • Cool the affected area with cold water for at least 15 minutes until the pain subsides. •...
-
Page 36: Parts Included/Description Of Components
PARTS INCLUDED/DESCRIPTION OF COMPONENTS... - Page 37 Ref. Description Quantity Lid thermometer Lid handle Flame distributor Grid Wooden cutting board Combustion chamber Food Container Side table (right) Accessory hook Lower cabinet strut Side panel base cabinet (right) Rear panel base cabinet Gas bottle holder Gas bottle suspension Floor base unit Swivel castor Warming grid...
- Page 38 FASTENERS x 18 5/32-32 1/4-20...
-
Page 39: Assembling The Gas Grill
ASSEMBLING THE GAS GRILL Danger of injury WARNING: Make sure your gas grill is properly installed, assembled and cared for. Failure to follow these instructions may result in serious bodily injury and/or property damage. If you have any questions concer- ning assembly or operation, consult our customer service. - Page 40 6 x B 2 x A...
- Page 41 4 x A...
- Page 42 4 x B...
- Page 43 8 x B 4 x D 2 x E...
- Page 44 2 x A...
- Page 45 1 x A The gas distributor is attached with a cable tie below the console for transport. Untie the cable tie and attach the gas distributor to the side panel. 1 x C...
- Page 48 WARNING: The grill radiates heat. Never place the grill next to glass windows, walls, plants, etc. The grill must be placed at a minimum distance from objects of any kind: Back: 60 cm Sides: 50 cm Top: 100 cm...
-
Page 49: Connecting The Gas Cylinder
CONNECTING THE GAS CYLINDER Fire and explosion hazard WARNING: Never connect new or not completely empty gas cylinders if there are ignition sources in the immediate vicinity. Do not smoke. The following parts are included. They comply with the applicable standard of the country in which the gas grill is supplied: •... - Page 50 LEAK TEST • Use a commercially available leak detection spray or paint brush and soapy water to check all connec- tions (mixing ratio of soap to water: 1:3). • Open the gas cylinder valve. Small bubbles will appear where there are leaks. •...
-
Page 51: Operating The Gas Grill
OPERATING THE GAS GRILL WARNING: Never switch the grill on with the lid closed. Before you use the gas grill for the first time, you should definitely first wipe the surface of the lid and the outer parts of the combustion chamber with a damp cloth. This will prevent any residues from the pro- duction process from burning in. - Page 52 USING THE INFRARED CERAMIC BURNER IN THE SIDE TABLE WARNING: The lid of the infrared ceramic burner installed in the side table must always be open before ignition or during operation. If you do not use the grill for a long time, remove the battery. It may leak and irreparably damage the ignition.
-
Page 53: Cleaning The Gas Grill
CLEANING THE GAS GRILL Fire and explosion hazard • Do not use any flammable cleaning agents. surface. Rinse with water and allow the gas grill • Remove the gas cylinder before cleaning the gas to dry completely before the next use. Alter- grill. - Page 54 3. Insert the grease drain plate (without the drip tray) into the grill again and place the empty bucket beneath the opening. 4. Rinse out the interior of your grill with water (e.g. with a watering can). WARNING: Make sure that no water gets into the gas nozzles.
- Page 55 MAINTENANCE OF THE STAINLESS STEEL GRIDS Stainless steel grids do not need to be burned in. You can clean the durable grids with warm water, mild detergent and a sponge by hand or in the dishwasher. Stainless steel can slightly discolour when exposed to high temperatures. This is a natural process and has no effect on the quality or your grilling result.
-
Page 56: Regular Maintenance
REGULAR MAINTENANCE After grilling, you should prepare the grill for the next use. Let the grill burn freely at maximum heat with the lid closed to burn up any residues on the grids and then brush them off. Follow the procedure below to do this: 1. -
Page 57: Troubleshooting
TROUBLESHOOTING Problem Possible cause Solution Gas cylinder is empty Connect new gas cylinder Have the pressure regulator checked Faulty pressure regulator by a specialist dealer Burner does not ignite Impurities in the burner Clean the burner Impurities in the ignition system or Clean the ignition and gas hose gas hose Impurities in the burner... -
Page 58: Storing The Gas Grill
The product and its packaging must be disposed of in accordance with local regulations. Contact your local waste disposal company if necessary. DECLARATION OF CONFORMITY The Springlane GmbH hereby declares that this product conforms to the basic CE requirements as of the day of publication. The full declaration of conformity can be found at www.burnhard.de. - Page 60 IMPRESSUM Aufbau- und Bedienungsanleitung 2-Brenner Gasgrill FRED Jr. Deluxe Black Series mit Infrarot-Keramikbrenner Art-Nr.: 944471 Druck- und Satzfehler vorbehalten. Copyright © BURNHARD c/o Springlane GmbH Reisholzer Werftstraße 25a 40589 Düsseldorf, Germany Telefon: +49 (0)211 749 55 10 Telefax: +49 (0)211 749 55 11 0 E-Mail: info@burnhard.de...
Need help?
Do you have a question about the FRED JR. DELUXE and is the answer not in the manual?
Questions and answers