Table of Contents
Advertisement
Available languages
Available languages
Quick Links
Advertisement
Table of Contents

Related Manuals for BURNHARD 4-branders gasbarbecue Big FRED Deluxe


Summary of Contents for BURNHARD 4-branders gasbarbecue Big FRED Deluxe
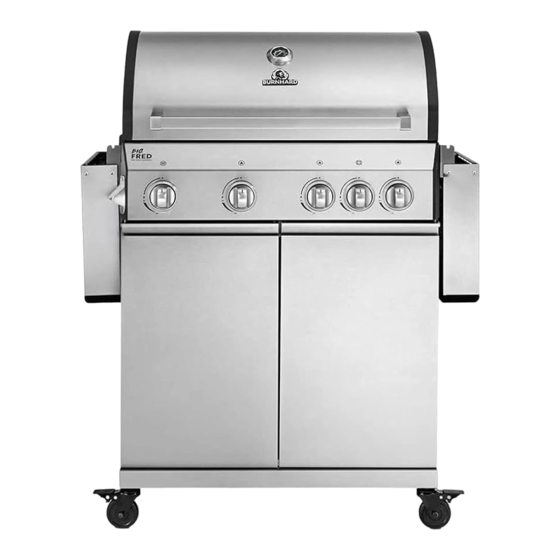
- Page 1 4-branders gasbarbecue big fred deluxe 4-BURNER GAS GRILL BIG FRED DELUXE...
- Page 2 INHOUD 4-BRANDERS GASBARBECUE BIG FRED DELUXE MET KERAMISCHE INFRAROOD-BRANDERS EN ZIJ-KOOKPLAAT Technische gegevens Veiligheidsaanwijzingen Leveringsomvang/onderdeelbeschrijving Gasbarbecue opbouwen Gasfles aansluiten Werken met de gasbarbecue Gasbarbecue reinigen Regelmatig onderhoud Problemen oplossen Gasbarbecue opbergen Klantenservice Afvalverwerking/milieubescherming...
-
Page 3: Table Of Contents
CONTENT 4-BURNER GAS GRILL BIG FRED DELUXE WITH INFRARED CERAMIC BURNER AND SIDE HOB Technical data Safety instructions Equipment delivered/Description of components Assembling the gas grill Connecting the gas cylinder Operating the gas grill Cleaning the gas grill Regular maintenance Troubleshooting Storing the gas grill Customer Service... - Page 4 TECHNISCHE GEGEVENS Vermogen: Een totaal van 17 kW – 3 hoofdbranders met 3,5 kW, 1 keramische infrarood- brander met 3,5 kW, 1 zijdelings kookveld met 3 kW 140 x 118 x 55 cm Afmetingen (b/h/d): Gewicht: ong. 48 kg Nominale warmtebelasting (Hs) Branders: 17 kW Aansluitwaarde...
- Page 5 GASSYSTEEM AANSLUITEN Brand- en explosiegevaar • Deze gasbarbecue mag uitsluitend met een geschikte drukverminderaar worden gebruikt. De bijge- voegde drukverminderaar wordt in de fabriek correct ingesteld voor gebruik met vloeibaar gas. • De gasslang moet eventueel worden vervangen als daarvoor nationale regelgeving bestaat. •...
- Page 6 de drukverminderaar en de slang te beschermen. • Gastoevoer op de gasfles afsluiten na gebruik. GASGRILL ONDERHOUDEN Brand- en explosiegevaar • Reparaties en onderhoud van het gassysteem mogen alleen worden uitgevoerd door geautoriseerde specialisten. Voer geen veranderingen door aan de gasbarbecue en de drukverminderaar. •...
- Page 7 • De betroffen huid met een steriel metalline-kompres afdekken. De zijde met het aluminium laagje op de wond leggen en losjes vastmaken met een gaasverband of een mitella. • Gebruik geen 'huismiddeltjes' zoals zalf, poeder, olie, desinfecteermiddelen etc.! Maatregelen bij lichte verbrandingen of brandwonden door hete vloeistof •...
- Page 8 LEVERINGSOMVANG/ ONDERDELENBESCHRIJVING...
- Page 9 Ref. Omschrijving Hoeveelheid Deksel Dekselthermometer Schroef dekselscharnier Greep deksel Dekselstop Warmhoudrooster Grillrooster Haakjes voor accessoires Vlamverdeler Klemveer Roestvrijstalen brander Achterwand verbrandingskamer Houder vetopvangbak Vetopvangbak Vetopvangbak Steun afdekking zij-kookplaat Afdekking zijtafel Warmhoudplaatje zij-kookplaat Brander zij-kookplaat Onderplaat zij-kookplaat Houder gasaansluiting zij-kookplaat Ontstekingskabel zij-kookplaat Ontsteking zij-kookplaat Gasleiding zijbrander Zijblad (rechts)
- Page 10 Basis controleknop Controleknop (schuifknop) Afdekplaat bedieningspaneel (rechts) Afdekplaat bedieningspaneel (links) Deurscharnier Front bedieningspaneel Gasverbinding Houder gasverbinding Flexibele gasverbinding Gasbuis Hoofdgaskraan Gaskraan zij-kookplaat Isolatieplaat verbrandingskamer Bevestigingsplaat bedieningspaneel (links) Bevestigingsplaat bedieningspaneel (rechts) Keramische infrarood-brander Houten snijplank Food container Houder gasfles Scharnier zijtafel (rechts) Houder zijtafel Scharnier zijtafel (links) BEVESTIGINGEN...
- Page 11 GASBARBECUE IN ELKAAR ZETTEN Letselgevaar WAARSCHUWING: Zorg ervoor dat je deze handleiding erbij neemt als je de barbecue monteert. Het niet naleven van deze instructies kan tot zware verwondingen en/of materiële schade leiden. Neem contact op met onze klantenservice als je vragen hebt over de installatie of het gebruik. De gasbarbecue kan op sommige plekken scherpe kanten hebben.
- Page 12 4 x B...
- Page 13 4 x A...
- Page 14 4 x B 8 x B 4 x D...
- Page 16 1 x A De gasaansluiting is voor het transport met een kabelbinder onder de console bevestigd. Maak de kabelbinder los en schroef de gasaansluiting aan de zijwand van de barbecue.
- Page 17 2 x C 2 x A...
- Page 19 WAARSCHUWING: de barbecue straalt warmte uit. Plaats de barbecue nooit direct tegen glazen wanden, muren, planten enz. De minimale afstand tot objecten bedraagt: aan de achterkant: 60 cm aan de zijkant: 50 cm aan de bovenkant: 100 cm 100 cm 50 cm 60 cm 50 cm...
- Page 20 GASFLES AANSLUITEN Brand- en explosiegevaar WAARSCHUWING: Sluit nieuwe of niet geheel lege gasflessen nooit aan als er zich ontstekingsbronnen in de onmiddellijke nabijheid bevinden. Rook nooit. De volgende onderdelen worden meegeleverd. Ze voldoen aan de norm die van toepassing is in het land waar de barbecue wordt geleverd: •...
- Page 21 LEKTEST • Spuit alle afdichtingen in met een gangbare lekzoekspray of kwast ze in met zeepwater (verhouding 1 deel zeep op 3 delen water). • Draai het ventiel van de gasfles open. Op ondichte plekken komen luchtbelletjes tevoorschijn. • Draai het ventiel van de gasfles weer dicht. •...
- Page 22 GASBARBECUE GEBRUIKEN WAARSCHUWING: Zet het barbecue nooit met gesloten deksel aan. Voordat je voor het eerst op de gasbarbecue gaat grillen, is het essentieel om het oppervlak van het deksel en de buitenste delen van de verbrandingskamer af te vegen met een vochtige doek. Op deze manier voor- kom je dat eventuele productieresten kunnen inbranden.
- Page 23 Steaks en hamburgers kun je zo binnen enkele minuten een krokant korstje geven zonder dat de kerntem- peratuur te sterk wordt beïnvloed. 1. Open het deksel van je barbecue. 2. Draai de stelknop tegen de klok in tot het uitstromende gas te horen is. 3.
- Page 24 REINIGING NA ELK GEBRUIK Om je grill alvast klaar te maken voor de volgende keer, laat je hem na gebruik (zonder grillgerechten) he- lemaal uitbranden. Op die manier kunnen restanten en vet op het rooster verbranden en achteraf gewoon afgeborsteld worden. 1.
- Page 25 doek. WAARSCHUWING: Zorg ervoor dat alle resten van de reiniger voor roestvrij staal volledig zijn verwijderd voordat je jouw barbecue de volgende keer gebruikt. Anders kunnen ze inbranden en het materiaal verkleuren of beschadigen. ONDERHOUD VAN GIETIJZEREN ROOSTERS Het gietijzeren rooster van de gasbarbecue is geëmailleerd. Deze coating beschermt tegen vliegroest en zorgt ervoor dat etenswaren niet aan het rooster blijven plakken.
- Page 26 REGELMATIG ONDERHOUD Na het barbecueën moet je de barbecue direct klaarmaken voor het volgende gebruik. Laat de barbecue op volle sterkte vrij branden (zonder etenswaren) met gesloten deksel, om resten van etenswaren op de roosters te verbranden. Verwijder de resten vervolgens met een borstel. Ga hierbij als volgt te werk: 1.
- Page 27 STORINGEN OPLOSSEN Probleem Mogelijke oorzaak Oplossing Gasfles is leeg Sluit een nieuwe gasfles aan Laat de drukregelaar door een Defecte drukregelaar specialist testen Onbedoelde materie in de brander Brander schoonmaken Branders ontsteken niet Onbedoelde materie in het ont- Ontsteking en slang schoonma- stekingssysteem of slang Piëzo-ontsteking laten vervan- Geen ontstekingsvonk...
- Page 28 Het product en de verpakking moeten volgens de plaatselijke regels worden afgevoerd. Informeer in dat geval bij je plaatselijke afvalstoffenverwerking. CONFORMITEITSVERKLARING Springlane GmbH verklaart hierbij dat het product in overeenstemming is met de fundamentele CE-ei- sen op de datum van afgifte. De volledige conformiteitsverklaring kan op www.burnhard.com/nl worden geraadpleegd.
-
Page 30: Technical Data
TECHNICAL SPECIFICATIONS Power: Total 17 kW – 3 main burners with 3.5 kW, 1 infrared ceramic burner with 3.5 kW, 1 side cooking hob with 3 kW Dimensions (W/H/D): 140 x 118 x 55 cm Weight: ca. 48 kg Nominal heat load (Hs) Burner: 17 kW Connected load... - Page 31 CONNECTING THE GAS SYSTEM Fire and explosion hazard • This gas grill may only be operated with a suitable pressure regulator. The enclosed pressure regulator is set correctly at the factory for liquid gas operation. • The gas hose may have to be exchanged if required by the relevant national regulations. •...
- Page 32 MAINTAINING THE GAS GRILL Fire and explosion hazard • Repairs and maintenance on the gas unit may only be carried out by authorised specialist personnel. Do not make changes to the gas grill or the pressure regulator. • Replace the pressure regulator and the hose after 10 years at the latest, even if there is no visible exter- nal damage.
- Page 33 Measures for minor burns or scalds • Burns: remove clothing only if it does not stick to the body. • In case of scalding: remove clothing immediately. • Cool the affected area with cold water for at least 15 minutes until the pain subsides. •...
-
Page 34: Equipment Delivered/Description Of Components
EQUIPMENT DELIVERED/DESCRIPTION OF COMPONENTS... - Page 35 Ref. Description Quantity Lid thermometer Screw for lid hinge Lid handle Lid bumper Warming grid Warming grid Accessory hook Flame distributor Clamping spring Stainless-steel burner Back wall combustion chamber Mounting grease drip tray Grease drip tray Grease drain plate Strut cover side hob Cover for side hob Warmer side hob Burner side hob...
- Page 36 Base control knob Control knob (regulator) Control panel aperture (right) Control panel aperture (left) Door hinge Front control panel Gas connection Gas connection bracket Corrugated pipe gas connection Gas pipe Main gas valve Gas valve side hob Insulation plate combustion chamber Mounting plate control panel (left) Mounting plate control panel (right) Infrared ceramic burner...
-
Page 37: Assembling The Gas Grill
ASSEMBLING THE GAS GRILL Danger of injury Make sure to assemble the grill according to the following instructions. Failure to follow these instructions may result in serious bodily injury or damage to property. Contact our customer service if you have questions about assembling or using the unit. - Page 38 4 x B...
- Page 39 4 x A...
- Page 40 4 x B 8 x B 4 x D...
- Page 42 1 x A The gas distributor is attached with a cable tie below the console for trans- port. Untie the cable tie and attach the gas distributor to the side panel.
- Page 43 2 x C 2 x A...
- Page 45 WARNING: The grill radiates heat. Never place the grill next to glass windows, walls, plants, etc. The minimum distance to any kind of object is: Back: 60 cm Sides: 50 cm Top: 100 cm 100 cm 50 cm 60 cm 50 cm...
-
Page 46: Connecting The Gas Cylinder
CONNECTING THE GAS CYLINDER Fire and explosion hazard WARNING: Never connect new or not completely empty gas cylinders if there are ignition sources in the immediate vicinity. Do not smoke. The following parts are included. They comply with the applicable standard of the country in which the gas grill is supplied: •... - Page 47 LEAK TEST • Use a commercially available leak detection spray or paint brush and soapy water to check all connec- tions (mixing ratio of soap to water: 1:3). • Open the gas cylinder valve. Small bubbles will appear where there are leaks. •...
-
Page 48: Operating The Gas Grill
OPERATING THE GAS GRILL WARNING: Never switch the grill on with the lid closed. Before you use the gas grill for the first time, you should first wipe the surface of the lid and the outer parts of the combustion chamber with a wet cloth. This will prevent any production residue from burning in. WARNING: Check that all burners are correctly positioned in the respective nozzles and that all cables below are accessible before using the gas grill. -
Page 49: Cleaning The Gas Grill
1. Open the lid of your grill. 2. Press the switch and turn it counterclockwise until you can hear the gas flowing in. 3. Count to 5 and ignite the burner by turning the knob a bit further and then you will hear the “click” sound of the piezo ignition. - Page 50 1. Close the lid and set all stainless steel burners (not the side burner) to “HI”. Set the infrared ceramic burners to "LO". 2. Let the grill burn out for 15–30 minutes until there is no more smoke coming out of the grill. 3.
- Page 51 MAINTENANCE OF THE CAST IRON GRIDS The grids are enameled. This layer protects against rust and prevents food from sticking to the grids. Des- pite this protective layer, the grids can absorb and release grease and moisture. It is therefore advisable to let the grids burn-in as well.
-
Page 52: Regular Maintenance
REGULAR MAINTENANCE After grilling, you should prepare the grill for the next use. Let the grill burn freely at maximum heat with the lid closed to burn up any residues on the grids and then brush them off. Follow the procedure below to do this: 1. -
Page 53: Troubleshooting
TROUBLESHOOTING Problem Possible cause Solution Gas cylinder is empty Connect new gas cylinder Have the pressure regulator che- Faulty pressure regulator cked by a specialist dealer Foreign debris in burner Clean the burner Burner does not ignite Foreign debris in the ignition Clean the ignition and hose system or hose No ignition spark... -
Page 54: Customer Service
The product and its packaging must be disposed of in accordance with local regulations. Contact your local waste disposal company if necessary. DECLARATION OF CONFORMITY The Springlane GmbH hereby declares that this product conforms to the basic CE requirements as of the day of publication. The full declaration of conformity can be found at www.burnhard.com/nl... - Page 56 COLOFON Installatie- en gebruiksaanwijzing voor 4-branders gasbarbecue Big FRED Deluxe Art-Nr.: 943737 Druk- en typefouten voorbehouden. Copyright © BURNHARD c/o Springlane GmbH Reisholzer Werftstraße 25a 40589 Düsseldorf, Duitsland Telefoon: +49 (0)211 749 55 10 Fax: +49 (0)211 749 55 11 0 E-mail: info@burnhard.com...
Need help?
Do you have a question about the 4-branders gasbarbecue Big FRED Deluxe and is the answer not in the manual?
Questions and answers