Table of Contents
Advertisement
Available languages
Available languages
Quick Links
Advertisement
Table of Contents

Related Manuals for BURNHARD BARNEY DELUXE


Summary of Contents for BURNHARD BARNEY DELUXE
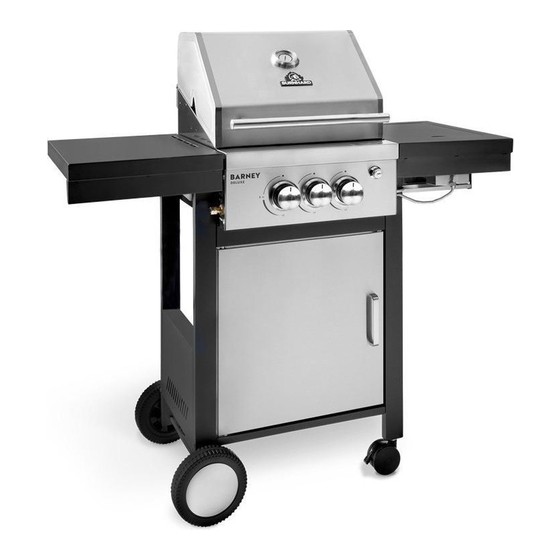
- Page 1 2-BRANDERS GASBARBECUE BARNEY DELUXE 2 - BURNER GAS GRILL BARNEY DELUXE...
-
Page 2: Table Of Contents
INHOUD 2-BRANDERS GASBARBECUE BARNEY DELUXE Technische specificaties Veiligheidsinstructies Leveringsomvang Onderdelenbeschrijving Bevestigingen Gasbarbecue in elkaar zetten Gasfles aansluiten Gasbarbecue gebruiken Gasbarbecue schoonmaken Regelmatig onderhoud Storingen verhelpen Gasbarbecue bewaren Klantenservice Afvoer/Milieu... - Page 3 CONTENT 2-BURNER GAS GRILL BARNEY DELUXE Technical specifications Safety instructions Parts included Description of parts Mountings Assembling the gas grill Connecting the gas cylinder Operating the gas grill Cleaning the gas grill Regular maintenance Troubleshooting Storing the gas grill Customer service...
-
Page 4: Technische Specificaties
TECHNISCHE SPECIFICATIES Vermogen: totaal 11 kW Afmetingen (b x d x h): 112 x 52 x 112 cm Gewicht: ca. 32 kg Nominale warmtebelasting (HO) Branders: 7,5 kW Nominale warmtebelasting (HO) Brander zijkant: 3,5 kW 873 g/h Aansluitwaarde brander: Uitgangsdruk: 29 mbar Gassoort: butaan (G30) en propaan (G31... - Page 5 APPARAAT UITPAKKEN Gevaar voor kinderen. Levensgevaar door verstikking / inslikken. Houd het verpakkingsmateriaal uit de buurt van kinderen. Gooi het onmiddellijk weg. Bewaar kleine onderdelen buiten het bereik van kinderen. GASSYSTEEM AANSLUITEN Brand- en explosiegevaar • Deze gasbarbecue mag alleen met een drukregelaar worden gebruikt. De meegeleverde drukregelaar is in de fabriek correct afgesteld voor gebruik met vloeibaar gas.
- Page 6 • De gasgrill wordt tijdens het gebruik zeer heet. • Draai bij storingen of als er gas ontsnapt onmid- Waarschuw omstanders en houd kinderen uit dellijk de gaskraan van de gasfles dicht. de buurt van de barbecue. • Als je de barbecue op een andere plaats wilt •...
- Page 7 Maatregelen bij ernstige verbrandingen of brandwonden door een hete vloeistof • Er bestaat een acuut gevaar voor onderkoeling of een shock. Bel direct een ambulance! • Doof brandende kleding onmiddellijk met water of doof de vlammen met een dikke deken. •...
-
Page 8: Leveringsomvang
LEVERINGSOMVANG... -
Page 9: Onderdelenbeschrijving
BESCHRIJVING ONDERDELEN Ref. Omschrijving Hoeveelheid Behuizing & deksel Vlamverdeler Gietijzeren rooster Warmhoudrooster Zijtafel Zijtafel-scharnier Onderstel poot linksachter Dwarsbalk Onderstel poot linksvoor Onderstel zijwand Wiel Wieldop Wielas Deurtje Deurstopper Deurgreep Onderstel bodem Loopwiel Onderstel poot rechtsvoor Onderstel poot rechtsachter Vetopvangbak Keramische infrarood-brander Opberghaakje Vetopvangbak keramische infrarood-brander Behuizing keramische infrarood-brander... -
Page 10: Gasbarbecue In Elkaar Zetten
GASBARBECUE IN ELKAAR ZETTEN Letselgevaar De gasgrill heeft een aantal scherpe randen. Draag veiligheidshandschoenen tijdens de montage om snijwonden te voorkomen. Voordat je met de montage begint moet je alle verpakkingsmaterialen en beschermfolie van de afzon- derlijke onderdelen verwijderen. Ref #7 Zijkanten voor de onderkast in elkaar zetten. - Page 11 Ref #9 Ref #19 Deurstopper in de gaten in de Ref #7 bodem bevestigen. Ref #10 Ref #15 Ref #19 Ref #20 Ref #8 Ref #17 Ref #C x 4 Pcs. Onderstel omdraaien en de dwarsbalk vastschroeven. Ref #A x 4 Pcs. Ref #F Ref #12 Ref #11...
- Page 12 Schroeven losdraaien en de greep vastschroeven. Ref #16 Ref #14 Ref #19 Ref #1 Ref #27 Behuizing (Ref #1) plaatsen, met schroeven (Ref # C) vastzetten en de knoppen bevestigen (Ref # 27). Ref #19 Ref #C x 4 Pcs.
- Page 13 De bovenste lange schroef (Ref # C) wordt stevig vastgezet en ondersteunt de behui- zing. De onderste schroeven (Ref # A en Ref # C) worden er nog niet helemaal ingedraaid – hier wordt de zijbrander ingehangen. Ref #C Ref #A Ref #C x 4 Stk.
- Page 14 Ref #25 Zijwand aan de schroeven inhaken en de schroeven vastdraaien. Schroeven van binnenuit vastdraai- en om de zijwand vast te zetten. Ref #B x 2 Stk.
- Page 15 Gasslang in de uitsparing steken en vanaf de achterkant met de moer vastdraaien. Kabel voor de elektrische ontsteking onder de zijbrander langs leggen en in de contrastekker steken. Keramische brander plaatsen en vast- zetten met de schroeven. Er moet een zekere afstand (opening) tussen de gasinjector en de branderbuis blijven.
- Page 16 Scharnieren aan de zijtafel schroeven. Ref #6 Ref #5 Ref #H x 6 Stk. Schroeven in de schroefdraad draaien. Ref #D x 4 Stk.
- Page 17 Zijtafel inhaken. Ref #5, #6 Vlamverdeler plaatsen. Ref #2...
- Page 18 Rooster plaatsen. Vetopvangbakken erin schuiven, haakjes bevestigen. Ref #21 Ref #4 Ref #24 Ref #3 Ref #26 Ref #23...
- Page 19 Wartelmoer aan het uiteinde van de slang voorzichtig met een tang aan de gasslang vastschroeven. Ref #28 Wartelmoer van de drukregelaar uitsluitend met de hand vastdraaien aan de gasfles. Ref #28 Gasfles...
- Page 20 Het klepje van de ontsteking los- schroeven. Een AA-batterij met de pluspool naar boven plaatsen.
-
Page 21: Gasfles Aansluiten
WAARSCHUWING: de barbecue straalt warmte uit. Plaats de barbecue nooit direct tegen glazen wan- den, muren, planten enz. De minimale afstand tot objecten bedraagt: aan de achterkant: 60 cm aan de zijkant: 50 cm aan de bovenkant: 100 cm GASFLES AANSLUITEN Brand- en explosiegevaar De volgende onderdelen worden meegeleverd. -
Page 22: Gasbarbecue Gebruiken
LEKTEST • Spuit alle afdichtingen in met een gangbare lekzoekspray of kwast ze in met zeepwater (verhouding 1 deel zeep op 3 delen water). • Draai het ventiel van de gasfles open. Op plekken waar een lek is, zijn luchtbellen te zien. •... - Page 23 GASBARBECUE AANZETTEN Open het deksel van de barbecue. 2. Draai alle stelknoppen met de klok mee op de 'OFF'-stand. 3. Verbind de drukregelaar met de gasfles. 4. Open het ventiel van de gasfles en voer de lektest uit met behulp van lekzoekspray of zeepsop tus- sen de gasdrukregelaar en de gasfles.
-
Page 24: Gasbarbecue Schoonmaken
GASBARBECUE SCHOONMAKEN REINIGING NA ELK GEBRUIK Sluit het deksel en zet beide branders op de 'HI'-stand. Laat de barbecue 15-30 minuten uitbranden tot er geen rook meer van de barbecue opstijgt. Zet de branders uit en draai het ventiel van de gasfles dicht. -
Page 25: Regelmatig Onderhoud
ONDERHOUD EN REINIGING VAN DE KERAMISCHE INFRAROOD - BRANDER De keramische steen kan en hoeft niet gereinigd te worden. Vet en vleessappen die op de brander druppelen, verbranden. Verkleuring van de steen en ingebrande plekken zijn normaal en hebben geen invloed op het vermogen van de brander. -
Page 26: Storingen Verhelpen
STORINGEN VERHELPEN Probleem Mogelijke oorzaak Oplossing Gasfles is leeg Sluit een nieuwe gasfles aan Laat de drukregelaar door een spe- Defecte drukregelaar cialist testen Branders ontsteken niet Vreemd voorwerp in de brander Maak de branders schoon Vreemd voorwerp in het ontste- Maak de ontsteking en slang schoon kingssysteem of de slang Kleine vlam of plof-... -
Page 27: Gasbarbecue Bewaren
Neem voor vragen over de bediening of de werking van onze artikelen contact op met onze klantenservice: Gratis hotline voor Nederland: 0800 0900058 E-mail: service@burnhard.com Internet: www.burnhard.com/nl AFVOER/MILIEU Onze producten worden gemaakt volgens hoge kwaliteitsnormen en zijn ontworpen voor een lange levensduur. -
Page 28: Technical Specifications
TECHNICAL SPECIFICATIONS Power: 11 kW in total Dimensions (W/H/D): 112 x 52 x 112 cm Weight: approx. 32 kg Nominal heat output (HO) burner: 7.5 kW Nominal heat output (HO) side burner: 3.5 kW Connected load per burner: 873 g/h Outlet pressure: 29 mbar Type of gas:... - Page 29 CONNECTING THE GAS SYSTEM Fire and explosion hazard • This gas grill may only be operated with a pressure regulator. The enclosed pressure regulator was set for operation with LPG in the factory. • The gas hose may need to be replaced if corresponding national requirements require it. •...
- Page 30 MAINTAINING THE GAS GRILL Fire and explosion hazard • The gas system may only be repaired and serviced by authorized specialist personnel. Do not make any changes to the gas grill or pressure regulator. • Change the pressure regulator and hose after 2 years maximum, even if no external damage is noti- ceable.
- Page 31 • Cool the affected area with cold water for at least 15 minutes until the pain subsides. • Let small burns or scalds that haven’t formed blisters heal in the air, do not cover with a patch or bandage. INSTRUCTIONS FOR TRANSPORT Fire and explosion hazard •...
-
Page 32: Parts Included
PARTS INCLUDED... -
Page 33: Description Of Parts
DESCRIPTION OF PARTS Ref. Beschreibung Menge Housing assembly Flame tamer Cast iron grate Warming rack (sheet) Left side table Side table hinge Trolley leg-left back Cross strut Trolley leg-left front Trolley side panel Wheel (7") Wheel cover Wheel axle Door assembly Door baffle-bottom Door handle Trolley bottom shelf... -
Page 34: Assembling The Gas Grill
ASSEMBLING THE GAS GRILL Risk of injury When handling tools and building a grill, injuries to hands and fingers can always occur. Wear safety gloves during assembly to prevent injury. Before starting assembly, remove all packaging materials and protective foils from the individual parts. Ref #7 Assemble the sides for the base cabinet. - Page 35 Ref #9 Ref #19 Attach both side parts to the Ref #7 underbody. Ref #10 Ref #15 Ref #19 Ref #20 Ref #8 Ref #17 Ref #C x 4 Pcs. Turn the base over and screw on the cross brace. Ref #A x 4 Pcs.
- Page 36 Loosen screws and screw on handle. Ref #16 Ref #14 Ref #19 Ref #1 Ref #27 Place body (Ref #1), fix with screws (Ref # C) and attach knobs (Ref # 27). Ref #19 Ref #C x 4 Pcs.
- Page 37 The upper long screw (Ref # C) is mounted firmly and supports the body. The lower screws (Ref # A and Ref # C) are not com- pletely screwed in at this point - the side burner is attached here. Ref #C Ref #A Ref #C x 4 Pcs.
- Page 38 Ref #25 Hook the side part on the screws and tighten the screws. Tighten screws from inside to fix side panel. Ref #B x 2 Pcs.
- Page 39 Insert the gas hose into the recess and tighten the nut from behind. Route the electrical ignition cable under the side burner and plug it into the socket. Insert the ceramic burner and fix it with the screws. A distance (gap) from the gas nozzle to the burner pipe is intended and correct.
- Page 40 Screw the hinges to the side table. Ref #6 Ref #5 Ref #H M5 x 10 x 6 Pcs. Turn the screws into the screw threads. Ref #D x 4 Pcs.
- Page 41 Hook side table. Ref #5, #6 Insert flame tamers. Ref #2...
- Page 42 Insert grids. Insert grease drip trays, attach hooks. Ref #21 Ref #4 Ref #24 Ref #3 Ref #26 Ref #23...
- Page 43 Carefully screw the thread from the end of the hose to the gas hose using pliers. Ref #28 Only tighten the screw of the pres- sure reducer to the gas cylinder with your hands. Ref #28 Cylinder...
- Page 44 Unscrew the ignition cap. Insert an AA battery with the positive pole to top.
-
Page 45: Connecting The Gas Cylinder
CAUTION: The grill radiates heat. Never place the grill next to glass windows, walls, plants, etc. The grill must be placed at a minimum distance from objects of any kind: 60 cm behind 50 cm to the side 100 cm above CONNECTING THE GAS CYLINDER Fire and explosion hazard The following parts are included. -
Page 46: Operating The Gas Grill
LEAK TEST • Use a commercially available leak detection spray or paint brush and soapy water to check all connections (mixing ratio of soap to water 1:3). • Open the gas cylinder valve. Bubbles will appear on all leaking points. •... - Page 47 IGNITING THE GAS GRILL Open the grill lid. 2. Turn all control knobs clockwise to the “OFF” position. 3. Connect the pressure regulator to the gas cylinder. 4. Open the gas cylinder valve and use a leak detection spray or soapy water to check for leaks bet- ween the gas pressure regulator and the gas cylinder.
-
Page 48: Cleaning The Gas Grill
CLEANING THE GAS GRILL CLEANING AFTER EACH USE Close the lid and set both burners to “HI”. Let the grill burn for 15–25 minutes until there is no more smoke coming out of the grill. Turn off all burners and close the gas cylinder valve. Open the grill and use a stainless steel brush to scrub the iron grates. -
Page 49: Regular Maintenance
MAINTENANCE AND CLEANING OF THE INFRARED CERAMIC BURNER The ceramic stone cannot and must not be cleaned. Fat and meat juices that drip onto the burner will burn away. Discoloration of the stone and burnt-in areas are normal and do not affect the performance of the burner. -
Page 50: Troubleshooting
TROUBLESHOOTING Problem Possible cause Solution Gas cylinder is empty Connect new gas cylinder Have the pressure regulator che- Faulty pressure regulator cked by a specialist dealer Burner does not ignite Impurities in the burner Clean the burner Impurities in the ignition Clean the ignition and gas hose system or gas hose Small flame / little... -
Page 51: Storing The Gas Grill
Free hotline for Germany/Austria only: 0800 270 70 27 From other EU countries: +49 211 - 749 55 10* *Different costs may apply. E-Mail: service@burnhard.de Internet: www.burnhard.de DISPOSAL/ENVIRONMENTAL PROTECTION Our Products are manufactured with the highest degree of care and are designed for a long durability. - Page 52 COLOFON Installatie- en gebruiksaanwijzing voor 2- branders gasbarbecue BARNEY Deluxe | Art-Nr.: 943731 Druk- en typefouten voorbehouden. Copyright © BURNHARD c/o Springlane GmbH Reisholzer Werftstraße 25a 40589 Düsseldorf, Germany Telefon: +49 (0)211 749 55 10 Telefax: +49 (0)211 749 55 11 0 E-mail: info@burnhard.com...
Need help?
Do you have a question about the BARNEY DELUXE and is the answer not in the manual?
Questions and answers