Table of Contents
Advertisement
Available languages
Available languages
Advertisement
Table of Contents

Related Manuals for BURNHARD BARNEY DELUXE


Summary of Contents for BURNHARD BARNEY DELUXE
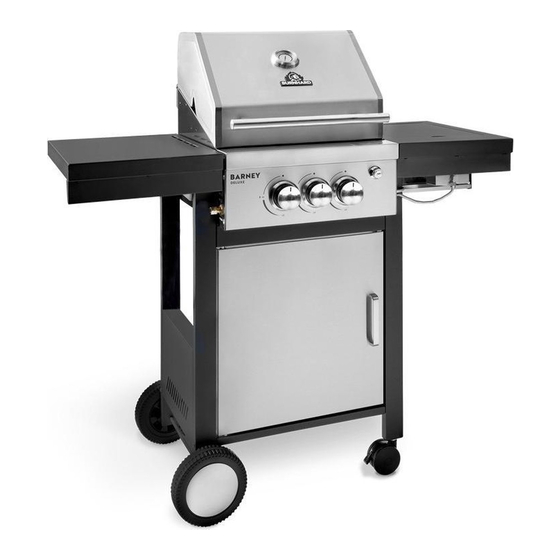
- Page 1 2-BRENNER GASGRILL BARNEY DELUXE 2 - BURNER GAS GRILL BARNEY DELUXE...
-
Page 2: Table Of Contents
INHALT 2-BRENNER GASGRILL BARNEY DELUXE Technische Daten Sicherheitshinweise Lieferumfang Teilebeschreibung Befestigungen Gasgrill aufbauen Gasflasche anschliessen Gasgrill betreiben Gasgrill reinigen Regelmässige Wartung Fehlerbehebung Gasgrill aufbewahren Kundenservice Entsorgung/Umweltschutz... - Page 3 CONTENT 2-BURNER GAS GRILL BARNEY DELUXE Technical specifications Safety instructions Parts included Description of parts Mountings Assembling the gas grill Connecting the gas cylinder Operating the gas grill Cleaning the gas grill Regular maintenance Troubleshooting Storing the gas grill Customer service...
-
Page 4: Technische Daten
TECHNISCHE DATEN Leistung: insgesamt 12 kW Maße (B/T/H): 112 x 52 x 112 cm Gewicht: ca. 32 kg Nennwärmebelastung (HO) Brenner: 7,5 kW Nennwärmebelastung (HO) Seitenbrenner: 4,5 kW Anschlusswert Brenner: 873 g/h Ausgangsdruck: 50 mbar Gasart: Butan (G30) und Propan (G31) Ausstattung: 2 Edelstahlbrenner, 1 Infrarot-Keramikbrenner, Gusseisenrost mit Porzellanbeschichtung für die Hauptgrillfläche und den Infrarot-Kera-... - Page 5 • ACHTUNG: Zugängliche Teile können sehr heiß sein. Kinder fernhalten. • Keine Änderungen am Gerät vornehmen. Jegliche Veränderungen am Gerät können zu Unfällen füh- ren. GERÄT AUSPACKEN Gefahr für Kinder. Lebensgefahr durch Ersticken/Verschlucken. Halte das Verpackungsmaterial von Kindern fern. Entsorge es sofort. Bewahre Kleinteile außerhalb deren Reichweite auf. GASANLAGE ANSCHLIESSEN Brand- und Explosionsgefahr •...
- Page 6 • Achte darauf, dass die Entlüftungsöffnungen • Drehe bei einer Störung oder bei Gasaustritt des Gehäuses unter keinen Umständen ver- sofort das Ventil der Gasflasche zu. deckt sind. • Vor jedem Stellplatzwechsel muss der Grill aus- • Die Flächen des Gasgrills werden während des geschaltet, das Ventil der Gasflasche zugedreht Betriebes sehr heiß.
- Page 7 stillstand die künstliche Beatmung ein. Maßnahmen nach schweren Verbrennungen oder Verbrühungen • Es besteht akute Gefahr einer Unterkühlung und eines Schocks. Rufe sofort den Rettungsdienst! • Brennende Kleider sofort mit Wasser löschen oder die Flammen mit einer dicken Decke ersticken. •...
-
Page 8: Lieferumfang
LIEFERUMFANG... -
Page 9: Teilebeschreibung
TEILEBESCHREIBUNG Ref. Beschreibung Menge Gehäusebaugruppe Brennerabdeckung Gusseisenrost mit Porzellanbeschichtung Warmhalterost Linke Seitenablage Knöpfe Trolley Fuß hinten links Vordere Querstrebe Trolley Fuß vorne links Trolley Seitenwand Rad (7‘‘) Radkappe Achse Tür Türstopper Türgriff Trolley Unterboden Laufrolle (3‘‘) Trolley Fuß vorne rechts Trolley Fuß... -
Page 10: Gasgrill Aufbauen
GASGRILL AUFBAUEN Verletzungsgefahr Der Gasgrill hat teilweise scharfe Kanten. Trage während der Montage Sicherheitshandschuhe, um Schnittverletzungen vorzubeugen. Entferne vor Beginn der Montage alle Verpackungsmaterialien und die Schutzfolien von den Einzeltei- len. Ref #7 Ref #10 Ref #9 Ref #A M6 x 12 x 4 Stk. Ref #19 Ref #10 Ref #20... - Page 11 Ref #10, 19, 20 Ref #7, 9, 10 Ref #8 Ref #15,17 Ref #C M6 x 65 x 4 Stk. Ref #F Ref #12 Ref #A M6x12x4 Stk. Ref #11 Ref #G Ref #13 Ref #G Ref #11 Ref #12 Ref #18 Ref #F Ref #F R clipx2 Stk.
- Page 12 Ref #16 Ref #1 Ref #14 Schrauben lösen (Türgriff) M4 x 5 x 2 Stk. Ref #6 Ref #C M6 x 65 x 4 Stk. Ref #C M6 x 65 x 2 Stk.
- Page 13 Die Schraube rechts vorne an der Gehäusebaugrup- pe entfernen. Die beiden 5 ~8mm Schrauben oben in den Trolley Fuß vorne rechts und hinten rechts drehen. Nicht vollständig reindrehen. Hier wird später das Seitenbren- nergehäuse eingehängt Ref #C M6 x 65 x 2 Stk. Ref #26 Die Muttern und Schrau- ben, die den Infrarot-...
- Page 14 Ref #26 Das Seitenbrennergehäuse einhängen und mit Schrauben an den Trolleyfüßen und der Gehäusebaugruppe montieren Ref #A M6 x 12 x 2 Stk. Ref #B M6 x 15 x 2 Stk.
- Page 15 Die Schrauben vom Seitenbrennerge- Ref #23 häuse entfernen und den Düsenhalter mit den Schrauben montieren Die Mutter von der Düse entfernen. Die Düse durch das Loch vom Dü- senhalter führen und mit der Mutter befestigen Ref #22...
- Page 16 Die Schrauben anziehen Ref #D Achse-lang x 4 Stk Ref #5 Ref #3...
- Page 17 Ref #21 Ref #4 Ref #25 Ref #3 Ref #27 Ref #24 Ref #28...
- Page 18 Ref #28 Zylinder Die Zünderkappe abschrauben. Eine AA-Batterie mit dem Pluspol nach oben einführen...
-
Page 19: Gasflasche Anschliessen
ACHTUNG: Der Grill strahlt Hitze ab. Stelle den Grill nie direkt an Glasfronten, Wände, Pflanzen etc. Der minimale Abstand zu Objekten jeder Art beträgt: Nach hinten: 60 cm Zur Seite: 50 cm Nach oben: 100 cm GASFLASCHE ANSCHLIESSEN Brand- und Explosionsgefahr Die folgenden Teile sind im Lieferumfang enthalten. -
Page 20: Gasgrill Betreiben
LECKTEST • Sprühe alle Dichtstellen mit handelsüblichem Lecksuchspray ein oder pinsele sie mit Seifenwasser (Verhältnis 1 Teil Seife auf 3 Teile Wasser) ein. • Drehe das Ventil der Gasflasche auf. An undichten Stellen zeigen sich Blasen. • Drehe das Ventil der Gasflasche wieder zu. •... - Page 21 GASGRILL EINSCHALTEN Öffne den Deckel des Grills. 2. Drehe alle Stellknöpfe im Uhrzeigersinn in die „OFF“ Position. 3. Verbinde den Druckregler mit der Gasflasche. 4. Öffne das Ventil an der Gasflasche und führe mit Lecksuchspray oder Seifenlauge eine Dichtheits- prüfung zwischen Gasdruckregler und Gasflasche durch. 5.
-
Page 22: Gasgrill Reinigen
GASGRILL REINIGEN REINIGUNG NACH JEDEM GEBRAUCH Schließe den Deckel und stelle alle 2 Brenner auf „HI“. Lasse den Grill 15-30 Minuten ausbrennen, bis kein Rauch mehr aus dem Grill aufsteigt. Schließe alle Brenner und drehe das Ventil der Gasflasche zu. Öffne den Grill und schrubbe die Roste mit einer Edelstahlbürste sauber. -
Page 23: Regelmässige Wartung
REGELMÄSSIGE WARTUNG Nach dem Grillen solltest du den Grill direkt für das nächste Grillen vorbereiten. Lass den Grill auf voller Hitze mit geschlossenem Deckel freibrennen (ohne jegliches Grillgut), um Rückstände von Grillgut und Fett auf den Rosten zu verbrennen und anschließend durch Abbürsten zu beseitigen. Gehe dazu folgendermaßen vor: Alle Speisen vom Grillrost entfernen, den Grill auf höchste Stufe stellen und bei geschlossenem De- ckel die Flammen 10 bis 20 Minuten brennen lassen, bis kein Rauch mehr aus dem Grill steigt. -
Page 24: Fehlerbehebung
FEHLERBEHEBUNG Problem Mögliche Ursache Lösung Gasflasche ist leer Neue Gasflasche anschließen Druckminderer Defekter Druckminderer im Fachhandel überprüfen lassen Brenner zünden nicht Fremdkörper im Brenner Brenner säubern Fremdkörper im Zündsystem oder Zündung und Schlauch säubern Schlauch Kleine Flamme oder Verpuffung im Fremdkörper im Brenner Brenner und Zündung säubern Brenner... -
Page 25: Gasgrill Aufbewahren
GASGRILL AUFBEWAHREN • Bewahre den Gasgrill in einem vor Frost geschützten und trockenen Raum auf. Schließe die Grillhau- be und decke das Gerät ab, um es vor Verschmutzungen und Beschädigungen zu schützen. • Eine Abdeckhaube (Cover) schützt deinen Grill das ganze Jahr gegen Witterung, wie Regen, Hagel, Schnee Wind und Frost. -
Page 26: Technical Specifications
TECHNICAL SPECIFICATIONS Power: 12 kW in total Dimensions (W/H/D): 112 x 52 x 112 cm Weight: approx. 32 kg Nominal heat output (HO) burner: 7.5 kW Nominal heat output (HO) side burner: 4.5 kW Connected load per burner: 873 g/h Outlet pressure: 50 mbar Type of gas:... - Page 27 children. Dispose of it immediately. Keep small parts out of their reach. CONNECTING THE GAS SYSTEM Fire and explosion hazard • This gas grill may only be operated with a pressure regulator. The enclosed pressure regulator was set for operation with LPG in the factory. •...
- Page 28 MAINTAINING THE GAS GRILL Fire and explosion hazard • The gas system may only be repaired and serviced by authorized specialist personnel. Do not make any changes to the gas grill or pressure regulator. • Change the pressure regulator and hose after 10 years maximum, even if no external damage is noti- ceable.
- Page 29 • Cool the affected area with cold water for at least 15 minutes until the pain subsides. • Let small burns or scalds that haven’t formed blisters heal in the air, do not cover with a patch or bandage. INSTRUCTIONS FOR TRANSPORT Fire and explosion hazard •...
-
Page 30: Parts Included
PARTS INCLUDED... -
Page 31: Description Of Parts
DESCRIPTION OF PARTS Ref. Description Quantity Housing assembly Flame tamer Cast iron grate with porcelain coating Warming rack (sheet) Left side table Knobs Trolley leg-left back Trolley bracket-front Trolley leg-left front Trolley side panel Wheel (7") Wheel cover Wheel axle Door assembly Door baffle-bottom Door handle... -
Page 32: Assembling The Gas Grill
ASSEMBLING THE GAS GRILL Risk of injury The gas grill has some sharp edges. Please wear safety gloves when assembling the grill to avoid cuts. Before starting to assemble the grill, remove all packaging materials and protective wrappings from the various components. - Page 33 Ref #10, 19, 20 Ref #7, 9, 10 Ref #8 Ref #15,17 Ref #C M6 x 65 x 4Pcs. Ref #F Ref #12 Ref #11 Ref #A M6 x 12 x 4 Stk. Ref #G Ref #13 Ref #G Ref #11 Ref #18 Ref #12 Ref #F...
- Page 34 Ref #16 Ref #1 Ref #14 Loosen the screws (handle) M4 x 5 x 2 Pcs. Ref #6 Ref #C M6 x 65 x 4 Pcs. Ref #C M6 x 65 x 2 Pcs.
- Page 35 Remove the screw on the front right of the housing as- 5 ~8mm sembly. Turn the two screws at the top of the trolley foot front right and rear right. Do not turn it in completely. The side burner housing will be hooked in here later Ref #C M6 x 65 x 2 Pcs.
- Page 36 Ref #26 Hook in the side burner housing and mount with screws on the trolley leg and the housing assembly Ref #A M6 x 12 x 2 Stk. Ref #B M6 x 15 x 2 Pcs.
- Page 37 Ref #23 Remove the screws from the side burner housing and mount the nozzle holder with the screws Remove the nut from the nozzle. Gui- de the nozzle through the hole in the nozzle holder and secure with the nut Ref #22...
- Page 38 Tighten the screws (left side) Ref #D Axis-long x 4 Pcs. Ref #5 Ref #3...
- Page 39 Ref #2 1 Ref #4 Ref #25 Ref #3 Ref #27 Ref #24 Ref #28...
- Page 40 Ref #28 Cylinder Unscrew the ingniter cap insert AA battery with the "+" end upwards...
-
Page 41: Connecting The Gas Cylinder
CAUTION: The grill radiates heat. Never place the grill next to glass windows, walls, plants, etc. The grill must be placed at a minimum distance from objects of any kind: 60 cm behind 50 cm to the side 100 cm above CONNECTING THE GAS CYLINDER Fire and explosion hazard The following parts are included. -
Page 42: Operating The Gas Grill
LEAK TEST • Use a commercially available leak detection spray or paint brush and soapy water to check all connections (mixing ratio of soap to water 1:3). • Open the gas cylinder valve. Bubbles will appear on all leaking points. •... - Page 43 IGNITING THE GAS GRILL Open the grill lid. 2. Turn all control knobs clockwise to the “OFF” position. 3. Connect the pressure regulator to the gas cylinder. 4. Open the gas cylinder valve and use a leak detection spray or soapy water to check for leaks bet- ween the gas pressure regulator and the gas cylinder.
-
Page 44: Cleaning The Gas Grill
CLEANING THE GAS GRILL CLEANING AFTER EACH USE Close the lid and set both burners to “HI”. Let the grill burn for 15–25 minutes until there is no more smoke coming out of the grill. Turn off all burners and close the gas cylinder valve. Open the grill and use a stainless steel brush to scrub the iron grates. -
Page 45: Regular Maintenance
REGULAR MAINTENANCE After grilling, you should prepare the grill for the next use. Let the grill burn freely at maximum heat with the lid closed to burn up any residues on the grates and then brush them off. Follow the procedure below to do this: Remove all grilled food from the grill and set the grill to maximum heat with the lid closed. -
Page 46: Troubleshooting
TROUBLESHOOTING Problem Possible cause Solution Gas cylinder is empty Connect new gas cylinder Have the pressure regulator che- Faulty pressure regulator cked by a specialist dealer Burner does not ignite Impurities in the burner Clean the burner Impurities in the ignition Clean the ignition and gas hose system or gas hose Small flame / little... -
Page 47: Storing The Gas Grill
STORING THE GAS GRILL • Store the gas grill in a dry room protected from frost. Close the grill hood and cover the unit to pro- tect it from dirt and damage. • A cover protects your grill from the weather such as rain, hail, snow, wind and frost all year round. •... - Page 48 IMPRESSUM Aufbau- und Bedienungsanleitung Barney 2-Brenner Gasgrill Deluxe Art-Nr.:943461 Druck- und Satzfehler vorbehalten. Copyright © Springlane GmbH Reisholzer Werftstraße 25a 40589 Düsseldorf, Germany Telefon: +49 (0)211 749 55 10 Telefax: +49 (0)211 749 55 11 0 E-Mail: info@springlane.de www.springlane.de SERVICE - HOTLINE Bei Fragen zum Gebrauch des Gerätes wende dich bitte an unseren Kundendienst.
Need help?
Do you have a question about the BARNEY DELUXE and is the answer not in the manual?
Questions and answers