
Subscribe to Our Youtube Channel
Related Manuals for Ametek Land LMG GS

Summary of Contents for Ametek Land LMG GS
- Page 1 LMG GS Signal Processor User Guide Issue 2: 07/10 Publication Nº. LMGGS 198.238 Language: English Copyright © 2004-2010 Land Instruments International...
- Page 3 Protective Clothing For further details on all LAND/ Protective clothing must always be worn when working in the vicinity of hot vessels or ducts. Ametek offices, distributors and Storage representatives, please visit our The instrument should be stored in its packaging, in a dry sheltered area.
- Page 4 PRODUCT WARRANTY Thank you for purchasing your new product from Land Instruments International. This Land manufacturer’s ‘back-to-base’ warranty covers product malfunctions arising from defects in design or manufacture. The warranty period commences on the instrument despatch date from the Land Instruments International Ltd.
- Page 5 • Tel: +44 (0) 1246 417691 • Fax: +44 (0) 1246 410585 Email: land.infrared@ametek.co.uk • www.landinst.com A M E T E K L a n d , I n c . • 1 5 0 F r e e p o r t R d .
-
Page 7: Table Of Contents
Contents Introduction About this Guide About the Processor 1.3 Specifications Unpacking the Processor Installing the Processor Installing the Processor Into a Panel Electrical Connections 2.2.1 Alarm output connection schedule 2.2.2 CMD (Command) input connection schedule 2.2.3 Output (Retransmission output) connection schedule 2.2.4 Thermometer input/output connection schedule 2.2.5 Serial communications and maths function options System 4 Thermometer Cable Connector Assembly... -
Page 9: Introduction
User Guide Signal Processor Introduction 1.1 About this Guide This guide gives you the information necessary for you to operate a LAND Landmark Graphic GS processor. Basic information regarding installation of the processor is also contained in the Installation Guide. More detailed information regarding servicing, repair and calibration of the processor is contained in the Service Manual. -
Page 10: About The Processor
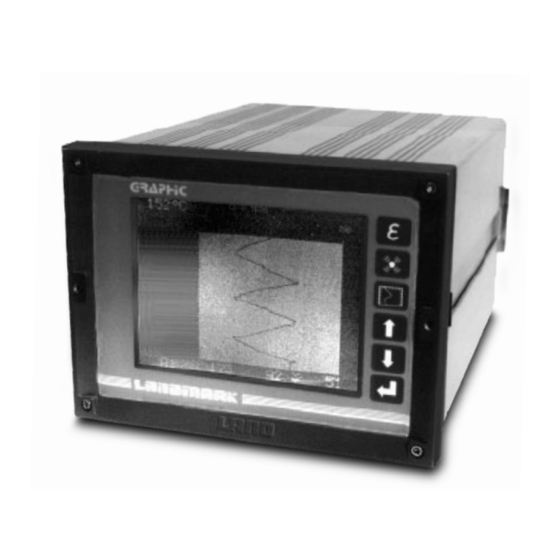
Signal Processor User Guide 1.2 About the Processor The Landmark Graphic GS Signal Processor is designed to be used in conjunction with the GST thermometer and also with LAND System 4 thermometers. The processor features include: • Large, clear LCD panel. • Easy to use configuration menu system, with security code, context sensitive help display and ‘Quick Key’... -
Page 11: Specifications
User Guide Signal Processor 1.3 Specifications Landmark Graphic GS (LMG GS) Processor Specifications Display: Cold cathode, back lit, 320 x 240 pixels Display update: 0.5s Screens: Numeric, line chart, deviation chart, mixed, Snapshot (S4), 4 channel numeric, 4 channel bar graph, 4 channel deviation bar graph 5°... - Page 12 Signal Processor User Guide LMG GS Page 4...
- Page 13 User Guide Signal Processor GST Input / Output Card Specifications Landmark Graphic GS (LMG GS) Inputs: 2 x +10V Accuracy: + 0.3% of FSR Discrimination: 0.003% of FSR Stability: 0.004% of span/° Input Update: 7.5ms Output Update: 30ms Outputs: 0 to 20mA or 4 to 20mA (user selectable) over set span. Temperature Span can be set in 5°...
-
Page 14: Unpacking The Processor
Signal Processor User Guide 1.4 Unpacking the Processor The package containing the processor will contain the following items: Landmark Graphic GS Processor. (ii) 7-way plug and cover (10-way plug and cover on GST Input Card)*, (includes 2 screws and a clamp bar) for connection to the thermometer. -
Page 15: Installing The Processor
User Guide Signal Processor Installing the Processor 2.1 Installing the Processor into a Panel The Landmark Graphic GS processor is designed to be mounted into an instrument panel. The overall installation dimensions of the processor are given in Fig. 2. Processor front bezel 192mm/7.6in Cut-Out 186 (+1.1,-0)mm... - Page 16 Signal Processor User Guide NOTE The Landmark Graphic GS processor can be set up to display text in either English, German, Italian, French, Spanish or Japanese. The processor is supplied set up to display in English. Changing the language setting involves removal of the back panel, therefore it is recommended that the language is selected before installing the processor in a panel.
- Page 17 User Guide Signal Processor Viewing side Clamp bar Mounting panel Retaining screw Fig. 3 - Mounting the processor into a panel 238003 From the rear, re-insert the clamp bars into their channels and push them up to touch the mounting panel. (vi) Insert and tighten the retaining screws until the mounting panel is firmly gripped between the processor front panel and the clamp bar.
-
Page 18: Electrical Connections
Signal Processor User Guide 2.2 Electrical Connections The electrical connections to and from the processor are all made via connectors on the rear panel of the processor. Fig. 4 shows the location of the connectors. WARNING Risk of electric shock. Refer to the processor Service Manual before removing the rear panel screws. - Page 19 User Guide Signal Processor RS 485 200 - 240V 100 - 120V T 1A 250V 35VA MAX. RS 232C 50-60Hz Alarm output AC power input Command input RS 232C serial comms input Retransmission output Channel A* terminal block (* Channels B,C & D may not Thermometer connector be identical to A, dependent on RS 485 serial comms output...
-
Page 20: Alarm Output Connection Schedule
Signal Processor User Guide 2.2.1 Alarm output connection schedule The alarm output connection schedule is given in Fig. 5. The alarm relay contact rating is 50V a.c. or d.c. at 0.5A. NOTE Each alarm is designed to be ‘fail-safe’. i.e. if there is a loss of power to the processor, the alarms will remain in an activated state until the power supply is restored. - Page 21 User Guide Signal Processor Remote switch Function Peak Picker Track & Hold Valley Picker Switch Open Peak Pick Track Valley Pick Switch Closed Reset Hold Reset Card Type System 4 Card All Cards System 4 Card Fig. 7 - ‘CMD’ (command) input control via a remote switch 238007 NOTE Remote switch can be replaced by voltage Vin.
-
Page 22: Output (Retransmission Output) Connection Schedule
Signal Processor User Guide 2.2.3 Output (Retransmission output) connection schedule The output (retransmission output) connection schedule for System 4 thermometers is given in Fig. 9a and the output (retransmission output) connection schedule for the GST thermometer is given in Fig. 9b. The processor is supplied fitted for ‘up scale’ operation. The mode of operation is set by means of a link on the input/output (I/O) board. - Page 23 User Guide Signal Processor Output (Retransmission output) Pin Nº Function Description Load Current output drive Maximum loop Current output return resistance: 500Ω Screen Screen Emissivity output drive 0-20mA max loop Emissivity output resistance: 500Ω return Fig. 9b - GST thermometer retransmission output cable connection schedule 238009b RS 485...
- Page 24 Signal Processor User Guide CON 1 D5 D6 Fig. 11 - Location of up scale/down scale selector on the input/output (I/O) p.c.b. 238011 LMG GS Page 16...
-
Page 25: Thermometer Input/Output Connection Schedule
User Guide Signal Processor 2.2.4 Thermometer input/output connection schedule The thermometer input/output connection schedules are given in Fig. 12 and 13. NOTE If using a thermocouple as a linear 4 to 20mA input, then a transmitter must be used scaled to fit one of the following ranges: 0 to 600°C 30 to 1100°F 0 to 1100°C 30 to 2000°F... -
Page 26: Serial Communications And Maths Function Options
Signal Processor User Guide Thermometer output Pin Nº Cable Colour Function Yellow Blue White Screen Screen Black Green Fig. 13 - System 4 thermometer cable connection schedule 238013 2.2.5 Serial communications and maths function options For details of any options for the Landmark Graphic GS Processor (e.g. -
Page 27: System 4 Thermometer Cable Connector Assembly
User Guide Signal Processor 2.3 System 4 Thermometer Cable Connector Assembly The cable connectors for the rear panel of the processor are included in the processor package. Each cable connector must be correctly wired with the appropriate cable before the processor is used (refer to Section 2.2 for the cable schedules). -
Page 28: Gst Thermometer Cable Connector Assembly
Signal Processor User Guide Ensure cable outer insulation Keep wire length as is held in clamp bar/cable tie short as possible Clamp bar Fig. Wiring arrangement for System 4 Thermometer cable connector 238014 2.4 GST Thermometer Cable Connector Assembly The cable connectors for the rear panel of the processor are included in the processor package. - Page 29 User Guide Signal Processor Keep wire length as short a spossible Fig. 14a - Wiring arrangement for GST Thermometer cable connector 238014a LMG GS Page 21...
-
Page 30: Power Input Plug
Signal Processor User Guide 2.5 a.c. Power Input Plug A rewireable a.c. power input plug is supplied with the processor, which will accept any mating IEC connection. The plug complies with BS 4491 - EN60 320. The wiring schedule of the plug assembly is shown in Fig.15. Earth Live Neutral... -
Page 31: Using The Processor
User Guide Signal Processor Using the Processor Once the processor has been installed in its chosen location, it must be connected to the appropriate thermometer(s) and to a suitable a.c. power supply. Ensure that the supply voltage setting switch, located on the rear panel of the processor, is set to correspond with your processor power supply. - Page 32 Signal Processor User Guide LMG GS Page 24...
- Page 33 User Guide Signal Processor LMG GS Page 25...
-
Page 34: Getting Started (Accessing The Menu System)
Signal Processor User Guide 3.1 Getting Started (accessing the menu system) When the processor is first connected to a thermometer and a suitable power supply, the processor display will be similar to that shown in Fig. 19. To access the configuration menus, and set up your system to your particular requirements, press the (ENTER) key. The processor display will now be similar to that shown in Fig. 20. A ‘Help’ bar is displayed below each menu, explaining the function of the (UP), (DOWN) and (ENTER) keys for that specific menu. - Page 35 User Guide Signal Processor Fig. 20 - Access code display 238020 LMG GS Page 27...
- Page 36 Signal Processor User Guide The processor requires an ‘access code’ to be entered before it allows you into the configuration menus. Use the UP and DOWN keys to change the displayed access code value to 417. Press the ENTER key. The Main Configuration Menu will now be displayed. See Fig. 21. NOTE A ‘Time-out’...
- Page 37 To select an item to configure, use the UP and DOWN keys to move cursor to the required item. Press the ENTER key. The Configuration Menu for the item you selected from the Main Configuration Menu will now be displayed. Fig. 22 shows the Channel A Configuration Menu for a standard System 4 Thermometer. See Fig. 24 for the equivalent GST Configuration Menu. Fig. 22 - System 4 Channel A configuration menu 238022 Page 29...
-
Page 38: About The Menu System
3.2 About the Menu System Each Configuration Menu comprises the components shown in Fig. 23. The function of each component of the menu is as follows. Main Menu This shows the items that can be altered in the Configuration Menu. Sub Menu This shows the list of options available for each main item in the Configuration Menu. - Page 39 User Guide Signal Processor Main menu Active title bar (white background) Cursor Note area (shows available options) Sub-menu Help Bar Inactive title bar (blue background) Fig. 23 - General Configuration Menu components 238023 LMG GS Page 31...
-
Page 40: Configuring Items In The Menu System
Signal Processor User Guide 3.3 Configuring Items in the Menu System To select an item from the Main Menu use the UP and DOWN keys to move the cursor to the required item. (ii) Press the ENTER key. The sub-menu relating to the item selected from the main menu is activated. - Page 41 User Guide Signal Processor (vi) To exit a sub-menu containing more than one variable, use the UP and DOWN keys to move the cursor to the <<< RETURN option and press the ENTER key. The cursor then reverts to a next to the most recently selected item in the Configuration Menu.
-
Page 42: Configuring Constants For Gst Thermometers
Signal Processor User Guide 3.4 Configuring Constants for GST Thermometers Enter the Main Configuration Menu (Fig. 21) in the normal way and select the channel to be configured. If an algorithm thermometer card is fitted, then the channel configuration menu will be typically displayed as in Fig. 24, showing the first valid thermometer type, if it is the first time that the menu has been selected. Alternatively, the currently selected thermometer type may be displayed. NOTE The emissivity/non-greyness menu option has now been replaced with the Constants menu option. Fig. 24 - Example of GST Channel B configuration menu 238024 Pressing the ENTER key will now allow the user to select one of the valid thermometers for the card type fitted. - Page 43 User Guide Signal Processor Fig. 25 - GST Constants ‘Calibrate Mode’ 238025 Fig. 26 - GST Constants ‘Measure Mode’ 238026 LMG GS Page 35...
-
Page 44: Constant Ranges For Gst
Signal Processor User Guide 3.4.1 Constant ranges for GST The value of Constant A (H4) may be set in the range 0.80 to 1.00 in increments of 0.01. The value of Constant B (H5) may be set in the range 0 to 1000 in increments of 1. -
Page 45: Using The Quick Keys
User Guide Signal Processor 3.5 Using the Quick keys The quick keys, on the processor front panel, provide immediate access to the parameters which are changed most frequently. 3.5.1 Emissivity Quick key Pressing the key opens up the emissivity menu (see Fig. 27). Fig. -
Page 46: Alarm Quick Key
Signal Processor User Guide 3.5.2 Alarm Quick key Pressing the key opens up the alarm menu (see Fig. 28). Fig. 28 - Alarms menu 238028 LMG GS Page 38... -
Page 47: Display Quick Key
User Guide Signal Processor 3.5.3 Display Quick key Pressing the key opens up the display menu (see Fig. 29). NOTE The function of each quick key can be locked. i.e. pressing the quick key accesses the relevant menu, but adjustment of the settings is prevented. This feature is useful in preventing inadvertent or mischevous altering of system settings. -
Page 48: Time Function Processing
Signal Processor User Guide Time Function Processing 4.1 Averager Refer to Fig. 30. The Averager time function can be used to ‘smooth’ the temperature output signal in relation to the temperature input. The averager response can be adjusted to suit your application. With a fast response speed, the temperature output signal tracks the input signal closely, any rapid fluctuations in the input are reflected in the output. With a slow response speed, the temperature output signal is much smoother, displaying more the... -
Page 49: Track And Hold
User Guide Signal Processor 4.2 Track and Hold Refer to Fig. 31. The Track and Hold time function is useful especially for measuring intermittent processes e.g. items on a conveyor belt. The presence of a ’hot’ object can be used to activate the ‘Track’ function, which causes the output to display the temperature of the object. -
Page 50: Peak Picker (Not Available On Gst Channels)
Signal Processor User Guide 4.3 Peak Picker (not available on GST channels) The Peak Picker function can be used to monitor the highest temperature measured by the thermometer. This feature is useful especially for moving targets and/or where the target is obscured partially e.g. by patches of oxidation an an otherwise un-oxidised surface. - Page 51 User Guide Signal Processor Adjustable decay rate ‘Hold’ mode ‘OFF’ Delay ‘ON’ Delay Threshold level ‘Reset’ mode Time Fig. 32 - Graphical representation of Peak Picker time function 238032 Processor output Thermometer signal ‘ON’ delay Bottom temp. limit Time Sample time (adjustable) Fig.
-
Page 52: Valley Picker (Not Available On Gst Channels)
Signal Processor User Guide 4.4 Valley Picker (not available on GST channels) Refer to Fig. 34. This function is the inverse of the Peak Picker. It allows the operator to find the minimum peak value instead of the largest peak value. Threshold level: Temperature below which the Valley Picker is active, used in conjunction with on/off delays. ON/OFF delay: See Peak Picker. - Page 53 User Guide Signal Processor IRT max Valley Sample Output Threshold Temperature Signal Time (adjustable interval 10-250 seconds) Fig. 35 - Typical output of Valley Sample function 238035 LMG GS Page 45...
-
Page 54: Language Selection
Signal Processor User Guide Language Selection The Landmark Graphic GS processor can be set up to display text in either English, German, Italian, French, Spanish or Japanese. The processor is supplied set up to display in English. Changing the language setting involves removal of the back panel, therefore it is recommended that the language is selected before installing the processor in a panel. - Page 55 User Guide Signal Processor (iv) Use a small bladed screwdriver to turn the switch to the required setting. The table of available language settings is given in Fig. 37. NOTE A Japanese set of characters is present in each of the other language character sets (e.g.
-
Page 56: Maintenance
Signal Processor User Guide Maintenance The Landmark Graphic GS Signal Processor is designed to be virtually maintenance free. The recommended maximum period between calibration checks is 12 months. LMG GS Page 48... -
Page 57: Appendix A - Display Modes
User Guide Signal Processor Appendix A - Display Modes This section contains typical samples of the displays available from the processor. Fig. A1 - Typical numeric display 238A01 Fig. A2 - Typical mixed display 238A02 LMG GS Page 49... - Page 58 Signal Processor User Guide Fig. A3 - Typical line chart display 238A03 Fig. A4 - Typical deviation chart display 238A04 LMG GS Page 50...
- Page 59 User Guide Signal Processor Fig. A5 - Typical 4-channel numeric display 238A05 Fig. A6 - Typical 4-channel bar graph display 238A06 LMG GS Page 51...
- Page 60 Signal Processor User Guide Fig. A7 - Typical 4-channel deviation bar graph display 238A07 Fig. A8 - Typical over-range display 238A08 LMG GS Page 52...
- Page 61 User Guide Signal Processor Fig. A9 - Typical under-range display 238A09 Fig. A10 - Typical obscuration display 238A10 LMG GS Page 53...
Need help?
Do you have a question about the Land LMG GS and is the answer not in the manual?
Questions and answers