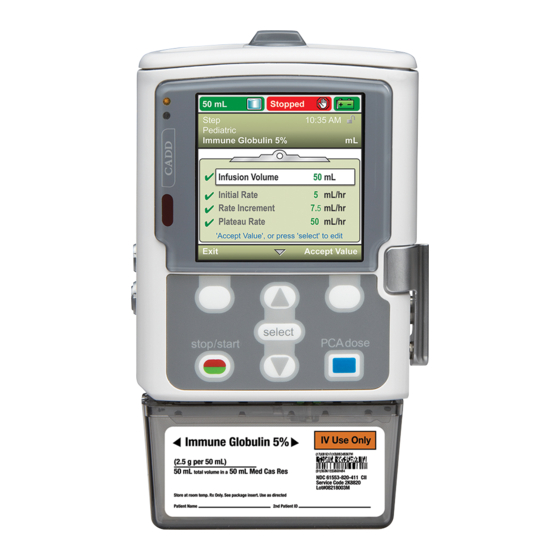
Smiths Medical CADD-Solis VIP Operator's Manual

Smiths Medical CADD-Solis VIP Operator's Manual

Ambulatory infusion pump
Hide thumbs Also See for CADD-Solis VIP:
Table of Contents

Advertisement

Quick Links

X
CADD
-Solis VIP
®
Ambulatory Infusion Pump
Operator's Manual
Model 2120
s

Advertisement

Table of Contents
loading

Summary of Contents for Smiths Medical CADD-Solis VIP

  • Page 1 CADD -Solis VIP ® Ambulatory Infusion Pump Operator’s Manual Model 2120...
  • Page 2: Technical Assistance

    The issue date of this Operator’s Manual is included on the back cover. In the event one year has elapsed between the issue date and product use, contact Smiths Medical to see if an updated version of this manual is available.
  • Page 3: Contraindications

    • If the pump is dropped or hit, inspect it for damage. Do not use a pump that is damaged or not functioning properly. Contact Smiths Medical Customer Service to return a pump for service. ® •...
  • Page 4 or other upstream obstructions is recommended. Upstream occlusions may result in underdelivery of medication. • Do not disclose pump security codes or any other information that would allow the patient or unauthorized clinician complete access to programming and operating functions. •...
  • Page 5 administration set with either an integral or add-on anti-siphon valve to protect against unregulated gravity infusion that can result from an improperly attached cassette. • Do not prime the fluid path with the tubing connected to a patient as this could result in overdelivery of medication or air embolism.
  • Page 6: Cautions

    CADD pumps must be performed by Smiths Medical or its authorized agents. ® • Use only Smiths Medical accessories that are specified for use with the CADD -Solis ambulatory infusion pump, as other brands may adversely affect pump operation. •...
  • Page 7: Table Of Contents

    Table of Contents Pump Programming Technical Assistance ......2 Contraindications ......3 Protocols and Protocol Libraries .
  • Page 8 Operating the Pump Alarm Settings ....... 105 Infusion Alerts On/Off....105 Batteries .
  • Page 9: General Description

    General Description General Description Introduction ® The CADD -Solis VIP ambulatory infusion pump provides measured drug therapy to patients in hospital or outpatient settings. Therapy should always be overseen by a physician or a certified, licensed healthcare professional. As appropriate, the caregiver and patient should be instructed in using the pump. Indications ®...
  • Page 10: Symbols

    General Description Symbols Symbols on the Pump and Labels Caution Power on/off switch Consult instructions for use Cassette unlock/lock < Catalog number Soft key > Serial number Up button Date of manufacture Down button Authorized representative in the Select button European Community Australian representative Stop/Start button...
  • Page 11 General Description Symbols on the Pump Display Reservoir volume PCA delivery mode Charge level of rechargeable battery Continuous delivery mode pack Charge level of rechargeable battery Intermittent delivery mode pack. AC adapter connected. Charge level of AA batteries Step delivery mode Charge level of AA batteries.
  • Page 12: Pump Diagram

    General Description Pump Diagram Front View Battery Compartment Display Indicator Lights Amber Green USB Port Blue AC Power Light AC Power Jack Remote Dose Cord Jack Keypad Rear View Power Switch Cassette/Keypad Lock Serial (Unlock/Lock) number Cassette Latch Cassette (The part of the CADD™ medication cassette reservoir or CADD®...
  • Page 13: Pump Components, Ports, And Connectors

    General Description Pump Components, Ports, and Connectors Indicator Lights When the pump is powered, one or both of the indicator lights flash. Green: The green light flashes to indicate that the pump is running and delivering fluid as programmed. Amber: The amber light flashes when the pump is stopped, an alarm condition exists, or the battery or the reservoir volume is low.
  • Page 14: Power Switch

    General Description Power Switch Turns the pump on or off. Press and hold the switch to turn the pump on. Press the switch to turn the pump off, and confirm that you want to power down by selecting Yes. Power Jack You may plug the AC adapter into the power jack.
  • Page 15: Accessories

    General Description Accessories ® CAUTION: Use only Smiths Medical accessories that are specified for use with the CADD -Solis ambulatory infusion pump, as other brands may adversely affect pump operations. ® All CADD -Solis accessories may be obtained through the Customer Service department at Smiths Medical.
  • Page 16: Pump Screens And Display

    General Description Pump Screens and Display Pump Screens The sample screens in this manual are only examples of what might be displayed. The protocols, consisting of therapies, qualifiers, drugs and concentrations, and all associated pump settings in the pump library will be established by your facility.
  • Page 17: Using Color

    General Description  Information indicating upcoming events that are important to the user. The message is mode-specific, and if the pump is running, indicates one of the following: • When a delayed start will begin • When the reservoir will be empty •...
  • Page 18: Security Settings

    General Description Security Settings Security settings are used to limit patient and unauthorized clinician access to certain programming and operating functions of the pump. Pump functions are protected by 3 different security codes. The security level tables list the functions that are available under each security code. WARNING: •...
  • Page 19 General Description Security Levels, Pump Operations and Tasks Pump Operations Available without Available with Available with Available with and Tasks a security code keypad code clinician code administrator code Running Stopped Running Stopped Running Stopped Running Stopped    ...
  • Page 20 General Description Security Levels, Advanced Tasks Advanced Tasks Available without Available with Available with Available with a security code keypad code clinician code administrator code Running Stopped Running Stopped Running Stopped Running Stopped Step Down      ...
  • Page 21: Autolock

    General Description Autolock ® The CADD -Solis VIP ambulatory infusion pump is designed to meet both safety and usability needs. The autolock feature reduces the chance of unauthorized pump programming. When the keypad is unlocked with a security code and left unlocked, the software automatically locks the keypad. If the pump is on the home screen, the autolock feature takes effect 30 seconds after the last key press.
  • Page 22: Customized Security Settings

    General Description 3. Depending on the level of security ® required and how the CADD -Solis system administrator has programmed the security settings, you may be able to use the pump key to unlock the keypad. When accessing a menu or function that requires a security code, 1 of 2 prompts appears, as shown in the sample screens to the right.
  • Page 23: Keypad Security

    General Description Keypad Security Under the Keypad Security setting, you may allow the use of the cassette/keypad lock to unlock the keypad. This is done by selecting the Code or Key setting. The use of the key to unlock the keypad allows the same permissions as the keypad code.
  • Page 24: Clinician Code

    General Description 4. Verify the new keypad code by reentering it on the next screen. Once the code has been entered, press Accept Value. Clinician Code This screen allows you to create a clinician code that is unique to your facility. Note: The clinician code changes only for the current protocol.
  • Page 25: Manual Programming

    General Description 2. Unlock the keypad. 3. Choose any 3-digit combination of numbers from 001 to 899. Press to enter the new code. Press to advance to the next digit. Once the code has been entered, select Accept Value. 4. Verify the new administrator code by reentering it on the next screen. Once the code has been entered, press Accept Value.
  • Page 26: Pump Programming

    Pump Programming Pump Programming Protocols and Protocol Libraries A protocol is a collection of medication delivery and other pump settings, including administrator ® settings for the CADD -Solis VIP ambulatory infusion pump, a therapy, qualifier, and drug combination, ® and other delivery parameters. A collection of protocols in CADD -Solis Medication Safety Software form ®...
  • Page 27: Protocol Selection From A Library

    Pump Programming Protocol Selection from a Library Start New Patient Each time a new patient is started, it is recorded in the event log. All other reports are cleared. Protocol ® libraries are created with the CADD -Solis Medication Safety Software and are loaded onto the pump by the ®...
  • Page 28: Manually Programmed Protocols

    Pump Programming 8. The “Review pump settings” screen appears. Select Review. 9. Press to scroll through and review all the settings. If the highlighted setting is correct, press Accept Value. A green check mark appears next to the setting. If the highlighted setting is incorrect, press S to adjust the setting. Press to modify the setting and then press Save.
  • Page 29 Pump Programming PCA Mode, Specific Attributes Value Defaults to: Clinician bolus amount 0 mL Concentration Selected by user Continuous rate 0 mL/hr (or mg or mcg equivalent) Delivery limit method Not in use KVO rate 0 mL/hr (or mg or mcg equivalent) Maximum delivery rate 125 mL/hr PCA dose...
  • Page 30 Pump Programming To start a new patient and manually program the protocol: 1. Make sure the pump is stopped. 2. In the Advanced Tasks menu (see page 99), press to highlight Start New Patient and press S. 3. Unlock the keypad. 4.
  • Page 31: Delayed Start/Next Dose Start Time

    Pump Programming Delayed Start/Next Dose Start Time Delayed Start NOTE: This task is available for all therapies except intermittent. If an intermittent therapy is programmed, this option is not visible under the Tasks menu. The Set Delayed Start task allows you to delay the start of an infusion by up to 96 hours by selecting the date and time at which the infusion should begin.
  • Page 32 Pump Programming Next Dose Start Time NOTE: This task is available for intermittent therapies only. If another therapy type is programmed, this option is not visible under the Tasks menu. A Next Dose Start Time may be programmed to delay the start of the next dose of an infusion. However if a dose is in progress, this cancels the remainder of the current dose.
  • Page 33: Delivery Hard And Soft Limits

    Pump Programming Delivery Hard and Soft Limits Pump protocol libraries consisting of therapies, qualifiers, and drugs are created and loaded on the pump ® using the CADD -Solis Medication Safety Software. Many of the delivery settings have hard and soft limits ®...
  • Page 34: Delivery Settings

    Pump Programming Delivery Settings The delivery settings are patient-specific parameters of a therapy that are directly related to the drug being ® infused and can be edited within limits established in the protocol. The CADD -Solis system administrator establishes the initial values of the parameters, any applicable programming units and drug concentration, other parameter limits, and which parameters can be viewed and/or edited.
  • Page 35: Editing Delivery Settings

    Pump Programming Editing Delivery Settings To view and edit delivery settings: 1. Stop the pump if it is running. 2. In the Tasks menu (see page 88), press until View Delivery Settings is highlighted, and then press S. 3. Press until the desired setting is highlighted, and then press S.
  • Page 36: Review Pump Settings

    Pump Programming Review Pump Settings When starting a new patient or a new protocol for the same patient (see page 27), or after adjusting any delivery settings (see page 35), the pump settings must be reviewed and accepted as accurate. WARNING: Always carefully review the program on the pump after it has been programmed to verify that the pump is programmed correctly.
  • Page 37: Pca Delivery Mode

    PCA Delivery Mode PCA Delivery Mode PCA (patient-controlled analgesia) delivery is used for therapies that require a continuous rate of infusion, patient-controlled demand doses, and/or a clinician-activated bolus. The delivery methods available are: • Continuous rate • PCA dose, a demand dose activated by the patient •...
  • Page 38: Programming Screens

    PCA Delivery Mode Programming Screens Continuous Rate This is the desired continuous rate of medication delivery. If the prescription does not call for a continuous rate during a PCA therapy, enter 0. The continuous rate value may be changed by scrolling up or down between the hard maximum and hard minimum settings.
  • Page 39: Programming Example

    PCA Delivery Mode KVO Rate The KVO or “keep vein open” rate is optional. It allows the delivery of a minimal amount of drug to help maintain catheter patency. If a continuous rate is programmed, the KVO rate automatically displays 0.1 mL/mg (or the mg or mcg equivalent).
  • Page 40 PCA Delivery Mode 2. Select the Qualifier • Press to highlight the desired qualifier and press 3. Select the Drug • Press to highlight the desired drug and concentration, and press 4. Confirm and Review the Settings • Review the information on the screen and select Yes if they are correct, or No to edit the settings.
  • Page 41 PCA Delivery Mode • Press until the value reads 5 mg/hr and select Save. • The pump returns to the Review screen. 6. Enter the PCA Dose • Press to highlight PCA Dose. If the value shown is set at the desired dose, select Accept Value and go to step 7.
  • Page 42 PCA Delivery Mode 8. Enter the Maximum Doses per Hour • Press to highlight Max Doses/Hr. If the value shown is correct, select Accept Value and go to step 9. If the value is not correct, press • Press until the value reads 2 and select Save. •...
  • Page 43: Give A Clinician Bolus

    PCA Delivery Mode 11. Accept Values • If any values have not already been accepted, press highlight each setting and select Accept Value if the setting is correct. A green check mark appears next to each accepted value. • After your review is complete, select Next. 12.
  • Page 44 PCA Delivery Mode 4. Press to change the value of the clinician bolus. Select Deliver. 5. If you enter a value outside the soft limit, a screen appears asking you to confirm the soft limit override. Select Confirm to deliver the bolus. WARNING: Never leave the pump unattended while on the clinician bolus edit screen.
  • Page 45: Start A Pca Dose

    PCA Delivery Mode Start a PCA Dose If a PCA dose is programmed, the patient may start a PCA dose while the pump is running. The amount delivered is added to the amount provided by the continuous rate. Each time the patient requests a PCA dose, the pump automatically adds it to the Given and PCA Dose Counters report.
  • Page 46: Stopping A Clinician Bolus Or Pca Dose

    PCA Delivery Mode Stopping a Clinician Bolus or PCA Dose To stop a clinician bolus: While the clinician bolus is delivering, the Clinician Bolus screen appears on the pump and shows the decreasing amount of the bolus remaining to be delivered. You may stop the clinician bolus from this screen by selecting Stop Bolus.
  • Page 47: Continuous Delivery Mode

    Continuous Delivery Mode Continuous Delivery Mode Continuous delivery allows the infusion of drug at a constant, programmed rate. The following graph illustrates an example continuous delivery. Delayed start (optional) Continuous Rate Time Home Screen The delivery mode and status of the infusion are indicated on the home screen with messages appearing in text, a graphic in a shape unique to the therapy, and with the colors green, red, and gray.
  • Page 48: Programming Example

    Continuous Delivery Mode Reservoir Vol. This is the volume of fluid contained in the reservoir. The reservoir volume value decreases as the pump is primed or delivers fluid. ® The CADD -Solis system administrator may choose a standard reservoir volume which allows the reservoir volume to be quickly reset to that value. The clinician can edit the reservoir volume to another amount.
  • Page 49 Continuous Delivery Mode 3. Select the Drug • Press to highlight the desired drug, and press 4. Confirm and Review the Settings • Review the information on the screen and select Yes if they are correct, or No to edit the settings. •...
  • Page 50 Continuous Delivery Mode 6. Enter the KVO rate • Press to highlight KVO Rate. If the value shown is set at the desired rate, select Accept Value and go to step 7. If the value shown does not show the desired rate, press •...
  • Page 51: Intermittent Delivery Mode

    Intermittent Delivery Mode Intermittent Delivery Mode Intermittent delivery allows the infusion of a specific volume of drug at a regular, programmed interval and over a specified duration. A dose may be repeated in a cycle up to 96 hours. The KVO (keep vein open) feature allows delivery of a minimal amount of drug between doses to maintain catheter patency.
  • Page 52: Programming Screens

    Intermittent Delivery Mode Programming Screens Dose Volume This is the volume of the dose. The dose volume cannot be programmed to a value that would cause the rate of delivery for the programmed dose duration to exceed the dose rate maximum of 500 mL/hr. Therefore, programming the dose volume may result in the automatic lengthening of the dose duration to accommodate the maximum dose rate.
  • Page 53: Programming Example

    Intermittent Delivery Mode KVO Rate The KVO or “keep vein open” rate is optional. It allows the delivery of a minimal amount of drug to help maintain catheter patency. If a next dose start time is programmed, the KVO rate is active until the dose begins.
  • Page 54 Intermittent Delivery Mode 3. Select the Drug • Press to highlight the desired drug, and press 4. Confirm and Review the Settings • Review the information on the screen and select Yes if they are correct, or No to edit the settings. •...
  • Page 55 Intermittent Delivery Mode 6. Enter the Dose Duration • Press to highlight Dose Duration. If the value shown is set at the desired duration, select Accept Value and go to step 7. If the value shown does not show the desired duration, press •...
  • Page 56 Intermittent Delivery Mode 9. Enter the Next Dose • Press to highlight Next Dose. If the time shown is correct, select Accept Value and go to step 9. If the value is not correct, press • Press until the value reads 8:00 PM and select Confirm. •...
  • Page 57 Intermittent Delivery Mode 11. Enter the Reservoir Volume • Press to highlight Reservoir Vol. If the value shown is correct, select Accept Value and go to step 11. If the value is not correct, press • Press until the value reads 100 mL and select Save. •...
  • Page 58: Stopping The Pump During An Infusion

    Intermittent Delivery Mode Stopping the Pump During an Infusion Stopping the pump between doses does not affect the start time of subsequent doses. Stopping the pump while a dose is in progress shifts all subsequent doses by the amount of time the pump is stopped (see illustration).
  • Page 59: Step Delivery Mode

    Step Delivery Mode Step Delivery Mode Step delivery allows the infusion of a specified volume of drug at an initial rate with linear step increases up to a plateau rate. Multiple steps down may also be applied, reducing the continuous rate as low as the initial rate.
  • Page 60: Programming Screens

    Step Delivery Mode Programming Screens Infusion Volume This is the total volume of fluid to be delivered. The reservoir volume must be large enough to support the entire infusion volume. Therefore, programming the infusion volume may result in an automatic increase in the reservoir volume.
  • Page 61 Step Delivery Mode Infusion Duration This is the time required to deliver the infusion volume. It is calculated by the pump based on the initial values programmed for infusion volume, initial rate, rate increment, step duration, and plateau rate. It appears on the screen for review only.
  • Page 62: Programming Example

    Step Delivery Mode Programming Example WARNING: Ensure that the ± 6% system delivery accuracy specification is taken into account when programming the pump and/or filling the reservoir. Failure to do so may result in medication in the reservoir becoming depleted sooner than expected. If the pump is used to deliver critical or life- sustaining medication, the interruption in the delivery of medication could result in patient injury or death.
  • Page 63 Step Delivery Mode • The pump displays the Review pump settings screen. Select Review to continue. 5. Enter the Infusion Volume • Press to highlight Infusion Volume. If the value shown is set at the desired volume, select Accept Value and go to step 6. If the value shown does not show the desired volume, press •...
  • Page 64 Step Delivery Mode • Press until the value reads 30 mL/hr and select Save. The pump then returns to the Review screen. 7. Enter the Rate Increment • Press to highlight Rate Increment. If the value shown is set at the desired increment, select Accept Value and go to step 8. If the value shown does not show the desired increment, press •...
  • Page 65 Step Delivery Mode 9. Enter the Step Duration • Press to highlight Step Duration. If the value shown is correct, select Accept Value and go to step 10. If the value is not correct, press • Press until the value reads 30 Min and select Save. •...
  • Page 66 Step Delivery Mode 12. Enter the Reservoir Volume • Press to highlight Reservoir Vol. If the value shown is correct, select Accept Value and go to step 13. If the value is not correct, press • Press until the value reads 700 mL and select Save. •...
  • Page 67: Starting Each Infusion

    Step Delivery Mode Starting Each infusion When a new cassette is attached to the pump at the beginning of infusion, the reservoir volume should be reset. This also resets the infusion. Follow the instructions in Operating the Pump beginning on page 78, for attaching a cassette and resetting the reservoir.
  • Page 68: Step Down

    Step Delivery Mode Step Down This option allows you to reduce the rate of infusion at any time. You cannot step down lower than the initial rate. Once the step down task has been performed successfully, the automatic step increases after each step duration are cancelled.
  • Page 69: Taper Delivery Mode

    Taper Delivery Mode Taper Delivery Mode Taper delivery allows the infusion of nutritional solutions (TPN, total parenteral nutrition) or other fluids, with optional tapering. Delivery can be gradually increased, or tapered up, at the beginning of the infusion, and it can be gradually decreased, or tapered down, at the end of the infusion. An optional KVO (keep vein open) rate may be delivered at the end of the infusion, depending on protocol settings.
  • Page 70: Programming Screens

    Taper Delivery Mode Programming Screens Infusion Volume This is the total volume of fluid to be delivered. If you enter an infusion volume that causes the plateau rate to exceed the maximum allowable rate, the pump automatically lengthens the infusion duration to accommodate the new volume.
  • Page 71 Taper Delivery Mode KVO Rate The KVO or “keep vein open” rate is optional. It allows the delivery of a minimal amount of drug to help maintain catheter patency. If a delayed start is programmed, the KVO rate is active until the infusion begins. It is also active after the infusion volume is delivered if the reservoir volume is programmed greater than the infusion volume.
  • Page 72: Programming Example

    Taper Delivery Mode Programming Example WARNING: Ensure that the ± 6% system delivery accuracy specification is taken into account when programming the pump and/or filling the reservoir. Failure to do so may result in medication in the reservoir becoming depleted sooner than expected. If the pump is used to deliver critical or life- sustaining medication, the interruption in the delivery of medication could result in patient injury or death.
  • Page 73 Taper Delivery Mode • The pump displays the Review pump settings screen. Select Review to continue. 5. Enter the Infusion Volume • Press to highlight Infusion Volume. If the volume shown is set at the desired value, select Accept Value and go to step 6. If the value shown does not show the desired volume, press •...
  • Page 74 Taper Delivery Mode • Press until the value reads 1 Hrs 30 Min and select Save. The pump then returns to the Review screen. 7. Enter Taper Down • Press to highlight Taper Down. If the value shown is correct, select Accept Value and go to step 8. If the value shown is not correct, press •...
  • Page 75 Taper Delivery Mode 9. Review the Plateau Rate • The plateau rate is a calculated value and cannot be edited. 10. Enter the KVO Rate • Press to highlight KVO Rate. If the value shown is correct, select Accept Value and go to step 11. If the value is not correct, press •...
  • Page 76: Starting Daily Infusion

    Taper Delivery Mode 12. Accept Values • If any values have not already been accepted, press highlight each setting and select Accept Value if the setting is correct. A green check mark appears next to each accepted value. • After your review is complete, select Next. 13.
  • Page 77: During An Infusion

    Taper Delivery Mode Stopping and Restarting the Pump During an Infusion If you stop the pump before a taper infusion was fully delivered, you may choose to either restart the infusion from where delivery left off, or you may reset the infusion. When you press stop/start , a screen appears with the message, “Infusion was interrupted before completion.
  • Page 78: Operating The Pump

    CADD -Solis VIP ambulatory infusion pump. NOTE: Smiths Medical does not recommend mixing new and used batteries because it may affect low battery alarm times. Always use 4 new batteries when replacing depleted ones.
  • Page 79: Install The Batteries Or Battery Pack

    Operating the Pump Install the Batteries or Battery Pack 1. Make sure the pump is stopped and powered off. Using your fingers, the pump key, or a coin, turn the knob on the battery door counterclockwise to open the battery door. 2.
  • Page 80: Power Up

    After the power up is completed, listen for the Morse Code “OK” sound (a series of six audible beeps). If you do not hear this sound, there may be a problem with the audible alarms. If you believe there is a problem, remove the pump from service and contact Smiths Medical Customer Service. •...
  • Page 81: Cassettes

    Operating the Pump Cassettes ™ ® The cassette is the part of the CADD medication cassette reservoir or CADD administration set that ™ ® attaches to the bottom of the pump. Either a CADD medication cassette reservoir used with a CADD ®...
  • Page 82: Attach A Cassette

    Operating the Pump Attach a Cassette ® Obtain a new, filled CADD™ medication cassette reservoir, or CADD administration set attached to a flexible IV bag. Refer to the instructions for use supplied with the product for information on preparing the product for use. WARNING: Attach the cassette properly.
  • Page 83: Prime Tubing

    Operating the Pump Prime Tubing When priming the fluid path, the tubing downstream of the pump is filled with fluid, removing any air bubbles. Prime the tubing before connecting it to the patient’s infusion set or indwelling catheter. Fluid delivered by priming is subtracted from the reservoir volume, but is not added to the amount given because this fluid is not delivered to the patient.
  • Page 84: Prime Tubing, No Cassette Change

    Operating the Pump Prime Tubing, No Cassette Change 1. Stop the pump if it is running. 2. In the Tasks menu (see page 88), press until Prime Tubing is highlighted, and then press 3. Unlock the keypad, if required. 4. If you have not already done so, disconnect the tubing from the patient, open the clamps, and select Prime.
  • Page 85: Start The Pump

    Operating the Pump Start the Pump Infusion begins when the pump starts. When the pump is running, “Running” appears on the status bar, the graphic on the home screen is green, and the green indicator light flashes. If the pump will not start, a message appears on the display.
  • Page 86: Stop The Pump

    Operating the Pump Stop the Pump Stopping the pump stops delivery. After the pump is stopped, “Stopped” appears in red on the status bar, the graphic on the home screen is red, the amber indicator light flashes, and the green indicator light is off. 1.
  • Page 87: Reset Reservoir Volume

    Operating the Pump Reset Reservoir Volume The reservoir volume setting indicates the amount of fluid contained in the reservoir. Once this number is set, the pump keeps track of how much fluid has been delivered and adjusts the reservoir volume setting accordingly.
  • Page 88: Tasks And Advanced Tasks

    Tasks and Advanced Tasks Tasks and Advanced Tasks Tasks Menu Overview The Tasks menu leads to most of the pump’s operating functions. Some items on the Tasks menu are protected by the various security levels. To learn more about the security codes, refer to Security Settings on page 18.
  • Page 89: Display And Sound Settings

    Tasks and Advanced Tasks Display and Sound Settings The Display and Sound Settings menu allows you to adjust various factors such as the intensity of the backlight on the screen, alarm volumes, sound themes, key beeps, and numeric formats. This change is for the current protocol only and remains in effect until the Start New Patient or Same Patient New Protocol task is selected.
  • Page 90: Sound Theme

    Tasks and Advanced Tasks Sound Theme The Sound Theme setting allows you to choose between 3 different sound themes for the alarms and beeps that the pump makes. The 3 themes are standard, intense, and distinctive. You may preview the sound themes in the menu.
  • Page 91: Key Beep On/Off

    Tasks and Advanced Tasks Key Beep On/Off The key beep on/off feature allows you to turn on or off the audible beep that accompanies each key press. This feature does not turn off any audible alarms associated with alarm or alert conditions of the pump. NOTE: If the key beep feature is turned on, the key beeps will not sound while any alarm screens are being displayed or when entering a security code.
  • Page 92: Time And Date

    Tasks and Advanced Tasks Time and Date The Change Time and Date setting allows you to edit the time and date, and to choose a time and date format. The time and date options should reflect the current time and date. The clock is powered by a separate, internal battery, which retains the time and date even when the 4 AA batteries or the battery pack is removed.
  • Page 93: Current Date

    Tasks and Advanced Tasks Current Date To set the current date: 1. In the Change Time and Date menu, press to highlight Current Date and press S. 2. Press to scroll to the correct month and press S to navigate to the day. NOTE: This example is for the Month/Day/Year date format.
  • Page 94: Date Format

    Tasks and Advanced Tasks Date Format The date format option allows you to select 1 of 3 formats for indicating the day, month, and year. The formats available are as follows: • Month/Day/Year • Day/Month/Year • Year/Month/Day To set the date format: 1.
  • Page 95: Reports

    Tasks and Advanced Tasks Reports The reports screen is used to view a variety of reporting and record-keeping functions. The reports available are: • Total Given (not available for PCA therapies) • Given and PCA Dose Counters (PCA therapies only) •...
  • Page 96: Given And Pca Dose Counters

    Tasks and Advanced Tasks Given and PCA Dose Counters NOTE: This report applies only to PCA therapies. See Total Given on page 95 for reports specific to therapies other than PCA. This report shows the total amount of drug given and the number of PCA doses given and attempted since the date and time indicated, which is the last time the information was cleared manually, or when a new protocol or new patient was started.
  • Page 97: Delivery History And Pie Chart

    Tasks and Advanced Tasks Delivery History and Pie Chart The delivery history and pie chart is a graphical view of the total drug given over a specified time frame, or since the start of a new patient or new protocol. The delivery history is displayed in the units for the current protocol.
  • Page 98: Event Log

    Tasks and Advanced Tasks Event Log The pump records the time and date of each event, and lists events in order, with the most recent at the bottom of the screen through the last 5000 events. The event log information includes but is not limited to: •...
  • Page 99: Advanced Tasks Menu Overview

    Tasks and Advanced Tasks Advanced Tasks Menu Overview ® Most pump configurations are set up by a CADD -Solis system administrator. Protocol libraries consisting ® of therapies, qualifiers, and drugs are created using the CADD -Solis Medication Safety Software. The ®...
  • Page 100: Patient Permissions

    Tasks and Advanced Tasks Patient Permissions Security levels are used to limit unauthorized access to certain programming and operating functions. In some cases, the default security settings may be changed to allow patients additional access to pump functions. Do not reduce security settings without providing proper training to patients. WARNING: •...
  • Page 101: Delayed Start Security On/Off

    Tasks and Advanced Tasks Delayed Start Security On/Off Setting this value to Off allows patients to set delayed starts (and change next dose start times for Intermittent therapies) without having to enter a security code. To set patient permissions for delayed start security: 1.
  • Page 102: Air And Occlusion Settings

    Tasks and Advanced Tasks Air and Occlusion Settings In the Advanced Tasks menu, press to highlight Air and Occlusions Settings and press S. Air Detector On/Off The pump is built with an integrated air detector. The pump may be customized to use the air detector. If air is detected in the part of the tubing that passes through the air detector, an alarm sounds and delivery stops.
  • Page 103: Air Detector Sensitivity

    Tasks and Advanced Tasks Air Detector Sensitivity NOTE: If the air detector is set to “Off”, this feature does not appear in the menu. If the air detector is set to “On”, the air detector sensitivity option allows you to customize how sensitive the pump should be to any air bubbles in the tubing.
  • Page 104: Downstream Sensor Sensitivity

    Tasks and Advanced Tasks Downstream Sensor Sensitivity A downstream occlusion is a blockage in the tubing between the pump and the patient. The pump contains a sensor that determines if there is a downstream occlusion. The downstream sensor sensitivity setting allows you to specify a high or low degree of response to pressure buildup in the downstream tubing.
  • Page 105: Alarm Settings

    Tasks and Advanced Tasks Alarm Settings You may adjust various alarm settings through the Alarm Settings task in the Advanced Tasks menu. Some of the adjustable settings include whether or not an alarm is active, the type of alarm that sounds, and at what point the alarm sounds.
  • Page 106: Reservoir Low Trip Point

    Tasks and Advanced Tasks Reservoir Low Trip Point The reservoir low trip point allows you to program the pump to alarm when the reservoir volume reaches a specified level. It can be programmed from 0 to 999 mL in 1 mL increments. If you prefer not to sound an alarm until the reservoir is empty, program the trip point to zero.
  • Page 107: Reservoir Empty Alarm Type

    Tasks and Advanced Tasks Reservoir Empty Alarm Type The reservoir empty alarm type option allows you to select between two types of alarms when the reservoir is empty: One Time Only: When a reservoir empty alarm occurs, you must press a button to acknowledge or silence the alarm.
  • Page 108: Pm Reminder

    Tasks and Advanced Tasks PM Reminder The PM Reminder appears as an option only if the PM Reminder On/Off setting is set to “On”. Use the PM Reminder to schedule the amount of time that should pass before a preventive maintenance reminder displays (1 to 24 months).
  • Page 109: Reset To Factory Settings

    Tasks and Advanced Tasks Reset to Factory Settings Reset to Factory Settings allows you to erase the protocol library and pump settings, and restore the pump to the factory default settings. NOTE: When the pump is reset to factory settings, all protocol library information is lost. To reset the pump to factory settings: 1.
  • Page 110: References And Troubleshooting

    If a system fault occurs, the fault should be reported to Smiths Medical Customer Service at 1 800.258.5361 (USA) or Smiths Medical International Ltd. at +44 (0) 1923 246434. To clear this alarm, remove power from the pump by opening the battery System fault alarm (red).
  • Page 111: Low Priority Alarm

    References and Troubleshooting Low Priority Alarm A low priority alarm does not stop the pump if it is running. The alarm is accompanied by a blue screen, and it persists for 5 seconds unless it is acknowledged by the press of a key or the condition that triggered the alarm goes away before the 5 seconds have passed.
  • Page 112: Troubleshooting

    References and Troubleshooting Troubleshooting Issue Possible Solution A continuous two-tone Delivery has stopped. Read the message on the display and refer alarm is sounding, and the to the list of messages in the table below. If the display is blank or amber light is lit or flashing.
  • Page 113 References and Troubleshooting Alarm Alarm / Message Description / Corrective Action Priority Battery low. Replace The rechargeable battery pack or the 4 AA batteries are low but battery. the pump is still operable. Select Acknowledge to clear the alarm, or the alarm will automatically clear after 5 seconds. Recharge or change the rechargeable battery pack or replace the 4 AA batteries soon.
  • Page 114 References and Troubleshooting Alarm Alarm / Message Description / Corrective Action Priority Cannot start pump Medium The pump will not start without a cassette attached and locked. without a latched Select Acknowledge to clear the alarm. Make sure a cassette is and locked cassette.
  • Page 115 References and Troubleshooting Alarm Alarm / Message Description / Corrective Action Priority Delivery too slow. Medium The pump is busy with too many activities and does not have [Quantity] of fluid sufficient resources to support the programmed delivery rate. delivery delayed.. Delivery has fallen behind by the quantity indicated.
  • Page 116 References and Troubleshooting Alarm Alarm / Message Description / Corrective Action Priority Infusion scheduled The pump is stopped and an infusion is scheduled for delivery in to start in [time]. the time indicated. Select Acknowledge to clear the alarm, and Pump is stopped.
  • Page 117 References and Troubleshooting Alarm Alarm / Message Description / Corrective Action Priority Pump settings and Medium The pump reverted to the factory default. The pump was either patient data lost. manually reverted to this default, recently had a software update, or has not been in use for some time.
  • Page 118 References and Troubleshooting Alarm Alarm / Message Description / Corrective Action Priority Unusable battery. High The batteries installed are either the wrong type of AA batteries, Pump stopped. or the rechargeable battery pack is not compatible with the pump. Select Acknowledge to clear the alarm. Remove the battery or batteries from service.
  • Page 119: Cleaning The Pump And Accessories

    References and Troubleshooting Cleaning the Pump and Accessories NOTE: Refer to the instructions for use for each accessory before proceeding with cleaning. The following solutions may be used to clean the pump and accessories, unless otherwise specified: • Soap solution •...
  • Page 120: Radiation And Magnetic Resonance

    References and Troubleshooting Radiation and Magnetic Resonance Imaging (MRI) CAUTION: • The pump should not be directly irradiated by therapeutic levels of ionizing radiation due to the risk of permanent damage to the electronic circuitry. The best procedure to follow is to remove the pump from the patient during therapeutic radiation sessions or diagnostic levels of radiographic and fluoroscopic radiation.
  • Page 121: Of The Pump

    References and Troubleshooting Standards used in development of the pump The following standards were used in whole or part in the development of the pump. Medical Electrical Equipment EN 60601-1 (1990), Medical Electrical Equipment, Part I: General Requirements for Safety. Amendment A1 (1993) Amendment A13 (1996) Amendment A2 (1995).
  • Page 122 References and Troubleshooting Miscellaneous Standards USB 1.1, Universal Serial Bus (USB) Specification, Revision 1.1, September 23, 1998—USB.org EN 1041 (1998), Information supplied by the manufacturer with medical devices. IEC/TR 60878 (2003), Graphical symbols for electrical equipment in medical practice. EN 980 (2003), Graphical symbols for use in the labeling of medical devices. IEC 60529 (2001), Degrees of protection provided by enclosures (IP Code).
  • Page 123: Pca Delivery Mode Scroll Ranges

    References and Troubleshooting PCA Delivery Mode Scroll Ranges PCA Continuous Rate Scroll Ranges Units Starting Value Increment Maximum Milliliters 0.10 100.00 Milligrams 10% of Values between 0.01 and 0.5: 0.01 Concentration x 100 only concentration Concentration x 100 Micrograms 10% of Values between 0.1 and 0.5: only concentration...
  • Page 124: Military Time

    References and Troubleshooting PCA Dose and Clinician Bolus Scroll Ranges: Micrograms Concentration Micrograms Concentration Micrograms mcg/mL Increment Max. mcg/mL Increment Max. 0.05 1.75 1750 0.10 2.00 2000 0.15 2.25 2250 0.20 2.50 2500 0.25 2.75 2750 0.30 3.00 3000 0.35 3.25 3250 0.40...
  • Page 125: Specifications (Nominal)

    References and Troubleshooting Specifications (Nominal) General Pump Specifications Used to test the pump: ™ • medication cassette reservoirs, < 21-7002 CADD ® • extension sets, < 21-7045 CADD ® • administration sets, < 21-7091 CADD ® • high volume administration sets, < 21-7055 CADD Resolution ™...
  • Page 126 References and Troubleshooting Battery status Battery State CADD®-Solis Pump Status 25% to 100% No alarm Low battery • Transition to low battery condition • Battery low message appears • Pump emits 3 beeps every 5 min • Low battery warning message appears on pump display •...
  • Page 127 References and Troubleshooting Step delivery Volume to Starting Step Step Rate No. of Operating Deliver Rate Duration Increase Rate Steps Time (mL) (mL/hr) (min) (mL/hr) (mL/hr) (hrs) 1500 37.5 2500 Taper delivery Volume Period Taper Up Taper Down Operating Time Vol.
  • Page 128 References and Troubleshooting Step delivery Volume to Starting Step Step Rate No. of Operating Deliver Rate Duration Increase Rate Steps Time (mL) (mL/hr) (min) (mL/hr) (mL/hr) (hrs) 1500 37.5 2500 Taper delivery Volume Period Taper Up Taper Down Operating Time Vol.
  • Page 129 References and Troubleshooting Power sources • AC adapter • CADD®-Solis rechargeable battery pack • Four AA (IEC LR6) alkaline batteries Charging system for internal memory backup battery The internal memory backup battery uses lithium manganese dioxide technology. It charges whenever the pump is powered on and has a 10-month memory capacity once it has been charged for 250 hours at 20°C (68°F).
  • Page 130: Delivery Specifications

    References and Troubleshooting Bolus accuracy specification: ± 6% Actual test data for bolus accuracy at 0.05 mL: Average 0.0508 mL % Error 1.6% Minimum Error % –3.0% Maximum Error % 4.2% Actual test data for bolus accuracy at 20 mL: Average 20.108 mL % Error...
  • Page 131: Pca Delivery Specifications

    References and Troubleshooting PM (preventive maintenance) reminder Interval: 1 to 24 months in 1 month increments Enable: On or off Custom keypad code 001 to 899 in increments of 1 Custom clinician code 001 to 899 in increments of 1 Custom administrator code 001 to 899 in increments of 1 Date format...
  • Page 132: Specifications

    References and Troubleshooting PCA dose 0 mL to 50 mL (or the mg or mcg equivalent) Max delivery rate (continuous rate + PCA dose) programmable from 40 to 250 mL/hr PCA dose lockout 1 minute to 24 hours in the following increments: •...
  • Page 133: Step Delivery Specifications

    References and Troubleshooting Step Delivery Specifications Initial rate 0.4 to 499 mL/hr Plateau rate 0.4 to 500 mL/hr Rate increment 0.4 to 499 mL/hr Infusion volume 1 to 9990 mL Step duration 15 min to 24 hr KVO rate 0 to 10 mL/hr Step infusion alerts On or Off Taper Delivery Specifications...
  • Page 134: Immunity Declarations

    References and Troubleshooting Electromagnetic Emissions and Immunity Declarations Guidance and Manufacturer’s Declaration—Electromagnetic Emissions The CADD®-Solis pump is intended for use in the electromagnetic environment specified below. The customer or the user of the CADD®-Solis pump should assure that it is used in such an environment. Emissions Test Compliance Electromagnetic Environment—Guidance...
  • Page 135 References and Troubleshooting Guidance and Manufacturer’s Declaration—Electromagnetic Immunity The CADD®-Solis pump is intended for use in the electromagnetic environment specified below. The customer or user of the CADD®-Solis pump should assure that it is used in such an environment. Immunity Test IEC 60601 Compliance Electromagnetic Environment—Guidance...
  • Page 136: Collect Separately

    References and Troubleshooting Recommended separation distances between portable and mobile RF communications equipment and the CADD®- Solis pump The CADD®-Solis pump is intended for use in an electromagnetic environment in which radiated RF disturbances are controlled. The customer or the user of the CADD®-Solis pump can help prevent electromagnetic interference by maintaining a minimum distance between portable and mobile RF communications equipment (transmitters) and the CADD®-Solis pump as recommended below, according to the maximum out put power of the communications equipment.
  • Page 137: Menu Maps

    References and Troubleshooting Menu Maps Tasks Menus Tasks Reset Reservoir Volume Taper Down Now (Taper only) Set Delayed Start (not Intermittent) Set Next Dose Start Time (Intermittent only) Prime Tubing View Delivery Settings Display and Sound Settings Change Time and Date View Reports View Advanced Tasks Delivery Settings...
  • Page 138 References and Troubleshooting Reports Total Given (not PCA) Given and PCA Dose Counters (PCA only) PCA Dose Graph (PCA only) Delivery History and Pie Chart Delivery Log Event Log Protocol Library Summary Device Information Advanced Tasks Step Down (Step only) Step Up (Step only) Give Clinician Bolus (PCA only) Patient Permissions...
  • Page 139: Advanced Tasks Menus

    References and Troubleshooting Advanced Tasks Menus Patient Permissions Priming Security On/Off Delayed Start Security On/Off Air and Occlusions Settings Air Detector On/Off Air Detector Sensitivity Upstream Sensor On/Off Downstream Sensor Sensitivity Alarm Settings Infusion Alerts (Step only) Pump Stopped Alarm Type Reservoir Low Trip Point Reservoir Low Alarm Type Reservoir Empty Alarm Type...
  • Page 140: Default Factory Settings

    References and Troubleshooting Default Factory Settings The first time you use the pump, the protocol is set to the factory default, which is the Continuous mode. You may reset the pump to the factory default settings at any time (see Reset to Factory Settings on page 109). Factory Default Pump Settings (Continuous Mode) Submenu Default Setting...
  • Page 141: Manual Mode Initial Settings

    References and Troubleshooting Manual Mode Initial Settings Manual Mode Initial Delivery Settings Therapy Default Setting All Therapies Reservoir Vol. 0 mL Continuous Rate 0 mL/hr PCA Dose 0 mL PCA Lockout 1 Hrs 0 Min KVO Rate 0.1 mL/hr Give Clinician Bolus 0 mL/hr Continuous Continuous Rate...
  • Page 142 References and Troubleshooting Manual Mode Initial Delivery Hard and Soft Limits Therapy Default Settings Continuous Rate Hard Max: 100 mL/hr Soft Min: 0 mL/hr Soft Max: 0 mL/hr Hard Min: 0 mL/hr PCA Dose Hard Max: 50 mL/hr Soft Min: 0 mL/hr Soft Max: 0 mL/hr...
  • Page 143: Accuracy Test Results

    References and Troubleshooting Accuracy Test Results In this device, as with all infusion pumps, the motion of the pumping mechanism and variations in individual disposables cause short-term fluctuations in rate accuracy. The following curves show typical performance of the pump system in two ways: 1.
  • Page 144 References and Troubleshooting Trumpet curve over T(2) period Low rate (10 mL/hr) 2.25 Ep max 2.00 Ep min 1.75 1.50 1.25 1.00 0.75 0.50 T (min) 0.25 0.00 Observation Interval Intermediate rate (150 mL/hr) Ep max 4.78% Overall % Error Ep min T (min) Observation Interval...
  • Page 145: Limited Warranty

    Manufacturer as follows: Customer Service Department, Smiths Medical ASD, Inc., 1265 Grey Fox Road, St. Paul, MN 55112, (800) 258-5361 (USA, Canada) or Smiths Medical International Ltd. WD24 4LG, UK, +44 (0) 1923 246434. Notice to the Manufacturer must include date of purchase, model and serial number, and a description of the claimed defect in sufficient detail to allow the Manufacturer to determine and facilitate any repairs which may be necessary.
  • Page 146: Index

    Index Index AC adapter 15 Backlight intensity 89 Accessories 15 Batteries 78, 129 Accuracy 129, 130, 143 AA batteries 14, 16, 78, 79 AC power jack 12 AC adapter 12, 15, 78 Admin code 18, 24, 131 Battery compartment 12, 14, 79 Advanced tasks 99, 138, 139 Battery life 126 Air and occlusion settings 102...
  • Page 147 Index Date, current 93 Edit delivery settings 35 Date format 94, 131 Epidural administration 9 Daylight savings time 94 Event log 98 Examples See Programming examples Default factory settings 140 Delayed start 31, 85, 130 Delayed start security on/off 101 Delivery hard and soft limits 33, 139, 142 Factory settings, reset 109 Delivery history and pie chart 97 Delivery limits 28, 33, 34, 38, 139, 142...
  • Page 148 Index Key See Pump key Occlusion and air settings 102, 139 Key beep on/off 91 Air detector on/off 102 Keypad 10, 12, 13 Air detector sensitivity 103, 130 Keypad code 18, 23, 131 Downstream sensor sensitivity 131 Keypad security 23 Upstream sensor on/off 103 KVO rate 39, 42, 47, 50, 53, 56, 61, 65, 71, 75 Occlusion sensor Downstream 14...
  • Page 149 Index Programming examples Continuous therapy 48 Intermittent therapy 53 Same patient, new protocol 27 PCA therapy 39 Screens and display 16 Step therapy 62 Security codes See Security settings Taper therapy 72 Security settings 18, 139 Programming screens Admin code 18, 24 Continuous therapy 47 Autolock 21 Intermittent therapy 52...
  • Page 150 Index Rate increment 60 Time and date 92, 137 Reservoir vol. 61 Current date 93 Restarting the pump during an infusion 67 Current time 16, 92 Set delayed start 31 Date format 94, 131 Starting each infusion 67 Daylight savings time 94 Start time 61 Military time 124 Step down 68...
  • Page 152 61 Brandl Street Eight Mile Plains, QLD 4113, Australia +61 (0) 7 3340 1300 CADD-Solis, CADD, and the CADD and Smiths Medical design marks are trademarks of the Smiths ® Medical family of companies. The symbol indicates the trademark is registered in the U.S. Patent and Trademark Office and certain other countries.

This manual is also suitable for:

2120

Table of Contents