AMX Endeleo TVM-1600 Operation/Reference Manual
Endeleo managed tv distribution hub
Hide thumbs
Also See for Endeleo TVM-1600:
- Quick start manual (2 pages) ,
- Quick start manual (2 pages) ,
- User manual (56 pages)
Table of Contents
Advertisement
Quick Links
Download this manual
See also:
User Manual
Advertisement
Table of Contents

Related Manuals for AMX Endeleo TVM-1600


Summary of Contents for AMX Endeleo TVM-1600
- Page 1 Operation/Reference Guide TVM-1600 Endeleo Managed TV Distribution Hub E n d e l e o D i s t r i b u t e d M e d i a L as t R e vi s ed: 6 /2 6 /20 0 8...
- Page 2 AMX is not responsible for products returned without a valid RMA number. AMX is not liable for any damages caused by its products or for the failure of its products to perform. This includes any lost profits, lost savings, incidental damages, or consequential damages.
-
Page 3: Markings Used In This Manual
There are NO user serviceable parts within the TVM-1600. Rating Label The rating label, containing important safety information, is found on the bottom left of the TVM-1600 beneath the IEC connector. Symbols used on this label are explained below; (IEC 60417-5032) The TVM Hub is suitable for Alternating current, 100 - 240V AC. -
Page 4: Environmental Conditions
85% or an area that is prone to condensation. Water / Liquids DO NOT install or operate the 16 port Endeleo TVM-1600 near water or in a location which may be prone to water seepage, dripping or splashing. -
Page 5: Table Of Contents
Powering on the TVM-1600 ... 6 Powering off the TVM-1600 ... 7 Connecting the TVM Receive Units to the TVM-1600 ... 7 Connecting the Receive Units to the display devices ... 7 Connecting the TVM-1600 to a UDM Hub ... 8 Hub Configuration ...9... - Page 6 Port Configuration ... 23 Port Properties ... 23 Port version ... 23 Naming a port ... 24 Enabling power on a port ... 24 TVM-RX03 Version ... 24 IR Remote Type ... 24 Device Port... 25 TVM-1600 Endeleo Managed TV Distribution Hub...
- Page 7 Learning the Device’s IR Protocol ... 34 Learning the Device’s Control Functions... 35 Saving the IR File To a PC ... 36 Loading an IR File To a TVM-1600 ... 37 Display Device IR Control ... 37 Important Notes About IR Control... 37 Configuring a Display Device’s IR protocol ...
- Page 8 Terminal Commands ... 47 Serial String Control ...49 Overview ... 49 Appendix A– Endeleo IR Codes ...51 Endeleo IR Codes... 51 Appendix B: ASCII Control Set ...53 Appendix C: ASCII / Hex Conversion ...55 Overview ... 55 TVM-1600 Endeleo Managed TV Distribution Hub...
-
Page 9: Overview
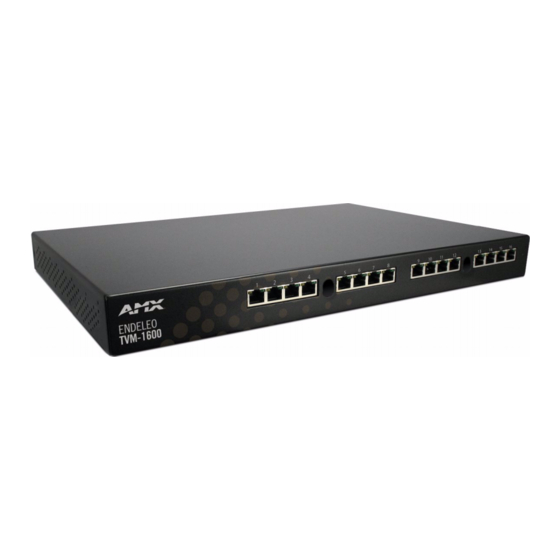
Each TVM-1600 supports 16 users and up to 192 video channels per user connection. The input to the TVM-1600 is via an industry standard RF feed and the output is presented as an RJ45 socket for connection to the Cat5, 5e or 6 twisted pair cable. -
Page 10: Ir Sensor
IR Sensor An IR receive port is found at the front of the TVM-1600 to the right hand side (FIG. 1). This is used to learn device IR remote control functions from devices such as DVD players, VCRs etc. Common functions learned include Power on, Power off, Play, Pause, Stop etc. -
Page 11: Rear Panel
It is important that there is a maximum of 6dB variation between channels. RF Out Use the RF Out connection (FIG. 3) to cascade TVM-1600s together. TV Channels can now be distributed to another TVM-1600 if this connection is used with another TVM-1600 (connected to its RF In port). Serial Port The serial port (FIG. -
Page 12: Ir Output Control Port
The TVM-1600 uses a universal switch-mode power supply (FIG. 3), which operates from 90-264V AC, 50/60Hz, with a power consumption of 60W. As a Class 1 appliance the TVM-1600 should be connected to a mains supply with a protective earthing connection. -
Page 13: Installation
It is recommended that you seek the assistance of another person when rack mounting the TVM-1600. Rack mounting brackets and screws are located in the accessories box supplied with the TVM-1600. 1. Attach the rack mounting brackets to each side of the TVM-1600 using four M4 screws for each bracket. FIG. 4... -
Page 14: Ventilation
Connecting the Headend into the TVM-1600 To connect the Headend (TV Signals) into the TVM-1600; 1. Run the RF feed from the Headend into the TVM-1600 via the RF Input port at the rear of the TVM-1600. 2. Ensure the cable is attached correctly. -
Page 15: Powering Off The Tvm-1600
1600 can be disconnected from the mains by removing the lead from the IEC inlet or from the mains socket. It is important that the TVM-1600 is installed in such a way that this method remains readily operable. The user should have easy access to either the IEC inlet or the mains socket in the event of a fault. -
Page 16: Connecting The Tvm-1600 To A Udm Hub
TVM-1600 ports. To connect a TVM feed into the UDM Hub, run a Cat5 cable from the relevant Port on the TVM-1600 and connect to the relevant AV Input port (1 - 4) on the UDM Hub. -
Page 17: Hub Configuration
Hub Configuration Overview The TVM-1600 can be configured in a number of ways, but this manual only details configuration via the web browser. Getting Started 1. The default IP address of the TVM-1600 Hub is 192.168.0.96. 2. Enter the IP address into the address field within a browser window (FIG. 7). -
Page 18: Network Configuration
Hub name (maximum of 20 characters). 3. Once the network environment has been configured click on Update. All changes are immediate - once the IP address of the TVM-1600 has been changed, redirect the web browser to the changed address. -
Page 19: Configuration - Channel Lineup
Configuration - Channel Lineup About Channel Lineup In this section the Administrator will configure the TV Channels which are to be fed into the TVM-1600. Several tasks will need to be performed; Name the channel; Configure the channel’s frequency; Configure the TV System and Configure the maximum number of channels the TVM can be configured for. -
Page 20: Configuring The Tv System
Configuring the TV system A drop down box is available on the Channel Lineup screen to set the TV standard of the incoming feed. Endeleo manufactures two types of TVM-1600; NTSC (for the US and Japanese market) and Multi-format (PAL / SECAM). -
Page 21: Uploading A Channel Lineup
Channel Lineup web pages. This channel information can then if necessary be applied to the TVM Ports. Consult AMX for further information on this file. If a configuration file exists, then: 1. Ensure the Channel Lineup option is selected. - Page 22 Configuration - Channel Lineup TVM-1600 Endeleo Managed TV Distribution Hub...
-
Page 23: Configuration - User Access
(FIG. 14). As with other controls via the web page, changes are instantaneously applied as they are made. User ports on the TVM-1600 are listed across the top of the page (beneath the Channels), with channels listed down the left of page. -
Page 24: Global Configuration Of Tv Channels
3. If necessary click on the Channels 17-32 link or Channels 33-48 link from the top of screen to disable the same TVM user port for TV channel numbers over 16. 4. Repeat the process for other TVM user ports. TVM-1600 Endeleo Managed TV Distribution Hub... -
Page 25: To Globally Disable Channels On A Tvm User Port
6. Repeat the process for other TV channels to be disabled on TVM user ports on this page - use the Channel links at the top of screen e.g. 17-32 to remove further channels from the TVM ports. TVM-1600 Endeleo Managed TV Distribution Hub Configuration - User Access... - Page 26 Configuration - User Access TVM-1600 Endeleo Managed TV Distribution Hub...
-
Page 27: Configuration - Devices
TVM-1600 for distribution. The TVM-1600 has the ability to learn the IR codes for those devices and then allow a user to control them from the TVM system. Endeleo refers to this feature as Pass-Through device control. For more information regarding Back end IR device control refer to the Advanced Administration section of this document. -
Page 28: Selecting A Device Protocol
Play – play the device. It is possible to send two commands to a device(s) using a single instruction. This is particularly useful where the display device does not return from standby into AV mode. TVM-1600 Endeleo Managed TV Distribution Hub... -
Page 29: Issuing Controls To A Device
(as above). Select the second command to be executed. 5. To execute the commands for the selected Device, click on Send to included. TVM-1600 Endeleo Managed TV Distribution Hub Configuration - Devices Control. A list... - Page 30 Configuration - Devices TVM-1600 Endeleo Managed TV Distribution Hub...
-
Page 31: Configuration - Status Page
The port controller version information is listed at the top of the page. To view a port’s controller version; 1. Click on the Status option. 2. Click on the relevant port hyperlink e.g. Port 1 (FIG. 20). FIG. 20 Port version 3.1.00 TVM-1600 Endeleo Managed TV Distribution Hub Configuration - Status Page... -
Page 32: Naming A Port
This option allows a user to set the type of remote the TVM-RX03 unit connected to this port will use. Typically an Endeleo multifunctional TVM remote is used to control this port. FIG. 23 Type of remote control 1. Click on the Status option. tick box. TVM-1600 Endeleo Managed TV Distribution Hub... -
Page 33: Device Port
3. From the Device Port options click on None. No device will be controlled at this port. Shared Selecting Shared will grant access for that port to control all devices setup on the TVM-1600. 1. Click on the Status page. -
Page 34: Changing Channels
Configuration - Status Page Changing Channels Changing channels by name Each port on the TVM-1600 has a drop down box, which displays all of the channels (from the channel line up) that the TVM port has been enabled for (FIG. 25). FIG. 25... -
Page 35: Locking A Port
Channel only to configure the ports for the channel setting only configured in the toolbar. Volume only to configure the ports for the volume setting only configured in the toolbar. Execute all to configure the ports for all the settings configured in the toolbar. TVM-1600 Endeleo Managed TV Distribution Hub Configuration - Status Page... -
Page 36: Sending Controls To A Device
When a device is already powered on, basic control functions such as Play, Stop, Pause etc. can be executed from the Status page (FIG. 29). FIG. 29 Bottom toolbar (2) of the Status page Control. A limited list of TVM-1600 Endeleo Managed TV Distribution Hub... -
Page 37: Issuing Multiple Controls To A Device
5 second delay. 6. To execute the commands for the selected TVM port(s) click on Send To Included. Multiple ports can be selected for power on/off etc. and play/stop. TVM-1600 Endeleo Managed TV Distribution Hub Configuration - Status Page... - Page 38 Configuration - Status Page TVM-1600 Endeleo Managed TV Distribution Hub...
-
Page 39: Configuration - Messaging
The text overlay is white with font size and color being fixed. About Messaging Messages can be displayed at display devices connected to the TVM-1600. The messaging interface is accessed by; Clicking on the Control link at the bottom of the screen (FIG. 30) or FIG. -
Page 40: Configuring Multiple Messages
3. At the bottom of the screen a field will appear called Message. Delete the message in this field. 4. Click on the Clear Display tick box. 5. Click on Send to included to clear the message from the selected TVM ports. TVM-1600 Endeleo Managed TV Distribution Hub... -
Page 41: Ir Learning And Ir Device Control
The Endeleo Managed TV solution supports the learning of the Infrared (IR) control protocols of the end display devices. For example it is possible from the TVM-1600 hardware to issue a remote IR request and place the screen in standby, or switch to an alternative AV input. -
Page 42: Performing Ir Learning
3. Push Enter to execute the command. The process will then guide you through what to do; Point the remote control at the IR port (right window only) on the front of the TVM-1600 and press any key on the remote when prompted. -
Page 43: Learning The Device's Control Functions
4. Push Enter to execute the command. The process will then guide you through what to do; Point the remote control at the IR port (right window only) on the front of the TVM-1600 and press the appropriate key e.g. power off from the remote when prompted (FIG. 35). -
Page 44: Saving The Ir File To A Pc
IR Learning and IR Device Control Saving the IR File To a PC AMX advises you create a folder to save your IR Files in and change to that directory in the command prompt. Once an IR protocol has been learned for a specific device, it can be saved across the network to a PC using the tftp command. -
Page 45: Loading An Ir File To A Tvm-1600
IR commands from the Endeleo RX. Important Notes About IR Control All devices requiring IR control must be connected to the TVM-1600 via the IR blaster port on the rear of the TVM-1600. The part number for the 4-Way IR Splitter necessary for TVM Central Device Control is TVM-IR04. -
Page 46: Learning Specific Control Functions Of A Device's Remote Control
4. Push Enter to execute the command. The process will then guide you through what to do; Point the remote control at the IR port (Right Window Only) on the front of the TVM-1600 and press any key on the remote when prompted. -
Page 47: Saving The Ir File To Your Pc
3. Push Enter to execute the command. The process will then guide you through what to do; Point the remote control at the IR port (Right Window Only) on the front of the TVM-1600 and press the appropriate key e.g. power off from the remote when prompted. -
Page 48: Loading A Previously Saved Ir File
1. At the command prompt, navigate to the location where the IR File is saved. 2. Enter the following command to put the file on a port on the TVM-1600 (FIG. 45): tftp –i [IP address of hub] put [name of ir table].XXX Where XXX is the port number the TVM-RX03 is connected to. -
Page 49: Uploading The Ir Protocol To A Tvm-Rx03
IR Learning and IR Device Control Uploading the IR protocol to a TVM-RX03 To upload this IR file to a TVM-RX03 unit on port 16 of the TVM-1600, now use the tftp command with the new file iSonyLCD.016. 1. Open a command session. - Page 50 IR Learning and IR Device Control TVM-1600 Endeleo Managed TV Distribution Hub...
-
Page 51: Serial Device Control
Overview The Endeleo Managed TV solution supports the learning of serial commands for display devices. For example it is possible to turn a TV, LCD or Plasma on and off from the TVM-1600 over a serial connection. This section describes how to learn the Serial Protocols for the TV screen and save it to the TVM-RX03 Managed TV Receiver. -
Page 52: Initializing The Tvm-Rx03 For Serial Control And Display Device's Baud Rate
Serial Device Control Initializing the TVM-RX03 For Serial Control and Display Device’s Baud Rate 1. A console session needs to be opened on the TVM-1600. The configuration settings for the Terminal session are: • Baud Rate: • Data Bits: • Parity: •... -
Page 53: Hexadecimal Control Codes
0E (FIG. 52). FIG. 52 Correct vs Incorrect serial strings Once the serial commands are learned, the TVM-RX03 unit is now configured for that screen type only. TVM-1600 Endeleo Managed TV Distribution Hub Serial Device Control Correct Incorrect... -
Page 54: Saving The Serial File To A Pc
FIG. 56 Successful copy of serial file 3. To upload (put) this Serial file to a TVM-RX03 unit on port 16 of the TVM-1600 use the tftp command with the new file sSonyLCD.016. The command is shown below; tftp –i 192.168.1.200 put sSonyLCD.016 4. -
Page 55: Terminal Commands
Only if directed by AMX support should the command line be used. Inappropriate use of the command line may result in misconfigurations. The TVM-1600 includes a serial console port and accepts some text based commands at that port – some of these commands are described below. - Page 56 Sets the system (for example, PAL I or NTSC) which the selected port (or range of ports specified in the Port property) will use. In most cases a single system is used for all ports on a TVM-1600, and if the port parameter is zero, all ports will be set with the same system.
-
Page 57: Serial String Control
2. Type the correct serial string command which is to be issued to the display device attached to the RX, in the text box. 3. Click the port(s) checkbox to the right of screen you would like to send the string to 4. Click Send to included. TVM-1600 Endeleo Managed TV Distribution Hub Serial String Control... - Page 58 Serial String Control TVM-1600 Endeleo Managed TV Distribution Hub...
-
Page 59: Appendix A- Endeleo Ir Codes
An asterisk in the Description column for any IR Code in this table indicates that the command will require custom code (since the command is not represented in the Actions list. TVM-1600 Endeleo Managed TV Distribution Hub IR code 90 -99 Appendix A–... - Page 60 Appendix A– Endeleo IR Codes TVM-1600 Endeleo Managed TV Distribution Hub...
-
Page 61: Appendix B: Ascii Control Set
ASCII characters can be included in the serial string provided they are enclosed in brackets. For example, Carriage Return <13>, Line Feed <10>. ASCII Control Set Char Space & TVM-1600 Endeleo Managed TV Distribution Hub Char < > " ’... - Page 62 Appendix B: ASCII Control Set TVM-1600 Endeleo Managed TV Distribution Hub...
-
Page 63: Appendix C: Ascii / Hex Conversion
(so) (si) (dle) (dc1) (dc2) (dc3) (dc4) (nak) (syn) (etb) (can) (em) (sub) (esc) (fs) (gs) (rs) (us) TVM-1600 Endeleo Managed TV Distribution Hub Char Char (sp) " & < > Appendix C: ASCII / Hex Conversion Char Hex (del) - Page 64 Appendix C: ASCII / Hex Conversion TVM-1600 Endeleo Managed TV Distribution Hub...
- Page 65 Appendix B – Endeleo IR Codes TVM-1600 Endeleo Managed TV Distribution Hub...
- Page 66 It’s Your World - Take Control™ 3000 RESEARCH DRIVE, RICHARDSON, TX 75082 USA • 800.222.0193 • 469.624.8000 • 469-624-7153 fax • 800.932.6993 technical support • www.amx.com...
Need help?
Do you have a question about the Endeleo TVM-1600 and is the answer not in the manual?
Questions and answers