
Related Manuals for AMX Endeleo UDM-0404


Summary of Contents for AMX Endeleo UDM-0404
- Page 1 Operation/Reference Guide UDM-0404 Endeleo Multi-Format Distribution Hub E n d e l e o D i s t r i b u t e d M e d i a L a s t U p d a t e d : 3 / 1 1 / 2 0 0 8...
- Page 2 AMX is not responsible for products returned without a valid RMA number. AMX is not liable for any damages caused by its products or for the failure of its products to perform. This includes any lost profits, lost savings, incidental damages, or consequential damages.
-
Page 3: Voltage
Important Safety Markings Markings Used In This Manual The following symbols are used on the UDM hardware and throughout this Installation Guide to advise you of important instructions. All maintenance must be carried out by an AMX trained and qualified installer. Voltage This symbol (FIG. -
Page 4: Important Instructions
Important Safety Markings Important Instructions This symbol, used within this manual, indicates an important instruction for the correct and safe installation, operation or maintenance of your UDM Hub. Failure to comply with such instruction may result in injury to person or damage to the UDM hardware. -
Page 5: Environmental Conditions
Important Safety Markings Environmental Conditions The criteria on this page must be observed for the installation of the UDM-0404. Temperature DO NOT install or operate the UDM Hub in an area where the ambient temperature exceeds 35ºC (95ºF) or falls below 5ºC (35ºF). Ventilation DO NOT obstruct the rear or side ventilation grilles during operation as this will restrict the airflow and may cause the main board to overheat. - Page 6 Important Safety Markings UDM-0404 Endeleo Multi-Format Distribution Hub...
-
Page 7: Table Of Contents
Table of Contents Table of Contents Important Safety Markings ................. a Markings Used In This Manual .................. a Voltage..........................a Rating Label......................a Important Instructions ....................b Compliance ....................... b FCC and IEC ........................b Date of Manufacture ....................... b Environmental Conditions.................. - Page 8 Table of Contents Connecting an IR Device to an IRTX Port ..............11 A/V Source Input Connectors ................. 12 Audio & Video Formats/Resolutions/Distance ............12 VIDEO IN Connectors (HD15)..................13 Connecting a VGA Video Input ..................13 Connecting a Composite Video Input................13 Connecting a Component Video Input ................
- Page 9 Table of Contents UDM HUB Port LEDs ..................... 22 Powering on the UDM-RX02................... 23 System Overview ....................23 Configuration ....................25 WebConsole Overview ................... 25 Connecting to the UDM-0404................. 25 Configuration - Status Page ................27 Overview ........................ 27 Port Configuration Options ..................28 Renaming Output Ports....................
- Page 10 Table of Contents Configuration - Inputs Page ................45 Overview ........................ 45 Configuring Inputs A-D ................... 45 Configuring Audio Types For Inputs ............... 46 Configuration - Devices Page ................47 Overview ........................ 47 Adding Centrally Located Devices ................48 Issuing Commands To a Centrally Located IR Device..........48 Custom Commands .......................
- Page 11 Table of Contents Loading the Hub Configuration File On the UDM-0404 ..........74 Copying Protocols Between UDM Receivers ............74 Retrieving IR Files From the UDM Ports................ 75 Backing up the Hub Configuration File ................. 75 Restoring the Hub Configuration File................76 Upgrading Input Controllers ...................
- Page 12 Table of Contents UDM-0404 Endeleo Multi-Format Distribution Hub...
-
Page 13: Udm-0404 Multi-Format Distribution Hub
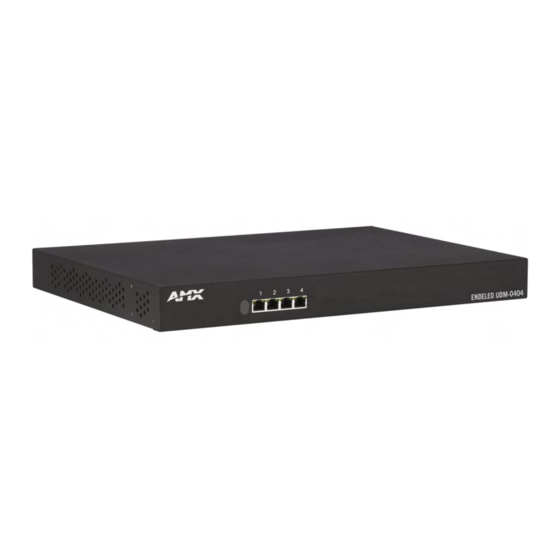
UDM-0404 Multi-Format Distribution Hub UDM-0404 Multi-Format Distribution Hub Overview The UDM-0404 Endeleo Multi-format Distribution Hub (FG-UDM-0404C) delivers any video source, including Component, RGB, VGA and S-Video to a virtually unlimited number of display devices (FIG. 1). FIG. 1 UDM-0404 The UDM-0404 supports four high-resolution input ports and four UDM output ports, and supports multiple methods of delivering sync information between the UDM Hub and the display device, including common mode. -
Page 14: Compatibility
UDM-0404 Multi-Format Distribution Hub Compatibility The UDM-0404 is compatible for use with UDM-RX01 (FG-UDM-RX01) and UDM-RX02 (FG-UDM-RX02) Receivers. Common Mode Sync delivery is supported only on the UDM-RX02. Product Specifications UDM-0404 Specifications Power Requirements: • 90-264V AC, 50/60Hz • Max power consumption: 130W Front Panel Components IR Sensor: Infrared receive port (IRRX) for learning IR remote control functions from IR con-... - Page 15 • IEC power cord • 19" mounting brackets • RS-232 DB-9/RJ-12 connection cable Note: No A/V interface cables supplied. Other AMX Equipment: • HD15 to S-Video Cable (FG-UDM-SVID01) • HD15 to 3x RCA Breakout Cable (FG-HD15RCA3) • RS232 DB9/RJ12 Connection Cable (FG-RS01) •...
- Page 16 UDM-0404 Multi-Format Distribution Hub UDM-0404 Endeleo Multi-Format Distribution Hub...
-
Page 17: Installation
Installation Installation Overview The UDM-0404 occupies a single rack space in a standard 19" equipment rack. Rack-mounting brackets and screws are located in the accessories box supplied with the UDM-0404. Exercise extreme care when lifting or moving the UDM-0404 within the rack to avoid injury. - Page 18 Installation UDM-0404 Endeleo Multi-Format Distribution Hub...
-
Page 19: Wiring And Connections
Wiring and Connections Wiring and Connections UDM-0404 Front Panel Components The components on the front panel of the UDM-0404 are described below (FIG. 4). IR Learning Sensor 4 RJ45 Output Ports for connection to UDM-RX02 Receivers FIG. 4 UDM-0404 - Front Panel Components IR Learning Sensor An IR receive port is found at the front of the UDM-0404 to the left-hand side (see FIG. -
Page 20: Udm Port Transmission Details
Wiring and Connections UDM Port Transmission Details The following table provides transmission details for the UDM port: Transmission on UDM Port Pair UDM (CVBS) UDM (SVideo) UDM (YPbPr) UDM (RGB) CVBS + Luma + Red + CVBS - Luma - Red - Chroma + Blue+... -
Page 21: Network Port (Rj45)
Wiring and Connections Network Port (RJ45) The RJ45 Network port on the rear panel of the UDM-0404 provides 10 BaseT network connectivity. Pinout Configuration The following table lists the pinouts, signals, and pairing for the Network port. RJ45 Network Port Pinouts and Signals Signals Connections Pairing... -
Page 22: Serial Port
Wiring and Connections Serial Port The Serial port on the rear panel (labelled “10101”) is available for diagnostic and troubleshooting purposes. Connecting the Serial port on the UDM-0404 is not an essential step in the installation process. The Serial port on the UDM-0404is an RJ12 connector, and requires a DB9-to-RJ12 adapter cable (FG-RS01) to connect to a PC for Terminal control. -
Page 23: Tx (Ir Transmit) Ports
Wiring and Connections TX (IR Transmit) Ports A maximum of two IR devices (such as DVD players or VCRs) can be connected to the UDM via the 3.5mm stereo TX ports (TX1/2 and TX3/4) on the rear panel (see FIG. 6 on page 8), and controlled via the WebConsole or remote control. -
Page 24: A/V Source Input Connectors
Wiring and Connections A/V Source Input Connectors There are four sets of input connectors to the rear panel of the UDM-0404, labelled A, B, C and D (FIG. 9). Digital Audio Input (SPDIF) RCA Audio Inputs (L/R) Video Input (female HD15) FIG. -
Page 25: Video In Connectors (Hd15)
Wiring and Connections Excessive skew can adversely affect video image quality, especially at long cable lengths and high signal resolutions. UDM Hubs allow you to compensate brightness, sharpness and skew delay via options in the Status page of the UDM’s built-in WebConsole (see the Video Compensation section on page 29). VIDEO IN Connectors (HD15) FIG. -
Page 26: Connecting A Component Video Input
Wiring and Connections 2. Attach the other end of the cable to the appropriate VIDEO IN connection (A or B) on the UDM. 3. Connect any audio to the analog (RCA) audio connectors or digital (SPDIF) connector. Connecting a Component Video Input 1. -
Page 27: Powering The Udm-0404 On
Wiring and Connections As a Class 1 appliance the UDM-0404 should be connected to a mains supply with a protective earthing connection. Powering the UDM-0404 On 1. Ensure a standard PC mains lead has been connected to the 3-pin power connection, and then connected to a mains power source. - Page 28 Wiring and Connections UDM-0404 Endeleo Multi-Format Distribution Hub...
-
Page 29: Wiring And Connections - Udm Receivers
Wiring and Connections - UDM Receivers Wiring and Connections - UDM Receivers Overview UDM Receivers include the UDM-RX01 and UDM-RX02. Each Receiver is described in the following sections. UDM-RX01 Installed at the display device, the UDM-RX01 (FG-UDM-RX01) converts the signal received from a UDM Multi-Format Distribution Hub to standard A/V signals (FIG. -
Page 30: Udm-Rx02
1.45 lb. (658 g) Certifications: • CE • FCC part 15 Class A Other AMX Equipment: • RS232 DB9/RJ12 Connection Cable (FG-RS01) • UDM-RC02 Multi-Format IR Remote Control (FG-UDM-RC02) • IR01 IR Emitter Module (FG-IR01) • IR03 External IR Receiver Module (FG-IR03) •... -
Page 31: Udm-Rx02 Product Specifications
1.45 lb. (658 g) Certifications: • CE • FCC part 15 Class A Other AMX Equipment: • RS232 DB9/RJ12 Connection Cable (FG-RS01) • UDM-RC02 Multi-Format IR Remote Control (FG-UDM-RC02) • IR01 IR Emitter Module (FG-IR01) • IR03 External IR Receiver Module (FG-IR03) •... -
Page 32: Udm Receivers - Configuration
Wiring and Connections - UDM Receivers UDM Receivers - Configuration UDM Receivers are configured via the UDM Hub’s WebConsole. Refer to the Configuration section on page 25 for details. UDM Receivers - Rear Panel Components All of the connectors and ports are located on the rear panel (FIG. 13): Composite (Pr) port UDM HUB port (RJ45) - from an Composite (Pb) port... -
Page 33: Connecting An Ir Device To The Ir Tx Port
Wiring and Connections - UDM Receivers Connecting an IR Device to the IR Tx Port 1. Connect an IR01 Endeleo IR Emitter Module (FG-IR01) to the IR Tx port on the UDM Receiver. Ensure the position of the device corresponds to the position assigned in the Devices option of the UDM- Hub’s WebConsole. -
Page 34: Audio & Video Formats/Resolutions/Distance
Wiring and Connections - UDM Receivers Audio & Video Formats/Resolutions/Distance Refer to the Audio & Video Formats/Resolutions/Distance section on page 12. Video Compensation Video at the Receive end can be compensated using three main methods; Using the UDM Hub’s WebConsole. Using the UDM-RC02 Multi-Format IR Remote Control. -
Page 35: Powering On The Udm-Rx02
Wiring and Connections - UDM Receivers Powering on the UDM-RX02 As a Class 1 appliance, ensure the device is connected to a main socket outlet with a protective grounding connection. The UDM-RX02 may be powered by its hub device through a standard CAT5 cable, but it may also be powered through an optional 24 VDC power supply (FG-UDM-PS) intended to augment power for very long cable runs. - Page 36 Wiring and Connections - UDM Receivers UDM-0404 Endeleo Multi-Format Distribution Hub...
-
Page 37: Configuration
Configuration Configuration WebConsole Overview Each UDM-0404 Hub can be configured for the correct network environment. It is also possible to configure each Hub for the correct date and time. Configuration options are available via the UDM’s built-in WebConsole, as described in this section. The UDM-RX02 Receiver connected to the UDM-0404 is also configured via the 0404’s WebConsole. - Page 38 Configuration 4. On initial connection, the Status page is displayed (FIG. 16). Click links to access the six main areas of the WebConsole (initial view is Status) FIG. 16 Status page (Initial View) Use the links in the left-pane of the page to access each of the main Configuration pages, as described in the following sections.
-
Page 39: Configuration - Status Page
Configuration - Status Page Configuration - Status Page Overview The Status page is the initial view when the UDM-0404’s WebConsole is accessed. To access the Status page from any other Configuration page in the WebConsole, click on the Status link in the navigation pane (FIG. -
Page 40: Port Configuration Options
Configuration - Status Page Port Configuration Options Click on any of the Port (1-4) links on the Status page (see FIG. 17) to access the Port Configuration options for the selected Port (FIG. 18): Click to return all Port Configuration options to default settings Click to send current settings to the Receiver Click to access... -
Page 41: Renaming Output Ports
Configuration - Status Page Port Configuration Options (Cont.) Red/Green/Blue skew: Use this set of radio buttons to manually add skew delay to any of the video colors. See the Basic Video Compensation section on page 29 for details. Protocol: Select a control protocol to be used for this Port. See the Testing Serial Control Commands section on page 68 for details. -
Page 42: Advanced Video Compensation
Configuration - Status Page Advanced Video Compensation To enable advanced video compensation options, click on the Enable advanced options checkbox, in the Setup page (FIG. 20). FIG. 20 Setup Page - Enable advanced options checkbox 1. In the Status page, click on a Port link to access the Port Configuration options for the selected Port (see FIG. -
Page 43: Compensating Video Via The Udm-Rc10 Remote Control
Configuration - Status Page FIG. 22 Port Configuration options - "Enable advanced options" selected in the Setup page and "Advanced" selected Video compensation settings can also be configured via hyper terminal session. See the Advanced Administration section on page 71 for details. Compensating Video Via the UDM-RC10 Remote Control Video can also be compensated using the Endeleo UDM-RC10 IR Engineering Remote Control (FIG. -
Page 44: Video Compensation (Udm-Rx01/Rx02)
Configuration - Status Page The compensation settings will be specific to this UDM-RX02 and stored internally (for example, if this UDM-RX02 is replaced or swapped out the compensation settings will travel with the UDM-RX02). It may therefore be necessary to re- compensate the UDM-RX02 / replacement UDM-RX02 if this UDM-RX02 is to be used elsewhere or is being replaced. -
Page 45: Selecting Multiple Inputs For Display
Configuration - Status Page Selecting Multiple Inputs For Display An input can be assigned to multiple ports to save administration time. 1. To change more than one port to display a particular input, select the desired input from the drop down list beside the Included option (FIG. -
Page 46: Changing An Input
Configuration - Status Page FIG. 28 Ports re-configured to use the "Included" input ("A1") Changing an Input The input being displayed at a Port can be changed at any time via the Input drop-down menu. To change multiple ports select/include those ports appropriately. User Control Administrators can issue commands directly from the UDM WebConsole, via the User Control options in the Status page (FIG. -
Page 47: Issuing Commands To A Selected Port
Configuration - Status Page Issuing Commands To a Selected Port Ensure the device’s IR commands have been learned by the Hub first. Refer to the Configuration - Protocols Page section on page 63. Control of the input is performed in a similar way to changing the input to be displayed. Commands can either be issued per Input or issued across all or groups of ports. -
Page 48: Issuing Commands To Multiple Ports
Configuration - Status Page Issuing Commands To Multiple Ports As with the input selection it is also possible to send multiple control commands to all or selected ports. Because the control strings are stored in the UDM Receivers, a global command across multiple ports will allow any range of display devices to be controlled simultaneously. - Page 49 Configuration - Status Page FIG. 32 User Control options for Port 1 3. Open the Control drop-down menu for any Key, and select the command which this key on the UDM-RC02 Remote Control will issue (FIG. 33). FIG. 33 Control drop-down menu for Key 2 ("Play" selected) Ensure the correct key on the Endeleo Remote corresponds with the correct command.
-
Page 50: Passthrough Mode (Inputs A - D)
Configuration - Status Page 4. Select either the Port or Device radio button to specify whether this button on the remote should be associated with the Port (display device) or an actual Device (e.g. a DVD player added to the system as a device) when it is pushed. -
Page 51: Configuring A Port For Passthrough Mode
Configuration - Status Page Configuring a Port for Passthrough Mode 1. Click on a Port link for the correct port to access the Port Configuration options (see FIG. 31 on page 36). 2. Select the Remote Control that will be used to put the device into passthrough mode from the Remote type drop-down menu (FIG. -
Page 52: Locking One Or More Ports
Configuration - Status Page Locking One or More Ports Locking an output port to a specific source prevents any user control at that port. 1. On the Status page, select the Locked checkbox beside the relevant port or ports (FIG. 37). FIG. -
Page 53: Configuration - Setup Page
Configuration - Setup Page Configuration - Setup Page Overview Each Hub must be configured for the correct network environment. It is also possible to view device information, configure the Hub for the correct date and time and specify Restore options, via options in the Setup page (FIG. -
Page 54: Network Configuration
Configuration - Setup Page Network Configuration The UDM-0404 does not support DHCP. Please configure a static IP Address. The default IP address is: 192.168.0.96 The default UDP Port is: 2008 1. The following Network Configuration options must be configured (FIG. 39): FIG. -
Page 55: Restoring Hub Configuration And Connections
Configuration - Setup Page Restoring Hub Configuration and Connections To ensure the configuration settings for the Hub are retained each time the hub boots it is advisable to ensure the Restore options at the bottom of the Setup page have been enabled (FIG. 41). FIG. - Page 56 Configuration - Setup Page UDM-0404 Endeleo Multi-Format Distribution Hub...
-
Page 57: Configuration - Inputs Page
Configuration - Inputs Page Configuration - Inputs Page Overview Use the options in the Inputs page (FIG. 42) to set up the video types and audio sources being presented to each input port and where appropriate renaming these. FIG. 42 Inputs Page Configuring Inputs A-D Each input port can be set to accept a local source:... -
Page 58: Configuring Audio Types For Inputs
Configuration - Inputs Page 2. To name the Input Type, type directly into the Name field for each Input (FIG. 44). FIG. 44 Naming the Input Type If the Input Type is Composite, additional Name fields are provided to name each of the 3 composite sources separately (FIG. -
Page 59: Configuration - Devices Page
Configuration - Devices Page Configuration - Devices Page Overview The system allows "centrally located" devices connected to the rear of the UDM-0404 (e.g. VCR, DVD, DVR or Satellite Decoders) to be managed from the user port. Centrally located devices are connected directly to the rear of the UDM-0404 via the UDM IR ports (Tx1 –... -
Page 60: Adding Centrally Located Devices
Configuration - Devices Page Adding Centrally Located Devices 1. Name each device accordingly by typing in the Name text field. Ensure the correct port is selected. 2. Configure the device with the relevant IR protocol if appropriate. Refer to the Creating and Learning an IR Protocol section on page 66 for details. Issuing Commands To a Centrally Located IR Device The UDM-0404 needs to learn the device’s IR protocol (which button on its remote performs which function). -
Page 61: Custom Commands
Configuration - Devices Page 4. Click the Send to Included link to send the selected command to the Included device(s). Alternatively such commands can be scheduled to occur later. Refer to the Configuration - Schedule Page section on page 51 for details. Custom Commands Custom Commands permits the Administrator to specify custom IR commands which can sent to the device or display. - Page 62 Configuration - Devices Page FIG. 52 Optional controls for a device The first command is limited to Power On, Off and A/V Select. 3. Click the Send to included link to issue the commands (see FIG. 52). The Device’s commands must have been learned by the UDM-0404 in order to function.
-
Page 63: Configuration - Schedule Page
Configuration - Schedule Page Configuration - Schedule Page Overview The UDM-0404 features an on-board clock that allows you to create scheduled events to be executed at a predetermined time in the future. Scheduled events are listed on the Schedule page (FIG. 53), but are created using options in both the Status and Devices pages, as described in this section. -
Page 64: Checking The Hub Time
Configuration - Schedule Page Scheduled Input Controls - Use the Schedule options in the top toolbar of the Status page to schedule inputs (devices connected to the Input connectors on the rear panel of the UDM) to be displayed on specific Ports (via the UDM receivers connected to the Output ports on the front of the UDM) at specified times. - Page 65 Configuration - Schedule Page 1. Select up to two commands to be executed from the 1st and 2nd Control drop-down menus at the bottom of the Devices page (FIG. 56). Select command #1 Select command #2 FIG. 56 Commands to be executed 2.
- Page 66 Configuration - Schedule Page 3. Click the Schedule link at the bottom of the Devices page to schedule the specified commands for the selected Devices (FIG. 59). FIG. 59 Schedule link 4. This invokes the Schedule page. The commands(s) and Port(s) selected in the Status page will automatically appear in the scheduled event (FIG.
-
Page 67: Scheduling Output Device Control Events
Configuration - Schedule Page Scheduling Output Device Control Events Use the Schedule options in the bottom toolbar of the Status page to schedule events to be executed at specified times on display devices connected to the RJ-45 Output ports on the front panel (FIG. 64). Output Device Control toolbar FIG. - Page 68 Configuration - Schedule Page 2. Select the Ports(s) to which the command should be sent by clicking on the relevant Include checkboxes (FIG. 66). FIG. 66 Devices 1 and 2 selected to receive the specified controls 3. Click the Schedule link at the bottom of the Status page to schedule the specified commands for the selected Devices (FIG.
-
Page 69: Scheduling Inputs
Configuration - Schedule Page 7. Click the Add link (see FIG. 69) to add the schedule to the list of scheduled events (FIG. 70). FIG. 70 Scheduled event added 8. Click the event’s Enabled checkbox (FIG. 71). Enabled Scheduled Event FIG. - Page 70 Configuration - Schedule Page FIG. 73 Included drop-down menu (Status page) 2. Select the Ports on which the input will be displayed by clicking on the Include checkbox at the relevant ports. The selected ports are highlighted in blue (FIG. 74). FIG.
- Page 71 Configuration - Schedule Page Input Ports Enter name for scheduled event here Preset toolbar FIG. 76 Schedule page (indicating Input "A1" and Ports 1 and 2 5. Name the scheduled event in the text field provided. 6. In the Frequency drop-down menu, select a frequency for the scheduled event, and enter the time for the event to occur in the text fields provided (FIG.
-
Page 72: Preset Scheduling
Configuration - Schedule Page 8. Click the event’s Enabled checkbox (FIG. 79). Enabled Scheduled Event FIG. 79 An enabled schedule Once enabled, the scheduled event will execute at the specified time/frequency. Each new scheduled event is displayed on the Schedule page. Preset Scheduling It is possible to create a scheduled Preset (or Combination) event - events based on schedules already created (such as combining two or more existing events), via options in the Schedule page. -
Page 73: Scheduling Events - Frequency Options
Configuration - Schedule Page 8. Enable the event also by clicking on the tick box beneath the Enable column beside the combination event (FIG. 82). Enabled Scheduled Event FIG. 82 Enabling a Preset schedule No tick box appears to the left of the combined event as several combined events can not be added together. - Page 74 Configuration - Schedule Page 2. Click on the User Control link at the top right of the page (see FIG. 83). This invokes the Control Options page for the selected Port (FIG. 84). FIG. 84 Control Options page 3. Keys 0 to F represent the keys on the UDM-RC02 Remote Control. For each Key, select the schedule (from the Schedule drop-down menu) to be issued by the selected Key on the UDM-RC02 Remote Control (FIG.
-
Page 75: Configuration - Protocols Page
Configuration - Protocols Page Configuration - Protocols Page Overview Protocols for serial and infrared devices used in the system can be created via options in the Protocols page. These protocols allow the UDM-0404 to control serial and infrared devices connected via the Hub. To access the Protocols page from any other Configuration page in the WebConsole, click on the Protocols link in the navigation pane (FIG. -
Page 76: Creating A Serial Protocol
Configuration - Protocols Page Creating a Serial Protocol 1. Open the Serial Protocol drop-down menu, and select New (FIG. 87). FIG. 87 Serial Protocol drop-down menu This action invokes several additional fields: Name, Settings and Initialise (FIG. 88): FIG. 88 Creating a new serial protocol 2. -
Page 77: Updating The Udm Receiver With The Serial Protocol
Configuration - Protocols Page 6. Click Add to create the new protocol. 7. Repeat if necessary for other serial commands which are to be stored under this protocol name. Once complete, the protocol can be assigned to relevant devices. It is presumed that the serial device connected to the Endeleo RX has the appropriate serial settings as described and the correct serial cable/pinouts configured in order to function correctly with the Receiver. -
Page 78: Creating And Learning An Ir Protocol
Configuration - Protocols Page A new table for this device’s Serial control is what is actually being created. When the administrator decides to create further commands particular to this serial device they will be stored within this table e.g power off, power on. If new commands are to be created in future ensure the correct Serial Protocol has been selected before defining new commands to ensure commands are stored in the correct table. -
Page 79: Updating The Udm Receiver With The Ir Protocol
Configuration - Protocols Page Ensure the device’s remote control is pointing to the IR sensor located at the front of the UDM-0404 when performing key presses. If not the key presses may not be stored in the UDM-0404. 4. Click on Step 1 (FIG. 95). FIG. -
Page 80: Testing Serial Control Commands
Configuration - Protocols Page Testing Serial Control Commands Device serial codes can be tested via options in the Status page, before they are added to the protocol library. Serial commands are stored in the UDM-RX02, and care should be taken to keep any serially programmed units associated with the correct display device type. -
Page 81: Examples Of Serial Controls
Configuration - Protocols Page Examples of Serial Controls Screen Type Command Ascii code Hex code NEC 30/40” LCD Power Off 00!%0D %00%00%21%0D Power On 00”%0D %00%00%22%0D CVBS Input Select 00_v1%0D %00%00%5f%76%31%0D Data Set Ready Panasonic Power Off %02POF%03 %02%50%4F%46%03 The video mode select commands (VGA select etc.) are extremely useful commands and enable a serial string to be associated with a change of input type, allowing a display automatically switched to the appropriate input port on a change of the video type from the UDM-0404. - Page 82 Configuration - Protocols Page UDM-0404 Endeleo Multi-Format Distribution Hub...
-
Page 83: Advanced Administration
Windows XP Pro has a built in TFTP client program. If you are using another operating system, or have an alternate TFTP client, follow the directions of your OS and install TFTP client if necessary. Consult with AMX Technical Support as to the appropriate client for your OS. -
Page 84: Web Interface Update
Windows XP Pro has a built in TFTP client program. If you are using another operating system, or have an alternate TFTP client, follow the directions of your OS and install TFTP client if necessary. Consult with AMX Technical Support as to the appropriate client for your OS. -
Page 85: Copying The Hub Configuration File
Windows XP Pro has a built in TFTP client program. If you are using another operating system, or have an alternate TFTP client, follow the directions of your OS and install TFTP client if necessary. Consult with AMX Technical Support as to the appropriate client for your OS. -
Page 86: Restoring The Udm-0404 Configuration File
Windows XP Pro has a built in TFTP client program. If you are using another operating system, or have an alternate TFTP client, follow the directions of your OS and install TFTP client if necessary. Consult with AMX Technical Support as to the appropriate client for your OS. -
Page 87: Retrieving Ir Files From The Udm Ports
Advanced Administration Retrieving IR Files From the UDM Ports 1. Run your TFTP client. If using the Windows client, move to step 2. 2. Create a folder on the C: drive named RX. 3. Browse the new RX folder with your TFTP client. 4. -
Page 88: Restoring The Hub Configuration File
Advanced Administration If the name of the Hub Protocol file is not known typing in i or s followed by any logical characters will find the file, as there is only one protocol file in the UDM-0404. A file name starting with either i or s will retrieve that file. Use a name that will identify the protocol file for the project. -
Page 89: Backend Commands
Advanced Administration Backend Commands In case of human error the Command Line can be used to perform several Administrative tasks on the multi format video hub. Changing the Login Password 1. Create a hyperterminal session with the UDM-0404 using default serial connections. 2. -
Page 90: User Outputs
Advanced Administration The table below describes typical values returned when using the ? command on an input port. Multi-Format Input Configuration Value Description Input A 00.06.00 Input Controller Version Extended Graphics Array 1024x768 Screen Resolution Vertical lines on screen Horizontal polarity (+/-) Vertical polarity (+/-) User Outputs 1. -
Page 91: Copying Ir/Serial Tables
Windows XP Pro has a built in TFTP client program. If you are using another operating system, or have an alternate TFTP client, follow the directions of your OS and install TFTP client if necessary. Consult with AMX Technical Support as to the appropriate client for your OS. -
Page 92: Endeleo Udm Receiver Commands
Advanced Administration Endeleo UDM Receiver commands Several Receiver-specific commands can be used for information purposes. Viewing Video Compensation Settings The z command will report the current compensation settings configured within the UDM Receiver. 1. Use Hyperterminal to connect to the Receiver via its serial port. 2. -
Page 93: Appendix A: Ascii / Hex Conversion
Appendix A: Ascii / Hex Conversion Appendix A: Ascii / Hex Conversion Overview Devices are typically controlled either using ascii text strings or using the HEX equivalent. Control codes can be entered into the Endeleo hardware using ASCII, HEX or a combination of both. (Where certain ASCII codes are difficult to enter (e.g. - Page 94 Appendix A: Ascii / Hex Conversion UDM-0404 Endeleo Multi-Format Distribution Hub...
-
Page 95: Appendix B - Endeleo Ir Codes
Appendix B – Endeleo IR Codes Appendix B – Endeleo IR Codes Overview The following is a list of IR Codes used by Endeleo in learning serial or IR controls for display devices. Note that several of the items in the following table are not represented in the Action drop-down menus for IR and Serial protocols (in the Web Configuration Interface). - Page 96 Appendix B – Endeleo IR Codes UDM-0404 Endeleo Multi-Format Distribution Hub...
- Page 97 Appendix B – Endeleo IR Codes UDM-0404 Endeleo Multi-Format Distribution Hub...
- Page 98 It’s Your World - Take Control™ 3000 RESEARCH DRIVE, RICHARDSON, TX 75082 USA • 800.222.0193 • 469.624.8000 • 469-624-7153 fax • 800.932.6993 technical support • www.amx.com...
Need help?
Do you have a question about the Endeleo UDM-0404 and is the answer not in the manual?
Questions and answers