
Related Manuals for Advantech IPPC-5211WS Series


Summary of Contents for Advantech IPPC-5211WS Series
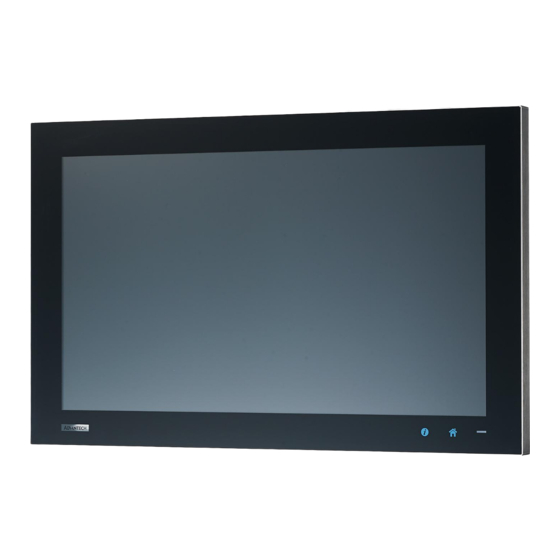
- Page 1 User Manual IPPC-5211WS Series Industrial Touch Panel Computers with ® ™ Intel Celeron Processors...
- Page 2 No part of this manual may be reproduced, copied, translated or transmitted in any form or by any means without the prior written permission of Advantech Co., Ltd. Information provided in this manual is intended to be accurate and reliable. How- ever, Advantech Co., Ltd.
- Page 3 Because of Advantech’s high quality-control standards and rigorous testing, most of our customers never need to use our repair service. If an Advantech product is defec- tive, it will be repaired or replaced at no charge during the warranty period. For out- of-warranty repairs, you will be billed according to the cost of replacement materials, service time and freight.
- Page 4 This product has passed the CE test for environmental specifications when shielded cables are used for external wiring. We recommend the use of shielded cables. This kind of cable is available from Advantech. Please contact your local supplier for ordering information.
- Page 5 The sound pressure level at the operator's position according to IEC 704-1:1982 is no more than 70 dB (A). DISCLAIMER: This set of instructions is given according to IEC 704-1. Advantech disclaims all responsibility for the accuracy of any statements contained herein.
- Page 6 Attention! Danger d'explosion si la pile est remplacée de façon incor- recte. Remplacez seulement avec le même type ou équivalent recom- mandé par le fabricant. disposer des piles usagées selon les instructions du fabricant. IPPC-5211WS Series User Manual...
-
Page 7: Table Of Contents
Jumper setting and Description............... 22 A.2.1 CMOS Clear Function (CN1) ............22 Switch Setting ..................22 A.3.1 Termination Resistor Select (SW3)..........23 Connector Pin Definition ................. 23 A.4.1 SATA connector (CN12) ............. 23 A.4.2 SATA Power connector (CN13) ..........24 IPPC-5211WS Series User Manual... - Page 8 Intel® Trusted Execution Engine Driver Installation........ 38 Windows 7 USB 3.0 Driver Installation ........... 42 Advantech EC Driver Installation ............45 Advantech EC Brightness Control Tool Installation ........ 47 Advantech EC Watchdog Timer Driver Installation......... 49 Advantech LMsensor Driver Installation ..........53...
-
Page 9: Chapter 1 General Information
Chapter General Information... -
Page 10: Introduction
iDoor x 1(optional) Waterproof Wireless Antenna x 1(optional) 1.2.3 O/S support Microsoft® Windows – Windows Embedded Standard 7 (64bit) – Windows Embedded 8 Standard (64bit) – Windows 7 (32bit/64bit) – Windows 8 (64bit) IPPC-5211WS Series User Manual... -
Page 11: Safety And Environment
Backlight Lifetime 50,000 hours Backlight Note! There might be several bright or dark pixels on the LCD. This phenome- non is normal in today’s LCD manufacturing. Inspection criteria are fol- lowing specifications defined by LCD vendor. IPPC-5211WS Series User Manual... -
Page 12: Touchscreen Specifications
+/- 20% (the fuse will become an open circuit if the input level exceeds 32 V Typical: 24 V @ 1.7Amp for IPPC-5211WS I/O Ports Arrangement The arrangement of the I/O ports is shown in Figure 1.1 Figure 1.1 I/O Port Arrangement IPPC-5211WS Series User Manual... -
Page 13: Mounting Type
Assemble the accessory module and a metal tube which customer prepare by themselves. And then, put IPPC-5211WS on the accessory module and insert the screws into every screw holes and fasten them. These screws will push the accessory and fix the unit. IPPC-5211WS Series User Manual... -
Page 14: Dimensions
Dimensions IPPC-5211WS Series Weight: 15.8 kg Dimensions (W x H x D): 555 x 346.5 x 81 (21.85" x 13.64" x 3.19") Figure 1.2 IPPC-5211WS Dimensions IPPC-5211WS Series User Manual... -
Page 15: Chapter 2 System Setup
Chapter System Setup... -
Page 16: System Setup
CompactFlash memory is hot swappa- ble. Il est suggéré de désactiver l'alimentation du système que vous bran- chez ou retirez le carte mémoire, même si la mémoire CompactFlash est remplaçable à chaud. IPPC-5211WS Series User Manual... -
Page 17: Installing The Drivers
Note! The drivers and utilities used for the IPPC-5211WS panel PCs are sub- ject to change without notice. If in doubt, check Advantech's website or contact our application engineers for the latest information regarding drivers and utilities. -
Page 18: Transport And Unpacking
Please ensure VESA equipment dimension as 100 x 100 mm. Take screws from the accessory box. Insert the screws into every screw holes and fasten them. These screws will push the VESA mounting and fix the unit. IPPC-5211WS Series User Manual... -
Page 19: Foot System Mounting
Assemble the accessory module and a metal tube which customer prepare by themselves. And then, put IPPC-5211WS on the accessory module and insert the screws into every screw holes and fasten them. These screws will push the accessory and fix the unit. IPPC-5211WS Series User Manual... -
Page 20: Arm System Mounting
Assemble the accessory module and a metal tube which customer prepare by themselves. And then, put IPPC-5211WS on the accessory module and insert the screws into every screw holes and fasten them. These screws will push the accessory and fix the unit. IPPC-5211WS Series User Manual... -
Page 21: Chapter 3 Features In Windows Embedded
Chapter Features in Windows Embedded... -
Page 22: Features In Windows Embedded Platform
Applying changes to an image applies all changes made to the operat- ing system during a specific period of time. Advantech provide utility to operate EWF. Refer below steps if you want to enable. Click Start Menu->All Programs->Advantech->AdvWF and click EWF Utility... - Page 23 Click EWF tab, and click “Enable” button After the system is rebooted automatically, EWF enable IPPC-5211WS Series User Manual...
-
Page 24: File-Based Write Filter (Fbwf)
Writes to folders with write- through exceptions will be persisted when the device restarts. Advantech provide utility to operate FBWF. Refer below steps if you want to enable Click Start Menu->All Programs->Advantech->AdvWF and click FBWF Utility Move volume you want to protect from “Available Volume”... -
Page 25: Horm
Run OSLock, and then system reboot automatically. Open those software that customers want to directly use after system resume from hibernation. Hibernate via Advantech HORM utility: Click Start Menu->All Programs->Advantech->AdvWF Select “Enable Hibernation” in “Power Options”. Open AdvWF and enable EWF After the system is rebooted automatically, open AdvWF and click EWF Utility. -
Page 26: Uwf
Enhanced Write Filter (EWF), File-Based Write Filter (FBWF), and Regis- try Filter in Windows Embedded Standard 7. EWF, FBWF, and Registry Filter are also included separately in Windows Embedded 8 Standard, primarily for backward com- patibility. IPPC-5211WS Series User Manual... -
Page 27: Appendix A Serial Port Settings
Appendix Serial Port Settings... -
Page 28: Jumper, Dip Switch And Connector Location
Jumper, Dip switch and Connector location A.1.1 IPPC-5211WS Series User Manual... -
Page 29: Bottom
A.1.2 Bottom IPPC-5211WS Series User Manual... -
Page 30: Jumper Setting And Description
This switch is used to select COM2 RS232/422/485 mode setting Default RS232 mode Bit 1,2,3,4,5 ON RS232 Mode Bit 6,7,8,9,10 OFF Bit 1,2,3,4,5,10 OFF RS422 Master Mode Bit 6,7,8,9 ON Bit 1,2,3,4,5 OFF RS422 Slave Mode Bit 6,7,8,9,10 ON IPPC-5211WS Series User Manual... -
Page 31: Termination Resistor Select (Sw3)
Default R_RX+ Pin 3 R_DATA- Pin 4 Connector Pin Definition A.4.1 SATA connector (CN12) 1654004659 Serial ATA 7P 1.27mm 180D(M) DIP WATM-07DBN4A3B83.12 Signal Description Signal Pair A : TX+/- (Transmit) Signal Pair B : RX+/ (Receive) IPPC-5211WS Series User Manual... -
Page 32: Sata Power Connector (Cn13)
* +3.3Vaux was suspend Power , power out to device +3.3V/1.1A * +3.3V was core power * +1.5V was core power, power out to device +1.5V/0.5A IPPC-5211WS Series User Manual... -
Page 33: Cfast Slot (Cn14)
Power in connector (CN18) 1652003104 PLUG-IN BLOCK 3P 5.08mm 90D(M) DIP ME050-50803 Signal Description Power IN V+ 24VDC +-20% Power in Power IN V– (GND) The GND_EARTH to connect a Screw hole for short with the GND_EARTH chassis GND IPPC-5211WS Series User Manual... -
Page 34: Lan Rj45 Connector (Cn7,Cn8)
1000BASE-T: In MDI and in MDI-X configuration, MDI[2]+/- corresponds to BI_DC+/- and MDI[3]+/- corre- MDI2- sponds to BI_DD+/-. 100BASE-TX: Unused. MDI3+ 10BASE-T: Unused. MDI3- Left LED Right LED 10Link 100Link 1000 Link Active Orange Green Green IPPC-5211WS Series User Manual... -
Page 35: Usb Connector (Cn10)
Ground for Power return SSRX- USB3.0 RX - SSRX+ USB3.0 RX + GND_DRAIN Ground for signal return SSTX- USB3.0 TX - SSTX+ USB3.0 TX + A.4.8 COM1 RS232 connector (CN15) 1654000056 D-SUB Conn. 9P 90D(M) DIP 070241MR009S200ZU RS232 IPPC-5211WS Series User Manual... -
Page 36: Com2 Rs232/422/485 Connector (Cn16)
A.4.9 COM2 RS232/422/485 connector (CN16) 1654000056 D-SUB Conn. 9P 90D(M) DIP 070241MR009S200ZU RS232 RS422 RS485 IPPC-5211WS Series User Manual... -
Page 37: Driver Installation And Configuration
Appendix Driver Installation and Configuration... -
Page 38: Intel Chipset Software Installation Utility Installation
Intel Chipset Software Installation Utility Installation Follow the steps below to install the Intel Chipset Software Installation Utility: Launch <Driver Root Path>\Intel Chipset Software Installation Util- ity\SetupChipset_XX.X.XX_PV Install SetupChipset.exe Click Next IPPC-5211WS Series User Manual... - Page 39 Click Accept Click Install Click Finish IPPC-5211WS Series User Manual...
-
Page 40: Intel Graphics Driver Installation
Intel Graphics Driver Installation Follow the steps below to install the Intel Graphics driver: Launch folder <Driver Root Path>\Graphics Driver\Intel EMGD win7 XX bit\ Install Setp.exe Click Next IPPC-5211WS Series User Manual... - Page 41 Click Yes Click Next Click Install IPPC-5211WS Series User Manual...
- Page 42 Click Next Choose Yes, then click Finish to restart IPPC-5211WS Series User Manual...
-
Page 43: Lan Driver Installation
LAN Driver Installation Follow the steps below to install the LAN driver: Launch folder <Driver Root Path>\LAN\Win7 \Install_Win7_XXX_XXXXXXXX Install setup.exe IPPC-5211WS Series User Manual... - Page 44 Click Next Click Install IPPC-5211WS Series User Manual...
- Page 45 Click Finish IPPC-5211WS Series User Manual...
-
Page 46: Intel® Trusted Execution Engine Driver Installation
Intel® Trusted Execution Engine Driver Installation Follow the steps below to install the Intel Trusted Execution Engine driver: Launch folder <Driver Root Path>\TXE\Intel TXE Firmware\Win7 Install kmdf-1.11-Win-6.1-x64.msu Click Yes IPPC-5211WS Series User Manual... - Page 47 Click Restart Now, then the system will restart Launch folder <Driver Root Path>\TXE\TXE_Win7_X_X.X_X.X.X.XXXX Install SetupTXE.exe IPPC-5211WS Series User Manual...
- Page 48 Click Next Click Next Click Next IPPC-5211WS Series User Manual...
- Page 49 Choose Yes, then click Finish to restart. IPPC-5211WS Series User Manual...
-
Page 50: Windows 7 Usb 3.0 Driver Installation
Windows 7 USB 3.0 Driver Installation Follow the steps below to install the Windows 7 USB 3.0 driver: Launch folder <Driver Root Path>\USB3\Win7\SetupUSB3_X.X.X.XX Install Setup.exe Click Next IPPC-5211WS Series User Manual... - Page 51 Click Yes Click Next Click Next IPPC-5211WS Series User Manual...
- Page 52 Choose Yes, then click Finish to restart IPPC-5211WS Series User Manual...
-
Page 53: Advantech Ec Driver Installation
Advantech EC Driver Installation Follow the steps below to install the EC drivers: Launch folder <Driver Root Path>\EC\Vx.xx.xxxx Install AdvEC_Vx.xx.xxxx.exe Click Next IPPC-5211WS Series User Manual... - Page 54 Click Install Click Finish Choose Yes, then click OK to restart IPPC-5211WS Series User Manual...
-
Page 55: Advantech Ec Brightness Control Tool Installation
Advantech EC Brightness Control Tool Installation Note! The Advantech EC driver must be installed first Follow the steps below to install the EC brightness control tool: Launch folder <Driver Root Path>\EC Brightness\Vx.xx.xxxx Install AdvECBrightness_Vx.xx.xxxx.exe Click Next IPPC-5211WS Series User Manual... - Page 56 Click Install Click Finish Choose Yes, then click OK to restart IPPC-5211WS Series User Manual...
-
Page 57: Advantech Ec Watchdog Timer Driver Installation
Advantech EC Watchdog Timer Driver Installation Note! The EC driver must be installed first Follow the steps below to install the EC Watchdog Timer driver: Launch folder <Driver Root Path>\WDT\Vx.xx.xxxx Install AdvWDT_Vx.xx.xxxx.exe IPPC-5211WS Series User Manual... - Page 58 Click Next Choose Advantech [EC]WDT, then click Next IPPC-5211WS Series User Manual...
- Page 59 Click Install Click Finish IPPC-5211WS Series User Manual...
- Page 60 Choose Yes, then click OK to restart IPPC-5211WS Series User Manual...
-
Page 61: Advantech Lmsensor Driver Installation
Restart Note! The drivers and utilities used for the panel PCs are subject to change without notice. If in doubt, check Advantech's website or contact our application engineers for the latest information regarding drivers and utilities. IPPC-5211WS Series User Manual... - Page 62 IPPC-5211WS Series User Manual...
-
Page 63: Appendix Cbios Setup
Appendix BIOS Setup... -
Page 64: Introduction
BIOS supports your CPU. If there is no number assigned to the patch code, please contact an Advantech application engineer to obtain an up-to-date patch code file. This will ensure that your CPU's system status is valid. -
Page 65: Main Setup
System Date using the <Arrow> keys. Enter new values through the keyboard. Press the <Tab> key or the <Arrow> keys to move between fields. The date must be entered in MM/DD/YY format. The time must be entered in HH:MM:SS format. IPPC-5211WS Series User Manual... -
Page 66: Advanced Bios Features Setup
Setup option by highlighting it using the <Arrow> keys. All Advanced BIOS Setup options are described in this section. The Advanced BIOS Setup screens are shown below. The sub menus are described on the following pages. IPPC-5211WS Series User Manual... - Page 67 State). This option may be not effective with some OS. ACPI Sleep State This item allows users to select the ACPI sleep state. The system will enter when the SUSPEND button is pressed. Lock Legacy Resources Enables or Disables Lock of Legacy Resources IPPC-5211WS Series User Manual...
- Page 68 This page display all information about system Temperature/Voltage/Current. iManager WatchDog IRQ This item allows users to set the IRQ number of EC watchdog. EC Watch Dog Function This item allows users to select EC watchdog timer. IPPC-5211WS Series User Manual...
- Page 69 Serial Port Console Redirection Console Redirection This item allows users to enable or disable console redirection for Microsoft Windows Emergency Management Services (EMS). Console Redirection This item allows users to configuration console redirection detail settings. IPPC-5211WS Series User Manual...
- Page 70 XD can prevent certain classes of malicious buffer overflow attacks when com- bined with a supporting OS. Intel Virtualization Technology This item allows users to enable or disable Intel Virtualization Technology. When enabled, a VMM can utilize the additional hardware capabilities provided by Vanderpool Technology. IPPC-5211WS Series User Manual...
- Page 71 This value controls the temperature of the ACPI critical Trip Point in which the OS will shut the system off. Passive Trip Point This value controls the temperature of the ACPI critical Trip Point - the point in which OS will begin throttling the processor. IPPC-5211WS Series User Manual...
- Page 72 Enable / Disable Serial ATA Port0 / Port1. SATA Port 0 / Port1 HotPlug Enable / Disable SATA Port0 / Port1 hotplug function. Note! Before installing WEC7 image, IDE configuration must set SATA Mode to IDE Mode in BIOS to boot successfully. IPPC-5211WS Series User Manual...
- Page 73 OS Selection to choose Windows 8.X / Windows 7 / Windows CE 7 C.2.2.10LAN Controller LAN A Controller Enable or disable onboard NIC. LAN B Controller Enable or disable onboard NIC. Wake on LAN Enable Enable/Disable integrated LAN to wake the system IPPC-5211WS Series User Manual...
- Page 74 Controls the execution of UEFI and Legacy Storage OpROM Video Controls the execution of UEFI and Legacy Video OpROM Other PCI devices Determines OpROM execution policy for devices other than Network, Storage, or Video IPPC-5211WS Series User Manual...
- Page 75 Maximum time the device will take before it properly report itself to the host con- troller. "Auto" uses default value: for a Root port it is 100 ms, for a Hub port the delay is taken from Hub descriptor. IPPC-5211WS Series User Manual...
-
Page 76: Chipset Configuration
C.2.3 Chipset Configuration Intel IGD Configuration Configure Intel IGD Settings C.2.3.1 Intel IGD Configuration GOP Driver Enable GOP Driver will unload VBIOS; Disable it will load VBIOS. IPPC-5211WS Series User Manual... -
Page 77: Security
To access the sub menu for the following items, select the item and press <Enter>: Administrator Password Set Administrator Password.. User Password Set User Password.. IPPC-5211WS Series User Manual... -
Page 78: Boot
Enables or disables boot with initialization of a minimal set of devices required to launch active boot option. Has no effect for BBS boot options. Boot Option #1 Sets the system boot order Boot Option #2 Sets the system boot order IPPC-5211WS Series User Manual... -
Page 79: Save & Exit
This item allows you to restore the user defaults to all the options. Boot Override Boot device select can override your boot priority. Launch EFI Shell from files system device Attempts to Launch EFI Shell application (Shell.efi) from one of the available file system devices. IPPC-5211WS Series User Manual... - Page 80 No part of this publication may be reproduced in any form or by any means, electronic, photocopying, recording or otherwise, without prior written permis- sion of the publisher. All brand and product names are trademarks or registered trademarks of their respective companies. © Advantech Co., Ltd. 2015...
Need help?
Do you have a question about the IPPC-5211WS Series and is the answer not in the manual?
Questions and answers