Table of Contents
Advertisement
Quick Links
Advertisement
Table of Contents

Related Manuals for Microcom 360C


Summary of Contents for Microcom 360C
- Page 1 360C Operator’s Manual 880076-0101 Rev.2...
-
Page 2: Table Of Contents
Table of Contents TABLE OF CONTENTS......................2 READ THIS FIRST ....................... 9 SAFETY PRECAUTIONS ....................10 GENERAL PRECAUTIONS ....................11 OTHER CAUTIONS ......................13 ........13 EGARDING THE RINTING OF APER URRENCY AND ECURITIES ........13 EGARDING THE REVENTION OF LECTROMAGNETIC NTERFERENCE REGARDING THE REGULATION OF HARMONIC WAVES .......... -
Page 3: Table Of Contents
CONNECTING VIA WIRELESS LAN ................. 43 LAN ................ 43 REPARING TO ONNECT VIA IRELESS )............43 ONNECTING VIA AN CCESS OINT NFRASTRUCTURE (AP M ) ............45 IRECTLY ONNECTING TO THE ACHINE USING BOTH A WIRED LAN AND WIRELESS LAN CONNECTION ........ 46 CONNECTING A USB CABLE ................... - Page 4 CONFIGURATION ......................72 PRINT INFO ........................74 MENUS ..........................75 ADMIN SETUP ........................78 PRINT STATISTICS ......................86 CALIBRATION ........................86 WIRELESS SETTING ......................88 WIRELESS (AP MODE) SETTING ..................88 BOOT MENU ........................89 LOADING PAPER ......................91 AVAILABLE PAPER SIZES ....................92 ......................
- Page 5 CHANGING THE COLOR SETTINGS................130 REDUCING TONER CONSUMPTION WHEN PRINTING ..........131 OVERLAYING TEXT OR LOGOS WHEN PRINTING ............132 REGISTERING PRINT DOCUMENTS AS NEW FORMS ..........133 SAVING THE DOCUMENTS TO PRINT AS FILES IN THE FORM FORMAT ..... 134 PRINTING HIDDEN TEXT (WATERMARKS) ..............
- Page 6 «CANCEL» B ..................198 RESSING UTTON ..................198 ANCELING FROM A OMPUTER CANNOT PRINT ....................... 199 LIST OF MESSAGES ....................... 200 CONNECTION PROBLEMS ..................... 208 ..................208 ETWORK ONNECTION ROBLEMS LAN C ................208 IRELESS ONNECTION ROBLEMS USB C .................... 210 ONNECTION ROBLEMS PRINT RESULT PROBLEMS ...................
- Page 7 ......226 APER REQUENTLY CCUR APER ULLED IN AT AN NGLE ......226 ACHINE ECOVER HEN THE APER EMOVED ................226 APER URLS APER RINKLES ..........227 APER TUCK IN THE OLLER OF THE USER ............... 227 APER TICKS TO THE RANSFER ...................
- Page 8 ............... 287 WITCHING THE TATUS ONITOR ETTINGS SPECIFICATIONS ......................289 GENERAL SPECIFICATIONS ..................290 PRINTING SPECIFICATIONS ..................291 NETWORK RELATED ...................... 292 LAN S ..................292 IRELESS PECIFICATIONS LIST OF INCLUDED FONTS .................... 293 CONSUMABLES/MAINTENANCE PARTS/OPTIONS ............. 294...
-
Page 9: Read This First
Read This First Safety Precautions General Precautions Other Cautions Trademarks Screens Licenses... -
Page 10: Safety Precautions
Safety Precautions Ignoring these instructions and improperly handling the machine may lead to death or serious injury. Ignoring these instructions and improperly handling the machine may lead to injury. -
Page 11: General Precautions
General Precautions Do not touch the safety switch inside the machine. High voltage that can cause electric shock may result. Injury may also result from the turning of gears. Do not use flammable sprays near the machine. Fire may result due to the high temperature parts inside the machine. - Page 12 Do not place objects such as cups of water on the machine. Electrocution or fire may result. Ensure that pet urine does not enter or wet the machine. Electrocution or fire may result. If you open the cover of the machine, do not touch the fuser unit. Burns may result.
-
Page 13: Other Cautions
Other Cautions Regarding the Printing of Paper Currency and Securities, etc. • The duplication and printing of items such as paper currency (including foreign paper currency), national bonds, municipal bonds, postage stamps, and revenue stamps or the creation of similar misleading objects is a crime and punishable by the law, regardless of the intended use. - Page 14 Screens Unless otherwise specified, this manual uses screens from the following operating system in examples. · Windows 10 Screens may differ from those in this manual, depending on the operating system, model, and version you are using. Marks This manual uses the following marks. Mark Meaning Indicates cautions for operating the machine correctly.
-
Page 15: Screens
Licenses The software license agreement that customers agree to before using the products included in the package of the machine is indicated below. • Request for Agreement Please make sure to read this agreement before using the products included in the package of the machine. - Page 16 4. Guarantee (1) Oki Data and its licensers do not guarantee anything regarding the software, including the following. That using the software will enable the customer to obtain the desired performance or results. That the software is free from defects. That the software does not violate the rights of third parties.
-
Page 17: Unpacking
Unpacking How to Unpack the Machine Checking the Accessories Installing Consumables... -
Page 18: How To Unpack The Machine
How to Unpack the Machine · Packaging and cushioning materials are used for transporting the machine. Do not dispose of them, and keep them for future use. Remove the machine from the box, and then remove the cushioning material and plastic bag. Lift the machine, and then place it where it is to be installed. - Page 19 · Toner Cartridge · A toner cartridge can print approximately 5,000 pages (reference value based on tests printing simple 1-inch square black mark patterns). · Guide Rib x 4 · Power Cord · A LAN cable and USB cable are not included. Prepare cables suitable for the connection environment.
-
Page 20: Installing Consumables
Installing Consumables · Do not turn the power of the machine on. · Install the consumables after confirming that the power of the machine is off. · Use extra care when handling the image drum (the glossy cylinder), because it is fragile. ·... - Page 21 Peel off the protective tape. Peel off the protective tape, and remove the desiccant. Remove the cover toner.
- Page 22 Close the top cover. Open the toner cartridge cover. Take out the toner cartridge from the packaging bag, and shake it several times vertically and horizontally.
- Page 23 Place the toner cartridge in the direction that it will be attached to the machine. Attach the toner cartridge. Close the toner cartridge cover.
-
Page 25: Using The Machine
Using the Machine Installation Names of Components Installing Options Turning On or Off the Machine Connecting a LAN Cable Connecting via Wireless LAN Using Both a Wired LAN and Wireless LAN Connection Connecting a USB Cable Installing the Printer Driver to a Computer... -
Page 26: Installation
Installation Installation Environment Install the machine in the following environment: Ambient temperature: 10°C to 32°C Ambient humidity: 20% to 80% relative humidity Maximum wet bulb temperature: 25°C · Use care to prevent condensation. It may cause a malfunction. · If you install the machine in a location whose ambient humidity is 30% RH or below, use a humidifier or antistatic mat. -
Page 27: Installation Space
Installation Space Install the machine on a flat surface that is wide enough to accommodate the legs of the machine. As shown in the following figures, allow enough space around the machine for your media type. 15” 7.75” 9.60” 17.28” 7.68”... -
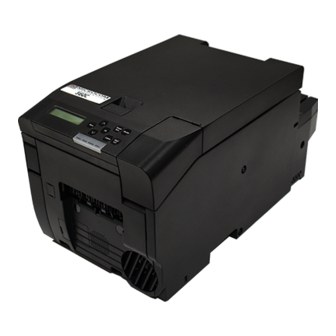
Page 28: Names Of Components
Names of Components Front View Name Description Top Cover The top cover of the machine. Close this when printing. Top Cover Lever Use this to open the top cover. LCD Panel Indicates the status of the machine and the settings. Toner Cartridge Cover Opens and closes when replacing the toner cartridge. -
Page 29: Side Of The Machine
Name Description Feeder Cover The cover of the paper feeder. Paper Inlet Load paper here. Feeder Cover Lever Use this to open the feeder cover. AC Inlet The terminal for the power cable. Paper Sensor The sensor for detecting the paper. Paper Guide Align this with the paper width. -
Page 30: Inside Of The Machine
Inside of the Machine Name Description LED Heads The LED heads. Image Drum Unit The image drum unit. Fuser Unit The fuser unit. Take care, as this becomes hot while printing. Toner Cartridge The toner cartridge. Transfer Belt Unit The transfer belt unit. This is set below the image drum unit. -
Page 31: Installing Options
Installing Options The machine has the following optional products. • Wireless LAN Module Installed to connect via wireless LAN. • Presenter Unit Installed to stop the printed paper before it is fully ejected. Installing the Wireless LAN Module Install the Wireless LAN Module to connect the machine and a computer via wireless LAN. Turn off the machine. - Page 32 Insert the cable of the Wireless LAN Module into the recess on the side of the machine. Attach the Wireless LAN Module to the front of the machine. Turn the machine on while holding «OK» button on the operation panel. Hold «OK»...
- Page 33 When the password has been entered, press «OK» button. Press «∧» button or «∨» button to display [WIRELESS MODULE], and press «OK» button. WIRELESS MODULE Press «∧» button or «∨» button to display [ENABLE], and press «OK» button. "*" is displayed on the right edge of the bottom of the screen. WIRELESS MODULE ENABLE Press «ONLINE»...
-
Page 34: Installing The Presenter Unit
Installing the Presenter Unit The Presenter Unit is installed to retain the printed paper in the outlet without ejecting it. When installation of the Presenter Unit is complete, set the Presenter Unit to [ENABLE] on the operation panel. · Installing the Presenter Unit Turn off the machine. - Page 35 Remove the Label-Cap (x 2). Remove the Cap-Cover-PSNT (x 2) of the Presenter Unit. Mount the Presenter Unit to the machine. · Take care, as it will not be completely secure.
- Page 36 Tighten the screws (x 2). Connect the connector.
- Page 37 Attach the Cover-Cable-PSNT. Attach the Cap-Cover-PSNT (x 2).
-
Page 38: Enable The Presenter Unit
Enable the Presenter Unit Turn on the machine. · For information on turning on the machine, refer to "Turning On the Machine". Confirm that [READY TO PRINT] is displayed on the machine. Press «∧» button or «∨» button several times to display [ADMIN SETUP]. Press «OK»... -
Page 39: Turning On Or Off The Machine
Turning On or Off the Machine About the Power Supply Ensure the following conditions for the power supply. N36700A: 110 to 127V AC (Range 99 to 140V AC) N36700B: 220 to 240V AC (Range 198 to 264V AC) Power frequency: 50/60 Hz ± 2% ·... - Page 40 • Be sure to turn off the machine before connecting and disconnecting the power cord and the ground wire. • Be sure to connect the ground wire to the designated ground terminal. • If the machine cannot be grounded, contact your dealer. •...
-
Page 41: Turning On The Machine
Turning On the Machine Connect the power cable to the power connector on the rear of the machine. Insert the power plug into the outlet. Open the cover on the front left of the machine and press and hold the power switch for approximately one second. -
Page 42: Turning Off The Machine
Turning Off the Machine Open the cover on the front left of the machine and press and hold the power switch for one second. Wait until [SHUTTING DOWN. PLEASE WAIT/TURN OFF AUTOMATICALLY] is displayed on the operation panel and the operation panel turns off. Remove the power plug from the outlet. -
Page 43: Connecting A Lan Cable
Connecting a LAN Cable A LAN cable can be used to connect the machine to a computer via a wired network. Before installing the printer driver, connect the printer to the network using a LAN cable. Prepare a LAN cable and hub. Make sure that the machine and the computer are turned off. -
Page 44: Connecting Via Wireless Lan
Connecting via Wireless LAN Preparing to Connect via Wireless LAN Connecting via an Access Point Check whether your wireless LAN access point supports the following environment. · Standard: IEEE 802.11 a/b/g/n · Access method: Infrastructure mode Check whether the wireless LAN access point supports WPS. If it does not support WPS, check the SSID and encryption key in the manual that came with the wireless LAN access point. - Page 45 Connecting Using WPS If the wireless LAN access point supports WPS, the connection to the wireless LAN can be made easily by using the easy setup button (WPS button). Follow the procedure below for the setup. Confirm the position of the easy setup button and when to press the button by referring to the user manual of the wireless LAN access point.
-
Page 46: Directly Connecting To The Machine (Ap Mode)
Press «∧» button or «∨» button on the operator panel to display [NETWORK SETTING], and then press the «OK» button. Press «OK» button when [IP ADDRESS SET] is displayed. Press «∧» button or «∨» button on the operator panel to select [AUTO] or [MANUAL]. -
Page 47: Using Both A Wired Lan And Wireless Lan Connection
Using Both a Wired LAN and Wireless LAN Connection The machine can use both a wired LAN and wireless LAN connection at the same time. The available combinations are indicated in the table below. · Wireless LAN (infrastructure) and wireless LAN (AP mode) cannot be enabled at the same time. ·... -
Page 48: Connecting A Usb Cable
Connecting a USB Cable · A USB cable is not included with the machine. Prepare an A-B type cable separately. Prepare a USB cable. Make sure that the machine and the computer are turned off. Insert the B end of the USB cable into the USB interface connector of the machine. ·... -
Page 49: Installing The Printer Driver To A Computer
Installing the Printer Driver to a Computer This section uses the procedure for installing from the software DVD-ROM of the machine as an example. The software DVD-ROM is not included with the machine. Obtain the "Software DVD- ROM" or the software you want to install from the provider of your machine. Connect this machine to a computer via a network or USB cable. -
Page 51: Using The Operation Panel
Using the Operation Panel Name and Function Description of the Display Entering and Viewing the Menu Entering Characters Printing a Demonstration Page Adjusting the Volume Checking Information About the Machine Setting the Power Save Mode Transition Time Setting the Sleep Mode Transition Time Precautions for the Power Save Function Setting the Auto Power Off Time Initializing the Flash Memory... -
Page 52: Name And Function
Name and Function Name Description Displays the status of the machine and the menu items. Turns off when the machine is in the Power Save mode. Enters the Menu mode. Returns to the previous item «∧» Button when the machine is in the Menu mode. Press and hold it for 1 second or more to skip forward. -
Page 53: Description Of The Display
Description of the Display The display indicates the status of the machine and the menu items, etc. When Printing Can Be Performed When the machine can perform printing, [READY TO PRINT] is displayed on the top of the screen. READY TO PRINT When an Error Has Occurred in the Machine Top: Displays the solution. -
Page 54: Entering And Viewing The Menu
Entering and Viewing the Menu Confirm that [READY TO PRINT] is displayed on the machine. READY TO PRINT Press «∧» button or «∨» button to enter the Menu mode and display the menu categories. DEMO PAGE Press «∧» button or «∨» button several times to display the category you want to set, and press «OK»... - Page 55 · [>>] is displayed on the bottom of the screen if there are lower menu categories. When an item is displayed on the top and a setting is displayed on the bottom, press «OK» button to make the setting flash and become changeable. Press «∧» button or «∨»...
-
Page 56: Entering Characters
Entering Characters When the screen for entering the password, etc. is displayed, press «∧» button or «∨» button to select the character to enter. Press «∧» button to display characters starting with lower case letters. The characters are displayed in the following order: lower case letters →... -
Page 57: Printing A Demonstration Page
Printing a Demonstration Page · Use cut sheet cut to the following size or continuous paper (roll paper) without a mark. The operation is not guaranteed for other paper. When printing on cut sheet Prepare paper that is 74 mm wide and 210 mm long. You can print on A4 or LETTER paper that has been cut to a quarter of its long side. -
Page 58: Adjusting The Volume
Adjusting the Volume A buzzer notifies the user when an error has occurred in the machine or printing has finished. By default, the machine is set to sound the buzzer when the paper has run out. This section describes how to change the volume and set whether to sound the buzzer. Setting the Volume Available values high, low, and off. -
Page 59: Setting The Volume For The Printing Complete Buzzer
Setting the Volume for the Printing Complete Buzzer The buzzer volume can be set to high, low, or off, and is set to off by default. If the buzzer volume is set to high or low, the buzzer sounds each time a page is printed by default, regardless of the page count of the print data. -
Page 60: Checking Information About The Machine
Checking Information About the Machine Printing and Checking a Report Perform the procedure below to print and check the values set in the machine. · Use cut sheet cut to the following size or continuous paper (roll paper) without a mark. The operation is not guaranteed for other paper. -
Page 61: Setting The Power Save Mode Transition Time
When you have finished checking, press «ONLINE» button, or press «BACK» button until [READY TO PRINT] is displayed. Setting the Power Save Mode Transition Time The machine enters the Power Save mode when it has not been used for a certain period of time. -
Page 62: Setting The Sleep Mode Transition Time
Setting the Sleep Mode Transition Time If the machine is not used for a certain period of time after it enters the Power Save mode, the machine enters the Sleep mode. 15 minutes is set by default. Confirm that [READY TO PRINT] is displayed on the machine. Press «∧»... -
Page 63: Precautions For The Power Save Function
Precautions for the Power Save Function The machine does not enter the Sleep mode in the following cases. · When an error has occurred in the machine The machine does not enter the Power Save mode in the following cases. ·... -
Page 64: Setting The Auto Power Off Time
Setting the Auto Power Off Time If the machine is not used for a certain period of time, it automatically turns off. By default, the machine does not automatically turn off. To make the machine automatically turn off, enable the Auto Power Off setting on the operation panel, and then set the time until the power turns off. -
Page 65: Initializing The Flash Memory
Initializing the Flash Memory When you initialize the flash memory, the following data is deleted. · Form data · Download demo print data · Saved menu settings Confirm that [READY TO PRINT] is displayed on the machine. Press «∧» button or «∨» button several times to display [ADMIN SETUP]. Press «OK»... -
Page 66: Initializing The Network Settings
If you selected [YES], the machine automatically restarts and the flash memory is initialized. Initializing the Network Settings The default network settings can be restored. Confirm that [READY TO PRINT] is displayed on the machine. Press «∧» button or «∨» button several times to display [ADMIN SETUP]. Press «OK»... -
Page 67: Initializing The Settings Of The Machine
Initializing the Settings of the Machine The default settings of the machine can be restored. When this operation is performed, the machine automatically restarts. Confirm that [READY TO PRINT] is displayed on the machine. Press «∧» button or «∨» button several times to display [ADMIN SETUP]. Press «OK»... -
Page 68: Changing The Administrator Password
Changing the Administrator Password This section describes the method for changing the administrator password. It is recommended that the default password is changed for increased security. Set 6 to 12 digits for the password. Numbers and lower case letters can be used for the password. Confirm that [READY TO PRINT] is displayed on the machine. -
Page 69: Correcting The Color Density
Correcting the Color Density This section describes the procedure for correcting the density on the operation panel. Confirm that [READY TO PRINT] is displayed on the machine. Press «∧» button or «∨» button several times to display [CALIBRATION], and press «OK»... -
Page 70: Adjusting The Color Balance (Density)
Adjusting the Color Balance (Density) You can adjust the cyan, magenta, and yellow highlights (light areas), intermediate areas, and dark areas. This section describes the procedure for adjusting cyan. If you want to adjust other colors, perform the same operation for those colors. Confirm that [READY TO PRINT] is displayed on the machine. -
Page 71: Correcting Color Shift
Correcting Color Shift This section describes the procedure for correcting color shift on the operation panel. Confirm that [READY TO PRINT] is displayed on the machine. Press «∧» button or «∨» button several times to display [CALIBRATION], and press «OK» button. Press «∧»... -
Page 72: Adjusting The Paper Sensors (Sensor Calibration)
Adjusting the Paper Sensors (Sensor Calibration) If paper jams or paper mark detection errors occur frequently, follow the procedure below to perform sensor calibration. The paper sensors are adjusted to the position suitable for the paper to use. · Adjust the paper sensors to a suitable position, as they cannot be correctly calibrated unless they are in a suitable position. -
Page 73: Menu List
Menu List This section describes the menu items that can be set on the operation panel. Menu DEMO PAGE For details, refer to "DEMO PAGE". CONFIGURATION For details, refer to "CONFIGURATION". PRINT INFO For details, refer to "PRINT INFO". MENUS For details, refer to "MENUS". - Page 74 Item Setting Description FUSER LIFE REMAINING nnn% Displays the remaining life of the fuser unit. TONER (n.nK) REMAINING nnn% Displays the remaining life of the toner cartridge. NETWORK PRINTER NAME **************** Displays the machine name. (*When the *************** Wireless LAN SHORT NAME *************** Displays the short name.
-
Page 75: Print Info
BAND 2.4 GHz (B) Displays the bandwidth being used. 2.4 GHz (B+G) 2.4 GHz (B+G+N) 2.4 GHz (G) 2.4 GHz (N) 2.4 GHz (B/G/N) 2.4 GHz 5.0 GHz (A+N) 5.0 GHz (A) 5.0 GHz (N) 5.0 GHz (A/N) 5.0 GHz CHANNEL Displays the channel number being used. -
Page 76: Menus
MENUS Settings related to printing and the operation of the machine. Item Setting Description FEEDER CONFIG PAPER FORM CONTINUOUS PAPER Sets the paper format. CUT PAPER X DIMENSION 1.00 IN / 25.0 MM Sets the paper width. 2.91 IN / 74.0 MM 3.40 IN / 86.0 MM Y DIMENSION 2.10 IN / 53.0 MM... - Page 77 Item Setting Description SYSTEM ADJUST POW SAVE TIME 0 MIN Sets the time until the machine enters the 1 MIN Power Save mode. 2 MIN 3 MIN 4 MIN 5 MIN 10 MIN 15 MIN 30 MIN 60 MIN SLEEP TIME 1 MIN Sets the time until the machine enters the 2 MIN...
- Page 78 Item Setting Description TIMEOUT NET 0 SEC Sets the time that the network ports are left 5 SEC open when an operation finishes. 90 SEC 290 SEC 295 SEC 300 SEC JAM RECOVERY Sets whether to print the page where a paper jam occurred again.
-
Page 79: Admin Setup
Item Setting Description BG SETTING Corrects uneven printing due to differences in the print density/print frequency or temperature/humidity. Change this value when the background is dense. DRUM CLEANING Set ON to reduce white horizontal streaks that appear in the print results. The lifetime of the image drum unit is shorter when this is set to HIGH HUM. - Page 80 Item Setting Description SNMP ENABLE Sets whether to enable or disable SNMP. DISABLE NETWORK SCALE NORMAL NORMAL: Operates efficiently even when connected to a hub SMALL with the spanning tree function. However, the printer startup time may become longer when connected to a small LAN with two or three computers.
- Page 81 BARCODE ADJUST Adjusts the line width of barcodes. ON1: Makes barcodes one dot thinner than the standard line width. ON2: Makes barcodes two dots thinner than the standard line width. Item Setting Description PRESENTER MODE Configures paper output. MODE1 OFF: Outputs paper with the regular output method. MODE2 MODE1: Retains the paper with the Presenter Unit and prints the next page when the paper is pulled out.
- Page 82 SYMBOL SET PC-8 Sets the PCL symbol set. PC-8 Dan/Nor PC-8 Grk PC-8 TK PC-775 PC-850 PC-851 Grk PC-852 PC-855 PC-857 TK PC-858 PC-862 Heb PC-864 L/A PC-866 PC-866 Ukr PC-869 PC-1004 Pi Font Plska Mazvia PS Math PS Text Roman-8 Roman-9 Roman Ext...
- Page 83 Item Setting Description Wingdings Dingbats MS Symbol OCR-A OCR-B OCRB Subset2 HP ZIP USPSFIM USPSSTP USPSZIP Arabic-8 Bulgarian CWI Hung DeskTop German Greek-437 Greek-437 Cy Greek-737 Greek-8 Greek-928 Hebrew NC Hebrew OC Hebrew-7 Hebrew-8 IBM-437 IBM-850 IBM-860 IBM-863 IBM-865 ISO Dutch ISO L1 ISO L2 ISO L4...
- Page 84 Item Setting Description WHITE PAGE SKIP Selects whether to print blank pages. ON: Do not print blank pages OFF: Print blank pages CR FUNCTION Sets the operation to take when a CR code is received. CR+LF CR: Return CR+LF: Return and line feed LF FUNCTION Sets the operation to take when an LF code is received.
- Page 85 Item Setting Description OTHERS RECEIVE AUTO Sets the reception buffer size to secure for the local interface. SETUP SETUP BUF SIZE 0.5 MB Normally, [AUTO] is used. 1 MB When memory overflow errors occur, lowering this setting may 2 MB improve the problem.
- Page 86 Item Setting Description NEARLIFE DRUM Sets the timing for displaying the near life warning for the image SETUP NEARLIFE 1000 drum unit. 1500 Displays the near life warning for the image drum unit in front of 2000 the selected value for the image drum unit lifetime. 2500 3000 3500...
-
Page 87: Print Statistics
PRINT STATISTICS Settings related to print statistics. Item Setting Description USAGE REPORT ENABLE Sets whether to enable or disable the print statistics function. DISABLE The device restarts if this setting is changed. RST MAIN CNT EXECUTE Resets the main counter. CHANGE NEW PASSWORD ****... - Page 88 Item Setting Description MAGENTA TUNING MAGENTA Adjusts the magenta highlights (light areas). HIGHLIGHT Positive values are darker and negative values are lighter. MAGENTA MID- Adjusts the magenta intermediate areas. TONE Positive values are darker and negative values are lighter. MAGENTA DARK Adjusts the magenta dark areas.
-
Page 89: Wireless Setting
WIRELESS SETTING Settings related to wireless LAN. Item Setting Description WIRELESS (INFRASTRUCTURE) ENABLE Sets whether wireless (infrastructure) is enabled or DISABLE disabled. NETWORK IP ADDRESS SET AUTO Sets the method for setting the IP address. SETTING MANUAL IPV4 ADDRESS xxx.xxx.xxx.xxx Sets the IP address. -
Page 90: Boot Menu
BOOT MENU Perform the following operation to display the BOOT MENU. If the machine is on, turn it off. Turn the machine on while holding «OK» button on the operation panel. Hold «OK» button until [BOOT MENU] is displayed on the screen. When [BOOT MENU] is displayed, release your finger and press «OK»... -
Page 92: Loading Paper
Loading Paper Available Paper Sizes Paper Storage Flow of Loading Paper Setting Paper Information on the Operation Panel Setting the Paper Sensors Attaching the Guide Ribs Loading Paper Feeding the Paper... -
Page 93: Available Paper Sizes
Available Paper Sizes · Paper Format Paper Format Description Continuous Paper Paper wound into a roll or paper folder along a perforation Cut Sheet Paper cut into rectangles in the range of 25 mm to 86 mm width and 53 mm to 551 mm length ·... -
Page 94: Paper Specifications
Paper Specifications · Continuous Paper: Without Mark B Printable Range Paper Thickness 0.080 to 0.250 mm Paper Width 25 to 86 mm Cut Length 53 to 551 mm Side margin 4.2 mm 2 mm Top margin 4.2 mm 2 mm Bottom margin 6.3 mm 2 mm... - Page 95 · Continuous Paper: With Black Mark B Printable Range Paper Thickness 0.080 to 0.250 mm Paper Width 25 to 86 mm Cut Length 53 to 551 mm Side margin 4.2 mm 2 mm Top margin 4.2 mm 2 mm Bottom margin 6.3 mm 2 mm Black Mark Width...
- Page 96 · Continuous Paper: With Holes With holes in the paper center Without holes in the paper center B Printable Range B Printable Range Paper Thickness 0.080 to 0.250 mm Paper Width 36 to 86 mm Cut Length 53 to 551 mm Side margin 4.2 mm 2 mm...
- Page 97 Usage Conditions When there is a hole in the center of the paper, set [Bottom margin] to a value equal or above the size of the hole. When there is not a hole in the center of the paper, set [Top margin] and [Bottom margin] to a value equal or above half the size of the hole.
- Page 98 · Cut Sheet B Printable Range Paper Thickness 0.060 to 0.250 mm Paper Width 25 to 86 mm Cut Length 53 to 551 mm Side margin 4.2 mm 2 mm Top margin 4.2 mm 2 mm Bottom margin 6.3 mm 2 mm Paper Format Setting CUT PAPER...
- Page 99 · Roll Paper Outer Wind Diameter 203.2 mm or less Wind Core Inner Diameter 50.8 mm Wind Core Outer Diameter Not specified Printed Surface Outer surface only · Paper with Perforation Paper Thickness 0.060 to 0.250 mm Cut position 1.5 mm or more ·...
-
Page 100: Paper Storage
Paper Storage Store paper under the following conditions to maintain quality. · In a dark, dry, and flat location such as inside a cabinet. · On a flat surface · Temperature: 20°C · Humidity: 50% RH (relative humidity) Do not store paper in places such as the following: ·... -
Page 101: Flow Of Loading Paper
Flow of Loading Paper For details, refer to "Setting Paper Setting Paper Information to the Machine Information on the Operation Panel". Setting the Paper Sensors For details, refer to "Setting the Paper Sensors". Attaching the Guide Ribs For details, refer to "Attaching the Guide Ribs". -
Page 102: Setting Paper Information On The Operation Panel
Setting Paper Information on the Operation Panel Use the operation panel to set the information for the paper to use to the machine. Set the information in the following order: paper format → paper size → paper weight → cut type →... - Page 103 · Paper Weight Set the weight of the paper to use. You can set LIGHT, MEDIUM LIGHT, MEDIUM, MEDIUM HEAVY, HEAVY, ULTRA HEAVY1, ULTRA HEAVY2. Press «∨» button once to display [MEDIAWEIGHT], and press «OK» button. With the setting flashing, press «∧» button or «∨» button to display the value you want to set, and press «OK»...
-
Page 104: Setting The Paper Sensors
Setting the Paper Sensors Checking the Paper Sensor Position The position for setting the paper sensors differs according to the paper to use. Adjust the paper sensors while checking the position based on the table below. · A paper jam will be incorrectly detected if the sensor position and cut type setting of the machine do not match. - Page 105 Printer Driver or Operation Panel Setting* Supported Sensor Position Paper Type PAPER FORM CUT TYPE GAP LENGTH Paper with black Top: Position of black mark CONTINUOUS B/M(FRONT) mark on the Bottom: Position that does not PAPER front overlap with the black mark on the front Paper with black Top: Position that does not overlap...
- Page 106 Printer Driver or Operation Panel Setting* Supported Sensor Position Paper Type PAPER FORM CUT TYPE GAP LENGTH Paper without Top: Position that does not overlap CONTINUOUS LENGTH mark with the bottom sensor PAPER Bottom: Center Cut Sheet Top: Position that does not overlap CUT PAPER with the bottom sensor Bottom: Center...
-
Page 107: Adjusting The Paper Sensor Position
Adjusting the Paper Sensor Position · If the guide ribs are attached, remove them before adjusting the position of the paper sensors. When the adjustment is complete, attach them again. · For information on attaching the guide ribs, refer to "Attaching the Guide Ribs." Insert your finger below the gray lever on the left of the machine rear, and lift it up to open the feeder cover. - Page 108 Push in the metal part of the upper sensor to fix the sensor. Insert a stick-shaped thing with a pointing tip (such as a ball-point pen) below the metal part of the lower sensor, and pull it out to unlock it. Hold the both ends of the lower sensor and move it to the correct position.
-
Page 109: Attaching The Guide Ribs
Close the feeder cover. Attaching the Guide Ribs Feed Direction Feed Direction Feed Direction Turn the machine to make its rear side face to you. Insert your finger below the gray lever on the left of the machine rear, and lift it up to open the feeder cover. - Page 110 Attach the guide rib to the position where the paper edge will be retained of the groove where the paper sensors move. Paper Sensor Guide Rib Guide Rib · Ensure that the paper sensors are not moved. · Take care of the orientation of the guide rib. ·...
-
Page 111: Loading Paper
Loading Paper Set the upper and lower paper sensors in the appropriate positions. · For details, refer to "Setting the Paper Sensors". Insert your finger below the gray lever on the left of the machine rear, and lift it up to open the feeder cover. - Page 112 Turn down the paper guide lever toward you to lock it. Remove the paper temporarily, and close the feeder cover. Insert the paper into the inlet until it stops. The paper is automatically loaded.
-
Page 113: Feeding The Paper
Feeding the Paper Feeding is performed for the paper set in the machine according to the machine settings. Execute feeding in the following cases. Printing may not be able to be performed correctly unless feeding is performed. · When paper is set in the machine again because it had run out, etc. ·... -
Page 114: Printing
Printing Registering Paper Information to the Printer Driver Printing from a Computer Printer Driver Screens and Functions Registering Frequently Used Settings (Favorites) Specifying the Print Orientation Rotating the Print Result 180 Degrees Specifying the Number of Prints Printing from the Last Page Cutting Every Specified Number of Pages Changing the Print Quality Printing with the Photo Mode... -
Page 115: Registering Paper Information To The Printer Driver
Registering Paper Information to the Printer Driver Register the information for the paper to use. Click [Start], and select [Control Panel] in [Windows System]. Click [View devices and printers]. Right-click the [Pro330 PCL6] icon, and select [Printing Preferences]. Click [User-defined paper] on the [Setup] tab. Enter the information for the paper to register. -
Page 116: Adjusting The Paper Sensors (Sensor Calibration)
Adjusting the Paper Sensors (Sensor Calibration) If paper jams or paper mark detection errors occur frequently, follow the procedure below to perform sensor calibration. It adjusts the paper sensors to the position suitable for the paper to use. · For details, refer to "Setting the Paper Sensors". ·... -
Page 117: Printing From A Computer
Printing from a Computer Word pad is used here as an example. Load the paper. · For details, refer to "Chapter 5 Loading Paper". Open the file to print. Select [Print] from the [File] menu. Select [Pro330] as the printer, and click [Preferences]. Select the paper to use in [Paper Settings] on the [Setup] tab. -
Page 118: Printer Driver Screens And Functions
Printer Driver Screens and Functions This section describes the functions of the printer driver. The printer driver screen is displayed by opening the file to print and clicking [Print] - [Preferences] in the [File] menu. [Setup] Tab Item Description Favorites Enables the printer driver settings to be saved to a file. -
Page 119: [Color] Tab
[Color] Tab Item Description Color Mode Displays the color mode set with the [Detail] button. Detail Configures settings related to color printing. Toner Saving Configures settings related to saving toner when printing. -
Page 120: [Overlays] Tab
[Overlays] Tab Item Description Overlay Selects whether to print the document with a form overlaid, register the document as a new form, or save the document to a file as a form. Do not use overlay print Prints documents without overlaying a form. Register print document as a new Registers the document to print to the printer as a new form... -
Page 121: [Extend] Tab
[Extend] Tab Item Description Watermarks You can print data created by an application with a watermark over it. Fonts Configures settings related to TrueType fonts and printer fonts. Drawing position adjustment Adjusts the position of the drawing data created by the printer driver. -
Page 122: Registering Frequently Used Settings (Favorites)
Registering Frequently Used Settings (Favorites) Registering frequently used settings to favorites with a name eliminates the need for changing the settings each time printing is performed. Select the registered name when printing. Open the file to print. Select [Print] from the [File] menu. Click [Preferences]. -
Page 123: Specifying The Print Orientation
Specifying the Print Orientation Perform the procedure below to change the print orientation. Open the file to print. Select [Print] from the [File] menu. Click [Preferences]. Select the desired print orientation in [Orientation] on the [Setup] tab. Click [OK]. Click [Print]. -
Page 124: Rotating The Print Result 180 Degrees
Rotating the Print Result 180 Degrees You can change the settings of the printer driver to rotate the print result by 180 degrees, without changing the file to print. Open the file to print. Select [Print] from the [File] menu. Click [Preferences]. -
Page 125: Specifying The Number Of Prints
Specifying the Number of Prints Available values are from 1 to 999. Open the file to print. Select [Print] from the [File] menu. Click [Preferences]. Enter the number of prints in [Copies] on the [Setup] tab. Click [OK]. Click [Print]. -
Page 126: Printing From The Last Page
Printing from the Last Page The document will be in page order if the print results are stacked with the printed surface facing Open the file to print. Select [Print] from the [File] menu. Click [Preferences]. Select [Print in reverse order] on the [Setup] tab. Click [OK]. -
Page 127: Cutting Every Specified Number Of Pages
Cutting Every Specified Number of Pages You can cut the paper every specified number of pages. Specify the position to cut the paper when using continuous paper. Open the file to print. Select [Print] from the [File] menu. Click [Preferences]. Enter the number of pages to cut the paper at in [Page(s) per cut] in [Cut Mode] on the [Setup] tab. -
Page 128: Changing The Print Quality
Changing the Print Quality Perform the procedure below to change the print quality. Open the file to print. Select [Print] from the [File] menu. Click [Preferences]. Select a value of your choice in [Quality] on the [Setup] tab. Click [OK]. Click [Print]. -
Page 129: Printing With The Photo Mode
Printing with the Photo Mode Perform the procedure below to print the image data of photos in detail. Open the file to print. Select [Print] from the [File] menu. Click [Preferences]. Select [Photo Enhance] on the [Setup] tab. Click [OK]. Click [Print]. -
Page 130: Correcting Barcodes For Printing
Correcting Barcodes for Printing Perform the procedure below to improve the accuracy of reading barcodes. Open the file to print. Select [Print] from the [File] menu. Click [Preferences]. Click [Preferences] in [Barcode Correction] on the [Setup] tab. Select a value in [Bar Width Adjustment]. ·... -
Page 131: Changing The Color Settings
Changing the Color Settings You can adjust color printing. Open the file to print. Select [Print] from the [File] menu. Click [Preferences]. Select a value of your choice in [Color Mode] on the [Color Settings] tab. Click [OK]. Click [Print]. -
Page 132: Reducing Toner Consumption When Printing
Reducing Toner Consumption When Printing You can reduce the toner consumption when performing test prints, etc. Open the file to print. Select [Print] from the [File] menu. Click [Preferences]. Select a value in [Toner Saving] on the [Color Settings] tab. Click [OK]. -
Page 133: Overlaying Text Or Logos When Printing
Overlaying Text or Logos When Printing You can print on forms registered in the machine in advance. Register the forms to the machine. · For details, refer to "Saving Documents to Print as Files in the Form Format". Open the file to print. Select [Print] from the [File] menu. -
Page 134: Registering Print Documents As New Forms
Registering Print Documents as New Forms Before performing overlay printing, perform the procedure below to register the forms. You can register up to 32 forms. Create the forms to register to the printer in an application. Select [Print] from the [File] menu. Click [Preferences]. -
Page 135: Saving The Documents To Print As Files In The Form Format
Saving the Documents to Print as Files in the Form Format You can save the documents to print as files in the form format. Create the forms to register to the printer in an application. Select [Print] from the [File] menu. Click [Preferences]. -
Page 136: Printing Hidden Text (Watermarks)
Printing Hidden Text (Watermarks) You can overlay user-defined text over files to print. Open the file to print. Select [Print] from the [File] menu. Click [Preferences]. Click [Watermark] on the [Extend] tab. Click [New]. Enter the characters to print in [Text] on the [Watermarks] screen. Configure [Font], [Size], and the other settings as required, and click [OK]. -
Page 137: Printing With A Specified Font
Printing with a Specified Font You can print by specifying a font in a computer or the machine. Open the file to print. Select [Print] from the [File] menu. Click [Preferences]. Select the [Extend] tab. Click [Font]. Select the print method in [TrueType Font Output Type]. Click [OK]. -
Page 138: Adjusting The Rendering Position
Adjusting the Rendering Position Perform the procedure below to adjust the position of the render data. Open the file to print. Select [Print] from the [File] menu. Click [Preferences]. Click [Adjustment] on the [Extend] tab. Enter the vertical (Y) and horizontal (X) values on the [Adjustment] screen, and click [OK]. Click [OK]. -
Page 139: Reducing The Size Of Spool Files (Disabling Emf)
Reducing the Size of Spool Files (Disabling EMF) The following procedure may be effective for reducing the time until processing is returned to the application after printing starts. Open the file to print. Select [Print] from the [File] menu. Click [Preferences]. Click [Advanced] on the [Extend] tab. -
Page 140: Keeping The Page Layout When Resizing A Document
Keeping the Page Layout when Resizing a Document The following procedure may be effective for maintaining the page layout when printing with a zoom ratio. Open the file to print. Select [Print] from the [File] menu. Click [Preferences]. Click [Advanced] on the [Extend] tab. On the [Advanced] screen, click [Keep page layout when resizing document], and select [ON] from the [Settings] drop-down box. -
Page 141: Correcting Faintness In Thin Lines And Small Text
Correcting Faintness in Thin Lines and Small Text Perform the procedure below to improve faintness in thin lines and small text. Open the file to print. Select [Print] from the [File] menu. Click [Preferences]. Click [Advanced] on the [Extend] tab. On the [Advanced] screen, click [Adjust ultra-fine lines], and select [ON] from the [Settings] drop-down box. -
Page 142: Executing Drum Cleaning Before Printing
Executing Drum Cleaning Before Printing Perform the procedure below to execute drum cleaning before printing. Open the file to print. Select [Print] from the [File] menu. Click [Preferences]. Click [Advanced] on the [Extend] tab. On the [Advanced] screen, click [Run maintenance cycle before printing], and select [ON] from the [Settings] drop-down box. -
Page 143: Skipping Blank Pages
Skipping Blank Pages You can skip the printing of blank pages to save paper. Open the file to print. Select [Print] from the [File] menu. Click [Preferences]. Click [Advanced] on the [Extend] tab. On the [Advanced] screen, click [Skip White Pages], and select [ON] from the [Settings] drop- down box. -
Page 144: Printing Using The Presenter Unit
Printing Using the Presenter Unit Using the optional Presenter Unit enables printed paper to be retained in the outlet without being output. The following operation modes exist. MODE1: Retain the printed paper in the outlet. Printing of the next paper starts when the printed paper is removed. - Page 145 Press «ONLINE» button, or press «BACK» button until [READY TO PRINT] is displayed. · When Set to MODE1 Open the file to print. Select [Print] from the [File] menu. Click [Preferences]. Select the items to set on each tab, and click [OK]. Click [Print].
-
Page 146: Removing The Windows Printer Driver
Removing the Windows Printer Driver · You must log in as the administrator to perform this procedure. Restart the computer. Click [Devices and Printers]. Right-click the icon for the printer to delete, and select [Remove device]. If the icons are grouped, select [Remove Print Queue] > [Pro330 PCL6]. When a confirmation message is displayed, click [Yes]. -
Page 148: Replacing Consumables
Replacing Consumables Cautions for Replacing Consumables Replacing the Toner Cartridge Replacing the Image Drum Unit Replacing the Fuser Unit Replacing the Transfer Belt Unit Replacing the Feed Roller Replacing the Paper Feed Roller... -
Page 149: Cautions For Replacing Consumables
Cautions for Replacing Consumables Observe the following cautions when replacing consumables. Do not throw toner or a toner cartridge into a fire. The toner will scatter, resulting in burns. Do not store a toner cartridge in a location where it is exposed to fire. The toner may ignite, resulting in fire or burns. - Page 150 When handling a paper jam or replacing toner cartridges, use care not to let your clothes or hands get dirty with toner. If toner stains your clothes, wash with cold water. If you warm the stained clothes by washing them with hot water or other methods, the toner will soak into the fabric and become impossible to remove.
-
Page 151: Replacing The Toner Cartridge
Replacing the Toner Cartridge When "ORDER TONER" is displayed on the screen of the operation panel, prepare a replacement toner cartridge. When "REPLACE TONER" is displayed and printing is stopped, replace the toner cartridge. § The print quality deteriorates after one year or more passes since you open the toner cartridge. In this case, prepare a new toner cartridge for replacement. - Page 152 Take out the new toner cartridge, and shake it several times vertically and horizontally. Place the toner cartridge in the direction that it will be attached to the machine. Attach the toner cartridge. Close the toner cartridge cover.
-
Page 153: Replacing The Image Drum Unit
Replacing the Image Drum Unit When "ORDER IMAGE DRUM" is displayed on the screen of the operation panel, prepare a replacement image drum unit. If you continue printing, "IMAGE DRUM LIFE" is displayed and printing stops. When "IMAGE DRUM LIFE" is displayed and printing stops, replace the image drum unit. The estimated replacement cycle of an image drum unit is approximately 25,000 pages for 216 mm simplex printing (one page per job). - Page 154 Insert your finger into the recess on the top of the machine and pull up the lever. Open the top cover until it stops. Burns may result. The fuser unit is extremely hot. Do not touch it. Hold the blue handle and pull out the image drum unit vertically. •...
- Page 155 Hold the blue handle of a new image drum unit, confirm the position to install it to the machine, and lower it vertically. Peel off the protective tape. Peel off the protective tape, and remove the desiccant.
- Page 156 Remove the cover toner. Close the top cover. Open the toner cartridge cover.
- Page 157 Take out the new toner cartridge from the packaging bag, and shake it several times vertically and horizontally. Place the toner cartridge in the direction that it will be attached to the machine. Attach the toner cartridge. Close the toner cartridge cover.
- Page 158 Turn on the machine. • For information on turning on the machine, refer to "Turning On the Machine".
-
Page 159: When The Lightproof Film Is Dirty
When the Lightproof Film is Dirty When the lightproof film of the image drum unit is dirty, wipe it clean with a soft tissue. Insert your finger into the recess on the top of the machine and pull up the lever. Open the top cover until it stops. -
Page 160: Replacing The Fuser Unit
Replacing the Fuser Unit When "ORDER FUSER UNIT" is displayed on the screen of the operation panel, prepare a replacement fuser unit. The estimated timing for the next message to be displayed is when printing approximately 5,000 pages. When "FUSER UNIT LIFE" is displayed, replace the fuser unit. The estimated replacement cycle of the fuser unit is approximately 100,000 pages for 216 mm simplex printing (one page per job). - Page 161 Open the top cover until it stops. Burns may result. The fuser unit is extremely hot. Do not touch it. \Hold the blue handle and pull out the image drum unit vertically. · Pull it out after opening the top cover fully. Place the image drum unit you took out on a flat surface and cover it with black paper, etc.
- Page 162 Pull up the blue handle at the front of the machine interior and pull out the fuser unit vertically. Burns may result. Since the fuser unit gets hot, carry out the operation carefully, and make sure to hold it by the handle when lifting it up. When it is hot, do not attempt to carry out the operations.
- Page 163 Hold the blue handle of an image drum unit, confirm the position to install it to the machine, and lower it vertically. Close the top cover.
-
Page 164: Replacing The Transfer Belt Unit
Replacing the Transfer Belt Unit When "ORDER BELT UNIT" is displayed on the screen of the operation panel, prepare a replacement transfer belt unit. The estimated timing for the next message to be displayed is when printing approximately 5,000 pages. When "BELT UNIT LIFE"... - Page 165 Open the top cover until it stops. Burns may result. The fuser unit is extremely hot. Do not touch it. Hold the blue handle and pull out the image drum unit vertically. · Pull it out after opening the top cover fully. Place the image drum unit you took out on a flat surface and cover it with black paper, etc.
- Page 166 Hold the handle (black) of the transfer belt unit and pull it out vertically. Burns may result. The fuser unit is extremely hot. Do not touch it. Hold the handle (black) of a new transfer belt unit, and lower it vertically to set the unit into the machine.
- Page 167 Close the top cover.
-
Page 168: Replacing The Feed Roller
Replacing the Feed Roller When paper jams frequently occur or the color is shifted, replace the feed roller. The feed roller should be replaced after approximately 60 km of printing · The actual lifetime of a feed roller depends on environment and paper. ·... - Page 169 Hold the blue handle and pull out the image drum unit vertically. · Pull it out after opening the top cover fully. Place the image drum unit you took out on a flat surface and cover it with black paper, etc. so that the image drums are not exposed to light.
- Page 170 Insert your fingers in the both ends of the recess in the center bottom of the back of the machine interior, and turn down the sensor lever towards yourself. Slide the blue levers (two locations) inside the machine inward to unlock it.
- Page 171 Hold the tabs (white and black) on the right and left sides of the feed roller and pull it out. Attach a new feed roller into the machine. Set it so that it is on the same surface as the blue lock.
- Page 172 Slide the blue levers (two locations) outward to fix the feed roller. Ensure that the blue lock is over the black knob on the right and that the blue lock is over the left knob. Push the sensor lever into the machine. Return it to its original position. Return the transfer belt unit to its original position in the machine.
- Page 173 Return the image drum unit to its original position in the machine. Close the top cover.
-
Page 174: Replacing The Paper Feed Roller
Replacing the Paper Feed Roller When paper jams frequently occur, replace the paper feed roller. The paper feed roller should be replaced after approximately 60 km of printing. Turn the machine to make its rear side face to you. Insert your finger below the gray lever on the left, and lift it up to open the feeder cover. - Page 175 Lift up the right-side side cover to remove it. Loosen the left screw with a driver. Lift up the left-side side cover to remove it. Lift the front up and pull it out forwards. Turn up the left lever of the paper feed roller to unlock it.
- Page 176 Turn up the right lever of the paper feed roller to unlock it. Hold the right and left levers of the paper feed roller and lift it directly up. Hold the right and left levers of a new paper feed roller and insert the roller vertically. With the side with the white gear on the right, hold the blue levers on both ends and insert it from directly above...
- Page 177 Turn down the left lever of the paper feed roller until it stops to lock it. Turn down the right lever of the paper feed roller until it stops to lock it. Attach the left-side side cover over the top and tighten the screw. Attach the right-side side cover over the top and tighten the screw.
- Page 178 Close the feeder cover until it clicks.
-
Page 180: Cleaning The Machine
Cleaning the Machine Cleaning the Surface of the Machine Cleaning Cleaning the LED Head Cleaning the Feed Rollers Cleaning the Paper Feed Rollers... -
Page 181: Cleaning The Surface Of The Machine
Cleaning the Surface of the Machine Turn off the machine. · For information on turning off the machine, refer to "Turning Off the Machine". Wipe the surface of the machine with a cloth that has been moistened with water or neutral detergent and squeezed well. -
Page 182: Cleaning The Led Head
Cleaning the LED Head Clean the LED head if white lines or black lines appear, images are faded, or the periphery of letters are smudged in the printouts. · Do not use solvents, such as methyl alcohol or thinners. They may damage the LED head. ·... - Page 183 Cover the image drum unit with black paper, etc. so that it is not exposed to light. Wipe the three lenses of the LED heads with a soft tissue lightly. Remove the black paper, etc. on the image drum unit, and close the top cover.
-
Page 184: Cleaning The Feed Rollers
Cleaning the Feed Rollers Insert your finger into the recess on the top of the machine and pull up the lever. Open the top cover until it stops. Burns may result. The fuser unit is extremely hot. Do not touch it. - Page 185 Hold the blue handle and pull out the image drum unit vertically. · Pull it out after opening the top cover fully. Place the image drum unit you took out on a flat surface and cover it with black paper, etc. so that the image drums are not exposed to light.
- Page 186 Insert your fingers in the both ends of the recess in the center bottom of the back of the machine interior, and turn down the sensor lever towards yourself. Wipe the feed roller with a soft cloth that has been moistened with water and then squeezed well.
-
Page 187: Cleaning The Paper Feed Rollers
Cleaning the Paper Feed Rollers Turn the machine to make its rear side face to you. Insert your finger below the gray lever on the left, and lift it up to open the feeder cover. Wipe the paper feed roller with a soft cloth that has been moistened with water and then squeezed well. -
Page 188: Troubleshooting
Troubleshooting When the LED Lights Up When the Paper Is Jammed Canceling Printing Cannot Print List of Messages Connection Problems Print Result Problems Software Problems Machine Problems Paper Problems When a Power Failure Occurs Moving the Machine Transporting the Machine Before Leaving the Machine... -
Page 189: When The Led Lights Up
When the LED Lights Up When a problem occurs in the machine, the ERROR LED or WARNING LED lights up or flashes and a message is displayed on the screen. Check the message and perform the remedy. For details, refer to "List of Messages". -
Page 190: When The Paper Is Jammed
When the Paper Is Jammed Error 381 (Paper on the Transfer Belt Unit) Insert your finger into the recess on the top of the machine and pull up the lever. Open the top cover until it stops. Burns may result. The fuser unit is extremely hot. - Page 191 Hold the blue handle and pull out the image drum unit vertically. · Pull it out after opening the top cover fully. Place the image drum unit you took out on a flat surface and cover it with black paper, etc. so that the image drums are not exposed to light.
- Page 192 Return the image drum unit to its original position in the machine. Close the top cover.
-
Page 193: Error 382 (Paper Jammed In The Fuser Unit)
Error 382 (Paper Jammed in the Fuser Unit) Insert your finger into the recess on the top of the machine and pull up the lever. Open the top cover until it stops. Burns may result. The fuser unit is extremely hot. Do not touch it. - Page 194 Hold the blue handle and pull out the image drum unit vertically. · Pull it out after opening the top cover fully. Place the image drum unit you took out on a flat surface and cover it with black paper, etc. so that the image drums are not exposed to light.
- Page 195 Gently pull the paper out to the back of the fuser unit (the opposite direction from the paper feed direction). Hold the blue handle of a new fuser unit, align the red ▲ on the right side and the red ▼ in the machine, and lower it vertically to set the unit in the machine.
- Page 196 Return the image drum unit to its original position in the machine. Close the top cover.
-
Page 197: Error 380/390 (Paper Jammed Near The Cutter)
Error 380/390 (Paper Jammed Near the Cutter) Turn the machine to make its rear side face to you. Insert your finger below the gray lever on the left, and lift it up to open the feeder cover. Gently pull out the jammed paper. - Page 198 Close the feeder cover until it clicks.
-
Page 199: Canceling Printing
Canceling Printing Pressing «CANCEL» Button Press «CANCEL» button on the operation panel to cancel printing. Canceling from a Computer You can cancel printing from a computer when a large amount of data has been accidentally sent to the printer. Click [Devices and Printers]. Right-click the icon for the printer, and select [See print jobs]. -
Page 200: Cannot Print
Cannot Print Cause Remedy Reference The machine is in the Sleep mode. Press «POWER SAVE» button on Using the Operation Panel the operation panel to switch the machine to standby. This machine is not turned on. Turn the machine on. Turning On the Machine The LAN cable/USB cable is Check whether the cable is... -
Page 201: List Of Messages
List of Messages This section describes the messages displayed on the operation panel. □ : Means that an arbitrary message is displayed on the top. [CODE] : Displays an arbitrary numeric value. [INFO] : Displays an arbitrary message. [FS_ERROR] : Displays an arbitrary numeric value. [ERRERROR] : Displays an arbitrary numeric value. - Page 202 CANCELING JOB The print data is being deleted because a paper jam (JAM) occurred. □ The temperature of the fuser unit is being adjusted. ADJUSTING TEMP.
- Page 203 Message Description □ The internal temperature of the machine is being OPTIMIZING TEMP adjusted. □ The machine is in the Power Save mode. POWER SAVE □ The machine is in the Sleep mode. SLEEP MODE CHANGING LANGUAGE The language displayed on the operation panel is PLEASE WAIT being changed.
- Page 204 □ A toner cartridge is not installed in the machine. Set TONER NOT INSTALLED the toner cartridge in the machine.
- Page 205 Message Description □ A suitable image drum unit is not installed in the IMAGE DRUM NOT RECOMMENDED machine. □ The image drum unit has reached the end of its lifetime, and printing will stop soon. Prepare a new IMAGE DRUM LIFE image drum unit.
- Page 206 Message Description PRESS OK BUTTON The wireless LAN module is not correctly connected [ERRCODE]:WIRELESS STARTUP ERROR to the machine. Correctly connect the wireless LAN module to the machine or turn the machine off and then on again. Press «OK» button to clear this message. PRESS OK BUTTON [ERRCODE]: The wireless LAN settings are insufficient.
- Page 207 Message Description UNKNOWN CONSUMABLEGO TO USER MANUAL You can use any consumables in your product, but "TROUBLE SHOOTING" you must accept the risks of using non-genuine consumables. If the use of non-genuine consumables causes damage to the product or results in your product not functioning to its full specification, then such damage or effect on the product is not covered by warranty.
- Page 208 Message Description CHECK FUSER UNIT The fuser unit is not set correctly. Set the fuser unit [ERRCODE]:FUSER UNIT MISSING again. CLOSE [COVER] The displayed cover is open. Close the cover. [ERRCODE]:[COVER] OPEN ERRCODE 310: Top cover ERRCODE 589: Feeder cover CLOSE TONER REPLACEMENT COVER The toner replacement cover is open.
-
Page 209: Connection Problems
Connection Problems Network Connection Problems Cause Remedy Reference A cross cable is being used. A cross cable is being used. Use a straight cable. The machine was turned on before Turn the machine on after Connecting a LAN Cable connecting the cable. connecting the cable. - Page 210 Cause Remedy Reference The network connection settings • [WIRELESS Connecting via Wireless LAN are not suitable. (INFRASTRUCTURE)] and [WIRELESS (AP MODE)] cannot be enabled at the same time. • To connect with [WIRELESS (INFRASTRUCTURE)], set [WIRELESS (AP MODE)] to [DISABLE] and then set [WIRELESS (INFRASTRUCTURE)] to [ENABLE].
-
Page 211: Usb Connection Problems
Cause Remedy Reference [Wireless (AP Mode)] • Check whether [WIRELESS Connecting via Wireless LAN (AP MODE)] is set to [ENABLE] A wireless device (such as a computer, tablet, or smartphone) is in the machine. not connected to the machine. • Check the SSID/password of the machine, and perform manual setup. -
Page 212: Print Result Problems
Print Result Problems List of Print Result Problems White streaks appear in the vertical Horizontal white streaks periodically appear The printing is faint in the vertical direction direction in the paper feed direction Feed direction Feed direction Feed direction Printing is light White dots and lines appear Condensation occurs in the printed paper Streaks appear in the vertical direction... -
Page 213: White Streaks Appear In The Vertical Direction
White Streaks Appear in the Vertical Direction Cause Remedy Reference The LED head is dirty. Wipe the LED head clean with a soft Cleaning the LED Head tissue. Toner is low. If [REPLACE TONER] or [TONER Replacing the Toner Cartridge EMPTY] is displayed, replace the toner cartridge. -
Page 214: The Printing Is Faint In The Vertical Direction
The Printing Is Faint in the Vertical Direction Cause Remedy Reference The LED head is dirty. Wipe the LED head clean with a soft Cleaning the LED Head tissue. Toner is low. If [REPLACE TONER] or [TONER Replacing the Toner Cartridge EMPTY] is displayed, replace the toner cartridge. -
Page 215: White Dots And Lines Appear
White Dots and Lines Appear Cause Remedy Reference The paper contains humidity or is Use paper that is stored in Loading Paper dry. an environment with suitable temperature and humidity. Condensation Occurs in the Printed Paper Cause Remedy Reference The paper contains humidity. Use paper that is stored in Loading Paper an environment with suitable... -
Page 216: Dots And Horizontal Streaks Periodically Appear In The Paper Feed Direction
Dots and Horizontal Streaks Periodically Appear in the Paper Feed Direction Cause Remedy Reference If the period is approximately Gently wipe it with a soft tissue. Replacing the Image Drum 63 mm, the glossy cylinder of the Replace the image drum unit if it is Unit image drum is damaged or dirty. -
Page 217: Bleeding Occurs Around Text
Bleeding Occurs Around Text Cause Remedy Reference The LED head is dirty. Wipe it clean with a soft tissue. Cleaning the LED Head The paper contains humidity. Replace the paper with new paper. Loading Paper Toner Comes off When Rubbed Cause Remedy Reference... -
Page 218: Black Dots Or White Dots Appear
Black Dots or White Dots Appear Cause Remedy Reference If the period is approximately Gently wipe the image drum with a Replacing the Image Drum 63 mm, the glossy cylinder of the soft tissue. Unit image drum is damaged or dirty. Replace the image drum unit if it is damaged. -
Page 219: Nothing Is Printed
Nothing Is Printed Cause Remedy Reference The machine may have failed. Contact your dealer. Parts of the Image Are Missing Cause Remedy Reference The paper contains humidity. Replace the paper with new paper. Loading Paper The Area Around the Image Is Dirty Cause Remedy Reference... -
Page 220: The Colors Of The Image Are Unexpected
The Colors of the Image Are Unexpected Cause Remedy Reference Toner is low. If [REPLACE TONER] or [TONER Replacing the Toner Cartridge EMPTY] is displayed, replace the toner cartridge. The toner adjustment was The toner adjustment was changed. Changing the Color Settings changed. -
Page 221: The Precision Of The Barcode Reading Is Low
The Precision of the Barcode Reading Is Low Cause Remedy Reference The color of barcodes/two- Disable the toner save function if it is Reducing Toner Consumption dimensional barcodes is light enabled. when Printing If the remaining toner is low, replace Replacing the Toner Cartridge the toner cartridge. -
Page 222: Software Problems
Software Problems Web Browser Problems Symptom Cause/Solution Reference Cannot connect to the machine. The LAN cable is disconnected. Connecting a LAN Cable Check the connection of the LAN cable. The IP addresses are incorrect. Starting the Webpage Check the IP address of the machine, and enter the correct address. - Page 223 · Problems Common to the Printer Driver and Utilities Symptom Cause/Solution [Help] is not displayed. The help function is not supported. The [User Account Control] screen is The [User Account Control] screen may be displayed when displayed. starting the installer or a utility. Click [Yes] or [Continue] to execute the installer or utility as an administrator.
-
Page 224: Machine Problems
Machine Problems The Machine Does Not Operate Cause Remedy Reference The power cord is not inserted Insert the power cord fully. Turning On the Machine properly. This machine is not turned on. Turn the machine on. Turning On the Machine Nothing Is Displayed on the Screen when the Power Is Turned On Cause Remedy... -
Page 225: Print Data Is Not Sent
Cause Remedy Reference The machine is warming up to Lengthen the time until the machine Setting the Power Save Mode recover from the Power Save enters the Power Save mode or Transition Time mode or Sleep mode. Sleep mode. Setting the Sleep Mode Select [MENUS] >... -
Page 226: Printing Stops Before It Is Complete
Printing Stops Before It Is Complete Cause Remedy Reference Temperature adjustment is being Wait until the machine finishes. performed because the internal Printing will automatically resume temperature of the machine has when the temperature of the machine risen due to continuous printing is suitable. -
Page 227: Paper Problems
Paper Problems Paper Jams Frequently Occur/The Paper Is Pulled in at an Angle Cause Remedy Reference The machine is not level. Install the machine in a flat and stable location. The paper is too light or too The paper is too light or too heavy. Loading Paper heavy. -
Page 228: The Paper Gets Stuck In The Roller Of The Fuser Unit
The Paper Gets Stuck in the Roller of the Fuser Unit Cause Remedy Reference The paper weight setting is not Set [MENUS] > [FEEDER CONFIG] Setting Paper Information on suitable. > [MEDIAWEIGHT] to a suitable the Operation Panel value on the operation panel. Or, set [MEDIAWEIGHT] to a heavier value. -
Page 229: When A Power Failure Occurs
When a Power Failure Occurs When a power failure occurs, the machine operates as follows. Machine Status Operation Receiving Reception is interrupted. Printing Printing is interrupted. When the power supply recovers, start printing again. Standby Printing cannot be started. · If a power failure occurs while the machine is turned on, the machine does not turn on when the power supply resumes. -
Page 230: Moving The Machine
Moving the Machine Turn off the machine. · For information on turning off the machine, refer to "Turning Off the Machine". Unplug all the cables. · Power cord · LAN cable/USB cable Remove the loaded paper. Lift up the machine and move it to the destination. -
Page 231: Transporting The Machine
Transporting the Machine · Use the packaging, cushioning material, and cover toner that came with the machine when the product was purchased. Turn off the machine. · For information on turning off the machine, refer to "Turning Off the Machine". Unplug all the cables. -
Page 232: Before Leaving The Machine
Before Leaving the Machine Before leaving the machine, it is strongly recommended that you erase the information registered or saved to the machine. To delete the information, execute [ADMIN SETUP] > [OTHERS SETUP] > [ERASE PRIVACY DATA]. The information saved in the machine includes the following items. ·... -
Page 234: Management Software
Management Software Type of Software Installing Software Web Page Configuration Tool Status Monitor... -
Page 235: Type Of Software
Type of Software • System Requirements Windows 10/Windows 8.1/Windows 8/Windows 7 Windows Server 2016/Windows Server 2012 R2/Windows Server 2012 Windows Server 2008 R2/Windows Server 2008 Software Name Description Configuration Tool Changes the menu settings of the machine, performs cloning, and sets the network of the machine. -
Page 236: Installing Software
Installing Software Obtain the "Software DVD-ROM" or the software you want to install from the provider of your machine, and install the required software. When using the "Software DVD-ROM," select the software to install from the following list of software. PCL6 Printer Driver Configuration Tool Status Monitor... -
Page 237: Web Page
Web Page Configures the network settings of the machine. Web Page Settings • System Item Description Status Displays the current status of the machine. Displays warnings and errors that have occurred in the machine. Also enables you to check the operation status of the network services, a list of the machine information, and the IP address set in the machine. - Page 238 • Network Management Item Description General Network Settings Configures the network connection method. Wireless LAN (Infrastructure) Setting Configures wireless LAN (infrastructure). Wireless (AP Mode) Setting Configures wireless (AP mode) connections. TCP/IP Configures information regarding TCP/IP. Configures information regarding NetBIOS over TCP. E-mail Alert Setting Configures e-mail notifications for errors that have...
- Page 239 Item Description Security Protocol ON/OFF Disables network protocol and network services that are not used. IP Filtering Restricts access via TCP/IP. Also supports access from outside the company. However, this function requires knowledge regarding IP addresses. Incorrect settings may lead to serious trouble, such as becoming unable to access the machine from the network.
-
Page 240: Starting The Web Page
Starting the Web Page · Set the security of your browser to the medium level or enable cookies. · A password is required to enter the [Admin Setup] menu. The default password is "999999." · You must log in as the administrator to change the settings of the machine via the Web page. The example environment used in the following description is indicated below. -
Page 241: Logging In As The Administrator
Logging In as the Administrator You must log in as the administrator to change the settings of the machine via a Web browser. Click [Admin Login]. Enter "admin" in [User Name] and the current password in [Password], and click [OK]. ·... - Page 242 Set the printer information that can be checked on the network, and click [OK] or [SKIP]. · Settings can be omitted by clicking [SKIP]. · Select [Do not show this page again] and click [OK] or [SKIP] to prevent this from being displayed again.
-
Page 243: Checking Or Changing The Status Of The Machine
Checking or Changing the Status of the Machine The following operations can be executed from the Web page on a computer. · Displaying the machine status · Configuring the machine System Requirements · Set the security of your browser to the medium level or enable cookies. ·... - Page 244 The settings of the machine can be changed from the [Admin Setup] tab.
-
Page 245: Encrypting Communication (Ssl/Tls)
Encrypting Communication (SSL/TLS) You can encrypt the communication between the computer and the machine. Communication is encrypted via SSL/TLS in the following cases. A certificate is installed in the machine by default, which enables communication using HTTPS to be performed. •... - Page 246 Click [OK]. Follow the on-screen instructions to install the certificate from the certificate authority. Click [Submit]. Proceed to "Enabling Encryption." • Importing a Certificate and Private Key This section describes how to import a certificate and private key using the Web page. A certificate and private key that have been issued can be imported in order to use a certificate issued by an external certificate authority.
- Page 247 Select [Enabled] for the protocol to encrypt. Click [Submit]. • Exporting a Certificate This section describes how to export a certificate using the Web page. The computer may request the certificate of the machine, depending on the function performing communication via SSL/TLS. In order to enable the computer to request the certificate of the machine, import the certificate of the machine that has been exported to the certificate store of the computer.
-
Page 248: Using Ipp
Using IPP The machine can be added to a computer as an IPP printer. When IPP printing is enabled, data can be sent to the machine via the Internet. • Adding the Machine as an IPP Printer Click [Start], and select [Devices and Printers] > [Add a Printer]. Select [Add a network, wireless or Bluetooth printer] in the [Add a Printer] wizard. -
Page 249: Encrypting Communication (Ipsec)
Encrypting Communication (IPSec) You can encrypt the communication between the computer and the machine. The communication is encrypted with IPSec. When IPSec is enabled, all applications use IPSec for encryption. 50 hosts can be specified with an IP address. Access to the machine from unregistered hosts is refused. - Page 250 Proceed to "Configuring the Computer." · Configuring the Computer Creating an IP Security Policy Setting Key Exchange Setting the IP Filter Setting the Filter Operations Assigning an IP Security Policy Configure IPSec on the computer. Follow the procedure below in order. ·...
- Page 251 · Setting Key Exchange Select the [General] tab in the IP security policy properties window. Click [Setup]. Enter a value (in minutes) in [Authenticate and generate a new key after every] in the [Key Exchange Settings] window. · Enter the same value as specified in [Lifetime] in "Phase1 Proposal" in "Configuring the Machine."...
- Page 252 Click [Next] on the [IP Protocol Type] screen. Click [Complete]. · Setting the Filter Operations Click [OK] in the [IP Filter List] window. In [Security Rules Wizard], select the new IP filter in the list, and click [Next]. Click [Add] on the [Filter Action] screen. Click [Next] in [Filter Action Wizard].
- Page 253 · If an advance shared key was set in "Configuring the Machine," enable "Use this string to protect the key exchange (preshared key)" on the [Authentication Method] screen and enter the preshared key. Click [Complete]. Click [OK] in the IP security policy properties window. Select the new IP security policy in the [Local Security Policy] window.
-
Page 254: Using The Ip Address Access Control Function (Ip Filter)
Using the IP Address Access Control Function (IP Filter) IP addresses can be used to control access to the machine. You can configure whether to allow printing or setting from the specified IP address. IP filtering is disabled by default. ·... -
Page 255: Using The Mac Address Access Control Function
Using the MAC Address Access Control Function MAC addresses can be used to restrict access to the machine. You can allow or refuse access from specified MAC addresses. · Make sure to specify the correct MAC address. If an incorrect MAC address is specified, the machine will become unable to be accessed from the network. -
Page 256: E-Mail Alert
E-Mail Alert A mail server needs to be configured in advance in order to use this function. · For details, refer to "E-mail Configuration (Web Page)". · Sending Error Notifications via E-mail Open the Web page of this machine. · For information on starting the Web page, refer to "Starting the Web Page". - Page 257 · Periodically Sending Error Notifications via E-mail Open the Web page of this machine. · For information on starting the Web page, refer to "Starting the Web Page". Log in as the administrator. Select [Admin Setup]. Select [Network] > [E-mail] > [Alert Settings]. Enter the e-mail address to notify in [Failure Notification Settings].
-
Page 258: Using Snmpv
Using SNMPv Using an SNMP manager that supports SNMPv3 enables the management of the machine to be encrypted via SNMP. Open the Web page of this machine. · For information on starting the Web page, refer to "Starting the Web Page". Log in as the administrator. -
Page 259: Using Ieee802.1X (Wired Lan)
Using IEEE802.1X (Wired LAN) The machine supports IEEE802.1X authentication. IEEE802.1X authentication is performed after enabling it on the Web page and connecting to the authentication switch. · Using EAP-TLS This section describes how to set EAP-TLS, which is a type of IEEE802.1X authentication. Open the Web page of this machine. - Page 260 · Using PEAP This section describes how to set PEAP, which is a type of IEEE802.1X authentication. Open the Web page of this machine. · For information on starting the Web page, refer to "Starting the Web Page". Log in as the administrator. Select [Admin Setup].
- Page 261 Turn on the machine. · For information on turning on the machine, refer to "Turning On the Machine". Set the IP address, etc. of the machine.
-
Page 262: Configuring Ieee802.1X (Wireless Lan)
Configuring IEEE802.1X (Wireless LAN) You can use wireless LAN to configure IEEE802.1X authentication. First configure IEEE802.1X authentication on the Web page of the machine, and then configure the wireless connection on the Web page · Using EAP-TLS Open the Web page of this machine. ·... - Page 263 · Using PEAP Open the Web page of this machine. · For information on starting the Web page, refer to "Starting the Web Page". Log in as the administrator. Select [Admin Setup]. Select [Network] > [IEEE802.1X]. Select [Disabled] for [IEEE802.1X]. Select [PEAP] in [EAP Type].
- Page 264 Select [Enabled] in [Wireless(Infrastructure)] in [Setup]. · The default setting is [Disabled]. Enter the SSID name of the wireless AP to connect to in [SSID]. Select [WPA/WPA2-EAP] in [Security] in [Security Settings]. When all the basic settings and security settings are complete, click [Submit] on the bottom left of the Web screen to reflect the settings.
-
Page 265: Configuration Tool
Configuration Tool The Configuration Tool enables multiple devices to be managed or configured. Registering the Machine When installing the machine for the first time, register it to the Configuration Tool. Click [Start], and select [General] > [Configuration Tool]. Select [Register Device] from the [Tools] menu. When the devices that can be registered are displayed, select the machine and click [Register]. -
Page 266: Checking The Status Of The Machine
Checking the Status of the Machine You can check the status and information of the machine. Click [Start], and select [General] > [Configuration Tool]. Select this machine from [Registered Device Table]. Select the [Device Info] tab. · If the machine is connected to the network, [Device Status] is displayed. ·... -
Page 267: Changing The Menu Settings
Changing the Menu Settings You can check the status and information of the machine. You can change the menu settings of the machine or copy the settings to another machine. This section describes how to save/restore the menu settings to/ from a file. ·... - Page 268 Click [Backup settings]. Enter the file name, select the folder to save the file, and click [Save]. · Restoring the Settings from a File Click [Start], and select [General] > [Configuration Tool]. Select this machine from [Registered Device Table]. Select the [Device Setting] tab.
- Page 269 Click [Menu settings]. Click [Restore Settings]. Check the displayed message, and click [Yes]. Select the file to restore, and click [Open]. Click [Save to device].
- Page 270 · Changing the Administrator Password of the Machine Click [Start], and select [General] > [Configuration Tool]. Select this machine from [Registered Device Table]. Select the [Device Setting] tab. Click [Change password]. Enter the current password and new password, and click [OK].
-
Page 271: Copying Settings (Cloning)
Copying Settings (Cloning) Menu settings can be copied to another machine. Click [Start], and select [General] > [Configuration Tool]. Select the machine to clone from [Registered Device Table]. Select the [Device Setting] tab. Click [Cloning]. Enter the administrator password, and then click [OK]. ·... - Page 272 Enter the administrator password of the destination device, and click [OK]. The result is displayed.
-
Page 273: Configuring The Network
Configuring the Network You can configure the network of the machine. · Searching for the Machine on a Network Click [Start], and select [General] > [Configuration Tool]. Select [Network Setting] in the [Plug-in] menu. Select [Discover Devices]. The search results are displayed. ·... - Page 274 Configure the search conditions as required, and click [OK]. · Changing the IP Address Click [Start], and select [General] > [Configuration Tool]. Select [Network Setting] in the [Plug-in] menu. Select [Discover Devices]. Select the machine from the list of devices. Click [Device Settings].
-
Page 275: Registering Forms (Form Overlay)
Registering Forms (Form Overlay) Forms for logos, etc. can be registered in the machine for performing overlay printing. This section describes how to register forms. · For information on performing overlay printing, refer to "Overlaying Text or Logos when Printing". ·... - Page 276 Click [Add File to Project], and select the form file you created. The form is added to the project. Click the form file. Enter the form ID (of your choice) in [ID], and click [OK]. · Do not change [Target Volume] or [Path]. ·...
- Page 277 Enter the administrator password, and then click [OK]. Confirm the setting results, and click [Back].
-
Page 278: Registering A Demonstration Page
Registering a Demonstration Page You can register demonstration pages to the machine for printing. This section describes how to registering a demonstration page. · Creating a Demonstration Page Click [Start], and then select [Devices and Printers]. Right-click the icon of the machine, and select the required printer driver in [Printer properties]. - Page 279 Click [Add File to Project], and select the demo page file you created. Select [Demo page file(*.DMO)] on the bottom right of the screen to select the created demo page file. Click the demo page file. Enter a component name for the demo page in [Component], and click [OK]. Select the machine in the window on the bottom of the Storage Manager plug-in screen.
- Page 280 Confirm the setting results, and click [Back].
-
Page 281: Checking The Free Memory/Storage Space
Checking the Free Memory/Storage Space Click [Start], and select [General] > [Configuration Tool]. Select [Storage Manager] in the [Plug-in] menu. Click the device name in the device selection area on the bottom of the Storage Manager plug-in screen. Communicating with the device displays the storage, volume name, size, free space, location name, label, status, file name, size, and comment, etc. -
Page 282: Removing The Machine
Removing the Machine You can cancel the registration of the machine. Click [Start], and select [General] > [Configuration Tool]. Right-click the machine in [Registered Device Table]. Select [Remove device]. Click [Yes] on the confirmation screen. -
Page 283: Names And Functions Of Each Screen
Names and Functions of Each Screen This section describes the names and functions of each screen. · [Device Info] Tab Displays information related to the machine. · [Device Setting] Tab Configures and copies the menus of the machine. Item Description Menu settings Changes the settings of the menu items of the machine. - Page 284 · [Network Setting] Plug-in Configures the network. Item Description Discover Devices Discovers network devices. Environment Settings Changes the device detection standard and communication options. · [Storage Manager] Plug-in Registers and edits the files to download to the machine.
-
Page 285: Status Monitor
Status Monitor The Status Monitor is a utility for displaying the status of printers on a computer. The Status Monitor includes the following functions. · Displaying the machine status · Retrieving information included in the following reports as a CSV file Setting Error Log System Requirements... -
Page 286: Displaying The Printer Status
Displaying the Printer Status [Printer State] Tab Description Displays the name of the printer for monitoring. Displays the printer status as text. Displays the printer status that has occurred concurrently with that on top as text. (Only displayed when connected via USB) Displays all the concurrent statuses of the printer as text. -
Page 287: Switching The Printer Settings
Switching the Printer Settings [Printer Setup] Tab Description Select Printer Changes the destination printer. Output Report Data Select [Setting] or [Error Log] from the pull-down menu, and click the [Execute] button to output the report data in the CSV format. Configuration Outputs detailed information on the printer settings. -
Page 288: Switching The Status Monitor Settings
Switching the Status Monitor Settings [Preferences] Tab Description Minimized View Display Status Panel Displays the printer status using text and the background color of the icon. Display icon only Displays the printer status using an icon displayed on the task bar. Alert View Specifies the display position of the status monitor when a warning occurs in the printer. -
Page 290: Specifications
Specifications General Specifications Printing Specifications Network Related List of Included Fonts Consumables/Maintenance Parts/Options... -
Page 291: General Specifications
General Specifications Model Model Number Pro330 N36700A/N36700B Item Pro330 ARM Cortex A9(533MHz) Memory DDR3 16bit 512MB 64MB Weight Approx. 9.5kg (including consumables) Dimensions (W x D x H) 198mm(7.8") x 380mm(15") x 195mm(7.7") Power supply N36700A: 110 - 127V AC +/-10% N36700B : 220 - 240V AC +/-10% Power consumption Typical operation... -
Page 292: Printing Specifications
Printing Specifications Item Pro330 Printing method LED color Page-description language PCL5c, PCL6(PCLXL) Resident fonts Bitmap: 4 fonts Scalabel: 27 fonts Resolution 1200x1200dpi Color Yellow, Magenta, Cyan Print speed Max 6 IPS Paper size Width: 25 - 86 mm Length: 53 - 551 mm Media type Plain, User Type 1 - 5 Warm-up time... -
Page 293: Network Related
Network Related Item Pro330 Interfaces Ethernet 10BASE-T/100BASE-TX, IEEE802.11 a/b/g/n wireless LAN Protocols TCP/IPv4, TCP/IPv6, NetBIOS over TCP, LPR, Port9100, IPP, FTP, HTTP, TELNET, SMTP, POP3, SNMPv1/v3, DHCP, DHCPv6, DNS, DDNS, UPnP, WINS, Bonjour, SNTP, LLTD, Web Services Discovery (WSD), SSL/TLS, IPSec, IEEE802.1X Wireless LAN Specifications Item Pro330... -
Page 294: List Of Included Fonts
List of Included Fonts Font Name List Description Courier Scalable Fonts Courier Bold Courier Italic Courier Bold Italic CG Times CG Times Bold CG Times Italic CG Times Bold Italic Univers Medium Univers Bold Univers Medium Italic Univers Bold Italic Letter Gothic Letter Gothic Bold Letter Gothic Italic... -
Page 295: Consumables/Maintenance Parts/Options
Consumables/Maintenance Parts/Options Purchase these consumables, maintenance parts, and options from the dealer where you bought the machine. · Consumables Product Name Model Description Toner Cartridge Enables printing of approximately 5,000 pages. Image Drum Unit Enables printing of approximately 25,000 pages. ·...
Need help?
Do you have a question about the 360C and is the answer not in the manual?
Questions and answers