Table of Contents
Advertisement
Quick Links
Advertisement
Table of Contents

Subscribe to Our Youtube Channel
Related Manuals for FLIR ORYX R


Summary of Contents for FLIR ORYX R
- Page 1 INSTALLATION GUIDE FLIR ORYX® Version 4.1 Revised 4/9/2020 Oryx part numbers with 10G and 10GS are functionally the same and differ only in dimensions and mass. Copyright © 2015-2020 FLIR Integrated Imaging Solutions Inc. All rights reserved.
- Page 2 For more detailed information about recycling of this product, please contact us. Trademarks Names and marks appearing on the products herein are either registered trademarks or trademarks of FLIR Systems, Inc. and/or its subsidiaries. Licensing To view the licenses of open source packages used in this product please see...
-
Page 3: Table Of Contents
6 Oryx Physical Interface 6.1 Oryx Physical Description 6.2 Oryx Dimensions 6.3 Interface Connector 6.3.1 Ethernet Connector 6.4 Interface Cables 6.5 Interface Card 6.6 General Purpose Input/Output (GPIO) 4/9/2020 ©2015-2020 FLIR ® FLIR Oryx Installation Guide Integrated Imaging Solutions Inc. All rights reserved. - Page 4 7.2 GPIO Electrical Characteristics 7.3 Input Timing Characteristics 7.4 Output Timing Characteristics 8 Troubleshooting 8.1 Support 8.2 Status Indicator LED 8.3 Network Status LEDs Contacting Us Revision History 4/9/2020 ©2015-2020 FLIR ® FLIR Oryx Installation Guide Integrated Imaging Solutions Inc. All rights reserved.
-
Page 5: Oryx Installation Guide
These resources as well as knowledge base articles and application notes can be found on the Support page for the product. Oryx Support Articles Oryx Resources 4/9/2020 ©2015-2020 FLIR ® FLIR Oryx Installation Guide Integrated Imaging Solutions Inc. -
Page 6: Handling Precautions And Camera Care
2 Handling Precautions and Camera Care Handling Precautions and Camera Care Your FLIR machine vision camera is a precisely manufactured device and should be handled with care. Here are some tips on how to care for the device. Avoid electrostatic charging. -
Page 7: Oryx Installation
Mounting Your Oryx) Interface card (see Interface Card) FLIR sells a number of the additional parts required for installation. To purchase, visit the Accessories page. Have you visited the FLIR website? FLIR machine vision products page has many resources to help you operate your camera effectively, including: ®... -
Page 8: Installing Your Interface Card And Software
3 Oryx Installation To access these resources: 1. Go to FLIR machine vision. 2. Click on your product family. 3. Click on Go to Support Page. Overview tab - links to software, knowledge base articles, and application notes. Resources tab - links to camera references, technical references, getting started manuals, imaging performance results, drawings, PCNs, firmware, and software. -
Page 9: Installing Your Oryx
Power is provided externally through the GPIO interface: 12 - 24 V. Power consumption is: ORX-10GS-32S4 — 11.8 W (11.3 nominal) ORX-10G(S)-51S5 — 12.3 W (11.7 W nominal) ORX-10G-71S7 — 13.6 W (13.2 W nominal) 4/9/2020 ©2015-2020 FLIR ® FLIR Oryx Installation Guide Integrated Imaging Solutions Inc. - Page 10 It may therefore take several images to get a satisfactory image. When the camera is power cycled (power disengaged then re-engaged), the camera reverts to its default factory settings, or if applicable, a saved user set. 4/9/2020 ©2015-2020 FLIR ® FLIR Oryx Installation Guide Integrated Imaging Solutions Inc.
-
Page 11: Tools To Control Your Oryx
Included with the SDK are a number of source code examples to help you get started. Spinnaker API examples are provided for C, C++, C#, and VB.NET languages. These examples are precompiled for your convenience. 4/9/2020 ©2015-2020 FLIR ® FLIR Oryx Installation Guide Integrated Imaging Solutions Inc. -
Page 12: Using Genicam Applications
Getting Started with Adaptive Vision Getting Started with Matrox Imaging Library Getting Started with Matrox Design Assistant Getting Started with NI-MAX and LabVIEW Getting Started with NI Vision Builder for Automatic Inspection 4/9/2020 ©2015-2020 FLIR ® FLIR Oryx Installation Guide Integrated Imaging Solutions Inc. -
Page 13: Configuring Oryx Setup
To verify your driver: 1. Launch SpinView: Start-->All Programs-->Point Grey-->Spinnaker SDK-->SpinView 2. Select the camera. 3. In the Feature tree search box, enter "driver". The Device Driver Version feature is highlighted. 4/9/2020 ©2015-2020 FLIR ® FLIR Oryx Installation Guide Integrated Imaging Solutions Inc. - Page 14 Note: If the filter driver is not installed, a caution icon appears next to the device. Right-click on the device and select GigE Filter driver is not installed-->Install filter driver to resolve. 4/9/2020 ©2015-2020 FLIR ® FLIR Oryx Installation Guide Integrated Imaging Solutions Inc.
-
Page 15: Configuring The Ip Address
GenICam Features Transport Layer Control. Alternatively, SpinView is a tool included with the Spinnaker SDK that allows you to set the internet protocol (IP) configuration for any GigE interface cards or FLIR GigE Vision cameras connected to your system. Using SpinView, you can: Set the IP address for the current connection. -
Page 16: Configuring Other Ethernet Settings
Spinnaker API—The Spinnaker SDK supports configuring heartbeat timeout. Heartbeat Disable The heartbeat is enabled by default. To disable Heartbeat use: GenICam—Under Transport Layer Control GevGVCPHeartbeatDisable. Spinnaker API—The Spinnaker SDK supports disabling heartbeat. 4/9/2020 ©2015-2020 FLIR ® FLIR Oryx Installation Guide Integrated Imaging Solutions Inc. All rights reserved. -
Page 17: Camera Firmware
5 Configuring Oryx Setup Camera Firmware Firmware is programming that is inserted into the programmable read-only memory (programmable ROM) of most FLIR cameras. Firmware is created and tested like software. When ready, it can be distributed like other software and installed in the programmable read-only memory by the user. -
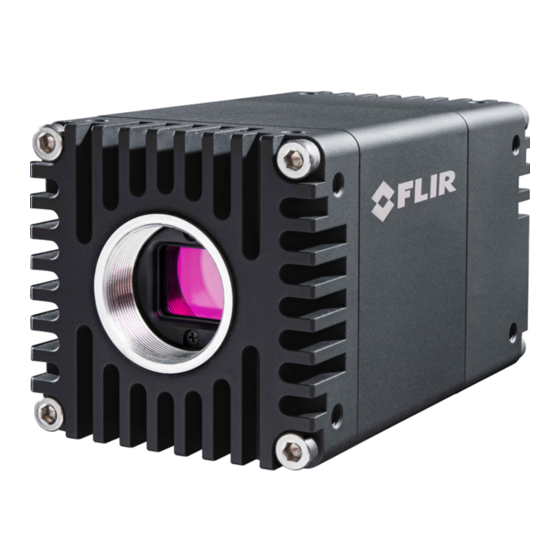
Page 18: Oryx Physical Interface
4. General purpose I/O connector 8. 1/4-20 mounting hole (standard and large case only) General Purpose Input/Output (GPIO) See Mounting Your Oryx 4/9/2020 ©2015-2020 FLIR ® FLIR Oryx Installation Guide Integrated Imaging Solutions Inc. All rights reserved. -
Page 19: Oryx Dimensions
6 Oryx Physical Interface Oryx Dimensions Note: To obtain 3D models, go to your product's support page from FLIR machine vision or contact Support. Oryx Dimensional Drawing—Small Format Barrel Length "A" Small Case Models (+0.1/-0.3) ORX-10GS-32S4 0.93 ORX-10GS-51S5 0.93 ORX-10GS-89S6 0.93 ORX-10GS-123S6 0.93... - Page 20 6 Oryx Physical Interface Oryx Dimensional Drawing—Standard Format Standard Case Models ORX-10G-51S5 ORX-10G-71S7 ORX-10G-89S6 ORX-10G-123S6 4/9/2020 ©2015-2020 FLIR ® FLIR Oryx Installation Guide Integrated Imaging Solutions Inc. All rights reserved.
- Page 21 6 Oryx Physical Interface Oryx Dimensional Drawing—Large Format Large Case Models ORX-10G-310S9 4/9/2020 ©2015-2020 FLIR ® FLIR Oryx Installation Guide Integrated Imaging Solutions Inc. All rights reserved.
-
Page 22: Interface Connector
(NIC). A 10G BASE-T NIC is recommended for streaming images on the Ethernet network between the camera and host system. FLIR sells a compatible card (PN: ACC-01-1101) available from our Products Accessories page. Note: For optimal video streaming and camera control performance, we recommend an Intel Pro chipset on a PCIe interface. -
Page 23: Mounting Your Oryx
Make sure the flow of heat from the camera to the bracket is not blocked by a non-conductive material like plastic. Make sure the camera has enough open space around it to facilitate the free flow of air. To access temperature information query the GenICam Device Control feature DeviceTemperature. 4/9/2020 ©2015-2020 FLIR ® FLIR Oryx Installation Guide Integrated Imaging Solutions Inc. -
Page 24: Lens Mounting
Hardware Warranty. Removing the protective glass or filter alters the optical path of the camera, and may result in problems obtaining proper focus with your lens. 4/9/2020 ©2015-2020 FLIR ® FLIR Oryx Installation Guide Integrated Imaging Solutions Inc. -
Page 25: 6.12 Infrared Cut-Off Filters
The following are the properties of the IR filter glass: Type Anti-reflective Material Schott B270 Dimensions 15.5 ±0.08 x 18 ±0.08 mm Thickness 1 ±0.07 mm For more information, see Dust Protection. 4/9/2020 ©2015-2020 FLIR ® FLIR Oryx Installation Guide Integrated Imaging Solutions Inc. All rights reserved. -
Page 26: Input/Output Control
Ground for opto-isolated I/O, not connected to camera OPTO_GND stripes ground *When configured as output line format is open drain, not TTL. Users should attach their own external pull-up resistor. 4/9/2020 ©2015-2020 FLIR ® FLIR Oryx Installation Guide Integrated Imaging Solutions Inc. -
Page 27: Gpio Electrical Characteristics
Absolute Maximum Ratings Description Minimum Maximum Non-opto-isolated Voltage -24 V 42 V Opto-isolated Input Voltage -70 V 40 V Opto-isolated Output Voltage -24 V 24 V 4/9/2020 ©2015-2020 FLIR ® FLIR Oryx Installation Guide Integrated Imaging Solutions Inc. All rights reserved. - Page 28 30 V 4.7 kΩ 1.4 V 1.32 V 30 V 11.08 V 5.96 mA 3.02 mA 5.08 mA Values are for reference only Opto-isolated input circuit 4/9/2020 ©2015-2020 FLIR ® FLIR Oryx Installation Guide Integrated Imaging Solutions Inc. All rights reserved.
- Page 29 12 V 2.0 kΩ 6.0 mA 12 V 2.4 kΩ 5.0 mA 24 V 4.7 kΩ 5.2 mA Values are for reference only Input/Output circuit 4/9/2020 ©2015-2020 FLIR ® FLIR Oryx Installation Guide Integrated Imaging Solutions Inc. All rights reserved.
-
Page 30: Input Timing Characteristics
Input Threshold High Voltage 4.54 V Input Threshold Low Voltage 1.26 V Cycle Rise Time 10.8 μs Cycle Fall Time 2 μs Current 4.1 mA 4/9/2020 ©2015-2020 FLIR ® FLIR Oryx Installation Guide Integrated Imaging Solutions Inc. All rights reserved. - Page 31 Propagation Delay High to Low 5.6 μs 16.7 μs PDHL Typical Positive Pulse Width 12 μs 12 μs MPPW Typical Negative Pulse Width 6 μs 6 μs MNPW 4/9/2020 ©2015-2020 FLIR ® FLIR Oryx Installation Guide Integrated Imaging Solutions Inc. All rights reserved.
-
Page 32: Output Timing Characteristics
Opto Current 3.08 mA 8.4 mA Opto Isolator Delay (High to Low) 5.3 μs 5.5 μs Opto Isolator Delay (Low to High) 12.7 μs 15.2 μs 4/9/2020 ©2015-2020 FLIR ® FLIR Oryx Installation Guide Integrated Imaging Solutions Inc. All rights reserved. - Page 33 Opto Current 2.68 mA 3.9 mA Opto Isolator Delay (High to Low) 3.9 μs 4.1 μs Opto Isolator Delay (Low to High) 26.8 μs 25.1 μs 4/9/2020 ©2015-2020 FLIR ® FLIR Oryx Installation Guide Integrated Imaging Solutions Inc. All rights reserved.
-
Page 34: Troubleshooting
8 Troubleshooting Troubleshooting Support FLIR endeavors to provide the highest level of technical support possible to you. Most support resources can be accessed through your product's Support page. From the FLIR machine vision page, click on your product family and then click the Go to Support Page link. -
Page 35: Status Indicator Led
Left and Right Bright Green 10 GigE connection Left Dim and Right Bright Green 1 GigE connection Left and/or Right Blinking Green Data transfer in progress 4/9/2020 ©2015-2020 FLIR ® FLIR Oryx Installation Guide Integrated Imaging Solutions Inc. All rights reserved. -
Page 36: Contacting Us
For any questions, concerns or comments please contact us via the following methods: Email General questions Support Ticket Technical support Go to the Support Page for any product on the FLIR machine Chat vision page and click the chat icon Find specifications, support articles, downloads on the Website product page at FLIR machine vision...
Need help?
Do you have a question about the ORYX R and is the answer not in the manual?
Questions and answers