FLIR Exx Series Getting Started Manual
Hide thumbs
Also See for Exx Series:
- User manual (206 pages) ,
- Getting started (148 pages) ,
- User manual (160 pages)
Table of Contents
Advertisement
Available languages
Available languages
Quick Links
Advertisement
Table of Contents

Related Manuals for FLIR Exx Series


Summary of Contents for FLIR Exx Series
- Page 1 Getting Started Guide FLIR Exx series...
- Page 4 Důležitá poznámka Před použitím zařízení si přečtěte veškeré pokyny, upozornění, varování a vyvázání se ze záruky, ujistěte se, že jim rozumíte, a řiďte se jimi. Vigtig meddelelse Før du betjener enheden, skal du du læse, forstå og følge alle anvisninger, advarsler, sikkerhedsforanstaltninger og ansvarsfraskrivelser.
-
Page 5: Table Of Contents
Table of contents Any late changes are first implemented in English. The latest revision of this publication always applies, and can be downloaded from http://support.flir.com. CS-CZ Čeština ....................7 DA-DK Dansk ..................... 12 DE-DE Deutsch................... 17 EL-GR Ελληνικά..................22 EN-US English .................... 27 ES-ES Español.................... -
Page 7: Cs-Cz Čeština
9. Přetažením přesuňte snímek z karty Pohled z levé strany nebo kamery. Poznámka: Snímky můžete do počítače přesunout také pomocí softwaru FLIR Tools dodávaného s kamerou. 1. Laserové ukazovátko © 2011, FLIR Systems, Inc. All rights reserved worldwide. Publ. no. T559524, rev. 014... - Page 8 2. Paměťová karta 3. Videokabel 1. Dotykový displej LCD 2. Navigační ploška 3. Tlačítko se dvěma funkcemi: • Potvrzení volby • Přepínání mezi automatickým a ručním režimem © 2011, FLIR Systems, Inc. All rights reserved worldwide. Publ. no. T559524, rev. 014...
- Page 9 1. Tabulka s výsledky měření 2. Měřicí nástroje (např. měření bodu) 3. Ikony stavu a režimu 4. Teplotní stupnice 5. Tlačítko Zpět 6. Režim nastavení (kamera, video, nastavení) © 2011, FLIR Systems, Inc. All rights reserved worldwide. Publ. no. T559524, rev. 014...
- Page 10 • Dbejte opatrnosti, když kameru držíte kolmo k cíli – můžete se stát zdrojem odraženého infračerveného záření. © 2011, FLIR Systems, Inc. All rights reserved worldwide. Publ. no. T559524, rev. 014...
- Page 11 • Různé typy chyb a vad, jako jsou například vady v konstrukci budovy, se mohou zobrazovat jako vady se stejným rozložení teplot. • Správná analýza infračerveného obrazu vyžaduje znalosti aplikace na profesionální úrovni. © 2011, FLIR Systems, Inc. All rights reserved worldwide. Publ. no. T559524, rev. 014...
-
Page 12: Dk Dansk
4. Fokusring Bemærk! Du kan også flytte billeder til 5. Infrarød linse computeren vha. FLIR Tools-softwaren, Set fra venstre der følger med kameraet. 1. Laserpointer © 2011, FLIR Systems, Inc. All rights reserved worldwide. Publ. no. T559524, rev. 014... - Page 13 Bemærk: Fjern ikke kortet, når denne indikator lyser 2. Hukommelseskort 3. Videokabel 1. LCD-berøringsskærm 2. Navigeringstaster 3. Knap med to funktioner: • Bekræft valg © 2011, FLIR Systems, Inc. All rights reserved worldwide. Publ. no. T559524, rev. 014...
- Page 14 1. Resultatoversigt for målingen 2. Måleredskaber (f.eks. spotmeter) 3. Status- og tilstandsikoner 4. Temperaturskala 5. Knappen Tilbage 6. Konfigurationstilstand (kamera, video, indstillinger) © 2011, FLIR Systems, Inc. All rights reserved worldwide. Publ. no. T559524, rev. 014...
- Page 15 • Vælg en zone med høj emissivitet, dvs. et område med en mat overflade, når der udføres en måling. • Blanke objekter, dvs. med lav emissivitet, kan i kameraet fremtræde © 2011, FLIR Systems, Inc. All rights reserved worldwide. Publ. no. T559524, rev. 014...
- Page 16 • Forskellige fejltyper, som eksempelvis omkring bygningskonstruktioner, kan resultere i samme type af termisk mønster. • Korrekt analyse af et infrarødt billede og anvendelse heraf kræver professionel viden. © 2011, FLIR Systems, Inc. All rights reserved worldwide. Publ. no. T559524, rev. 014...
-
Page 17: De Deutsch
Drop von der Karte oder Kamera. Hinweis: Sie können Bilder auch mit der Software FLIR Tools, die im Lieferumfang der Kamera enthalten ist, auf den Computer übertragen. © 2011, FLIR Systems, Inc. All rights reserved worldwide. Publ. no. T559524, rev. 014... - Page 18 5. Taste zum Einschalten des Laserpointers 6. Betriebsanzeige 7. Ein/Aus-Taste 8. Taste mit zwei Funktionen: • Anzeige des Menüsystems • Zurück 1. Verriegelung der Akkufach- Abdeckung. Zum Öffnen drücken. © 2011, FLIR Systems, Inc. All rights reserved worldwide. Publ. no. T559524, rev. 014...
- Page 19 Digitalkamera, Thermische Fusion, Bild-in-Bild) Geräte: rechte Seite 8. Messwerkzeuge 9. Farbpaletten 10. Messparameter Entnehmen des Akkus 1. Drücken Sie auf die Verriegelung des Akkufachs. 1. Stromversorgungskabel © 2011, FLIR Systems, Inc. All rights reserved worldwide. Publ. no. T559524, rev. 014...
- Page 20 5. Drehen Sie das Objektiv um 30 Grad im Uhrzeigersinn. 2. Verwenden Sie die Objektivkappe als Werkzeug zum Lösen des Kunststoffvorderteils am Objektiv. Drehen Sie das Kunststoffvorderteil © 2011, FLIR Systems, Inc. All rights reserved worldwide. Publ. no. T559524, rev. 014...
- Page 21 • Die Elemente, die Sie untersuchen möchten, sollten keiner direkten Sonneneinstrahlung ausgesetzt sein. • Unterschiedliche Mängel, beispielsweise in der Gebäudekonstruktion, können zu gleichartigen Wärmemustern führen. © 2011, FLIR Systems, Inc. All rights reserved worldwide. Publ. no. T559524, rev. 014...
-
Page 22: El-Gr Ελληνικά
κάρτα ή την κάμερα με μεταφορά και απόθεση. Σημείωση: Μπορείτε επίσης να μετακινήσετε εικόνες στον υπολογιστή, χρησιμοποιώντας το λογισμικό εργαλείων του FLIR, το οποίο συνοδεύει την κάμερά σας. © 2011, FLIR Systems, Inc. All rights reserved worldwide. Publ. no. T559524, rev. 014... - Page 23 8. Κουμπί με δύο λειτουργίες: • Εμφάνιση του συστήματος μενού • Επιστροφή 1. Ασφάλεια για το άνοιγμα του καλύμματος της υποδοχής της μπαταρίας. Πιέστε για να ανοίξει. © 2011, FLIR Systems, Inc. All rights reserved worldwide. Publ. no. T559524, rev. 014...
- Page 24 ή/και τη διαμόρφωση του χρήστη. 1. Πίνακας αποτελεσμάτων μέτρησης 2. Εργαλεία μέτρησης (π.χ. σημειακός μετρητής) 3. Εικονίδια κατάστασης και λειτουργίας 4. Κλίμακα θερμοκρασίας 5. Κουμπί πίσω © 2011, FLIR Systems, Inc. All rights reserved worldwide. Publ. no. T559524, rev. 014...
- Page 25 3. Σημειώστε τα σημάδια που βρίσκονται πάνω στην υποδοχή μπαγιονέτ του φακού και στον ανταλλακτικό φακό. 3. Τραβήξτε τη διαφανή ταινία για να βγάλετε τη μπαταρία. © 2011, FLIR Systems, Inc. All rights reserved worldwide. Publ. no. T559524, rev. 014...
- Page 26 και την απόσταση του στόχου. Χρησιμοποιήστε το κέντρο του εργαλείου μέτρησης σημείου ως οδηγό για το ελάχιστο δυνατό μέγεθος αντικειμένου και πλησιάστε, αν απαιτείται. Φροντίστε να απομακρυνθείτε από επικίνδυνες © 2011, FLIR Systems, Inc. All rights reserved worldwide. Publ. no. T559524, rev. 014...
-
Page 27: Us English
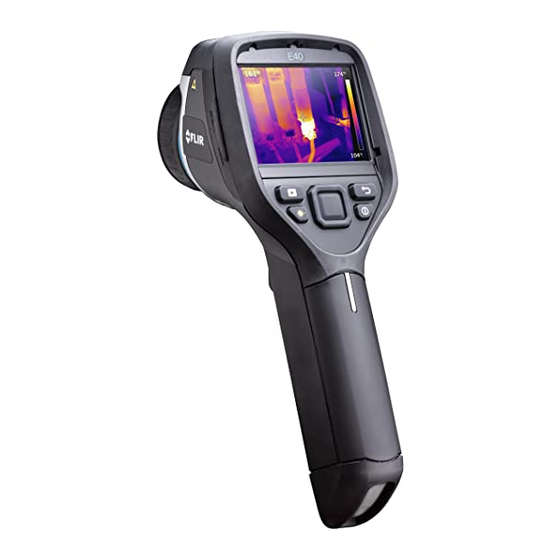
View from the left Note: You can also move images to the computer using the FLIR Tools software, which comes with your camera. 1. Laser pointer © 2011, FLIR Systems, Inc. All rights reserved worldwide. Publ. no. T559524, rev. 014... - Page 28 2. Memory card 3. Video cable 1. Touch-screen LCD 2. Navigation pad 3. Button with two functions: • Confirm choice © 2011, FLIR Systems, Inc. All rights reserved worldwide. Publ. no. T559524, rev. 014...
-
Page 29: Removing The Battery
1. Measurement result table 2. Measurement tools (e.g., spotmeter) 3. Status and mode icons 4. Temperature scale 5. Back button 6. Setup mode (camera, video, settings) © 2011, FLIR Systems, Inc. All rights reserved worldwide. Publ. no. T559524, rev. 014... - Page 30 • Select a zone of high emissivity, i.e., an area with a matte surface, to perform a measurement. © 2011, FLIR Systems, Inc. All rights reserved worldwide. Publ. no. T559524, rev. 014...
- Page 31 • Various types of faults, such as those in a building’s construction, may result in the same type of thermal pattern. • Correctly analyzing an infrared image requires professional knowledge about the application. © 2011, FLIR Systems, Inc. All rights reserved worldwide. Publ. no. T559524, rev. 014...
-
Page 32: Es Español
"arrastrar y soltar". Nota: También puede mover imágenes al equipo con el software FLIR Tools, que se incluye con la cámara. © 2011, FLIR Systems, Inc. All rights reserved worldwide. Publ. no. T559524, rev. 014... - Page 33 8. Botón con dos funciones: • Mostrar el sistema de menús • Volver 1. Pestaña para abrir la cubierta del compartimento de la batería. Presione para abrir. © 2011, FLIR Systems, Inc. All rights reserved worldwide. Publ. no. T559524, rev. 014...
- Page 34 8. Herramientas de medición 9. Paletas de colores 10. Parámetros de medición Extracción de la batería 1. Presione la pestaña del compartimento de la batería. 1. Cable de alimentación © 2011, FLIR Systems, Inc. All rights reserved worldwide. Publ. no. T559524, rev. 014...
- Page 35 5. Gire la lente 30° hacia la derecha. 2. Utilice la protección de la lente a modo de herramienta para extraer la parte frontal de plástico de la lente. © 2011, FLIR Systems, Inc. All rights reserved worldwide. Publ. no. T559524, rev. 014...
- Page 36 • El análisis correcto de una imagen de infrarrojos requiere conocimientos profesionales específicos acerca de su uso. © 2011, FLIR Systems, Inc. All rights reserved worldwide. Publ. no. T559524, rev. 014...
-
Page 37: Fi Suomi
9. Siirrä kuva kortista tai kamerasta 5. Infrapunalinssi vetämällä ja pudottamalla. Kuva vasemmalta Huomautus: Voit siirtää kuvia tietokoneeseen myös kameran mukana toimitetun FLIR Tools -ohjelmiston avulla. 1. Laserosoitin 2. Digitaalikameran lamppu © 2011, FLIR Systems, Inc. All rights reserved worldwide. Publ. no. T559524, rev. 014... - Page 38 Älä poista korttia, kun merkkivalo palaa. 2. Muistikortti 3. Videokaapeli 1. Kosketusnäyttö (nestekidenäyttö) 2. Nuolinäppäimistö 3. Kaksitoiminen painike: • Vahvista valinta • Vaihda automaattisen ja manuaalisen säätötilan välillä 4. Kuvakansiopainike © 2011, FLIR Systems, Inc. All rights reserved worldwide. Publ. no. T559524, rev. 014...
- Page 39 1. Mittaustulostaulu. 2. Mittaustyökalut (esimerkiksi mittauspiste) 3. Tilakuvakkeet 4. Lämpötila-asteikko 5. Paluupainike 6. Asetustila (kamera, video, asetukset) © 2011, FLIR Systems, Inc. All rights reserved worldwide. Publ. no. T559524, rev. 014...
- Page 40 • Vältä suoraa auringonvaloa kuvattavissa kohteissa. • Erityyppiset viat, kuten rakennuksen rakenneviat, voivat tuottaa samantyyppisiä lämpökuvia. • Lämpökuvien oikea analysointi edellyttää ammattitietoutta. © 2011, FLIR Systems, Inc. All rights reserved worldwide. Publ. no. T559524, rev. 014...
- Page 41 FI-FI Suomi © 2011, FLIR Systems, Inc. All rights reserved worldwide. Publ. no. T559524, rev. 014...
-
Page 42: Fr Français
5. Objectif infrarouge déposer. Remarque : Le logiciel FLIR Tools livré avec la caméra vous permet également de déplacer des images vers l'ordinateur. © 2011, FLIR Systems, Inc. All rights reserved worldwide. Publ. no. T559524, rev. 014... - Page 43 8. Bouton à double fonction : • Affichage du système de menus • Précédent 1. Poussez le loquet pour ouvrir le couvercle du compartiment réservé à la batterie. © 2011, FLIR Systems, Inc. All rights reserved worldwide. Publ. no. T559524, rev. 014...
-
Page 44: Retrait De La Batterie
8. Outils de mesure 9. Palettes de couleurs 10. Paramètres de mesure Retrait de la batterie 1. Poussez le loquet du compartiment de la batterie. 1. Câble d'alimentation © 2011, FLIR Systems, Inc. All rights reserved worldwide. Publ. no. T559524, rev. 014... - Page 45 5. Faites pivoter l'objectif de 30 ° dans le sens des aiguilles d'une montre. 2. Utilisez le cache de l'objectif pour retirer la partie avant en plastique de © 2011, FLIR Systems, Inc. All rights reserved worldwide. Publ. no. T559524, rev. 014...
- Page 46 • Pour analyser correctement une image infrarouge, vous devez posséder les connaissances professionnelles requises pour le type d’opération en question. © 2011, FLIR Systems, Inc. All rights reserved worldwide. Publ. no. T559524, rev. 014...
-
Page 47: Hu Magyar
9. Áthúzással töltse át a képet a (külön megvásárolható kiegészítő). kártyáról vagy a kameráról. 4. Fókuszgyűrű Megjegyzés: A képeket a kamerához 5. Infravörös lencse mellékelt FLIR Tools szoftverrel is áttöltheti. © 2011, FLIR Systems, Inc. All rights reserved worldwide. Publ. no. T559524, rev. 014... - Page 48 7. Be- és kikapcsológomb 8. Két funkcióval rendelkező gomb: • A menürendszer megjelenítése • Visszalépés 1. Az akkumulátortartó fedelének kinyitására szolgáló retesz. Nyomja be a fedél kinyitásához. © 2011, FLIR Systems, Inc. All rights reserved worldwide. Publ. no. T559524, rev. 014...
- Page 49 Külső eszközök kép a képben) 8. Mérőeszközök csatlakoztatása: jobb oldal 9. Színpaletták 10. Mérési paraméterek Az akkumulátor eltávolítása 1. Nyomja be az akkumulátortartó reteszét. 1. Tápkábel © 2011, FLIR Systems, Inc. All rights reserved worldwide. Publ. no. T559524, rev. 014...
- Page 50 5. Fordítsa el a lencsét az óramutató járásával megegyezően 30°-kal. 2. A lencsevédőt használva távolítsa el a lencse műanyag előtétjét. Fordítsa © 2011, FLIR Systems, Inc. All rights reserved worldwide. Publ. no. T559524, rev. 014...
- Page 51 • Különböző hibák (pl. épületszerkezeti hibák) ugyanilyen típusú termikus mintát eredményezhetnek. • Az infravörös képek megfelelő elemzéséhez az alkalmazási terület magas szintű ismerete szükséges. © 2011, FLIR Systems, Inc. All rights reserved worldwide. Publ. no. T559524, rev. 014...
-
Page 52: It Italiano
4. Ghiera di messa a fuoco 5. Obiettivo a infrarossi Nota: è inoltre possibile spostare le immagini nel computer utilizzando il software FLIR Tools, fornito con la termocamera. © 2011, FLIR Systems, Inc. All rights reserved worldwide. Publ. no. T559524, rev. 014... - Page 53 8. Pulsante con due funzioni: • Visualizza il sistema di menu • Torna indietro 1. Leva di apertura per aprire il coperchio del vano batteria. Premere per aprire. © 2011, FLIR Systems, Inc. All rights reserved worldwide. Publ. no. T559524, rev. 014...
- Page 54 1. Tabella dei risultati di misurazione 2. Strumenti di misurazione (ad esempio, puntatore) 3. Icone di stato e di modalità 4. Scala temperatura 5. Pulsante Indietro © 2011, FLIR Systems, Inc. All rights reserved worldwide. Publ. no. T559524, rev. 014...
-
Page 55: Rimozione Della Batteria
2. Aprire il coperchio della batteria. 3. Notare i segni indicatori sull'innesto a baionetta dell'obiettivo e sull'obiettivo sostitutivo. 3. Tirare il nastro trasparente per sollevare la batteria. © 2011, FLIR Systems, Inc. All rights reserved worldwide. Publ. no. T559524, rev. 014... - Page 56 Assicurarsi di restare lontano da aree pericolose o da componenti elettrici attivi. © 2011, FLIR Systems, Inc. All rights reserved worldwide. Publ. no. T559524, rev. 014...
- Page 57 左 左 側 側 か か ら ら の の 外 外 観 観 カードまたはカメラから画像を移動 します。 注 注 : カメラに付属する FLIR Tools ソフト ウェアを使用して、画像をコンピュー ターに移動することもできます。 1. レーザー ポインター 2. デジタル カメラ用ライト © 2011, FLIR Systems, Inc. All rights reserved worldwide. Publ. no. T559524, rev. 014...
-
Page 58: Ja-Jp 日本語
ことを示すインジケーターです。注 注 : このインジケーターが点灯している 場合はカードを取り出さないでくだ さい。 2. メモリー カード 3. ビデオ ケーブル 1. タッチ スクリーン LCD 2. ナビゲーション パッド 3. 2 つの機能を持つボタン: • 選択の確定 • 自動調整と手動調整モードの切り 替え © 2011, FLIR Systems, Inc. All rights reserved worldwide. Publ. no. T559524, rev. 014... - Page 59 2. 測定ツール (スポットメーターなど) 3. ステータスおよびモード アイコン 4. 温度スケール 5. [戻る] ボタン 6. セットアップ モード (カメラ、ビデ オ、設定) 7. カメラ モード (赤外線カメラ、デジ タル カメラ、フュージョン、ピク チャー イン ピクチャー) 8. 測定ツール © 2011, FLIR Systems, Inc. All rights reserved worldwide. Publ. no. T559524, rev. 014...
- Page 60 追 追 加 加 レ レ ン ン ズ ズ の の 取 取 り り 付 付 け け 4. 注意しながらレンズを所定の位置に 押し込みます。 1. レンズ前面の 2 つのくぼみと、レン ズ キャップにある対応するツメの位 置を確認してください。 5. レンズを 30°時計回りに回します。 2. レンズ キャップをツールとして使用 し、プラスチックのレンズ前面を取 り外します。レンズ前面を 30°反時計 回りに回します。 3. レンズのバヨネット式マウント側の 目印と交換用レンズの目印の位置を 確認します。 © 2011, FLIR Systems, Inc. All rights reserved worldwide. Publ. no. T559524, rev. 014...
- Page 61 • カメラは対象に対して垂直になるよう にしてください。反射によりユーザー 自身が赤外線の放射源となる可能性も あります。 • 光沢のない表面を持つ領域など、放射 率の高い場所を選択し、測定を実施し てください。 • 反射の影響で、放射率の低い空のオブ ジェクトが温かい (または冷たい) オブ ジェクトとしてカメラに表示される場 合があります。 • 検査対象に直射日光が当たらないよう にしてください。 • 建物の構造などのさまざまな種類の欠 陥により、同様の熱的パターンが生成 される場合があります。 • 熱画像を適切に解析するには、その用 途に関する専門知識が必要です。 © 2011, FLIR Systems, Inc. All rights reserved worldwide. Publ. no. T559524, rev. 014...
- Page 62 퓨터에 카메라를 연결합니다. 9. 드래그 앤 드랍 기능을 사용하여 이미 지를 카드 또는 카메라에서 이동합니 다. 참 참 고 고 : 카메라와 함께 제공되는 FLIR Tools 1. 레이저 포인터 소프트웨어를 사용하여 컴퓨터로 이미지 2. 디지털 카메라용 램프 를 이동할 수도 있습니다.
-
Page 63: Ko-Kr 한국어
5. 레이저 포인터를 작동하기 위한 버튼 6. 전원 표시등 7. 켜기/끄기 버튼 1. 전원 케이블 8. 다음 두 가지 기능을 가진 버튼: 2. USB 미니 B 케이블 © 2011, FLIR Systems, Inc. All rights reserved worldwide. Publ. no. T559524, rev. 014... - Page 64 배 배 터 터 리 리 분 분 리 리 1. 배터리함의 래치를 누릅니다. 2. 렌즈 마개를 도구로 사용하여 렌즈 전 면의 플라스틱 덮개를 분리합니다. 플 © 2011, FLIR Systems, Inc. All rights reserved worldwide. Publ. no. T559524, rev. 014...
- Page 65 유형의 결함이 열화상 패턴을 동일한 유형으로 인식되게 할 수 있습니다. • 적외선 이미지를 올바르게 분석하려면 응용 분야에 대한 전문 지식이 필요합 니다. 5. 렌즈를 시계 방향으로 30도 회전합니 다. © 2011, FLIR Systems, Inc. All rights reserved worldwide. Publ. no. T559524, rev. 014...
-
Page 66: Nb-No Norsk
Merk: Du kan også overføre bildene til 4. Fokusring datamaskinen med programvaren i FLIR 5. Infrarød linse Verktøy, som leveres sammen med Sett fra venstre kameraet. 1. Laserpeker 2. Lampe for digitalkamera © 2011, FLIR Systems, Inc. All rights reserved worldwide. Publ. no. T559524, rev. 014... - Page 67 2. Minnekort 3. Videokabel 1. LCD berøringsskjerm 2. Navigasjonspute 3. Knapp med to funksjoner: • Bekreft valg • Bytte mellom automatisk og manuell justeringsmodus © 2011, FLIR Systems, Inc. All rights reserved worldwide. Publ. no. T559524, rev. 014...
- Page 68 1. Tabell over måleresultater 2. Måleverktøy (f.eks. punktmåler) 3. Status- og modusikoner 4. Temperaturskala 5. Tilbake-knapp 6. Oppsettsmodus (kamera, video, innstillinger) © 2011, FLIR Systems, Inc. All rights reserved worldwide. Publ. no. T559524, rev. 014...
- Page 69 – du kan bli gjenstand for infrarød stråling via refleksjon. • Velg en sone med høy emissivitet, f.eks. et område med matt overflate, for å utføre en måling. © 2011, FLIR Systems, Inc. All rights reserved worldwide. Publ. no. T559524, rev. 014...
- Page 70 • Forskjellige typer feil som f.eks. kan påvises i en bygningskonstruksjon, kan føre til samme type termisk mønster. • Å analysere et infrarødt bilde på riktig måte krever profesjonell kunnskap om bruken. © 2011, FLIR Systems, Inc. All rights reserved worldwide. Publ. no. T559524, rev. 014...
-
Page 71: Nl Nederlands
Opmerking: u kunt afbeeldingen ook naar de computer verplaatsen met behulp van de FLIR-software die met uw camera wordt meegeleverd. © 2011, FLIR Systems, Inc. All rights reserved worldwide. Publ. no. T559524, rev. 014... - Page 72 6. Voedingsindicator 7. Aan/uit-knop 8. Knop met twee functies: • Menusysteem weergeven • Terug naar 1. Vergrendeling voor het openen van het batterijvak. Druk om te openen. © 2011, FLIR Systems, Inc. All rights reserved worldwide. Publ. no. T559524, rev. 014...
- Page 73 8. Meethulpmiddelen 9. Kleurpaletten 10. Metingsparameters De batterij verwijderen 1. Druk op de vergrendeling van het batterijvak. 1. Voedingskabel © 2011, FLIR Systems, Inc. All rights reserved worldwide. Publ. no. T559524, rev. 014...
- Page 74 5. Draai de lens 30° met de klok mee. 2. Gebruik de lenskap om de plastic voorkant van de lens te verwijderen. © 2011, FLIR Systems, Inc. All rights reserved worldwide. Publ. no. T559524, rev. 014...
- Page 75 • Het correct analyseren van een infraroodafbeelding vereist professionele kennis van het toepassingsgebied. © 2011, FLIR Systems, Inc. All rights reserved worldwide. Publ. no. T559524, rev. 014...
-
Page 76: Pl Polski
„przeciągnij i upuść”. Uwaga: możesz też przenosić obrazy do komputera przy użyciu oprogramowania Narzędzia FLIR, dołączonego do kamery. 1. Wskaźnik laserowy 2. Lampa kamery cyfrowej © 2011, FLIR Systems, Inc. All rights reserved worldwide. Publ. no. T559524, rev. 014... - Page 77 1. Ekran dotykowy LCD 2. Przyciski nawigacyjne 3. Przycisk dwufunkcyjny: • Przycisk potwierdzania wyboru • Przełącza między trybem regulacji automatycznej i ręcznej 4. Przycisk archiwizacji obrazu © 2011, FLIR Systems, Inc. All rights reserved worldwide. Publ. no. T559524, rev. 014...
- Page 78 1. Tabela wyników pomiarów 2. Narzędzia pomiarowe (np. miernik punktowy) 3. Ikony trybu i stanu 4. Skala temperatury 5. Przycisk Wstecz 6. Tryb konfiguracji (kamera, obraz, ustawienia) © 2011, FLIR Systems, Inc. All rights reserved worldwide. Publ. no. T559524, rev. 014...
- Page 79 Uważaj, aby nie znaleźć się w obszarze niebezpiecznym ani w pobliżu działających podzespołów elektrycznych. • Zachowaj ostrożność, trzymając kamerę prostopadle do celu — możesz stać się źródłem © 2011, FLIR Systems, Inc. All rights reserved worldwide. Publ. no. T559524, rev. 014...
- Page 80 • Różne typy usterek, jak np. wady w konstrukcji budynku, mogą tworzyć ten sam typ rozkładu temperatury. • Prawidłowa analiza obrazu termowizyjnego wymaga profesjonalnej znajomości odpowiedniego obszaru tematycznego. © 2011, FLIR Systems, Inc. All rights reserved worldwide. Publ. no. T559524, rev. 014...
-
Page 81: Pt Português
5. Lente de infravermelhos arrastar e largar. Nota: Também pode transferir imagens para o computador utilizando o software FLIR Tools fornecido com a câmara. © 2011, FLIR Systems, Inc. All rights reserved worldwide. Publ. no. T559524, rev. 014... - Page 82 8. Botão com duas funções: • Visualizar o sistema de menus • Retroceder 1. Fecho para abrir a tampa do compartimento da bateria. Premir para abrir. © 2011, FLIR Systems, Inc. All rights reserved worldwide. Publ. no. T559524, rev. 014...
- Page 83 8. Ferramentas de medição 9. Paletas de cores 10. Parâmetros de medição Remover a bateria 1. Prima o fecho do compartimento da bateria. 1. Cabo de alimentação © 2011, FLIR Systems, Inc. All rights reserved worldwide. Publ. no. T559524, rev. 014...
- Page 84 2. Utilize a tampa da lente como ferramenta para remover a parte frontal de plástico da lente. Rode a parte frontal de plástico 30° graus no © 2011, FLIR Systems, Inc. All rights reserved worldwide. Publ. no. T559524, rev. 014...
- Page 85 • A análise correcta de uma imagem de infravermelhos requer o conhecimento profissional do campo em que vai ser utilizada. © 2011, FLIR Systems, Inc. All rights reserved worldwide. Publ. no. T559524, rev. 014...
-
Page 86: Ru-Ru Русский
памяти или из камеры, перетащив его при помощи мыши. Примечание. Можно также переместить изображения на компьютер с помощью программного обеспечения FLIR Tools, которое поставляется вместе с камерой. © 2011, FLIR Systems, Inc. All rights reserved worldwide. Publ. no. T559524, rev. 014... - Page 87 7. Кнопка On/Off (Вкл./Выкл.) 8. Кнопка с двумя функциями • Отображение системы меню • Назад 1. Нажмите на фиксатор, чтобы открыть крышку аккумуляторного отсека. Нажмите для открытия. © 2011, FLIR Systems, Inc. All rights reserved worldwide. Publ. no. T559524, rev. 014...
- Page 88 модели камеры и/или заказанной конфигурации устройства. 1. Таблица результатов измерения 2. Инструменты измерения (например, экспозиметр) 3. Значки состояния и режима 4. Шкала температуры 5. Кнопка Назад © 2011, FLIR Systems, Inc. All rights reserved worldwide. Publ. no. T559524, rev. 014...
- Page 89 30° против часовой стрелки. 2. Откройте крышку аккумулятора. 3. Обратите внимание на метки на байонетной оправе объектива и на сменном объективе. 3. Потяните прозрачную ленту, чтобы поднять аккумулятор. © 2011, FLIR Systems, Inc. All rights reserved worldwide. Publ. no. T559524, rev. 014...
- Page 90 до объекта съемки. Используйте центральную часть инструмента для измерения точек как ориентир для минимально возможного размера объекта и при необходимости выполните приближение. Избегайте опасных зон и не касайтесь © 2011, FLIR Systems, Inc. All rights reserved worldwide. Publ. no. T559524, rev. 014...
-
Page 91: Se Svenska
Obs! Du kan också flytta bilder till datorn 3. Stativgänga. Kräver en adapter (extra med programvaran FLIR Tools som tillbehör) medföljer kameran. 4. Fokusring 5. IR-objektiv © 2011, FLIR Systems, Inc. All rights reserved worldwide. Publ. no. T559524, rev. 014... - Page 92 6. Driftindikator 7. På/av-knapp 8. Knapp med två funktioner: • Visa menysystemet • Gå tillbaka 1. Spärr för att öppna batterifackets lock. Tryck för att öppna. © 2011, FLIR Systems, Inc. All rights reserved worldwide. Publ. no. T559524, rev. 014...
- Page 93 Ansluta externa enheter: sammanslagning, bild-i-bild) 8. Mätverktyg höger sida 9. Färgpaletter 10. Mätparametrar Ta bort batteriet 1. Tryck på spärren på batterifacket. 1. Spänningskabel 2. USB mini-B-kabel © 2011, FLIR Systems, Inc. All rights reserved worldwide. Publ. no. T559524, rev. 014...
- Page 94 2. Använd linsskyddet som ett verktyg för att ta bort plastlocket på Att tänka på • Ställ först in fokus. När fokus inte är inställt blir mätningen fel. © 2011, FLIR Systems, Inc. All rights reserved worldwide. Publ. no. T559524, rev. 014...
- Page 95 • Olika typer av fel (exempelvis fel i en byggnads konstruktion) kan resultera i samma typ av värmemönster. • Det krävs professionella kunskaper om tillämpningen för att kunna analysera en IR-bild. © 2011, FLIR Systems, Inc. All rights reserved worldwide. Publ. no. T559524, rev. 014...
-
Page 96: Tr-Tr Türkçe
(ekstra aksesuar) Not: Resimleri kameranızla birlikte verilen 4. Odak halkası FLIR Tools yazılımını kullanarak 5. İnfrared merceği bilgisayara da taşıyabilirsiniz. Soldan görünüm 1. Lazer imleç © 2011, FLIR Systems, Inc. All rights reserved worldwide. Publ. no. T559524, rev. 014... - Page 97 Not: Bu gösterge yanıp sönerken kartı çıkarmayın 2. Bellek kartı 3. Video kablosu 1. Dokunmatik LCD ekran 2. Navigasyon aracı 3. İki işlevli düğme: • Seçeneği onayla © 2011, FLIR Systems, Inc. All rights reserved worldwide. Publ. no. T559524, rev. 014...
- Page 98 3. Durum ve mod simgeleri 4. Sıcaklık skalası 5. Geri düğmesi 6. Ayar modu (kamera, video, ayarlar) 7. Kamera modu (infrared kamera, dijital kamera, termal birleşme, resim içinde resim) © 2011, FLIR Systems, Inc. All rights reserved worldwide. Publ. no. T559524, rev. 014...
- Page 99 • Kamerayı hedefe dik tutarken dikkatli olun; yansıtma ile infrared ışıma kaynağı haline gelebilirsiniz. • Ölçüm yapmak için yüksek emisyona sahip bir alan (örn. mat yüzeye sahip bir bölge) seçin. © 2011, FLIR Systems, Inc. All rights reserved worldwide. Publ. no. T559524, rev. 014...
- Page 100 • Aynı tip termal modellerde, bir binanın yapısına benzer şekilde çeşitli hatalar oluşabilir. • İnfraredli bir resmin doğru şekilde analiz edilmesi için uygulama hakkında profesyonel bilgi gereklidir. © 2011, FLIR Systems, Inc. All rights reserved worldwide. Publ. no. T559524, rev. 014...
- Page 101 右 右 视 视 图 图 • 存储卡 • 视频接口 底 底 视 视 图 图 1. 右侧接口盒盖: • USB-A • USB mini-B • 电源 1. 用于打开电池盒盖的锁扣。推动可打 开。 © 2011, FLIR Systems, Inc. All rights reserved worldwide. Publ. no. T559524, rev. 014...
-
Page 102: Zh-Cn 简体中文
连 连 接 接 外 外 部 部 设 设 备 备 : : 右 右 侧 侧 4. 图像存档按钮 5. 用于操作激光指示器的按钮 6. 电源指示灯 7. 开/关按钮 8. 双功能按钮: • 显示菜单系统 • 返回 1. 电源线 2. USB mini-B 线缆 3. USB-A 线缆 © 2011, FLIR Systems, Inc. All rights reserved worldwide. Publ. no. T559524, rev. 014... - Page 103 安 安 装 装 其 其 他 他 镜 镜 头 头 9. 调色板 1. 注意镜头正面的两个凹口和镜头盖上 10. 测量参数 的对应翼片。 卸 卸 下 下 电 电 池 池 1. 推动电池盒上的锁扣。 2. 使用镜头盖作为工具卸下镜头的塑料 前盖。将塑料前盖逆时针旋转 30°。 © 2011, FLIR Systems, Inc. All rights reserved worldwide. Publ. no. T559524, rev. 014...
- Page 104 4. 小心将镜头推入指定位置。 有源电气组件。 • 在垂直于目标把持热像仪时请小心,由 于反射,您可能会成为红外辐射源。 • 请选择高辐射率区域(即具有不光滑表 面的区域)来执行测量。 • 空白物体(即辐射率低的物体)由于会 产生反射,因而在热像仪中可能会显得 暖或冷。 • 请避免阳光直射于要进行检查的零部 件。 • 不同类型的错误(如建筑物建造中的错 5. 将镜头顺时针旋转 30°。 误)可能会产生同一类型的热敏感图 案。 • 正确分析红外图像要求具备有关应用的 专业知识。 © 2011, FLIR Systems, Inc. All rights reserved worldwide. Publ. no. T559524, rev. 014...
- Page 105 俯 俯 視 視 圖 圖 1. 右側連接埠盒蓋: • USB-A • USB mini-B • 電源 1. 開啟電池盒蓋的閂鈕。按下便可開 啟。 注 注 意 意 : : 蓋子有兩種款式。一種是硬塑 膠材質,另一種是軟橡膠材質。此影 © 2011, FLIR Systems, Inc. All rights reserved worldwide. Publ. no. T559524, rev. 014...
-
Page 106: Zh-Tw 繁體中文
連 連 線 線 外 外 部 部 裝 裝 置 置 : : 右 右 側 側 6. 電源指示器 7. 開/關按鈕 8. 提供兩項功能的按鈕: • 顯示功能表系統 • 返回 1. 電源線 2. USB mini-B 纜線 3. USB-A 纜線 © 2011, FLIR Systems, Inc. All rights reserved worldwide. Publ. no. T559524, rev. 014... - Page 107 安 安 裝 裝 額 額 外 外 的 的 鏡 鏡 頭 頭 9. 色譜 1. 請注意鏡頭前方的兩個刻痕,以及鏡 10. 測量參數 頭蓋上的對應凸片。 取 取 出 出 電 電 池 池 1. 推動電池盒上的閂鈕。 2. 使用鏡頭蓋做為工具來拆掉鏡頭的塑 膠前蓋。逆時針方向旋轉塑膠前蓋 30°。 © 2011, FLIR Systems, Inc. All rights reserved worldwide. Publ. no. T559524, rev. 014...
- Page 108 • 熱像儀的位置若與目標垂直,就要十分 小心—因為你可能成為紅外線的反射 源。 • 選取高放射率的區域,例如無光表面的 位置,以便進行測量。 • 空白物件 (也就是具有低放射率) 在熱像 儀當中可能顯示為高溫或低溫的狀態, 因為它們可能會導致反射。 • 請避免陽光直射您正在檢視的影像細 節。 5. 順時針旋轉鏡頭 30°。 • 不同的故障類型 (如建築結構的故障), 可能產生同一類模式的熱像。 • 要能正確分析紅外線影像,必須具備相 關應用的專業知識。 © 2011, FLIR Systems, Inc. All rights reserved worldwide. Publ. no. T559524, rev. 014...
- Page 110 A note on the technical production of this publication This publication was produced using XML – the eXtensible Markup Language. For more information about XML, please visit http://www.w3.org/XML/ A note on the typeface used in this publication This publication was typeset using Linotype Helvetica™ World. Helvetica™ was designed by Max Miedinger (1910–1980).
- Page 112 Corporate Headquarters FLIR Systems, Inc. 27700 SW Parkway Ave. Wilsonville, OR 97070 Telephone: +1-503-498-3547 Website http://www.flir.com Customer support http://support.flir.com Carbon offset The logistics chain of the hardcopy of this publication was carbon offset with the following unit series: ES-1-1-1931819756-1-1 to...
Need help?
Do you have a question about the Exx Series and is the answer not in the manual?
Questions and answers