Table of Contents
Advertisement
Advertisement
Table of Contents

Subscribe to Our Youtube Channel
Summary of Contents for Elitech ChloroChek Chloridometer 3400
- Page 1 ® CHLOROCHEK M O D E L 3 4 0 0 User’s Manual CHLORIDOMETER®...
- Page 2 CHLOROCHEK® ® Chloridometer Sweat Chloride Analyzer Model 3400 USER’S MANUAL 57-2006-03B (Last update 10/14/2020)
- Page 3 © 2017 ELITechGroup Inc. All rights reserved. Printed in the United States of America. The information in this document is subject to change without notice.
-
Page 4: Table Of Contents
TABLE OF CONTENTS Section 1 - Introduction ChloroChek Description ................4 Section 2 - Safety and Handling Information System Certification ................. 9 Buffer Solution, Gelatin Solution, and Standard Solution ......10 Section 3 - Operating the ChloroChek Menu Structure ..................11 Setup and Initial Description .............. -
Page 5: Section 1 - Introduction
O Standard Solution (REF: SS-251), is to be used on the ChloroChek. It is used as a calibration verifier, and quality control solution. ELITech Group Sweat Controls (REF: SS-150), levels #1, #2, and #3, are to be used on the ChloroChek. They are used as quality control solutions. - Page 6 The SS-251 ampule has a One Point Cut (OPC). Locate this point and break ampule by pushing the top of the ampule back while holding onto the base. It is recommended to use a plastic sleeve when breaking ampules. ELITech Group provides two protective sleeves with each new box of sweat controls (SS-150).
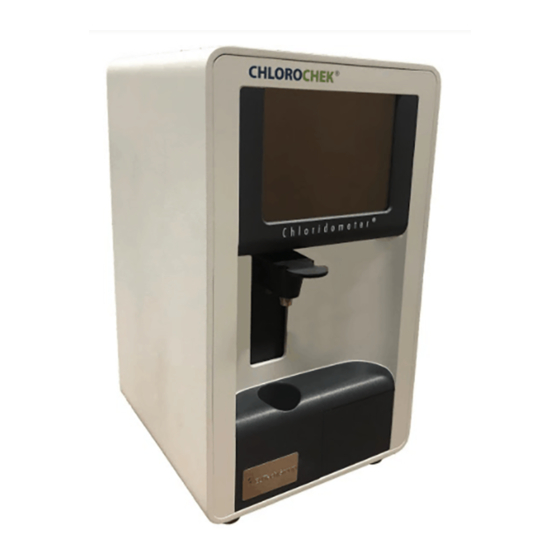
- Page 7 SECTION 1 INTRODUCTION 1.1 ChloroChek Description (continued) Instrument Front Touch Screen/ Display Handle for lowering the electrode carriage into the titration beaker. Pipette guides are Measurement Electrode on the side of the handle. Titration Beaker and Holder Silver Electrodes (Black housing = cathode Red housing = anode)
- Page 8 SECTION 1 INTRODUCTION 1.1 ChloroChek Description (continued) Instrument Rear Panel COM 1 – Serial data input port (Not active in this model) COM 2 – Serial data output port. RS232 port. USB data output port. Fuse holder for two- phase fuse Product protection of power Model/Serial...
- Page 9 B for manufacturer contact information). The packaging for this equipment was specially designed to ensure safe and hygienic transport. The packaging is reusable. Please save the packaging in case the unit needs to be shipped back to ELITech Group for repairs or service.
-
Page 10: Section 2 - Safety And Handling Information
SECTION 2 SAFETY AND HANDLING INFORMATION 2.1 System Certification The ChloroChek is an electronic laboratory measurement device. It should therefore be handled according to the safety provisions and precautions for electric measurement, control, and laboratory equipment. Warning! An apparatus with CLASS I construction shall be connected to a power outlet with a protective grounding connection. -
Page 11: Buffer Solution, Gelatin Solution, And Standard Solution
SECTION 2 SAFETY AND HANDLING INFORMATION 2.2 Buffer Solution, Gelatin Solution, and Standard Solution SS-251 100 mmol/L NaCl/H O Standard Solution Composition: 100 mmol/L sodium chloride in distilled water. Container: Clear glass One Point Cut (OPC) ampule. Nominal Volume: 1 mL. Storage and Shelf Life: Up to the expiration date indicated on the packaging when stored in the ampule at 41- 113°F, (5˚... -
Page 12: Section 3 - Operating The Chlorochek
SECTION 3 OPERATING THE CHLOROCHEK 3.1 Menu Structure... -
Page 13: Setup And Initial Description
SECTION 3 OPERATING THE CHLOROCHEK 3.2 Initial Setup and Description Place the instrument onto a flat and solid surface, such as a laboratory table. Avoid direct sunlight on the LCD screen for easier reading. Use the provided power cord to connect power from an outlet to the power entry module. NOTE: Ensure that the line voltage matches the voltage indicated by the arrow on the power entry module of the instrument. -
Page 14: Installing Electrodes
SECTION 3 OPERATING THE CHLOROCHEK 3.3 Installing Electrodes Hands should be gloved so that the electrodes and beaker are not contaminated. The Electrode Carriage must be in the up position. Install the anode (red housing) and cathode (black housing) electrodes in the appropriate colored receptacle. -
Page 15: Preparing The Working Solution
SECTION 3 OPERATING THE CHLOROCHEK 3.4 Preparing the Working Solution (Reagents) A fresh Working Solution must be prepared each day before using the ChloroChek. Appropriate good laboratory practices should be followed, including using appropriate personal protective equipment (PPEs). Refer to SDS. NOTE: The Reagent Set (SS-248) contains 1 bottle of SS-248GS and 37 flasks for SS-248BS. -
Page 16: Conditioning
SECTION 3 OPERATING THE CHLOROCHEK 3.5 Conditioning NOTE: Conditioning must take place whenever a new Working Solution is prepared and used. A new Working Solution should be prepared and used each day. With the instrument on, press MEASURE on the display. Place the filled titration beaker in the beaker receptacle. - Page 17 SECTION 3 OPERATING THE CHLOROCHEK 3.5 Conditioning (continued) Press the READY button on the display. NOTE: Pressing CANCEL ends the conditioning cycle and returns user to the Main screen. If this is done, the Working Solution must be replaced. In the following display, the user will be asked to wait until the system has reached its Working Point. A runtime display under the message visualizes this process.
- Page 18 (blue dot) on the neck of the ampule. Use a protective plastic sleeve when opening the ampule. Place a correctly-sized pipette tip onto a 10 µL fixed-volume piston pipette. ELITech Group has an appropriate pipette (AC-178) and pipette tips (SS-253) available.
- Page 19 SECTION 3 OPERATING THE CHLOROCHEK 3.5 Conditioning (continued) Using one of the pipette guides found on the sensor carriage, place the loaded pipette tip as near as possible in the center of the stirring Working Solution. Dispense the sample above the working solution, allowing the sample to drop into the working solution.
-
Page 20: Quality Control
SECTION 3 OPERATING THE CHLOROCHEK 3.6 Quality Control To ensure adequate quality control, Sweat Control Solution (SS-150) should be run at all three levels and the 100 mmol/L NaCl/H O Standard Solution (SS-251) should be assayed before running any patient samples. This must be done at least once a day and after conditioning with a freshly prepared Working Solution. -
Page 21: Sample Measurement
3.7 Sample Measurement PROCEDURE NOTE: Before each sample series, perform quality control procedures (see Section 3.5). ELITech Group normally recommends testing the 100 mmol/L NaCl/H O Standard Solution until it consistently reads 100 ± 2 mmol/L. Also, the three levels of sweat control should be tested; results should be within the specified values for the sweat controls. - Page 22 SECTION 3 OPERATING THE CHLOROCHEK 3.7 Sample Measurement (continued) Sample Measurement without ID Management The ChloroChek recognizes the added sample and the display will start counting up from 0 until it reaches the final value. The final value remains on the screen until another sample is pipetted into the Working Solution, or until user presses STANDBY on the screen.
- Page 23 SECTION 3 OPERATING THE CHLOROCHEK 3.7 Sample Measurement (continued) Sample Measurement with ID Management NOTE: Screen prompts are dependent on ID type selected in the ID Management settings menu. Flow charts describing screen prompts during sample measurement are provided in Appendix D. After conditioning is finished, the READY screen will contain sample or batch options, depending on the ID types selected.
- Page 24 SECTION 3 OPERATING THE CHLOROCHEK 3.7 Sample Measurement (continued) NOTE: Test results must be interpreted by a qualified physician, according to the pertinent guideline. See Appendix F, Reference Intervals for Sweat Chloride. After a final value is reached, the user can pipette another sample into the Working Solution following Steps 1-3 above.
-
Page 25: Ending A Measurement Series
SECTION 3 OPERATING THE CHLOROCHEK 3.8 Ending a Measurement Series Once all samples are measured, press STANDBY and then CANCEL. This will end the measurement sequence. NOTE: Users can run up to 50 samples in each series before needing a fresh Working Solution. A freshly prepared Working Solution should be a transparent red color. - Page 26 SECTION 3 OPERATING THE CHLOROCHEK 3.8 Ending a Measurement Series (continued) Discard the Working Solution. Rinse the titration beaker, stir bar, and electrodes with deionized water. Remove the electrodes from the electrode carriage for easy rinsing and drying. Dry the titration beaker, stir bar, and electrodes with lint-free tissue. To prevent oxidation, store cleaned and well dried electrodes in their individual plastic containers.
-
Page 27: Error Messages And Troubleshooting
SECTION 4 MAINTENANCE AND TROUBLESHOOTING 4.1 Error Messages and Troubleshooting The following is an overview of the individual component groups, identifying the function of each component, its potential malfunctions, the effects of the malfunctions on the measurement system, and the possible causes of the malfunction and the procedure for correcting each malfunction. -
Page 28: Cleaning The Electrodes
SECTION 4 MAINTENANCE AND TROUBLESHOOTING 4.2 Cleaning the Electrodes NOTE: If conditioning is unsuccessful or the software ‘times out’. The Measurement Electrode, silver anode, and silver cathode must be cleaned and a new Working Solution prepared. The Measurement Electrode must be replaced if conditioning continues to fail after multiple cleaning attempts. - Page 29 SECTION 4 MAINTENANCE AND TROUBLESHOOTING 4.2 Cleaning the Electrodes (continued) Dampen the large silver polishing cloth with deionized water. Clean all four sides of the electrode on the dampened cloth. Rinse the electrode with deionized water. 7. Dry with lint free tissue, i.e. Kimwipes. 8.
-
Page 30: Calibration And Meter Check
SECTION 4 MAINTENANCE AND TROUBLESHOOTING 4.3 Calibration and Meter Check The ChloroChek is factory calibrated. Calibration is not required by the user. Return the ChloroChek for service if the following occurs: • ChloroChek not able to condition even after electrodes have been cleaned and or replaced. •... -
Page 31: Cleaning The Chlorochek
REF: SS-133 (Decontamination Solution, Concentrate) can also be used. NOTE: These cleaning procedures are for routine use only. If shipping the instrument to ELITech Group for repair or service, refer to Appendix G, Returning Product for Warranty Repair or Credit. -
Page 32: Changing The Power Fuses Or Voltage Setting
SECTION 4 MAINTENANCE AND TROUBLESHOOTING 4.5 Changing the Power Fuses or Voltage Setting WARNING! Risk of electrical shock: Unplug the unit from the power supply before attempting to replace the fuses. Use the following instructions to replace fuses or to change the voltage setting to the local output. Use the correct rating of fuses for the power setting to be used. -
Page 33: Section 5 - Digital Data Management
SECTION 5 DIGITAL DATA MANAGEMENT 5.1 Digital Data Output If digital data output is installed, three digital data ports are located on the back of the ChloroChek. The ChloroChek can output the recorded measurement results to a PC via the COM2 (RS232) serial data port or the USB port. - Page 34 SECTION 5 DIGITAL DATA MANAGEMENT 5.1 Digital Data Output (continued) The following data format will be used for output: Formatting: ASCII A comma character (ASCII 0x2C ","), is used to separate the data columns and the carriage return character (ASCII 0x0d <CR>) to separate lines.
-
Page 35: Lab Options Menu Structure
SECTION 5 DIGITAL DATA MANAGEMENT 5.2 Lab Options Menu Structure... -
Page 36: Log Format Options
SECTION 5 DIGITAL DATA MANAGEMENT 5.3 Log Format Options Log Formats Format Description Advantages Disadvantages • • • Line by line Compact RFC4180: Not a formally • • released and controlled Comma-separated values Can be uploaded into • standard spreadsheets (e.g. Excel) Placed within quotation marks •... -
Page 37: Csv Format
SECTION 5 DIGITAL DATA MANAGEMENT 5.4 CSV Format If CSV format is selected, the log is displayed line by line. Each line is separated by the end of line symbol selected in the Lab Options. There are three types of line content: Type Purpose Intro... - Page 38 SECTION 5 DIGITAL DATA MANAGEMENT 5.4 CSV Format (continued) Output Content After each measurement a result line is published, which contains the following semicolon-separated values in a fixed order: charge Batch ID appears if entered manually or set to automatic. A minus sign "-" is displayed if Batch ID type is none or Single Sample is selected during measurement.
-
Page 39: Xml Format
SECTION 5 DIGITAL DATA MANAGEMENT 5.5 XML Format The XML format is published line by line, but a single record will generally extend across several lines. Each record is imported as a ticket and multiple measurements for one batch are combined into one ticket. Records are allocated to tickets in the same way as they are published;... - Page 40 SECTION 5 DIGITAL DATA MANAGEMENT 5.5 XML Format (continued) Measurement A measurement or mismeasurement is described in a ticket in an XML tag called MEASUREMENT, which contains the following values: BatchID Batch ID appears if entered manually or set to automatic. A minus sign "-" is displayed if Batch ID type is none, Single Sample is selected during measurement, or if it is a mismeasurement.
- Page 41 SECTION 5 DIGITAL DATA MANAGEMENT 5.5 XML Format (continued) Example of a Batch Measurement If a new batch is initiated, a section is published that opens the ticket as an XML tag in the log and measurements are then implemented within that batch: <Ticket class=”BATCH”...
-
Page 42: Legacy Csv Format
SECTION 5 DIGITAL DATA MANAGEMENT 5.6 Legacy CSV Format If Legacy CSV format is selected, the following header will be transferred before any data output at the beginning of a charge or a single sample measurement: charge, sample, date, time, value, device, device-no <CR> Then, the following output will be transferred after every successful measurement: <charge>,<sample>,<date>,<time>,<value>,<device>,<deviceno>... -
Page 43: Error Messages
SECTION 5 DIGITAL DATA MANAGEMENT 5.7 Error Messages The following error messages may be used to diagnose an operating error or device failure: Notification Meaning ABORT User cancels by pressing the exit key LIFT User cancels by lifting the sensor MFAIL Measurement could not be completed successfully CFAIL... -
Page 44: Checksums
SECTION 5 DIGITAL DATA MANAGEMENT 5.8 Checksums The checksum for each result line is calculated from the values from the columns BatchID, SampleID, DateTime, Measurement, Unit, and Device number. A possible result line is as follows: <Measurement> <SampleId>01</SampleId> <DateTime>2016-12-22T12:55:30</DateTime> <Value>21</Value> <Unit>mmol/l</Unit>... -
Page 45: Using A Barcode Scanner For Id Input
SECTION 5 DIGITAL DATA MANAGEMENT 5.9 Using a Barcode Scanner for ID Input A barcode reader can be attached to the COM1 port and allows for scanned barcodes to be used in ID management. Barcode reader AC-192 is available for purchase and necessary cables are included. To use a barcode for ID management, the batch and/or sample ID Management type must first be set to numeric or alphanumeric from the ID Management settings menu. -
Page 46: Appendix Aspecifications
APPENDIX A SPECIFICATIONS ChloroChek Chloridometer Model 3400 Sample Volume ................. 10 μL Measurement Duration ............. Approximately 20 Seconds Reproducibility* ................ CV of 1.02% at 100 mmol/L Measurement Display ............... 0 - 999 mmol/L Linearity Measuring Range ............10 - 160 mmol/L Resolution .................. -
Page 47: Customer Service Information
APPENDIX B CUSTOMER SERVICE INFORMATION ELITech Group is ready to help you resolve any problems with your ChloroChek. If you cannot solve a problem using the procedures in this manual please contact us. Customers within the United States and Canada are encouraged to contact us by telephone. Contact ELITech Group by mail, telephone, fax or e-mail at the address and numbers listed below. -
Page 48: Consumables, Accessories, And Replacement Parts
APPENDIX C CONSUMABLES, ACCESSORIES, AND REPLACEMENT PARTS ChloroChek Accessories Item Reference Number Reagent Set (37 x 10 mL of SS-248BS, 1 x 30 mL of SS-248GS) ....... SS-248 100 mmol/L NaCl/H O Standard Solution, 10 x 1.0 mL ampule ......SS-251 Sweat Control Solutions, (level #1, level #2, level #3, 12 x 0.75 mL ampule of each level) ...... -
Page 49: Flow Charts For Sample Measurement Using Id Management
APPENDIX D FLOW CHARTS FOR SAMPLE MEASUREMENT USING ID MANAGEMENT Screen Cascade for Batch ID Type None... - Page 50 APPENDIX D FLOW CHARTS (CONTINUED) Screen Cascade for Batch ID Type Auto...
- Page 51 APPENDIX D FLOW CHARTS (CONTINUED) Screen Cascade for Batch ID Type Auto (Continued)
- Page 52 APPENDIX D FLOW CHARTS (CONTINUED) Screen Cascade for Batch ID Type Numeric...
- Page 53 APPENDIX D FLOW CHARTS (CONTINUED) Screen Cascade for Batch ID Type Numeric (Continued)
- Page 54 APPENDIX D FLOW CHARTS (CONTINUED) Screen Cascade for Batch ID Type Alpha-Numeric...
- Page 55 APPENDIX D FLOW CHARTS (CONTINUED) Screen Cascade for Batch ID Type Alpha-Numeric (Continued)
-
Page 56: Appendix E Theory Of Operation
O Standard Solution (SS-251), is to be used on the ChloroChek. It is used as a calibration verifier, and quality control solution. ELITech Group Sweat Controls (SS-150), levels #1, #2, and #3, are to be used on the ChloroChek. They are used as quality control solutions. -
Page 57: Reference Intervals For Sweat Chloride
APPENDIX F REFERENCE INTERVALS FOR SWEAT CHLORIDE Normal Intermediate Indicative of CF Range Range Range Infants (0-6 months) ≤ 29 mmol/L 30-59 mmol/L ≥ 60 mmol/L Beyond Infancy (6 months- ≤ 39 mmol/L 40-59 mmol/L ≥ 60 mmol/L 18years) Adults (>18 years)* ≤... -
Page 58: Returning Products For Warranty, Service, Or Repair
You may also request a return order for equipment that is being returned for non-warranty repair, but you will be liable for the cost of the repairs. Clean the equipment before returning it to ELITech Group. NOTE: Shipping costs are paid by the customer. -
Page 59: Appendix Hperformance Data
APPENDIX H PERFORMANCE DATA Measuring Range (Linearity) Determined according to CLSI EP6-A protocol, the measuring range is from 10 – 160 mmol/L. Some samples below 10 mmol/L can be and are read on the ChloroChek. If a result <10mmol/L is obtained, the user should follow the procedure in Section 3.6 step 4 Note of this Manual. - Page 60 APPENDIX H PERFORMANCE DATA (continued) Correlation Study #1 (continued) Predicate Device Total ± ChloroChek ± Total Where ‘+’ = Indicative of CF, ‘±’ = Intermediate (Equivocal), ‘-’ = Normal The nine spiked samples were not included in this comparison table. Study #2: Number of samples: 90 (All 90 samples were natural sweat samples.) The sample concentrations were between <10 and >119 mmol/L.
-
Page 61: Appendix Ibibliography
APPENDIX I BIBLIOGRAPHY Sweat Testing: Sample Collection and Quantitative Chloride Analysis; Approved Guideline—Third Edition. CLSI document C34-A4 (2009), 29 (27). Evaluation of the Linearity of the Measurement of Quantitative Procedure: a Statistical Approach; Approved Guideline. CLSI (NCCLS) document EP6-A (2003), 23 (16). Evaluation of Precision Performance of Quantitative Measurement Methods;... - Page 62 ELITechGroup Inc. 370 West 1700 South Logan, Utah 84321-8212 800 453 2725 +1 435 752 6011 WWW.ELITECHGROUP.COM...
Need help?
Do you have a question about the ChloroChek Chloridometer 3400 and is the answer not in the manual?
Questions and answers