Table of Contents
Advertisement
Quick Links
Advertisement
Chapters
Table of Contents

Related Manuals for Riello TAU Unit 50


Summary of Contents for Riello TAU Unit 50
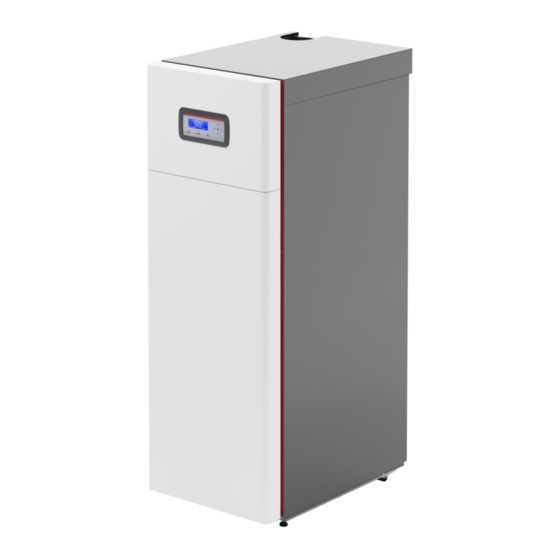
- Page 1 TAU Unit 50 - 70 - 100 - 115 EN INSTALLATION AND MAINTENANCE MANUAL...
- Page 2 You have se- lected a modern, quality product that is designed to give de- MODEL CODE pendable, efficient and safe service and to provide comfort in TAU Unit 50 20144105 the home for many years to come. TAU Unit 70 20144106 This manual provides information that is essential to the in- stallation of the appliance.
-
Page 3: Table Of Contents
CONTENTS 1 GENERAL INFORMATION . . . . . . . . . . . . . . . . . . . . . . . . . . . . 5 3.2.9 Flow switch configuration. - Page 4 5 SYSTEM MANAGEMENT . . . . . . . . . . . . . . . . . . . . . . . . . . .110 Communication between the thermal modules .
-
Page 5: General Information
GENERAL INFORMATION GENERAL INFORMATION The equipment, before being connected to the hydraulic system and to the gas supply and being electrically pow- ered can be exposed to temperatures ranging between 4°C General Safety Information and 40°C. Once it is able to activate the antifreeze functions, it can be exposed to temperatures within -20°C and 40°C After removing the packaging, check the condition and We recommend cleaning inside the exchanger once a year,... -
Page 6: Description Of The Appliance
GENERAL INFORMATION Description of the appliance − Flue gas thermostat: placed in the lower part of the exchanger, it triggers with high flue gas temperature The condensing thermal unit TAU Unit is a hot water generator, (>75°C). with high thermal efficiency, for the heating of environments −... -
Page 7: Identification
Data plate This lists the technical specifications and performance of the product. Categoria: Combustibile: Combustible: Categorie: Brennstoff: Brandstof: Kategorie: RIELLO S.p.A. Via Ing.Pilade Riello 7 37045 Legnago (VR) - ITALY T067802GE NOx (PCS): η mg/kWh Cod. N° P.nom.G20= mbar 230 V ~ 50Hz... -
Page 8: System Layout
GENERAL INFORMATION System layout Control panel Electrical panel Boiler body Front panel Condensate drain siphon Ignition electrode Flame inspection window Combustion chamber pressure tap 10 Flue gas limit thermostat Gas valve 12 Detection electrode 13 Automatic bleed valve 14 Main switch 15 Central heating flow 16 High temperature system return 17 Low temperature CH return... -
Page 9: Technical Specifications
GENERAL INFORMATION Technical specifications TAU Unit TAU Unit TAU Unit TAU Unit DESCRIPTION condensing boiler for central heating Appliance type B23, B23P , B53P , C13(*), C33(*), C43(*), C53(*), C63(*), C83(*), C93(*) IT-CH-PT: G20=20mbar G31=37mbar Fuel FR: G20/G25 - 20/25 mbar G31=37mbar BE: G20/G25 - 20/25 mbar IT-CH-PT: II2H3P IT-CH-PT: II2H3P... -
Page 10: Circulation Pump Sizing
In order to choose a pump of the right size, bear in mind the boiler’s water-side pressure drop, as shown in the figure below. Water-side pressure drop Pressure drop (mbar) TAU Unit 50 TAU Unit 70 TAU Unit 100 TAU Unit 115... -
Page 11: Location Of Sensors
GENERAL INFORMATION Location of sensors SENSORS INSERTED IN THEIR SOCKETS IN THE BOILER: Exhaust flue probe Safety thermostat CH flow temperature sensor Return probe Flue gas limit thermostat Rear view Front view 1.10 Control panel 04:29 12.0 °C ” ” CH Setpoint 48.0 °C... -
Page 12: Installation
The instruction manual is an integral part of the appliance; therefore, it should be read and stored carefully. Keep the documentation envelope in a safe place. Any re- placement documents must be ordered from Riello S.p.A. who reserve the right to charge for the cost of the replace- ment. -
Page 13: Moving And Removing The Packing
INSTALLATION Moving and removing the packing Once you have removed the packaging, proceed as follows to position the boiler: − Pull the front panel towards you then lift it up to remove Wear suitable personal protection equipment when moving the boiler and removing the packing. Only use lifting equip- ment that is suitable for the weight involved. -
Page 14: Installation Premises
INSTALLATION 2.4.1 Recommended minimum distances With flat and smooth flooring and for small movements, the thermal unit can be slightly lifted and moved through the wheels (8). This figure shows the minimum distances that must be respect- ed to allow installation and maintenance of the boiler. Level the thermal unit by acting on the 2 feet on the front side The thermal module TAU Unit can be installed in rooms that are of the thermal unit. -
Page 15: Water Connections
TAU Unit boilers are designed and made for installation in combined central heating and domestic hot water production systems. The specifications of the water fittings are as follows. Unit of DESCRIPTION TAU Unit 50 TAU Unit 70 TAU Unit 100 TAU Unit 115... -
Page 16: Gas Connections
INSTALLATION Gas connections 2.8 Flue gas vent and comburent air intake The equipment is supplied as standard in type B configura- tion, hence prepared to suck air directly in the installation room through the venting openings, that must be carried out in com- pliance with the Technical Standards. -
Page 17: Technical Specifications Of Stack
INSTALLATION 2.8.1 Technical specifications of stack The stack must satisfy the following requirements:: − It must be constructed from materials that are imper- meable to flue gases and that offer lasting resistance to mechanical stress, heat and the action of the products of combustion and condensate −... - Page 18 INSTALLATION See the specific standard for details. In Belgium, see NBN-D51-003. For B-type installation, combustion air is taken from the environment and goes through the openings (shutters) on the rear panel of the device that must be located in a suita- ble and ventilated technical room.
-
Page 19: Preparation For The Condensate Drain
INSTALLATION 2.8.3 Preparation for the condensate drain Following are the tables of the maximum equivalent lengths for the different available models. EQUIPMENT CONFIGURATION TYPE B “OPEN” Always maintain a slope “i” of over 3° and ensure that the TAU Unit diameter of any hose used is greater than that of the boiler’s Description own condensate drain pipe. -
Page 20: Neutralising The Condensate
INSTALLATION 2.8.4 Neutralising the condensate System filling and emptying The N2 and HN2 neutralisation kits are available for condensate TAU Unit boilers require a filling pipe connected to the central neutralisation. heating circuit return pipe. N2 TYPE NEUTRALISATION KIT All the necessary circuit shut-off and drain cocks must be The N2 TYPE neutralisation units were designed for systems provided. -
Page 21: Wiring Diagram
INSTALLATION 2.10 Wiring diagram ⏚ L - GEN/ VLPG VLPG ⏚ P.125 L - CH (N.C.) PB/PI/VD/VC L - DHW (N.O.) / PB / PI ⏚ P.128 L - PC/PS/PI PC/PS/PI ⏚ P.187 L - ALLARM P.127 MOD 1 0 - 10V MOD 2 0 - 10V J15-1 h... - Page 22 INSTALLATION Low voltage legend High voltage legend Low-voltage terminal board High-voltage terminal board INAIL INAIL safety devices (accessory) Power supply (230V ~ 50Hz) Water pressure transducer (accessory) Central heating system pump Pmin VLPG LPG shut-off solenoid valve (accessory) Water minimum pressure switch (accessory) Flow-meter (accessory) Storage cylinder circulator PminG GAS minimum pressure switch (accessory)
-
Page 23: Electrical Connections
INSTALLATION 2.11 Electrical connections The following is mandatory: − The use of an omnipolar magnetothermic switch, line Condensing thermal units TAU Unit leave the factory fully wired disconnecting switch in compliance with CEI-EN stand- and require only the connection of power cord and accessories, ards (contact opening of at least 3 mm) according to the system configuration. -
Page 24: Modulating Circulation Pump Connection
INSTALLATION 2.12 Modulating circulation pump connection Example of Duty cycle The regulator on the control panel can manage one modulating circulation pump (as an alternative to standard 230Vac circula- tion pumps). L - DHW (N.O.) / PB / PI Period of time ⏚... -
Page 25: 0-10V Circulation Pump Control
INSTALLATION 2.14 0-10V circulation pump control Electronic circuit The regulator allows the control in modulating mode (0-10V) of Opto-isolator one circulation pump (as an alternative to standard 230Vac cir- culation pumps). To enable pump control set parameter 135 = 1. PWM output Reference signal... -
Page 26: Electronic Control
INSTALLATION 2.15 Electronic control The electronic control operator interface menu is a multi-level one. Navigation between the various levels is shown in the figures below. Level 0 displays the Home Screen (Home). Level 1 displays the Main Menu screen. The subsequent levels are activated depending on available sub-menus. -
Page 27: Menu Structure
INSTALLATION 2.15.1 Menu structure... - Page 28 INSTALLATION...
- Page 29 INSTALLATION...
- Page 30 INSTALLATION...
- Page 31 INSTALLATION...
- Page 32 INSTALLATION...
-
Page 33: Parameters' List
INSTALLATION 2.15.2 Parameters' list The programming lines can be hidden, according to the access level (User, Installer, Manufacturer) and to the thermal unit configuration. The parameters of the Installer and Manufacturer levels should only be changed by Technical Assistance Service Parameters are listed base on the reference menu. -
Page 34: Minimum
INSTALLATION Nr. dis- Par. Default set- Access Menu played Description Range Category ting type Display Sets the value of the temperature difference (Delta T) between the module's delivery and return tem- perature. For a Delta T value ranging between Par. 12 and (Par. - Page 35 INSTALLATION Nr. dis- Par. Default set- Access Menu played Description Range Category ting type Display DHW Tank Defines the hysteresis to stop the domestic hot 0…20 °C Hyst. Up water demand. Defines the primary circuit's set-point increase in DHW Tank degrees compared to the temperature set for the 0…30 °C...
- Page 36 INSTALLATION Nr. dis- Par. Default set- Access Menu played Description Range Category ting type Display The value of this parameter is defined by Par. 97. Prog Input 0 = Disabled 0…2 General 1 = Drainage switch 2 = Gas minimum pressure switch The value of this parameter is defined by Par.
- Page 37 INSTALLATION Nr. dis- Par. Default set- Access Menu played Description Range Category ting type Display The value of this parameter is defined by Par. 97. 0 = Disabled 1 = General circulation pump 2 = Heating circulation pump 3 = DHW circulation pump 4 = System circulation pump 5 = Cascade circulation pump Prog.
- Page 38 INSTALLATION Nr. dis- Par. Default set- Access Menu played Description Range Category ting type Display Activates bleeding the system's air. To activate air bleeding, it is necessary to switch on the boiler and change the parameter from "No" to "Yes". Wait for one minute.
-
Page 39: Module
INSTALLATION Nr. dis- Par. Default set- Access Menu played Description Range Category ting type Display Defines by how many degrees the temperature Hyst. Down measured by the primary circuit's probe must fall Start Mod- below the set-point in order for the subsequent 0…40 °C Cascade... - Page 40 INSTALLATION Nr. dis- Par. Default set- Access Menu played Description Range Category ting type Display Defines the speed (in °C/100 ms) with which the set-point of individual modules is decreased in the PID Slew event the primary circuit's set-point is exceeded (if 0…25.5 Cascade Rate Dn...
-
Page 41: Source Water Systems And Configurations
INSTALLATION 2.16 Source water systems and configurations Diagram 1: circuit with thermal module directly connected to the heating system TA/OT VLPG(*) Isolating valve Domestic cold water inlet Non-return valve High temperature system flow Pressure reducer High temperature system return Water softener filter Thermal unit circulation pump Outdoor sensor Safety valve... - Page 42 INSTALLATION Electrical connections - Diagram 1 Basic parameter configuration - Diagram 1 Par. Description Parameter setting 1 = Climate mode with external probe CH mode and ambient thermostat DHW mode 0 = Disabled (*) Prog Input 2 3 = Heating flow meter (*) VLPG Prog Input 8 2 = Water pressure switch (*)
- Page 43 INSTALLATION Diagram 1.1: circuit with thermal module directly connected to the system with two direct heating zones TA/OT MI 1 PI 1 VLPG(*) MI 2 PI 2 RI 1 RI 2 Isolating valve Domestic cold water inlet Non-return valve MI 1 First circuit system delivery Pressure reducer RI 1...
- Page 44 INSTALLATION Electrical connections - Diagram 1.1 Basic parameter configuration - Diagram 1.1 Par. Description Parameter setting 1 = Climate mode with external probe CH mode and ambient thermostat DHW mode 0 = Disabled (*) Prog Input 2 3 = Heating flowmeter VLPG Prog Input 8 2 = Water pressure switch (*)
- Page 45 INSTALLATION Diagram 2: circuit with thermal module directly connected to the heating system and DHW production with heater and di- verting valve TA/OT VLPG(*) Isolating valve Domestic cold water inlet Non-return valve Domestic hot water outlet Pressure reducer High temperature system flow Water softener filter High temperature system return Safety valve...
- Page 46 INSTALLATION Electrical connections - Diagram 2 Basic parameter configuration - Diagram 2 Par. Description Parameter setting 1 = Climate mode with external probe CH mode and ambient thermostat VLPG DHW mode 1 = Water heater with probe ⏚ DHW Priority 2 = On (*) L - CH (N.C.) Prog Input 2...
- Page 47 INSTALLATION Diagram 3: circuit with thermal module directly connected to the heating system and DHW production with heater and ded- icated circulation pump TA/OT VLPG(*) Isolating valve Domestic cold water inlet Non-return valve Domestic hot water outlet Pressure reducer High temperature system flow Water softener filter High temperature system return Safety valve...
- Page 48 INSTALLATION Electrical connections - Diagram 3 Basic parameter configuration - Diagram 3 Par. Description Parameter setting 1 = Climate mode with external probe CH mode and ambient thermostat DHW mode 1 = Water heater with probe VLPG DHW Priority 2 = On (*) ⏚...
- Page 49 INSTALLATION Diagram 4: circuit with thermal module connected through separator to the heating system. DHW production with heater and diverting valve on primary circuit TA/OT VLPG(*) Isolating valve Domestic cold water inlet Non-return valve Domestic hot water outlet Pressure reducer High temperature system flow Water softener filter High temperature system return...
- Page 50 INSTALLATION Electrical connections - Diagram 4 Basic parameter configuration - Diagram 4 Par. Description Parameter setting 1 = Climate mode with external probe CH mode and ambient thermostat DHW mode 1 = Water heater with probe VLPG DHW Priority 2 = On (*) ⏚...
-
Page 51: Commissioning And Maintenance
COMMISSIONING AND MAINTENANCE 3 COMMISSIONING AND MAINTENANCE 3.2.2 Date and time setting Press the MENU key and select "Settings" with the ▲ / ▼ keys Preparing for initial startup Menu It is essential to perform the following checks before starting up “... -
Page 52: Password Access
COMMISSIONING AND MAINTENANCE Press the ● key to confirm. By accessing the "Time Zone Setttings" menu, it is possible to set the time zone parameter as shown in the figure below: − The system will now ask you to enter a password (the password is required for thermal module settings only): Time Zone Settings Password... - Page 53 COMMISSIONING AND MAINTENANCE After the selection, use the ► key to highlight the value and use Mode 1 the ▲ / ▼ keys to change the selected value. Press the ● key to (Climatic functioning with room/heat demand thermostat, vari- confirm/save the new settings..
- Page 54 COMMISSIONING AND MAINTENANCE Parameter 190 (installer level) Enter the "CH" menu. The following display will appear: Each building has its own thermal characteristics, therefore the time needed to set up the heating system can differ even Central Heating (CH) among buildings located in the same area, with the same ex- “...
- Page 55 COMMISSIONING AND MAINTENANCE Mode 2 Mode 3 (Working on climatic mode with attenuation controlled by a (Continuous fixed set-point operation with attenuation con- room/heat demand thermostat, variable set point according to trolled by room/heat demand thermostat) the outdoor temperature) In this mode the fixed set-point is adjusted in the same way as described for Mode 0.
- Page 56 COMMISSIONING AND MAINTENANCE Mode 4 Mode 5 (Set-point adjustment based on a 0-10V analogical input) (Adjusting the power based on an analogue input 0-10V) In this operating mode, the power of the thermal unit (fan The parameters that control this mode are the following: speed) is adjusted by an incoming analogue signal supplied by an external management system.
-
Page 57: Setting The Domestic Hot Water Parameters
COMMISSIONING AND MAINTENANCE 3.2.5 Setting the domestic hot water parameters − Use the ► key to highlight the value, and use the ▲ / ▼ keys to change the selected value. Press the ● key to con- The parameter 35 defines the various operation modes of the firm/save the new settings.. -
Page 58: Scheduled Programme
COMMISSIONING AND MAINTENANCE 3.2.6 Scheduled programme Priority setting The parameter 42 sets the priorities between the DHW and CH The Scheduled Programme is designed to program the opera- circuit. tion of the various circuits managed by the thermal module, (CH, Four modes are envisaged: DHW and additional mixed zones). - Page 59 COMMISSIONING AND MAINTENANCE DHW setting Select Ext. Zones in Group Group “ ” External Zone Disabled “ ” Program Comfort Period “ ” “ ” “ ” External Zone Disabled “ ” Out of interval setpoint “ ” “ ” External Zone Disabled “...
-
Page 60: Tempera
COMMISSIONING AND MAINTENANCE Holiday setting Seasonal setting Enables the user to change parameters for the Seasonal Pro- gramme. Holiday Settings The seasonal programme is used to define a period of inactivity “ ” Mode Group for the heating system. This menu includes the following ele- “... -
Page 61: Thermal Module Information
COMMISSIONING AND MAINTENANCE 3.2.7 Thermal module information Boiler History “ ” In order to display key information on the screen, press the Successful Ignitions menu key and select "Information" with the ▲ / ▼ keys. “ ” Failed Ignitions “ ”... -
Page 62: Flow Meter Parameters Configuration (Accessory)
COMMISSIONING AND MAINTENANCE 3.2.8 Flow meter parameters configuration − Check the full stop of the thermal module and the heat (accessory) demand by opening the “RT” contact (OFF). − Check that the thermal module has come to a complete stop by setting the main switch of the equipment and Choose the flow meter to be installed according to the ΔT of op- the main switch of the system to “off”. -
Page 63: Error List
COMMISSIONING AND MAINTENANCE 3.4.1 Permanent Errors − select "Max. power" with the ▲ / ▼ keys and press ● to confirm. The fan starts turning at its maximum speed (which can vary based on the model). Error Description E2PROM_READ_ERROR Internal software error System Test Three unsuccessful ignition “... -
Page 64: Temporary Errors
COMMISSIONING AND MAINTENANCE 3.4.2 Temporary Errors 3.4.3 Warnings Error Description Error Description WD_ERROR_RAM Internal software error Cascade system: the burner of the CC_LOSS_COMMUNI- managing module has lost the WD_ERROR_ROM Internal software error CATION signal of one of the depending thermal module burner WD_ERROR_STACK Internal software error Cascade system: the managing... -
Page 65: Conversion From One Type Of Gas To The Other
COMMISSIONING AND MAINTENANCE Conversion from one type of gas to the other After installing the kit, check the tightness of all connections made. The boiler TAU Unit is delivered set up to operate with G20 (methane gas), however it can be converted to operate with the If all conditions are met, power the thermal module positioning following gases: the main switch of the system and of the equipment to “on”. -
Page 66: Parameter Configuration For Changing The Type Of Gas Used
3.5.1 Parameter configuration for changing the type of gas used By changing the value of parameter 98 the settings of parameters 123, 125 and 128 will return to factory settings. TAU Unit 50 TAU Unit 70 TAU Unit 100 TAU Unit 115 Par. -
Page 67: Adjustments
If it is necessary to adjust it again, for example after extraor- Versions TAU Unit 50 ÷ TAU Unit 70 dinary maintenance, after the replacement of the gas valve or after a conversion from G20 gas to G25/G31 or vice-versa, carry out the procedure below. -
Page 68: State
− Adjust the CO2 using a screwdriver on the adjustment screw (3) on the fan unit, so as to obtain a value listed in the table. Versions TAU Unit 50 ÷ TAU Unit 70 CHECKING THE CALIBRATION Select the "Max. power" value, wait until speed stabilises and check that CO correspond to required ones. -
Page 69: Temporary Or Short-Term Shut-Down
COMMISSIONING AND MAINTENANCE Temporary or short-term shut-down 3.8 Preparing for extended periods of disuse In the event of temporary or short-term shut-down (e.g. due to Long periods of inactivity of the thermal module TAU Unit imply holidays), proceed as follows: the following operations to be carried out: −... -
Page 70: Cleaning And Maintenance
COMMISSIONING AND MAINTENANCE Cleaning and maintenance and selecting "Maintenance" using the ▲ / ▼ arrows It is essential to clean the boiler and remove carbon deposits Information from the surfaces of the heat exchanger in order to keep the “ ”... -
Page 71: Removing The Burner
COMMISSIONING AND MAINTENANCE 3.9.3 Removing the burner It is essential to respect the dimensions in the figure. Proceed as follows to remove the burner: − Open and remove the front panel and the upper panel of the thermal module − Loosen the nut (1) fastening the gas supply tube from the gas valve (2) −... -
Page 72: Condensate Drain Siphon Cleaning
COMMISSIONING AND MAINTENANCE 3.9.6 Condensate drain siphon cleaning − Disconnect the flue gas discharge duct (9) from the flue gas chamber closure (10) − Remove the condensate drain siphon (11) as indicated on − Remove the front panel from the boiler and locate the paragraph Condensate drain siphon cleaning condensate discharge syphon (1) −... -
Page 73: Troubleshooting
COMMISSIONING AND MAINTENANCE 3.10 Troubleshooting FAULT CAUSE SOLUTION Flame not detected − Call Technical Assistance Service The burner performs pre-ventilation and ignition correctly but shuts down after about 5 attempts No gas supply − Check gas valve opening Flue blocked −... -
Page 74: Configuration Of Cascaded Thermal Units
CONFIGURATION OF CASCADED THERMAL UNITS 4 CONFIGURATION OF CASCADED THERMAL UNITS The installation of thermal units of similar power is recom- mended in order to maximise the cascaded system’s per- formance. The DHW and heating circuits must be completed with ex- pansion vessels of a suitable capacity and correctly sized Check that the parameter “Cascade mode”... -
Page 75: Configuration Of The Secondary System
CONFIGURATION OF CASCADED THERMAL UNITS Configuration of the secondary system For the sake of simplicity, the hydraulic circuits downstream of the separator can be identified as the secondary system. Optimal use of the modules in cascade occurs by placing a hy- The basic configuration of the secondary system takes place draulic separator (available as an accessory) between the pri- using a system circulator (PI). - Page 76 CONFIGURATION OF CASCADED THERMAL UNITS − Zone sensor (S2) This is required to adjust and control an additional direct zone managed by the “Depending” thermal unit in combination with the zone pump (P2). The zone sensor (S2) and the pump (P2) must be connected to the “Depending” thermal unit, which communicates via Bus with the "Managing"...
-
Page 77: Typical Water System Schematics And Configuration Of Cascaded Thermal Units
CONFIGURATION OF CASCADED THERMAL UNITS Typical water system schematics and configuration of cascaded thermal units 4.3.1 Block diagram 1 Cascaded thermal units with single pump for each thermal unit and system and cascade sensors. Management of a DHW circuit with two direct zones and a mixed zone, with electronic zone management device (ZM). TA/OT P2 2 TA/OT... -
Page 78: Electrical Connections - Diagram 1
CONFIGURATION OF CASCADED THERMAL UNITS 4.3.2 Electrical connections - Diagram 1 MANAGING CONNECTIONS PI (*) P.125 = 2 INAIL P. 123 = 2 INAIL L - DHW (N.O.)/PB/PI P.128 = 3 23 +5V P. 117 = 3 P.187 = 1 SIGNAL TA/OT P. - Page 79 CONFIGURATION OF CASCADED THERMAL UNITS Hardware configuration DEPENDING CONNECTIONS 1 S1 = OFF (not used) DIPSWITCH = 10000000 INAIL P.123 = 2 INAIL P.117 = 3 SIGNAL TA/OT P.188 = 2 P.122 = 3 BUS 2 BUS 2 depending 2 terminals 1 e 2 Dip switch ON Low-voltage terminal board...
- Page 80 CONFIGURATION OF CASCADED THERMAL UNITS Hardware configuration S1 = OFF (not used) VLPG DIPSWITCH = 01000000 P.125 (*) P.128 = 16 L - DHW (N.O.)/PB/PI P.187 = 1 High-voltage terminal board VLPG LPG fuel shut-off valve Zone 2 pump (high temperature) Thermal unit circulation pump Live Neutral...
- Page 81 CONFIGURATION OF CASCADED THERMAL UNITS DEPENDING CONNECTIONS 2-8 Hardware configuration S1 = OFF (not used) DIPSWITCH = 00100000 INAIL P.123 = 2 INAIL 23 +5V P.117 = 3 SIGNAL BUS 2 BUS 2 depending 3 terminals 1 e 2 Low-voltage terminal board Minimum pressure switch Lockout pressure switch Flow-meter...
- Page 82 CONFIGURATION OF CASCADED THERMAL UNITS ZONE MANAGEMENT ELECTRONIC DEVICE managing BUS 1 terminals Zone management electronic device Live Neutral Earth/ground Zone 3 pump (low temperature) Mixer valve zone 3 Zone 3 sensor Room thermostat BUS 1 Managing / Zones Bus...
-
Page 83: System Parameters Block Diagram 1
CONFIGURATION OF CASCADED THERMAL UNITS 4.3.3 System parameters Block diagram 1 Hardware configuration S1 = OFF (not used) DIPSWITCH = 10000000 See section "Commissioning and maintenance" for a de- Configuration of boiler parameters tailed description of how the parameters work Par. - Page 84 CONFIGURATION OF CASCADED THERMAL UNITS DEPENDING 1 DEPENDING 2-8 Functions: Functions: − Reads the secondary circuit sensor (SC) − Controls thermal unit pump (PC) − Controls thermal unit pump (PC) − Controls the pump in a DEPENDENT direct zone (P2) with Programmable outputs and inputs parameter configuration (*) the zone sensor (S2), with the consent of TA/OT (room (If Par.
-
Page 85: Block Diagram 2
CONFIGURATION OF CASCADED THERMAL UNITS 4.3.4 Block diagram 2 Cascaded thermal units with two-way valve for each thermal unit, system pump, and system and cascade sensors. Management of a DHW circuit, of a direct zone and a mixed zone with electronic zone management device (ZM). TA/OT P1 2 1 DEP. -
Page 86: Electrical Connections - Diagram 2
CONFIGURATION OF CASCADED THERMAL UNITS 4.3.5 Electrical connections - Diagram 2 MANAGING CONNECTIONS PB (*) INAIL P.125 = 2 P.123 = 2 INAIL L (N.C.) P.128 = 1 L (N.O.) P.117 = 3 SIGNAL P.187 = 4 P.188 = 1 P.122 = 3 High-voltage terminal board BUS 1... - Page 87 CONFIGURATION OF CASCADED THERMAL UNITS Hardware configuration DEPENDING CONNECTIONS 1 S1 = OFF (not used) DIPSWITCH = 10000000 INAIL P.123 = 2 INAIL P.117 = 3 SIGNAL TA/OT P.188 = 2 P.122 = 3 BUS 2 BUS 2 depending 2 terminals 1 e 2 Dip switch ON Low-voltage terminal board...
- Page 88 CONFIGURATION OF CASCADED THERMAL UNITS Hardware configuration S1 = OFF (not used) VLPG DIPSWITCH = 01000000 P. 125 (*) L (N.C.) P. 128 = 1 L (N.O.) P. 187 = 16 High-voltage terminal board VLPG LPG fuel shut-off valve Thermal unit two-way valve Dip switch ON Zone 1 pump (high temperature) Live...
- Page 89 CONFIGURATION OF CASCADED THERMAL UNITS DEPENDING CONNECTIONS 2-8 Hardware configuration S1 = OFF (not used) DIPSWITCH = 00100000 INAIL P.123 = 2 INAIL 23 +5V P.117 = 3 SIGNAL BUS 2 BUS 2 depending 3 terminals 1 e 2 Low-voltage terminal board Minimum pressure switch Lockout pressure switch Flow-meter...
- Page 90 CONFIGURATION OF CASCADED THERMAL UNITS ZONE MANAGEMENT ELECTRONIC DEVICE managing BUS 1 terminals 7 e 8 Zone management electronic device Live Neutral Earth/ground Zone 2 circulator (low temperature) Mixer valve zone 2 Zone 2 sensor Room thermostat BUS 1 Managing / Zones Bus...
-
Page 91: System Parameters Block Diagram 2
CONFIGURATION OF CASCADED THERMAL UNITS 4.3.6 System parameters Block diagram 2 Hardware configuration S1 = OFF (not used) DIPSWITCH = 10000000 See section "Commissioning and maintenance" for a de- Configuration of boiler parameters tailed description of how the parameters work Par. - Page 92 CONFIGURATION OF CASCADED THERMAL UNITS DEPENDING 1 DEPENDING 2-8 Functions: Functions: − Reads the secondary circuit sensor (SC) − Controls thermal unit two-way valve (V1) − Controls thermal unit two-way valve (V1) − Controls the pump in a DEPENDENT direct zone (P1) with Programmable outputs and inputs parameter configuration (*) the zone sensor (S1), with the consent of TA/OT (room (If Par.
-
Page 93: Block Diagram 3
CONFIGURATION OF CASCADED THERMAL UNITS 4.3.7 Block diagram 3 Cascaded thermal units with single pump for each thermal unit and system and cascade sensors. Management of a DHW circuit with two direct zones and a mixed zone, with electronic zone management device (ZM). TA/OT P1 2 1 TA/OT... - Page 94 CONFIGURATION OF CASCADED THERMAL UNITS MANAGING CONNECTIONS VLPG INAIL P.123 = 2 INAIL P. 125 = 8 L - DHW (N.O.)/PB/PI P. 128 = 3 P.117 = 3 SIGNAL P. 187 = 1 P.188 = 1 P.122 = 3 High-voltage terminal board BUS 1 VLPG LPG fuel shut-off valve depending 1...
- Page 95 CONFIGURATION OF CASCADED THERMAL UNITS Hardware configuration DEPENDING CONNECTIONS 1 S1 = OFF (not used) DIPSWITCH = 10000000 INAIL P.123 = 2 INAIL P.117 = 3 SIGNAL TA/OT P.188 = 2 P.122 = 3 BUS 2 BUS 2 depending 2 terminals 1 e 2 Dip switch ON Dip switch OFF...
- Page 96 CONFIGURATION OF CASCADED THERMAL UNITS Hardware configuration S1 = OFF (not used) VLPG DIPSWITCH = 01000000 P.125 = 8 L - DHW (N.O.)/PB/PI P.128 = 16 P.187 = 1 High-voltage terminal board VLPG LPG fuel shut-off valve Zone 1 pump (high temperature) Thermal unit circulation pump Live Neutral...
- Page 97 CONFIGURATION OF CASCADED THERMAL UNITS DEPENDING CONNECTIONS 2-8 VLPG INAIL P.125 = 8 P.123 = 2 INAIL P.128 = 16 L - DHW (N.O.)/PB/PI P.117 = 3 SIGNAL P.187 = 1 TA/OT P.188 = 2 High-voltage terminal board BUS 2 BUS 2 VLPG LPG fuel shut-off valve depending 3...
- Page 98 CONFIGURATION OF CASCADED THERMAL UNITS Hardware configuration ZONE MANAGEMENT ELECTRONIC DEVICE S1 = OFF (not used) DIPSWITCH = 00100000 managing BUS 1 terminals Zone management electronic device Live Neutral Earth/ground Zone 3 pump (low temperature) Dip switch ON Mixer valve zone 3 Zone 3 sensor Room thermostat Dip switch OFF...
-
Page 99: System Parameters Block Diagram 3
CONFIGURATION OF CASCADED THERMAL UNITS 4.3.8 System parameters Block diagram 3 Hardware configuration S1 = OFF (not used) DIPSWITCH = 10000000 See section "Commissioning and maintenance" for a de- Configuration of boiler parameters tailed description of how the parameters work Par. - Page 100 CONFIGURATION OF CASCADED THERMAL UNITS DEPENDING 1 DEPENDING 2-8 Functions: Functions: − Reads the secondary circuit sensor (SC) − Controls thermal unit pump (PC) − Controls thermal unit pump (PC) − Controls the pump in a DEPENDENT direct zone (P2) with −...
-
Page 101: Block Diagram 4
CONFIGURATION OF CASCADED THERMAL UNITS 4.3.9 Block diagram 4 Cascaded thermal units with two-way valve for each thermal unit, system pump, and system and cascade sensors. Management of a DHW circuit with two direct zones and a mixed zone, with electronic zone management device (ZM). TA/OT P1 2 1 TA/OT... -
Page 102: Electrical Connections - Diagram 4
CONFIGURATION OF CASCADED THERMAL UNITS 4.3.10 Electrical connections - Diagram 4 MANAGING CONNECTIONS PB (*) P.125 = 3 INAIL P.123 = 2 INAIL L (N.C.) P.128 = 1 L (N.O.) P.117 = 3 P.187 = 4 SIGNAL P.188 = 1 P.122 = 3 High-voltage terminal board DHW circulator... - Page 103 CONFIGURATION OF CASCADED THERMAL UNITS Hardware configuration DEPENDING CONNECTIONS 1 S1 = OFF (not used) DIPSWITCH = 10000000 INAIL P.123 = 2 INAIL P.117 = 3 SIGNAL TA/OT P.188 = 2 P.122 = 3 BUS 2 BUS 2 depending 2 terminals 1 e 2 Dip switch ON Low-voltage terminal board...
- Page 104 CONFIGURATION OF CASCADED THERMAL UNITS Hardware configuration S1 = OFF (not used) VLPG DIPSWITCH = 01000000 P. 125 = 8 L (N.C.) P. 128 = 1 L (N.O.) P. 187 = 16 High-voltage terminal board VLPG LPG fuel shut-off valve Thermal unit two-way valve Zone 1 pump (high temperature) Live...
- Page 105 CONFIGURATION OF CASCADED THERMAL UNITS DEPENDING CONNECTIONS 2-8 VLPG INAIL P. 125 = 8 P.123 = 2 INAIL L (N.C.) P. 128 = 1 L (N.O.) P.117 = 3 SIGNAL P. 187 = 16 TA/OT P.188 = 2 BUS 2 BUS 2 depending 3 High-voltage terminal board...
- Page 106 CONFIGURATION OF CASCADED THERMAL UNITS Hardware configuration ZONE MANAGEMENT ELECTRONIC DEVICE S1 = OFF (not used) DIPSWITCH = 00100000 managing BUS 1 terminals Zone management electronic device Live Neutral Earth/ground Zone 3 pump (low temperature) Mixer valve zone 3 Zone 3 sensor Dip switch ON Room thermostat BUS 1 Managing / Zones Bus...
-
Page 107: System Parameters Block Diagram 4
CONFIGURATION OF CASCADED THERMAL UNITS 4.3.11 System parameters Block diagram 4 Hardware configuration S1 = OFF (not used) DIPSWITCH = 10000000 See section "Commissioning and maintenance" for a de- Configuration of boiler parameters tailed description of how the parameters work Par. - Page 108 CONFIGURATION OF CASCADED THERMAL UNITS DEPENDING 1 DEPENDING 2-8 Functions: Functions: − Reads the secondary circuit sensor (SC) − Controls thermal unit two-way valve (V1) − Controls thermal unit two-way valve (V1) − Controls the pump in a DEPENDENT direct zone (P2) with −...
-
Page 109: Adjusting Setpoint
CONFIGURATION OF CASCADED THERMAL UNITS 4.3.12 Adjusting setpoint Adjusting setpoint with sensor on primary circuit (SS) Through setting the following parameters you can manage automatically decreasing/increasing the setpoint, if necessary, based on the value detected by the primary circuit sensor (SS). The setpoint will be decreased/increased after the time set in Par. 81 has elapsed. -
Page 110: System Management
SYSTEM MANAGEMENT 5 SYSTEM MANAGEMENT The setting must be carried out on each thermal module. For configuration of the individual thermal module, refer to the following table. Communication between the thermal modules Dip switch ON Communication between all the modules installed is a funda- mental aspect in a system with multiple thermal modules. -
Page 111: Bus Connections
SYSTEM MANAGEMENT Bus connections MANAGING Identify the terminal boards located beside the controller. The bus connections are to be made on the low voltage terminal board (M01). 10 11 12 13 14 15 16 17 18 Thermal module terminal board BUS 1 DEPENDING 10 11 12 13 14 15 16 17 18... -
Page 112: Zone Control With Depending Module
SYSTEM MANAGEMENT 5.2.1 Zone control with Depending module The electronic control of the thermal module will automatically check which zones are connected to the bus. If used on a cascade system, with heating zone control using DEPENDING thermal module, after carrying out the connections The zone menu headings in the thermal unit electronic con- as described in the Cascade Manual, the following modifications trol will be available on the managing display menu, when 1 or... -
Page 113: Setting Depending Zone Parameters
SYSTEM MANAGEMENT Setting depending zone parameters Controls interface 255x80 point backlit display (106,4x39,0mm) RESET key: restores normal operations after a safety shut-down MENU key: switches on the main menu ESC key: in menu navigation, it enables you to exit a menu item and go back to the previous 5 ÷... -
Page 114: Menu Structure
SYSTEM MANAGEMENT 5.4.1 Menu structure Level 0 Level 1 Level 2 Level 3 Level 4 Level 5 Level 6 Level 7 Home / Menu Information Dependent Zone Status Dependent Zone 2 - 16 Zone Setpoint ” ” “ ” “ ”... -
Page 115: Setting Zone's Climatic Curve Parameters (Accessible Only With Installer Password)
SYSTEM MANAGEMENT Setting zone's climatic curve parameters 5.6 Programming the zone (accessible only with installer password) By default the schedule timer is disabled. Menu → “Settings” → “Zone Clim. Curve” To start up a request from the zone, just close the zone request contact. -
Page 116: Scheduling The Time Bands
SYSTEM MANAGEMENT The programmable periods for each zone are 7 and they can be Entering in “Program Comfort Period”: selected by changing the number that appears beside “Program Confort period”. Dependent Zone Period Group " " " " " " Program Comfort Period Active Day(s) Monday-Sunday... -
Page 117: Electronic Control
SYSTEM MANAGEMENT Electronic control For further information on the electronic control, refer to the specific section in the user manual of the individual appliance TAU Unit. switches on the main menu in menu navigation, it enables you to exit a menu item and go back to the previous one supports selecting menus or parameters or decreasing nu- meric values... -
Page 118: Setting The Main Parameters
SYSTEM MANAGEMENT 5.9.1 Setting the main parameters 5.9.5 General operation Some parameters are essential in order for the system to operate With cascade operation the managing unit regulator sets a set- in cascade and setting these parameters is a determining factor point to send to the depending units. -
Page 119: Parameter 148: Operating Mode Of The Cascade
SYSTEM MANAGEMENT 5.12 Parameter 148: operating mode of the 5.12.1 Par 148 = 1 cascade Not applicable It is possible to adopt cascade management which can be modi- 5.12.2 Par 148 = 2 fied according to different strategies. These different strategies can be set using the parameter known as "Cascade mode"... -
Page 120: Managing Additional Zone
MANAGING ADDITIONAL ZONE 6 MANAGING ADDITIONAL ZONE Jumper positioning example. Check zone with zone management Jumpers electronic device optional If you need to check an additional heating zone (direct or mixed) other than those allowed by the system configuration, it is pos- sible to install the ZONE CONTROL ELECTRONIC DEVICE optional. - Page 121 MANAGING ADDITIONAL ZONE The electronic control of the thermal module will automatically check which zones are connected to the bus. The menu items of the zone in the electronic control of the ther- mal module will be available when one or more zone manage- ment devices are detected.
-
Page 122: Setting Parameters Of The Additional Zone
MANAGING ADDITIONAL ZONE Setting parameters of the additional zone Controls interface 255x80 point backlit display (106,4x39,0mm) RESET key: restores normal operations after a safety shut-down MENU key: switches on the main menu ESC key: in menu navigation, it enables you to exit a menu item and go back to the previous 5 ÷... -
Page 123: Menu Structure
MANAGING ADDITIONAL ZONE 6.3.1 Menu structure Level 0 Level 1 Level 2 Level 3 Level 4 Level 5 Level 6 Level 7 Home / Menu Information External Zone Status External Zone 1 - 16 Zone Setpoint ” ” “ ” “... -
Page 124: Setting Zone's Climatic Curve Parameters (Accessible Only With Installer Password)
MANAGING ADDITIONAL ZONE 6.4 Setting zone's climatic curve parameters 6.5 Programming the zone (accessible only with installer password) By default the schedule timer is disabled. Menu → “Settings” → “Zone Clim. Curve” In fact, to start a request from the zone just close the contact of the zone request. -
Page 125: Scheduling The Time Bands
MANAGING ADDITIONAL ZONE 6.6 Scheduling the time bands The programmable periods for each zone are 7 and they can be selected by changing the number that appears beside “Program Confort period”. By going to: Menu → “Clock program” → “Zones CH Program ” The “Comfort Setpoint”... -
Page 126: Information On The Operation Of The Zone
MANAGING ADDITIONAL ZONE Information on the operation of the zone The information displayed is the following: Error code Description By going to: Menu → “Information” → “Zone Status” Indicates the error code of the board (255 = no error) External Zone Status Indicates whether there is a request (namely, if “... -
Page 127: System Manager
SYSTEM MANAGER SYSTEM MANAGER 7 SYSTEM MANAGER − Switch the system's master switch to the ON position and the thermal module's master switch to (I). Putting into service The appliance must be maintained and adjusted at least once a year by Technical Assistance Service or by profession- ally qualified staff in compliance with all applicable Nation- al and Local provisions. -
Page 128: Temporary Or Short-Term Shut-Down
SYSTEM MANAGER SYSTEM MANAGER Temporary or short-term shut-down − close the fuel valves and the water valves of the thermal and DHW system. In the event of temporary or short-term shut-down (e.g. due to holidays), proceed as follows: − Press the MENU key and select with keys ▲ / ▼ "Time schedule", confirm with key ●. -
Page 129: Useful Information
SYSTEM MANAGER SYSTEM MANAGER Useful information Seller: ................Installer: ................Mr.: .................. Mr.: .................. Address: ................Address: ................Tel.: .................. Tel.: .................. Technical Assistance Service: ..........Mr.: .................. Address: ................Tel.: .................. Date Work done Fuel oil supplier: ............... Mr.: .................. Address: ................ -
Page 130: Modbus Connection
SYSTEM MANAGER MODBUS CONNECTION 8 MODBUS CONNECTION Registers Depending on the type of Modbus device used to connect to The thermal mode is equipped with a Modbus connection the thermal module, the registers' addressing may start from (based on the RS485 communication standard) that supports 0x0000 or 0x0001. - Page 131 SYSTEM MANAGER MODBUS CONNECTION Status parameters Dependent information Access Access Register Automatic Value Register Automatic Value Description Description number conversion range number conversion range See "State" Dependent 01 State table See "State" State See "Sta- table Status tus" table See "Error" Error code See "Error"...
-
Page 132: Error Code
SYSTEM MANAGER MODBUS CONNECTION Parameters registers Access Register Automatic Value Access Auto- Description number conversion range Register Descrip- matic Value Note number tion conver- range Dependent 09 sion See "State" State Heating table mode 0..x See "Error" (Par. 1) Error code tables Power 0..100%... -
Page 133: Register Number Description
SYSTEM MANAGER MODBUS CONNECTION STATE table Auto- Name Description Register matic Value Access Description Note number conver- range RESET_0 Initialisation of reset variables sion RESET_1 Reset Minimum value that STANDBY_0 Standby Depends can be as- on °C/°F signed to the PRE_PURGE Initialisation of pre-purging variables units... -
Page 134: Water In Central Heating Systems
SYSTEM MANAGER WATER IN CENTRAL HEATING SYSTEMS 9 WATER IN CENTRAL HEATING SYSTEMS 2. Central heating systems INTRODUCTION Do not use automatic filling devices to add water to central heating systems. Use a manual device instead and record Water used in central heating systems MUST be suitably treated top-ups in the system service book. - Page 135 SYSTEM MANAGER WATER IN CENTRAL HEATING SYSTEMS 4. Eliminating air and gas from central heating systems If oxygen enters a circuit continuously or even intermittently (e.g. in under-floor heating systems whose pipes are not pro- tected by impermeable synthetic sheaths, in circuits with open expansion vessels, or in circuits that require frequent top-ups) always separate the boiler’s water circuit from the central heat- ing circuit.
-
Page 136: Recycling And Disposal
SYSTEM MANAGER RECYCLING AND DISPOSAL 10 RECYCLING AND DISPOSAL The device is primarily composed of: Material Component Metal materials Pipework, boiler body ABS (acrylonitrile-butadiene-styrene) Control panel enclosure Glass wool felt Boiler body insulation Electrical and electronic components Cables and wiring, controller At the end of the device's useful life, these components must be separated and disposed of according to current regulations in the country of installation. - Page 137 SYSTEM MANAGER...
- Page 138 SYSTEM MANAGER...
- Page 139 SYSTEM MANAGER...
- Page 140 RIELLO S.p.A. Via Ing. Pilade Riello, 7 37045 - Legnago (VR) www.riello.com The manufacturer strives to continuously improve all products. Appearance, dimensions, technical specifications, standard equipment and accessories are therefore liable to modification without notice.
Need help?
Do you have a question about the TAU Unit 50 and is the answer not in the manual?
Questions and answers