Table of Contents
Advertisement
Quick Links
Advertisement
Table of Contents

Subscribe to Our Youtube Channel
Related Manuals for Riello TAU UNIT OIL 28 G FLEX


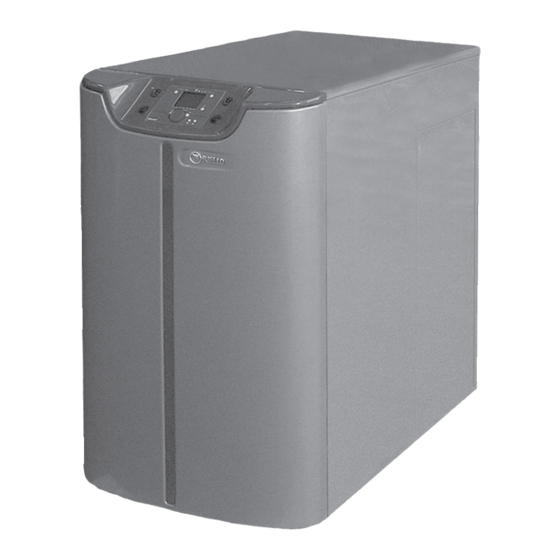
Summary of Contents for Riello TAU UNIT OIL 28 G FLEX
- Page 1 CONDENSING BOILERS TAU UNIT OIL 28 G FLEX INSTRUCTION FOR THE USER...
-
Page 2: Table Of Contents
CONTENTS General safety information Precautions Control panel Mode selection User levels Start-up Temporary shutdown Preparing for extended periods of disuse Cleaning Maintenance Useful information The following symbols are used in this manual: = Identifies actions that require caution and adequate preparation. = Identifies actions that you MUST NOT do This manual, Code 20091440 Rev. - Page 3 Technical Assistance Centres also stock any original spare parts that might be required. This instruction manual contains important instructions and precautions that must be observed to ensure the trouble-free installation and efficient functioning of your boiler. Please accept our renewed thanks for your purchase. Riello S.p.A. USER...
-
Page 4: General Safety Information
GENERAL SAFETY INFORMATION The operation of any appliance that uses electrical power demands that a number of fundamental safety precautions be respected. Do not allow children or Never pull, disconnect, or twist the electrical cables infirm persons to operate coming from the boiler even if it is disconnected the boiler unsupervised. -
Page 5: Control Panel
CONTROL PANEL PRIMARY USER INTERFACE / CONTROLS bottom view 1 - Safety thermostat trip indicator. 2 - Electronic operator unit (controller). 3 - DHW production on/off button (only present if the optional remote storage cylinder is installed). A line appears under the "... - Page 6 SECONDARY USER INFORMATION / DISPLAY A - DHW mode: ON or OFF B - Central heating modes: AUTOMATIC CONTINUOUS COMFORT Continuous REDUCED COOLING Frost protection. The "t" symbol is displayed. C - Small numeric display: time D - Message area E - Daily heating program indicator F - Large numeric display: current value G - Display symbols:...
- Page 7 MAIN SCREEN Boiler temperature A1 - DHW production mode: ON or OFF. Press the DHW button to (3) to switch DHW on or off (as shown by the line under the symbol). B1 - Central heating modes: Press the central heating mode button (5) to activate the various modes as shown by the line under the corresponding symbol.
-
Page 8: Mode Selection
MODE SELECTION Press the central heating mode button (5) to select the various modes. The active mode is shown by a line under the corresponding symbol. Boiler temperature Automatic In automatic mode, room temperature is controlled by the time program. Characteristics: - Central heating operates according to the time program. - Page 9 Information Press the information button (6) to display: - Errors or maintenance codes (see the “Errors/Maintenance codes” section) - Special messages. Other screens: Other screens depend on the system configuration and status. Some of the info lines shown below may not therefore appear.
-
Page 10: User Levels
USER LEVELS There are 4 different user levels: - End user - Commissioning - Heating engineer - OEM (Manufacturer). See the “Complete list of parameters” section for a list of the parameters displayed in each level. Proceed as follows to access the user level you require. - Go to the main screen. - Page 11 Ora e data - The message area shows the current hour. Press "OK". Ore / minuti Time of day and date Hours/minutes - The display flashes the current hour. Turn the knob to go on or back to the correct value. Press "OK"...
-
Page 12: Start-Up
START-UP Have r’s Technical Assistance Service start-up your boiler for the first time. Once this has been done, the boiler can be left to function automatically. Under certain circumstances, such as after long periods of disuse, the user may need to re-start it without involving the Technical Assistance Service. Before doing so, perform the following checks and operations: - Check that the fuel cock and heating system water cock are shut. - Page 13 Setting the room temperature setpoint Turn the knob (14) to set the desired room temperature comfort setpoint. Proceed in a similar way to set the room temperature reduced setpoint. - Press the "OK" button (13). Comfort setpoint - Select “Heating circuit 1”. - Set the room temperature reduced setpoint.
- Page 14 HEATING CURVE SLOPE 2,75 2,25 2,75 °C °C 1,75 1,25 0,75 0,25 °C Outside temperature Heating curve slope must only be set by the r Technical Assistance Service. If no room units are installed, the room temperature setpoint set on the control panel simply performs a paral- lel shift of the heating curves.
-
Page 15: Temporary Shutdown
TEMPORARY SHUTDOWN If you are going to be away for a short period of time like a weekend or a short holiday, etc. proceed as follows. - Press the central heating mode button (5) to select "Protection" mode (b). Power to the boiler remains switched on, and the dis- Boiler temperature play remains active. -
Page 16: Cleaning
CLEANING Use a cloth damped in soapy water to clean the boil- er’s external panelling. To remove stubborn marks, use a cloth damped in a 50% mix of water and denatured alcohol or a suitable cleaning product. Wipe the boiler dry after cleaning it. Remove the protective film (F) from the front panel and the control panel before you start cleaning the boiler’s casing panels. -
Page 17: Useful Information
USEFUL INFORMATION Seller: Installer: ....................................................................................................................Address Address ......................................................Tel. Tel............................................................Technical Assistance Service: ............................................Address ............................Tel............................... Date Work done Fuel oil supplier: ....................................................Address ............................Tel............................... Date Quantity supplied Date Quantity supplied Date... - Page 18 USER...
- Page 20 RIELLO S.p.A. Via Ing. Pilade Riello, 7 37045 - Legnago (VR) www.riello.com The manufacturer strives to continuously improve all products. Appearance, dimensions, technical specifi cations, standard equipment and accessories are therefore liable to modifi cation without notice.
Need help?
Do you have a question about the TAU UNIT OIL 28 G FLEX and is the answer not in the manual?
Questions and answers