Egholm Park Ranger 2150 Operator's Manual
Basic machine
Hide thumbs
Also See for Park Ranger 2150:
- Operator's manual (52 pages) ,
- Operator's manual (22 pages) ,
- Operator's manual (32 pages)
Table of Contents
Advertisement
Advertisement
Table of Contents

Subscribe to Our Youtube Channel
Related Manuals for Egholm Park Ranger 2150


Summary of Contents for Egholm Park Ranger 2150
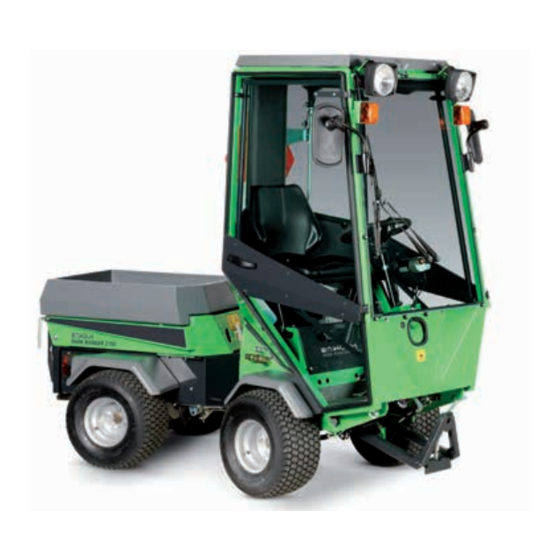
- Page 1 Operator´s manual Basic machine Park Ranger 2150...
- Page 2 We ask you to pay particular attention to section 1.1. Safety. The machine must only be serviced by professionals. The Park Ranger 2150 is designed only for use by professionals. On delivery, the user will receive thorough training to become a competent operator.
-
Page 3: Table Of Contents
3.3 Park Ranger 2150 service and maintenance chart ....... . . - Page 4 Introduction...
-
Page 5: Introduction
The Park Ranger 2150 utility machine The Park Ranger 2150 is an Egholm utility machine with a complete range of special attachments designed to allow you to perform outdoor maintenance work all year round. Sweeping and vacuuming in spring and autumn, mowing grass and lawn-edge cutting in the summer, and sweeping snow, and spreading gravel and sand in the winter. - Page 6 General information...
-
Page 7: General Information
Make sure that no one is standing working area near the machine while it is in use. (Picture 1) Turn the steering wheel carefully The Park Ranger 2150 is articulated and the steering mechanism is extremely responsive. (Picture 2) Avoid accidents with battery acid and gases... - Page 8 The driver is protected from lightning strikes inside the cabin. The cabin works like a Faraday cage. Keep the windows closed and make sure you put your hands close to your body. Do not touch fittings or any metal parts. Operator’s Manual Park Ranger 2150...
-
Page 9: Attachments
There is an operator’s manual for each attachment. Operation with these attachments must follow the instructions outlined in the relevant operator’s manual. Do not operate the Park Ranger 2150 with the attachment unless all instructions have been followed. Operator’s Manual Park Ranger 2150... -
Page 10: Ec Declaration Of Conformity
Unless otherwise agreed in writing between the operator, customer and Egholm, Egholm is the data originator (data originator) of all data generated by the machine and attachments during use. -
Page 11: Technical Data
At 2,800 rpm ............approx. 3.6 l/h Operator’s Manual Park Ranger 2150... - Page 12 Park Ranger 2150 has an extremely small turning radius ....... .
- Page 13 The classification of the cab is according to EN 15695-1 Category 1. This type of cab does not protect you from harmful and unhealthy substances. Park Ranger 2150 can NOT be used in environments, which require protection of the driver against harmful and unhealthy substances.
-
Page 14: Access To The Cab
To leave the cab, open the door with the inside door handle. The doors will open when you press the door handle down. (Picture 3) Both doors can be used as an emergency exit. Cab floor Inside door handle - Press down Operator’s Manual Park Ranger 2150... - Page 15 (Picture 3) Safetybelt (Picture 4) Handles for entering the machine (Picture 5) Pull back handle for window to open Roof hatch handle Safety belt Handles for entering the machine Operator’s Manual Park Ranger 2150...
-
Page 16: Steering Column
General information 1.6 Steering column Steering column 1. 12V Connector. 2. Horn switch. 3. Ignition key. Operator’s Manual Park Ranger 2150... - Page 17 General information 1.6 Steering column - continued 4. Hazard lights. 5. Instrument panel switch to switch between rpm and the timer. 6. Warning steering pressure failure. 7. Instrument panel. 8. Switch - electrical socket rear. Operator’s Manual Park Ranger 2150...
- Page 18 5. Fuel tank indicator - Red LED. Lights up when there is less than five litres of fuel left in the tank. Enough for about 1½ hour drive. Sound alarm activates in case of 3 and 4 Operator’s Manual Park Ranger 2150...
- Page 19 General information 1.6 Steering column - continued Steering column 1. Throttle. 2. Handbrake. 3. Indicator light switch/stalk. 4. Fuses. See section 1.13. Operator’s Manual Park Ranger 2150...
-
Page 20: Operational Features
Lever C can be locked in pos. 1 by using the locking handle. This function must be used during work with the salt and sand spreader. Hydraulic connectors C1, C2 Pos. 0: Neutral (depends on the attachment). Operator’s Manual Park Ranger 2150... - Page 21 Lock rear lift: Pull the lock out of the locking slot and release it, can be done with the rear lift in raised or lowered position. (Picture 4) Lever C Unlock rear lift Lock rear lift Operator’s Manual Park Ranger 2150...
- Page 22 If you leave it with the engine running and the handbreake is off, the engine will stop within 2 sec. 7. Brake pedal Activated in its lowest position. (Picture 3) Operator’s Manual Park Ranger 2150...
- Page 23 The towing lever is in closed position when the lever is vertical. The towing lever is fitted to the transmission pump and is located under the rear chassis of the Park Ranger 2150. Towing lever closed Operator’s Manual Park Ranger 2150...
-
Page 24: Operating Panel, Cab
To switch on cab heating, turn the lever (pos 1) to horizontal position. The cabin fan must also be activated. To ventilate the cabin without heating turn the lever (pos 1) to vertical position. The cabin fan must be activated. Operator’s Manual Park Ranger 2150... -
Page 25: Removable Load Carrier (Optional)
C) Make sure that the locking handle is locked in position in the locking eye. Pull the load carrier to make sure that it is locked in position. (Picture 4) Locking eye Locking handle Locking handle in “released” position Locking handle in “locked” position Operator’s Manual Park Ranger 2150... -
Page 26: Driver's Seat
Move the adjustment handle to the right to unlock the guides. When adjustment is completed, ensure that the handle “clicks” and locks the guides. Check that the seat does not move longitudinally. (Picture 2), handle 1 Operator’s Manual Park Ranger 2150... - Page 27 Set and reset by turning the knob a quarter. (Picture 1), handle 5 Backrest angel adjustment: Pull the red straps upwards to unlock the backrest When adjustment is completed, ensure that the handle “clicks” and locks the backrest. (Picture 1), pos.4 Operator’s Manual Park Ranger 2150...
-
Page 28: Oil Cooler Cover
Fitting A) Insert the top edge of the oil cooler cover at an angle under the rim of the opening in the Park Ranger 2150. (Picture 1) Fitting the oil cooler cover B) Push the oil cooler cover into position. -
Page 29: Fuses And Main Switch
Fuses in the steering wheel panel compartment below the exhaust pipe. (Picture 3) Main switch To start the Park Ranger 2150, the main switch on the left-hand side of the machine must be ON. The main switch controls all power to the machine. -
Page 30: Fuses And Relay Overview Fuse / Relay Overview In The Steering Column
Plug V-plough Low beam / Signal supply Horn / Rear Work light / Radio Fan cab / Trailer plug Beacon / Wiper system L.Pos.Light R.Pos.Light / Radio / emergency line Start relay Control preheat relay Operator’s Manual Park Ranger 2150... - Page 31 Relay placed below the driver´s seat KT2 Preheat timer KT3 Seat timer KT4 Impuls relay (intentional startup) K3 Anti startup K4 Hot bulb timer feedback K5 Intentional startup (safty) K6 Intentional startup (safty) K7 Brake light K8 Lights Operator’s Manual Park Ranger 2150...
- Page 32 Operator´s manual...
-
Page 33: Operator's Manual
Filling – see “Maintenance”, Section 3.4. Hydraulic oil (Picture 2) Engine oil The oil level must be between the two lines on the dipstick. Filling – see Section 3.5. (Picture 3) Engine oil Operator’s Manual Park Ranger 2150... - Page 34 The control light comes on when 5 litres remain = sufficient for approx. 1½ hours. This light can only work when the Park Ranger 2150 is switched on. (Picture 2+3) Control light for diesel Topping up Diesel Operator’s Manual Park Ranger 2150...
-
Page 35: Starting, Operating And Stopping
Park Ranger 2150. • Always drive carefully. • Do not forget that the Park Ranger 2150 is a relatively high and narrow vehicle. Turning should therefore be done at a low speed. • Do not let the engine run in a closed area: there is a risk of asphyxiation. -
Page 36: Starting, Operating And Stopping
When the pre-heater indicator goes out, turn the key further clockwise and the Park Ranger 2150 will start. G) Release the brake pedal (1) to its top position. H) You can now activate the drive pedal(6). - Page 37 - continued The function of the Park Ranger 2150 propulsion system · The Park Ranger 2150 must be expected to have operating changes within the first 25-50 hours of its lifetime. · The Park Ranger 2150 is developed with controlled deceleration.
- Page 38 C) Press the brake pedal (1) down to its lowest position and slide the parking brake (2) forward. (Picture3) D) Stop the Park Ranger 2150 by turning the key back to stop position (counter clockwise) and remove the key. (Picture 3)
- Page 39 Never leave a rear attachment in tipped position. Warning: always stop the machine before connecting the attachments hydraulics connectors. Warning: Always remove the key and turn of the main switch before working on the machine Operator’s Manual Park Ranger 2150...
-
Page 40: Trailer
Operator’s manual 2.3 Trailer When Park Ranger 2150 is equipped with the approved coupling class A50-X, the following trailers can be connected: Trailers without brakes .........max.750 kg (See type plate) Trailers with overrun brakes ......max.1500 kg Light plug Hook Secure wire (See type plate) Vertical load on trailer coupling .... - Page 41 Service and maintenance...
-
Page 42: Service And Maintenance
Removing the radiator cover The daily maintenance of the Park Ranger 2150 is simple and straightforward – but very important. Three operations need to be performed: cleaning of the radiator, oil cooler and air filter. -
Page 43: Lubrication
(Picture 1+2+3) Lubricating nipples, A-frame Cables and moving parts Lubricate with a few drops of oil every 15 hours or so. Lubricating nipples, steering cylinders Lubricating nipples, steering cylinders Operator’s Manual Park Ranger 2150... -
Page 44: Park Ranger 2150 Service And Maintenance Chart
Service and Maintenance 3.3 Park Ranger 2150 service and maintenance chart X Lubricate t Clean m Check lReplace Operation Service schedule First Every Every Every Every Daily See § 400h 800h year 2.year Machine Walk-around inspection Tire Pressure (1) Wheel bolts (2) - Page 45 Service and Maintenance 3.3 Park Ranger 2150 service and maintenance chart - continued X Lubricate t Clean m Check lReplace Operation Service schedule First Every Every Every Every Daily See § 400h 800h year 2.year Hydraulic Hydraulic oil Hydraulic oil filter, return...
-
Page 46: Hydraulic System
Refilling hydraulic oil A) Park the Park Ranger 2150 on a level surface. B) Put the handbrake on, turn off the engine, remove the radiator cover and open up the bonnet. -
Page 47: Engine Maintenance
Check the engine oil 1. Park the Park Ranger 2150 on a level surface. Check the oil level 2. Check the oil level before starting the engine. (Picture 1) 3. - Page 48 5. Switch off the engine and check the level of engine oil. 6. Add oil if the level of engine oil drops after the filter has been changed. Operator’s Manual Park Ranger 2150...
-
Page 49: Fuel
3. Bleed the fuel system. It is important to bleed the fuel system 1. When the fuel filter and hoses have been removed and then replaced. 2. If the engine has run out of fuel. Operator’s Manual Park Ranger 2150... - Page 50 Checking the fuel hoses during every service 1. Check for loose clips. Apply a little oil to the screw and tighten. 2. If any fuel hoses or clips appear worn, replace them immediately. 3. Bleed the fuel system after replacing hoses. Operator’s Manual Park Ranger 2150...
-
Page 51: Radiator
C) Replace the radiator cap carefully after filling up with coolant. D) Start the Park Ranger 2150 and let it run until it reaches operating temperature. E) Stop the engine and add coolant. (Picture 2) Check the radiator/cooler hoses Replace the hoses and clips every two years –... -
Page 52: Air Filter
A) The windscreen washer tank is in the cab, on the right side of the driver´s seat. B) To add windscreen liquid, unscrew the cap, add windscreen liquid and screw the filling cap on again. (Picture 4) Windscreen washer liquid cap Operator’s Manual Park Ranger 2150... -
Page 53: Battery
(+) pole of the battery, and connect the negative (–) terminal to the negative (–) pole. Battery fluid level The battery is maintenance free, only check the green lamp on battery. (Picture 1) Operator’s Manual Park Ranger 2150... -
Page 54: Fan Belt
Remember to retighten the nuts and bolts after adjustment. 3.12 Articulated joint If there is any play in the articulated joint, the bearings need to be replaced. To check for play, rock the front Articulated joint chassis. (Picture 2) Operator’s Manual Park Ranger 2150... -
Page 55: Towing
Park Ranger. Be careful when towing from the rear end of the Park Ranger - the steering is difficult. Towing points front Towing at front end Towing at back end Operator’s Manual Park Ranger 2150... -
Page 56: Transporting The Park Ranger 2150
Service and Maintenance 3.14 Transporting the Park Ranger 2150 To transport the vehicle, if necessary, cross the restraint straps and attach them to the four transport securing rings of the vehicle. (Picture 1+2+3+4) Anchoring at the front Straps at the front... -
Page 57: Tire Change
6. Retighten the bolts again after 5-10 hours. Attention: Only use tyre dimensions and tyre pressure as specified in section 1.4 page 11. Attention: Changing tyres on rims may only be carried out at an authorized workshop. Operator’s Manual Park Ranger 2150... -
Page 58: Checking For Worn Brakes
Worn mark on wheel flange Place the bonnet key up against the drum The wheel flange must be outside the bonnet key. If the flange is covered or almost covered the drum must be replaced. Operator’s Manual Park Ranger 2150... - Page 59 Conditions...
-
Page 60: Conditions
Conditions 4.1 Warranty The warranty period for the materials and manufacture of this Park Ranger 2150 is 12 months from the date of purchase. In case of errors or defects on the machine within the warranty period, Egholm will carry out the necessary repairs at no charge to the customer, including materials and working hours, in accordance with the terms and conditions listed below. -
Page 61: Complaints
Egholm A/S 4.3 Disposal When, many years from now, your Park Ranger 2150 has reached the end of its working life, it should be disposed of in a responsible manner that conforms to relevant disposal regulations. 1. Used hydraulic oil, engine oil, diesel oil, coolant and AC coolant are to be delivered at an approved waste disposal facility or site. - Page 62 Wearing parts...
-
Page 63: Wearing Parts
Wearing parts 5.1 Wearing parts – Park Ranger 2150 E01100250 Tyres and wheels E90501643 Filter kit 2150 E01006500 Air filter E01020020 Oil filter E04003050 Hydraulic filter E01020010 Fuel filter E04003060 Hydraulic oil filter E50000656 Fan belt 2150 E05001080 Bulb, main light E05001050 Bulb, rotary light Operator’s Manual Park Ranger 2150... - Page 64 Wearing parts 5.1 Wearing parts – Park Ranger 2150 - continued E04501200 Hydraulic connector, E05001090 Bulb, indicator switch male, 1/4” E04501220 Hydraulic connector, E05001010 Bulb, indicator male ½” E04501210 Hydraulic connector, E05001040 Bulb, parking light, front male3/8” E04501230 Hydraulic connector, E04501240 Hydraulic connector, female, 1/4”...
-
Page 65: Notes
Notes Operator’s Manual Park Ranger 2150... - Page 66 Notes Operator’s Manual Park Ranger 2150...
- Page 67 Notes Operator’s Manual Park Ranger 2150...
- Page 68 Egholm A/S Transportvej 27 7620 Lemvig, Denmark T.: +45 97 81 12 05 www.egholm.eu - info@egholm.dk...
Need help?
Do you have a question about the Park Ranger 2150 and is the answer not in the manual?
Questions and answers