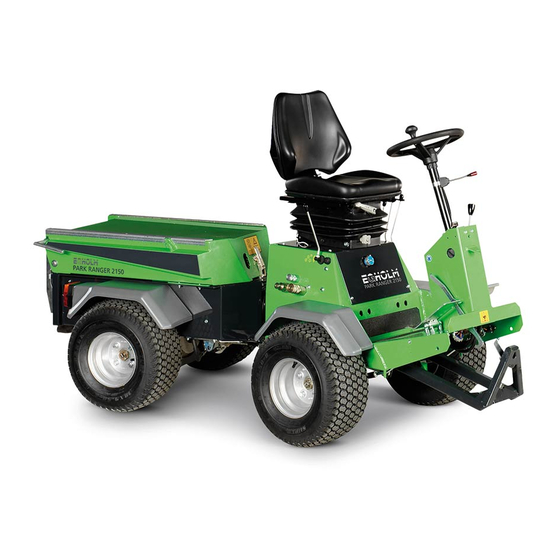
Egholm Park Ranger 2150 Operator's Manual
Basic machine
Hide thumbs
Also See for Park Ranger 2150:
- Operator's manual (68 pages) ,
- Operator's manual (18 pages) ,
- Operator's manual (26 pages)

Related Manuals for Egholm Park Ranger 2150


Summary of Contents for Egholm Park Ranger 2150
- Page 1 ’ peratOr s manual BASIC MACHINE Park Ranger 2150 All Year Operation Cost Saving...
- Page 2 Reservations: As it is the Egholm policy to make continuous improvements, we reserve the right to alter the specifications and equipment at any time without notice. Egholm accepts no liability for errors or shortcomings in the operator’s manual.
-
Page 3: Table Of Contents
3.3 Service and maintenance chart for the Park Ranger 2150 ....... - Page 4 Introduction The Park Ranger 2150 utility machine The Park Ranger 2150 is an Egholm utility machine with a complete range of special attachments designed to allow you to perform outdoor maintenance work all year round. Sweeping and vacuuming in spring and autumn, mowing grass and lawn-edge cutting in the summer, and sweeping snow, and spreading gravel and sand in the winter.
-
Page 5: General Information
Make sure that no one is standing near the machine while it is in use. (Picture 1) Turn the steering wheel carefully: The Park Ranger 2150 is articulated and the steering mechanism is extremely responsive. (Picture 2) Articulated joint... - Page 6 General information Avoid crushing fingers: Keep your hands and fingers away from areas where there is a danger of crushing. The A-frame Take care not to catch your fingers in the A-frame for the various tools. (Picture 1) Exhaust pipe Avoid crushing fingers Make sure not to touch the exhaust pipe as this becomes very hot when the machine is operating.
-
Page 7: Ec Declaration Of Conformity
Transportvej 27 · DK-7620 Lemvig Address: Telephone: +45 97 81 12 05 hereby declares that Park Ranger 2150 The machine: Type: UHM 2150A0 XX (year of manufacture) A XXXXX (serial number) · has been manufactured in conformity with Directive 2006/42/EU... -
Page 8: Technical Data
General information 1.3 Technical data Dimensions: Length (L) 2,225 mm Width (W) 1,015 mm Height with cab 1,935 mm Height without cab 1,210 mm Max. speed 16 km/h Weight Weight 485 kg Max. permitted weight for: Utility machine 1,300 kg Machine and trailer without brakes 1,750 kg Machine and trailer with overrunning brakes... - Page 9 Whole body, EN 13059 0.6 m/s Hand/arm, EN 13059 2.4 m/s Turning radius: Park Ranger 2150 has an extremely small turning radius 1.5 m Information plate: Mounted on the right side of the front chassis. Attention: Specifications may change without notice.
-
Page 10: Steering Column
General information 1.4 Steering column Hazard lights Timer Load control lamp If this symbol lights up at any time other than during ignition, stop the engine and identify the cause. Pre-heater indicator Does not light up together with the three other warning lights. It does not light up until the key has been turned to “pre-heating”... - Page 11 Generel information 1.4 Steering column - continued - Indicator switch/stalk Throttle. When starting the machine, pull the throttle open to approx. 1/4 of its capacity. It is then easy to start the engine. Fuel control light. Comes on when 5 litres remain in the tank – sufficient for approx. 1½ hours’ operation. This light is only lit when the machine is switched on.
-
Page 12: Operating Levers And Pedals
General information 1.5 Operating levers and pedals 1. Lever A (Picture 1) For raising and lowering front-mounted attachments on the A-frame: A B C Top position: Raises the attachment Middle position: Locks the attachment in a given position Bottom position: Lowers the attachment Levers A, B, C Hydraulic connectors B1, B2... - Page 13 General information 1.5 Operating levers and pedals - continued Operation of attachments when the operator is not sitting in the driver’s seat (exclusively for external vacuum hose): A) Park the basic machine and lock the parking brake B) Keep the start button for attachment operation (Picture 1) depressed while operating lever D.
- Page 14 The towing lever is in closed position when the lever is vertical. Towing lever closed The towing lever is fitted to the transmission pump and is located under the rear chassis of the Park Ranger 2150. Operator’s Manual City Ranger 2150...
-
Page 15: Fitting A Cab (Optional)
General information 1.6 Fitting a cab (optional) 1. Lower the cab onto the utility machine. Use a crane with a lifting strap that passes through the cab frame. (Picture 1) 2. Fasten the cab to the utility machine chassis using two bolts at the front and two bolts at the back. -
Page 16: Operating Panel, Cab (Optional)
General information 1.7 Operating panel, cab (optional) Heat regulation in the cab Light switch: Position 1. Parking lights Position 2. Driving lights Work light, rear Rotary light Windscreen wipers: Position 1. Wipe Position 2. Wipe and wash Cab heater: Position 1. Half power Position 2. -
Page 17: Removable Load Carrier (Optional)
General information 1.8 Removable load carrier (optional) Removing the load carrier A) Move the locking lever to “released” position. To do this, pull the lever out firmly while turning it to the right. B) Pull the load carrier towards the back. Fitting the load carrier Load carrier Locking handle... -
Page 18: Driver's Seat
Fitting (Picture 2): A) Insert the top edge of the oil cooler cover at an angle under the rim of the opening in the Park Ranger 2150. B) Push the oil cooler cover into position. Fitting the oil cooler cover... -
Page 19: Fuses And Main Switch
20 Amp Driving lights and rear work light Main switch For it to be possible to start the Park Ranger 2150, the main switch on the left-hand side of the machine must be ON. The main switch controls all power to the machine. -
Page 20: Operator's Manual
Operator’s manual 2.1 Daily checks before start-up Before carrying out the daily checks, open the engine cover: A) Remove the removable load carrier. See Section 1.8 B) Remove the radiator cover. See Section 3.1 C) Open the engine cover lock by pushing the locking button 1) down and then opening the catch 2). - Page 21 Tank capacity: 20 litres. The control light comes on when 5 litres remain = sufficient for approx. 1½ hours. This light can only work when the Park Ranger 2150 is switched on. Check the coolant Remove the radiator cap and check that the fluid comes all Diesel the way up to the filling opening.
-
Page 22: Starting, Operation And Stopping
When the pre- heater indicator goes out, turn the key farther clockwise and the Park Ranger 2150 will start. G) Release the brake pedal (1) to its top position. H) You can now activate the drive pedal (6). - Page 23 C) Press the brake pedal (1) down to its lowest position A B C and slide the parking brake (2) forward. D) Stop the Park Ranger 2150 by turning the key back to the starting position. Levers A, B and C...
-
Page 24: Service And Maintenance
Service and Maintenance 3.1 Daily maintenance The daily maintenance of the Park Ranger 2150 is simple and straightforward – but very important. Three operations need to be performed: cleaning of the radiator, oil cooler and air filter. Cleaning the radiator... -
Page 25: Lubrication
Service and Maintenance 3.2 Lubrication Lubricating nipples Lubricate the lubricating nipples on the machine with one or two shots of good quality grease – every 15 hours or so. There are two lubricating nipples by the A-frame, and four by the steering cylinders. Lubricating nipples, A-frame Cables and moving parts Lubricate with a few drops of oil every 15 hours or so. -
Page 26: Service And Maintenance Chart For The Park Ranger 2150
7) Lubricate the machine for every 15 hours of operation. 8) We recommend replacing the air filter for every 200 hours We recommend that service and maintenance procedures are carried out by authorised Egholm dealers. Operator’s Manual City Ranger 2150... - Page 27 Service and Maintenance Service plan Service aspects Hours Measures Daily 4000 4400 4800 5200 5600 6000 6400 6800 7200 7600 · Motor oil Check · · · · · · · · · · Replace · Hydraulic oil Check · ·...
-
Page 28: Hydraulic System
Replace the filter and clean the housing during service procedures. Hydraulic oil filter Tank filter housing A) Remove the oil filter under the Park Ranger 2150 and let the oil run out until the tank is empty. B) Lubricate the gasket with oil. C) Fit the new filter. -
Page 29: Engine Maintenance
Check the motor oil. (Picture 1) Check the oil level 1. Park the Park Ranger 2150 on a level surface. 2. Check the oil level before starting the engine. 3. Pull out the dipstick, wipe it clean and then replace it. - Page 30 Service and Maintenance 3.5 Engine maintenance - continued - Recommendations concerning oil: For the best engine performance, we recommend approved Perkins engine oils. Other high-quality oils may be used if they have one of the following API classifications: CF, CF-4, CG-4 or CH-4. Never use special additives.
-
Page 31: Fuel
Service and Maintenance 3.6 Fuel Warning Always switch off the engine before filling up with fuel. Make sure there are no naked flames nearby because diesel oil is highly flammable. Fuel Diesel cap ONLY use diesel as fuel. (Picture 1) Important when filling up with fuel! Make sure to keep the area free from dirt when filling up –... - Page 32 Service and Maintenance 3.6 Fuel – continued – Bleeding the fuel system/the fuel filter 1. Switch on the machine to start the electric fuel pump 2. Loosen the bleeding screw on the fuel filter. (Picture 1) 3. When fuel starts to run out, close the bleeding screw. 4.
-
Page 33: Radiator
C) Replace the radiator cap carefully after filling up with coolant. D) Start the Park Ranger 2150 and let it run until it reaches operating temperature. E) Stop the engine and add coolant. (Picture 2) Check the radiator/cooler hoses Replace the hoses and clips every two years –... -
Page 34: Air Filter
3.8 Air filter Cleaning the air filter A) Open the vacuum valve every day to remove large particles of dirt and dust when the Park Ranger 2150 is being used in dusty environments. B) Open the air filter housing. C) Remove the filter unit. -
Page 35: Fan Belt
Service and Maintenance 3.9 Battery - continued - Warning! Both the explosive gases and the sulphuric acid that the battery contains can cause blindness and serious burns. Charging - pole Battery + pole Connect the positive (+) terminal of the charger to the positive (+) pole of the battery, and connect the negative (–) terminal to the negative (–) pole. -
Page 36: Conditions
The warranty period for the materials and manufacture of this suction sweeper is 12 months from the date of purchase. In case of errors or defects on the machine within the warranty period, Egholm will carry out the necessary repairs at no charge to the customer, including materials and working hours, in accordance with the terms and conditions listed below. -
Page 37: Complaints
Best regards Egholm A/S 4.3 Disposal When, many years from now, your Park Ranger 2150 comes to the end of its working life, it should be disposed of in a responsible manner and in accordance with the relevant disposal regulations. -
Page 38: Wearing Parts
Wearing parts 5.1 Wearing parts – Park Ranger 2150 01100250 Tyres and wheels 90501643 Filter kit 2150 01020020 Oil filter 01006500 Air filter 04003050 Hydraulic filter 01020010 Fuel filter 04003060 Hydraulic oil filter E50000656 Fan belt 2150 05001080 Bulb, main light 05001050 Bulb, rotary light Operator’s Manual City Ranger 2150... - Page 39 Wearing parts 5.1 Wearing parts – Park Ranger 2150 05001030 Bulb, tank gauge 05001090 Bulb, indicator switch 05001010 Bulb, indicator 05001110 Bulb, brake light 05001060 Bulb, rear work light 05001040 Bulb, parking light, front 05001020 Bulb, parking light, rear 04501200 Hydraulic connector, male, 1/4”...
- Page 40 Wearing parts 5.1 Wearing parts – Park Ranger 2150 04501230 Hydraulic connector, 04501240 Hydraulic connector, female, 1/4” female, 3/8” 01006505 Safety element, air filter 04501250 Hydraulic connector, female ½” Operator’s Manual City Ranger 2150...
-
Page 41: Notes
Notes Operator’s Manual City Ranger 2150... - Page 42 Notes Operator’s Manual City Ranger 2150...
- Page 43 Notes Operator’s Manual City Ranger 2150...
- Page 44 Egholm A/S Transportvej 27 DK-7620 Lemvig T. +45 97 81 12 05 F. +45 97 81 12 10 www.egholm.eu info@egholm.dk 90001061-03 EN...
Need help?
Do you have a question about the Park Ranger 2150 and is the answer not in the manual?
Questions and answers