Advertisement
Quick Links
HS-2410W/2410A
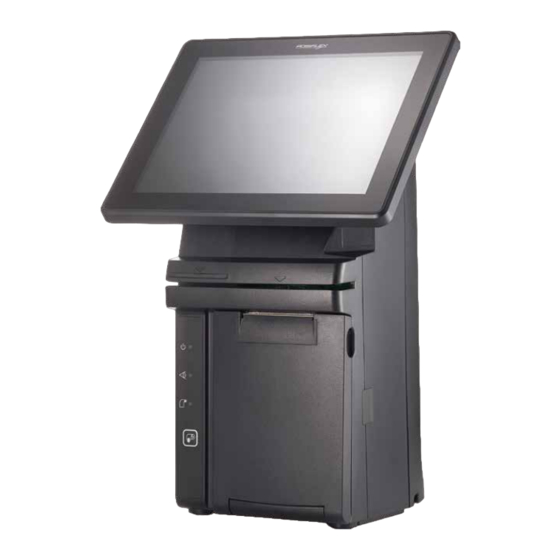
JIVA Desktop POS
User Manual
Product Features
Compact
The compact footprint of HS-2410 Series makes itself adaptable to a wide
range of counter styles and allows every inch of the work space usage to be
optimized, thus creating maximum profit return for the store owners. This is
what space saving is all about.
All-in-one
As an "all-in-one" solution, HS-2410 Series touch-screen terminal integrates
some of the most widely used peripherals in daily POS operation, such as 2" or
3" thermal printer, MSR, smart card reader, finger print sensor and 2nd
customer display, and has the features and functionality to cater for
applications in retail, hospitality, health care, banking and more, while offering
uncompromising performance.
Aesthetics
Dressed from head to toe in timeless black or white color, the only trend that
never goes out of style, and with stylish touches added throughout, HS-2410
Series is not just a piece of machinery, it is an elegantly crafted piece of art
that looks right at home in any store decoration.
15590906050 Ver. D0
http://www.posiflex.com
Package Contents
HS-2410W/2410A desktop POS (x 1)
Power Adaptor (x 1)
Power cord (x 1)
Thermal paper roll (x 1)
Desktop mounting kit pack (x 1)
(including 1 desktop mounting bracket,
4 fixing screws, 4 plastic anchors)
User manual (x 1)
Recovery DVD (for HS-2410W) or
Information DVD
1
Advertisement

Summary of Contents for POSIFLEX JIVA HS-2410W
- Page 1 HS-2410 Series is not just a piece of machinery, it is an elegantly crafted piece of art that looks right at home in any store decoration. 15590906050 Ver. D0 http://www.posiflex.com...
- Page 2 Views of the HS-2410W/2410A Front View P-CAP Touch Screen 3-Track Magnetic Smart Card Reader Stripe Reader for HS-2410W only (Optional) (Optional) Power LED Indicator Printed Paper Error LED Indicator Exit Paper-Out LED Indicator Rear View Top I/O Interface Cover Bottom I/O Interface Cover Cable Exit...
- Page 3 Left Side View Power Button Right Side View Paper Roll Cover Release Handle RFID Card Reader for HS2410-W only (Optional)
- Page 4 Bottom View Rubber Pad Bottom I/O Interface Rubber Pad Views of I/O Interface of HS-2410W/2410A Top I/O Interface VGA Port USB 2.0 Port for HS-2410W only COM (RJ-50) Port Bottom I/O Interface 12VDC-IN Power Jack Line Out RJ-11 Cash Drawer Port DB9 COM Ports USB Ports RJ-45 LAN Port...
- Page 5 Connecting Power Adapter and I/O Cables Please refer to the following instructions on how to connect power adapter and I/O cables to HS-2410 series while organizing your cables. Lay your desktop POS on a level surface with its touch screen facing down as shown in the figure.
- Page 6 Before pushing the cover back into place, neatly thread the cables through the cable exit. Cable Exit Press down the cover to close the bottom I/O interface chamber. Installing a Customer Display to HS-2410W/2410A HS-2410 series also allows you to additionally install a customer display to expand its functionality.
- Page 7 Align the two screw bolts on the bottom of the POS with the screw holes of the mounting bracket. Push the POS backwards along the slide rails of the bracket in the direction shown in the figure To completely mount the desktop POS onto the table, you can apply two more self-tapping screws into the two holes on the back of the base stand of the POS as illustrated below.
- Page 8 Unroll the thermal paper and drag the loose end of the paper till it extends towards the paper cutter. Paper cutter Close the paper roll cover and make sure the loose end sticks out of the opening of the paper roll compartment. Make sure the paper roll is well loaded with the end of the paper sticking out as shown in the figure.
- Page 9 Power OFF the HS-2410 series For HS-2410W For HS-2410W which is preloaded with Windows 8.1, please carefully go through the sequences described below to properly shut down the system: 1. Right click on Start button on the taskbar. 2. In the pop-up menu, select Shut down or sign out > Shut down to completely power down HS-2410W.
-
Page 10: Status Led Indicator
Status LED Indicator After HS-2410 series is powered on, it is significant to observe the status of LED indicators anytime to ensure your system functions normally. More importantly, knowing how to interpret the status indicators enables you to perform basic troubleshooting more efficiently. -
Page 11: Installing An Operating System
Installing an Operating System You are highly advised NOT to install an operating system on HS-2410 series without professional instructions. Not only might the careless handling during installation cause irreversible damage to your system, but also the improper installation likely leads to system malfunction or failure. - Page 12 Operating the Magnetic Stripe Reader (Optional) To have the magnetic stripe reader of HS-2410 series work properly, you must bear in mind the following tips while swiping your MSR cards through the reader. Make sure to swipe your card with the side of magnetic stripe facing up.
-
Page 13: Specifications
Serial Port on the top I/O plate CR Port 1 port, control 1 CR D-SUB 15-pin , with 12V power for Posiflex VGA Port LCD monitors 4 x USB 2.0 ports (one on the top I/O plate and Standard USB Port... - Page 14 <MEMO>...
- Page 15 <MEMO>...
- Page 16 <MEMO>...


Need help?
Do you have a question about the JIVA HS-2410W and is the answer not in the manual?
Questions and answers