Biotage Selekt User Manual
Automated flash purification system
Hide thumbs
Also See for Selekt:
- User manual (28 pages) ,
- Installation and safety (12 pages) ,
- Safety & maintenance checklist (5 pages)
Table of Contents
Advertisement
Quick Links
Advertisement
Table of Contents

Subscribe to Our Youtube Channel
Related Manuals for Biotage Selekt


Summary of Contents for Biotage Selekt
- Page 1 Biotage Selekt ® User Manual...
-
Page 2: Table Of Contents
Flush the Column with Air General Information Purge the Column Consumables and Accessories Unload the Run Manufacturer Flush the System Contact Us Shut Down the System Notes Results Search the Results Analysis of the Result Biotage Selekt User Manual | © Biotage 2020 ®... -
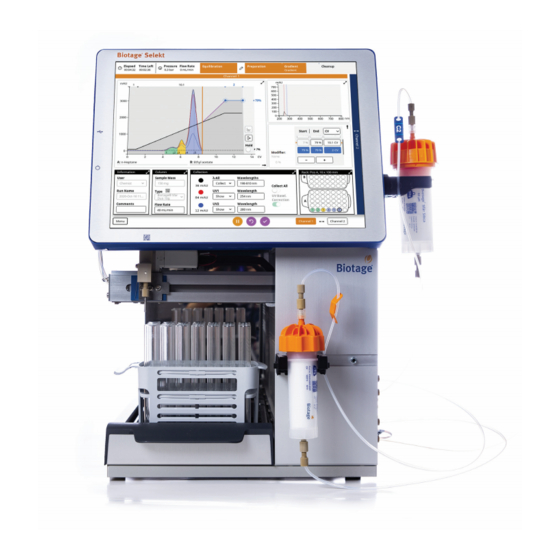
Page 3: System Overview
The following Selekt racks are available: and touch screen. » 48 positions for 13 x 100 mm tubes Optional accessories from Biotage that can be used with the with a vessel volume of 9 mL. system are Biotage Solvent Detector, an instrument tray, ®... -
Page 4: Solvent Supply
Figure 6. The Collection panel expanded on a system with a Spektra software license and an external detector connected. Figure 5. The optional instrument tray with a solvent detector. It is only possible to connect one Biotage Solvent Detector to the system. Biotage Selekt User Manual | © Biotage 2020... -
Page 5: Mail Functionality
The safety valve is designed to open at 8 bar and discharge a waste reservoir needs to be emptied, and a leak fluid until the pressure drops below 8 bar. is detected by Biotage Solvent Detector. ® »... -
Page 6: Prepare The System
SNAP XL column onto the system, see “Mount a Biotage ® SNAP XL Column (Optional)” on page 5. 5. Insert the drain tube into the system’s waste reservoir. Figure 10. Biotage columns up to 50g can be placed on the front of the system. Install Biotage Safety Valve (Optional) ®... -
Page 7: Mount A Biotage
1. Remove the stoppers from the top and bottom of the column. » Always use Biotage Safety Valve (P/N 417115SP) when 2. Place the column in the bottom loop on the column holder processing columns or combinations (e.g. column and dry (see C in Figure 12) and then unfasten and lower the top loop load vessel) with a total CV larger than 0.8 L. -
Page 8: Inspect The Tubing
» Shut down the system before replacing any tubing. Use only tubing designed for the Selekt system and supplied by Biotage. Inspect all tubes before each run to ensure that they do not show signs of wear or damage and that they are properly connected and tightened. -
Page 9: Setup Of Automatic Conversion Between Normal And Reversed Phase
Normal and Reversed Phase 5. Prime the solvent inlets that have been assigned a new Selekt automatically converts system solvents from normal to solvent; see below. reversed phase when the following criteria are met: »... -
Page 10: Set Up A Purification
Racks with vessel volumes up to 120 mL » Never exceed the maximum pressure or flow rate for the require the collection tray. Selekt racks are automatically used column. » identified by the system when placed on the collection bed. - Page 11 Set Up a Purification To add a gradient segment, press the + button in the gradient table or the expanded gradient graph. The new segment will be added after the selected segment or node or at the end of the gradient if nothing is selected.
-
Page 12: Specify The Information Parameters
Note: If using a column or a combination of a column and e.g. dry load vessel with a total CV larger than 0.8 L, a safety valve supplied by Biotage (P/N 417115SP) must be used. For more information, see page 4. -
Page 13: Specify The Collection Parameters
: Select whether the average absorbance within Load Racks a user-defined wavelength range should be used for The Selekt racks have RFID tags that are automatically identified collection and fractionation (Collect), used for monitoring by the system when placed on the collection bed. RFID racks (Show), or not be shown during the run (Hide). - Page 14 Rack panel, enable the Max Fraction Volume option (see Figure 26 on page 11), and enter the desired volume. Note that this setting will only be applied on racks with a higher vessel volume. Biotage Selekt User Manual | © Biotage 2020 ®...
-
Page 15: Start, Monitor, And Control A Purification
Read and follow the safety precautions against static electricity While a purification is running, a dynamic chromatogram and in the Biotage Selekt Installation and Safety document ® the programmed gradient are displayed in the run view (see (P/N 416182) that is supplied with the system. -
Page 16: Manual Uv Zero
At any time during the gradient run, you can start an isocratic segment by enabling the Hold option in the chromatogram (see Figure 30). End the segment by disabling the option. Biotage Selekt User Manual | © Biotage 2020 ®... -
Page 17: Add, Empty, And Replace Racks During The Run
Rack panel; see Figure 31. When a Selekt rack that has been used for the run in progress is removed from the system and then reinserted, it is not cleared automatically. -
Page 18: Manually Fractionate
8. To undo all changes, press . Note: To add a solvent combination to the gradient, expand the chromatogram to full size by pressing . 3. To apply the changes and resume the run, press . Biotage Selekt User Manual | © Biotage 2020 ®... -
Page 19: Confirm Cleanup
Start, Monitor, and Control a Purification Confirm Cleanup If the Confirm Cleanup option is enabled on the system, the Gradient Run Completed dialog appears before cleanup is performed, giving the user the option to manually extend the run (see Figure 33). To extend, press Extend Run, edit the run settings, and then resume the run. -
Page 20: Unload A Purification
Select Rack drop-down list. Figure 35. The power switch is located on the left side of the system. Figure 34. When a run is finished, couple the column inlet and outlet tubes together. Biotage Selekt User Manual | © Biotage 2020 ®... -
Page 21: Results
ID. The system ID can be found in the About view. When a Selekt rack is unloaded after a run has been completed, it is automatically cleared in the software (in the Rack panel) when returned to the system. -
Page 22: Analysis Of The Result
Requires a Spektra software license. Fractions only collected due to the Collect All option are gray. Figure 40. The Options dialog. Figure 38. The Analysis view showing the chromatogram and the rack(s). Biotage Selekt User Manual | © Biotage 2020 ®... -
Page 23: Customize The Report
Report Note field in the Report Setup view. » Log: The run log. » Unit: The length unit. Note that the full Selekt report is not overwritten and can always be accessed by turning off the Apply Report Setup option. -
Page 24: Base A New Run On A Previous Run
4. Press Export. 5. If the Export dialog opens, press Export again. The report is saved as a PDF file at \biotage\selekt\ user name . The result files are saved at \biotage\selekt\results. 6. When the export has been completed ( ), remove the USB memory device. -
Page 25: Flushes And Purge
Flushes and Purge Flushes and Purge Warning Flush » Never flush the system without a column mounted or the column Use the flush feature to for example: inlet and outlet tubing coupled together, on both channels. » » Clean the flow path. If the last purification of the day Always use the purge feature to release any remaining pressure in a column after a flush operation. -
Page 26: Air Flush
3. Ensure that the inlet and outlet tubing on the other (unused) channel are coupled together. 4. Press Purge. Note that the current pressure is displayed in the top left corner of the software. Biotage Selekt User Manual | © Biotage 2020 ®... -
Page 27: Data Administration
3.1 L. » Never exceed the maximum pressure or flow rate for the column. Note: The preconfigured Biotage column types cannot be edited or deleted. We recommend that you disable Visible for any column that will not be used. -
Page 28: Administrate Racks
» E-mail Address: The user’s e-mail address. If the system The software comes with a preconfigured list of Biotage is connected to an e-mail server, this address can be racks and their settings. If desired, it is possible to lower the used for e-mail notifications, auto-send of reports, vessel volume for these racks. -
Page 29: System Settings
» Line Flush: If enabled, the system flushes the column inlet » RFID Rack Detection: If enabled, Selekt racks line at the end of the run using the run’s weakest solvent. are automatically identified by the system Select whether to Collect the flush (using the same collection when placed on the collection bed. -
Page 30: Optional Detectors
6. When the message saying that it is safe to turn off the system appears on the screen, turn off the system. The power switch is located on the left side of the system. 7. Turn on the system. Biotage Selekt User Manual | © Biotage 2020 ®... -
Page 31: Licenses
To install a license: 1. Create a directory called \biotage\selekt\ on a USB memory device and save the license file to this location. 2. Connect the memory device to a USB port on the left side of the system. -
Page 32: Maintenance
3. If the Export dialog opens, press Export again. The appears, remove the memory device and press Shut Down. documents are saved in a zip file at \biotage\selekt\logs. The backup file is saved at \biotage\selekt\backup\. 4. When the export has been completed ( ), press Close and remove the USB memory device. -
Page 33: Clean The Exterior Of The System
Maintenance Clean the Exterior of the System To clean the detector flow cell: 1. Shut down the system as described on page 18. Regular cleaning of the touch screen, if performed properly, extends the touch screen life and reduces wear. 2. -
Page 34: Clean Or Release Check Valves
» Shut down the system before replacing any tubing. Use only tubing designed for the Selekt system and supplied by Biotage. Figure 56. Removing the check valve cap from one of the CV OUT valves. Shut Down the System at Leakage 2. - Page 35 Note: All tube types, dimensions, and lengths are essential a waste reservoir. for the performance of the system. Only replace tubes with the equivalent tubes designed for the Selekt system and supplied by Biotage. If an external leakage is observed: 1.
-
Page 36: Replace The Fuses
Warning inlet line. The solvent inlet filters protect the pump and » Use only exact replacement fuses specified by Biotage columns from damage due to particulate contamination. (P/N 411916SP). Incorrect fuses create a potential fire hazard. These filters should be cleaned (sonicated) or replaced every 1000 hours of operation or every 12 months, whichever comes 1. -
Page 37: Troubleshooting
Ensure that there is nothing obstructing or restricting the arm movement. If this does not solve the problem, the collection arm may need to be recalibrated. Contact Biotage 1-Point Support. Longer delay than expected (approx. 2 CV instead of 1 CV) »... -
Page 38: Leak Detected
» Shut down the system before replacing any tubing. Use only tubing designed for the Selekt system and supplied by Biotage. 1. Once the pressure has decreased to ambient pressure (the current pressure is displayed in the top left corner of the Figure 64. -
Page 39: Qr Reader Problems
Biotage 1-Point Support. Contact Biotage 1-Point Support ® ™ For assistance at any time during troubleshooting or if your problem persists, contact Biotage 1-Point Support. See contact information on the back of this document or visit our website www.biotage.com. -
Page 40: Solvent Specifications
Dean J. A. Lange’s Handbook of Chemistry, 15th edition, McGraw-Hill (1999). Snyder L. R. and Kirkland J. J. Introduction to Modern Liquid Chromatography, Wiley (1979). When water is used in reversed phase chromatography, the strength value is 0. Biotage Selekt User Manual | © Biotage 2020 ®... -
Page 41: General Information
General Information General Information Consumables and Accessories Only genuine Biotage consumables and accessories must be used in the system. To order consumables and accessories, see contact information on the back of this document or visit our website www.biotage.com. Accessories that may be necessary for the “Maintenance”... -
Page 42: Notes
Notes Notes Biotage Selekt User Manual | © Biotage 2020 ®... - Page 44 Part Number: 416183-G © 2020 Biotage. All rights reserved. No material may be reproduced or published without the written permission of Biotage. Information in this document is subject to change without notice and does not represent any commitment from Biotage. E&OE.
Need help?
Do you have a question about the Selekt and is the answer not in the manual?
Questions and answers