Biotage Selekt User Manual
Hide thumbs
Also See for Selekt:
- User manual (44 pages) ,
- Installation and safety (12 pages) ,
- Safety & maintenance checklist (5 pages)
Table of Contents
Advertisement
Quick Links
Advertisement
Table of Contents

Subscribe to Our Youtube Channel
Related Manuals for Biotage Selekt


Summary of Contents for Biotage Selekt
- Page 1 Biotage Selekt ® User Manual...
-
Page 2: Table Of Contents
General Information Unload the Run Consumables and Accessories Flush the System Manufacturer Shut Down the System Contact Us Results Export a Report to USB Base a New Run on a Previous Run Biotage Selekt User Manual | © Biotage 2018 ®... -
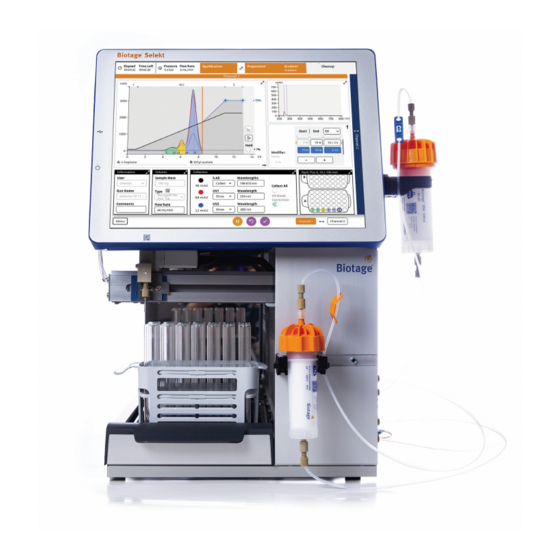
Page 3: System Overview
Biotage Selekt is an automated flash purification system ® with a built-in QR reader for Biotage Sfär columns, RFID reader The system collects fractions into a variety of collection racks for Selekt racks, UV detector, pump, fraction collector, and and vessels. The following Selekt racks are available: touch screen. -
Page 4: Solvent Supply
Signals that are not used for collection and fractionation can be used for monitoring. Biotage Selekt User Manual | © Biotage 2018 ®... -
Page 5: Prepare The System
For more information, see “Manage Solvents” on page 13. 3. Prime the solvent inlets that have been assigned a new solvent; see page 4. Figure 6. Biotage columns up to 50g can be placed on the front of the system. -
Page 6: Prime The Solvent Inlets
The Solvent Setup window opens; see Figure 8. 2. Prime the solvent inlets by pressing the corresponding Prime buttons. Note that 27 mL of the assigned solvent is used for each prime. Biotage Selekt User Manual | © Biotage 2018 ®... -
Page 7: Set Up A Purification
6. Place the collection rack(s) that you want to use on the collection bed. Racks with vessel volumes up to 120 mL require the collection tray. Selekt racks are automatically identified by the system when placed on the collection bed. If automatic rack detection has been disabled (see page 15), select the collection rack manually;... -
Page 8: Specify The Information Parameters
R Impurity 1 and R Impurity 2 text boxes or by sliding the corresponding lines to the correct positions on the TLC plate. A value for R Impurity 1 is required. Biotage Selekt User Manual | © Biotage 2018 ®... -
Page 9: Specify The Collection Parameters
Set Up a Purification Specify the Rack Parameters The Selekt collection racks have RFID tags that are automatically identified by the system when placed on the collection bed. If the RFID rack detection feature is disabled in the system settings (see page 15), it is possible to select the collection rack manually by expanding the Rack panel (see Figure 15). -
Page 10: Start, Monitor, And Control A Purification
UV Warm-up: The UV lamp is being warmed up. Figure 16. The run view. » UV Zero: The system is setting the UV zero level using the solvent mix used at the start of the gradient. Biotage Selekt User Manual | © Biotage 2018 ®... -
Page 11: Replace And Allocate Racks During The Run
Start, Monitor, and Control a Purification » Pause, End, or Abort a Purification Baseline Detection: The system is measuring the solvent absorbance of the gradient so that the baseline can be Note: Pausing a purification may cause gradient inconsistency subtracted from the signal during the gradient run. due to heat, solvent and sample diffusion, etc. -
Page 12: Unload A Purification
(e.g. DCM), we recommend that you assign methanol or a similar solvent to the inlet line used with the halogenated solvent (see page 3) and flush with at least 30 mL (see page 12). Biotage Selekt User Manual | © Biotage 2018 ®... -
Page 13: Results
2. Select the desired report. 3. Press Export. The report is saved as a PDF file at USB :\ biotage\selekt\ user name . Base a New Run on a Previous Run To create a new run with the same purification parameters as in a previous run: 1. -
Page 14: Flushes And Purge
2. If a channel option was selected, select the column mounted from the Column Type drop-down menu. If selecting “No Column”, ensure that the column inlet and outlet tubing are coupled together. Biotage Selekt User Manual | © Biotage 2018 ®... -
Page 15: Data Administration
Warning » Never exceed the maximum pressure or flow rate for the column. Note: The preconfigured Biotage columns cannot be edited or deleted. We recommend that you hide any column that will not Figure 22. The Solvent Administration view. be used to simplify finding the ones to use. -
Page 16: Manage User Accounts
» System Owner: The user has both the chemist privilege (see above) and access to the Data Administration view (see page 13), System Settings view (see page 15) and Maintenance view. Biotage Selekt User Manual | © Biotage 2018 ®... -
Page 17: System Settings
1) rack change is needed, 2) high pressure, 3) misalignment of the collection arm, and 4) pump failure. » RFID Rack Detection: If enabled, Selekt racks Figure 24. The System Settings view. are automatically identified by the system when placed on the collection bed. -
Page 18: Maintenance
1:20 to 1:10), unless they react nut is loosened. with stainless steel, PTFE, or fused silica windows. Biotage Selekt User Manual | © Biotage 2018 ®... -
Page 19: Clean Or Release Check Valves
Maintenance 5. Visually re-examine cell windows for visible contamination. 3. Push on the ball inside the check valve using an unused If contamination is still present, repeat step 4. If you are not pipette tip or similar; see Figure 29B. Ensure that the able to remove the contamination, we recommend that you ball moves freely. -
Page 20: Leaks
Shut down the system before replacing any tubing. Use only safely connected to the drain port at the rear; see Figure 31. tubing designed for the Selekt system and supplied by Biotage. The other end shall be inserted into a waste reservoir. -
Page 21: Replace The Fuses
Warning inlet line. The solvent inlet filters protect the pump and » Use only exact replacement fuses specified by Biotage columns from damage due to particulate contamination. (P/N 411916SP). Incorrect fuses create a potential fire hazard. These filters should be cleaned (sonicated) or replaced every 1000 hours of operation or every 12 months, whichever comes 1. -
Page 22: Troubleshooting
If this does not solve the problem, the collection arm may If using a system with a Spektra software license, try performing the run with the UV Baseline Correction option turned on. need to be recalibrated. Contact Biotage 1-Point Support. » Dripping needle and/or inconsistent dispensing Internal UV Detector-Related Problems volumes can be signs of a dirty collect valve. -
Page 23: Overpressure Detected
» Shut down the system before replacing any tubing. Use only tubing designed for the Selekt system and supplied by Biotage. Note that there may be precipitate in areas not visible. Figure 34. Removing the check valve cap from one of the CV OUT valves. -
Page 24: Qr Reader Problems
1-Point Support ® ™ For assistance at any time during troubleshooting or if your problem persists, contact Biotage 1-Point Support. See contact information on the back of this document or visit our website www.biotage.com. Biotage Selekt User Manual | © Biotage 2018... -
Page 25: Solvent Specifications
Solvent Specifications Solvent Specifications Warning » Many solvents are considered hazardous to humans and the environment, so take appropriate safety precautions when using them. Comply with Safety Data Sheets (SDS) and any other applicable regulations for the safe use, handling, transporting, storage, and disposal of these solvents. -
Page 26: General Information
General Information General Information Consumables and Accessories Only genuine Biotage consumables and accessories must be used in the system. To order consumables and accessories, see contact information on the back of this document or visit our website www.biotage.com. Accessories that may be necessary for the “Maintenance”... - Page 28 Part Number: 416183-A © 2018 Biotage. All rights reserved. No material may be reproduced or published without the written permission of Biotage. Information in this document is subject to change without notice and does not represent any commitment from Biotage. E&OE.
Need help?
Do you have a question about the Selekt and is the answer not in the manual?
Questions and answers